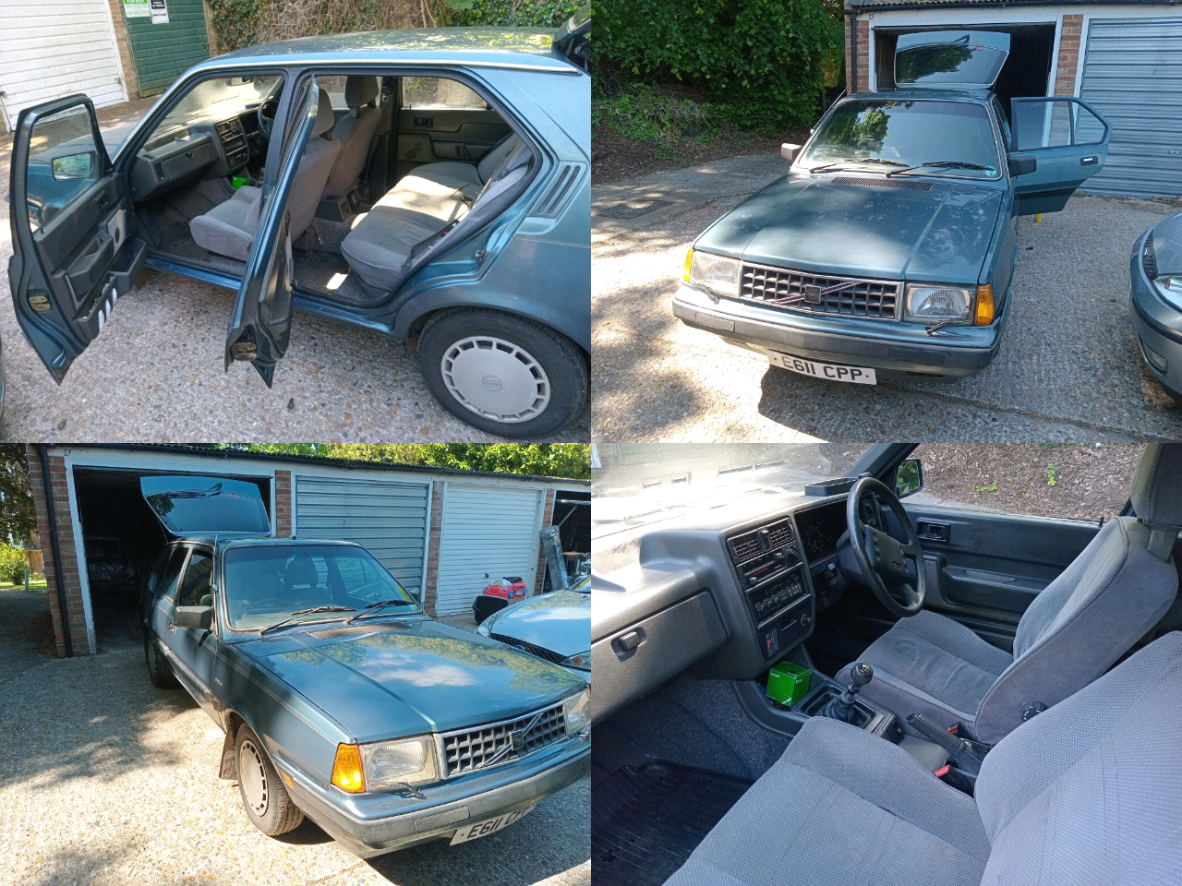
January - December 2025
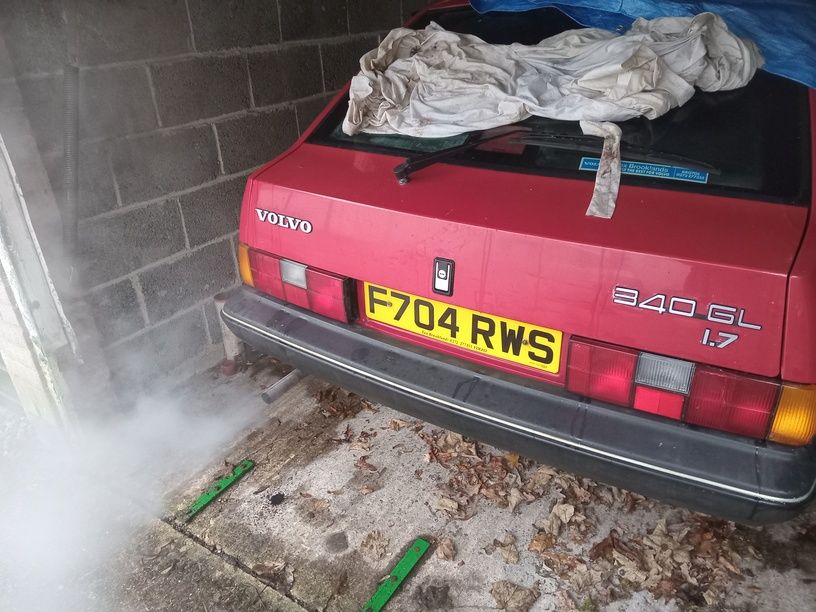
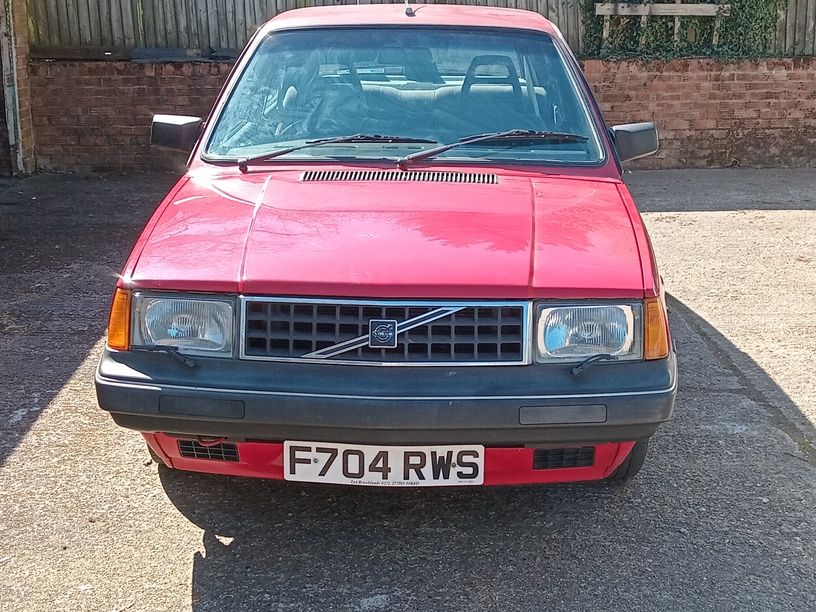
The year begins with efforts on Red Ness's brakes which seem to
have become locked on, at least at the rear. Hence the drums are
removed and copper grease reapplied to the backing plate and the
self-adjusters are wound fully in. Still it is very difficult to
get the drums back on and when the are back on, they are still
very much stuck. Puzzling stuff.
So the plan is to disassemble them a bit more to see what is
going on, hopefully.
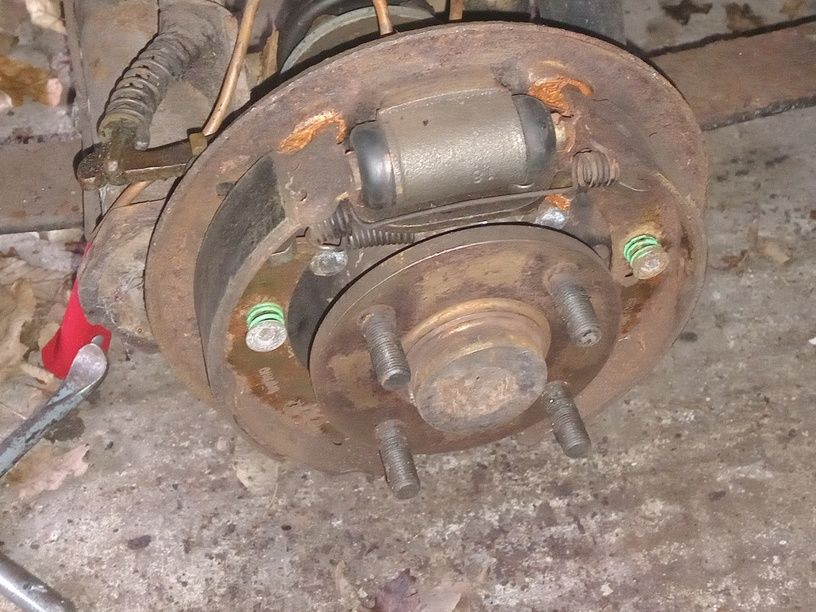
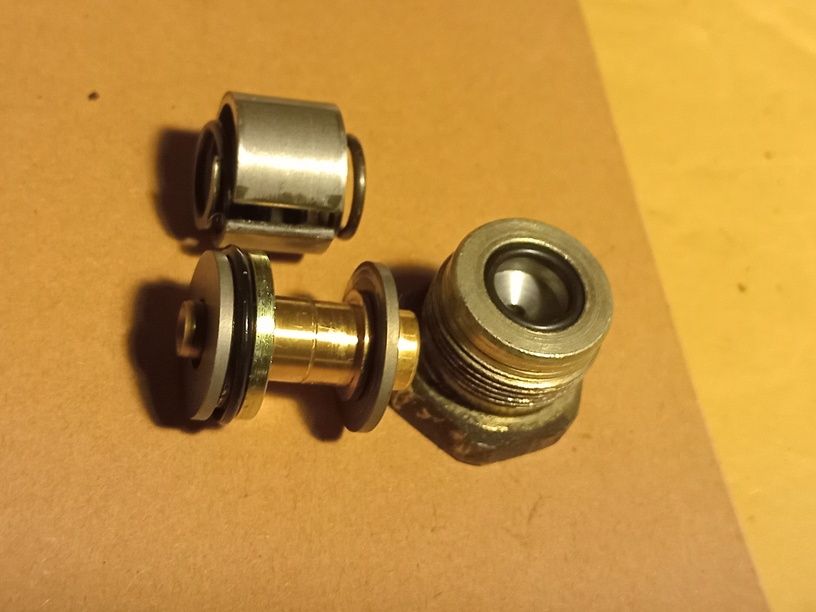
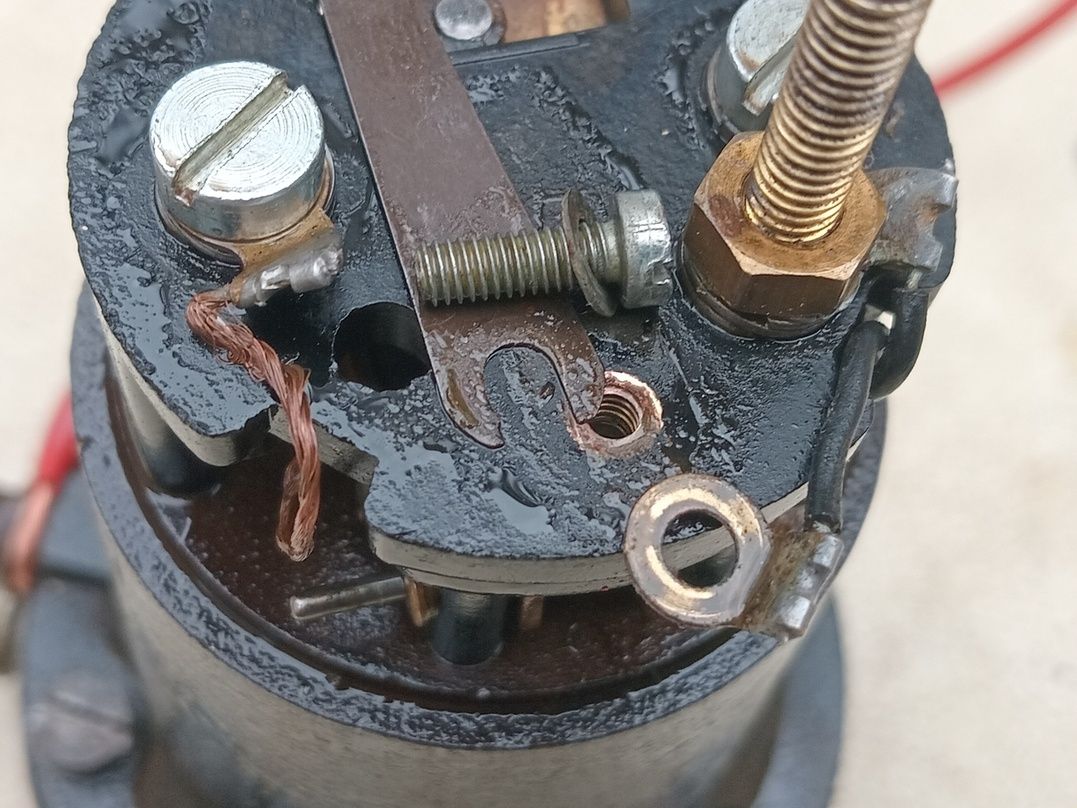
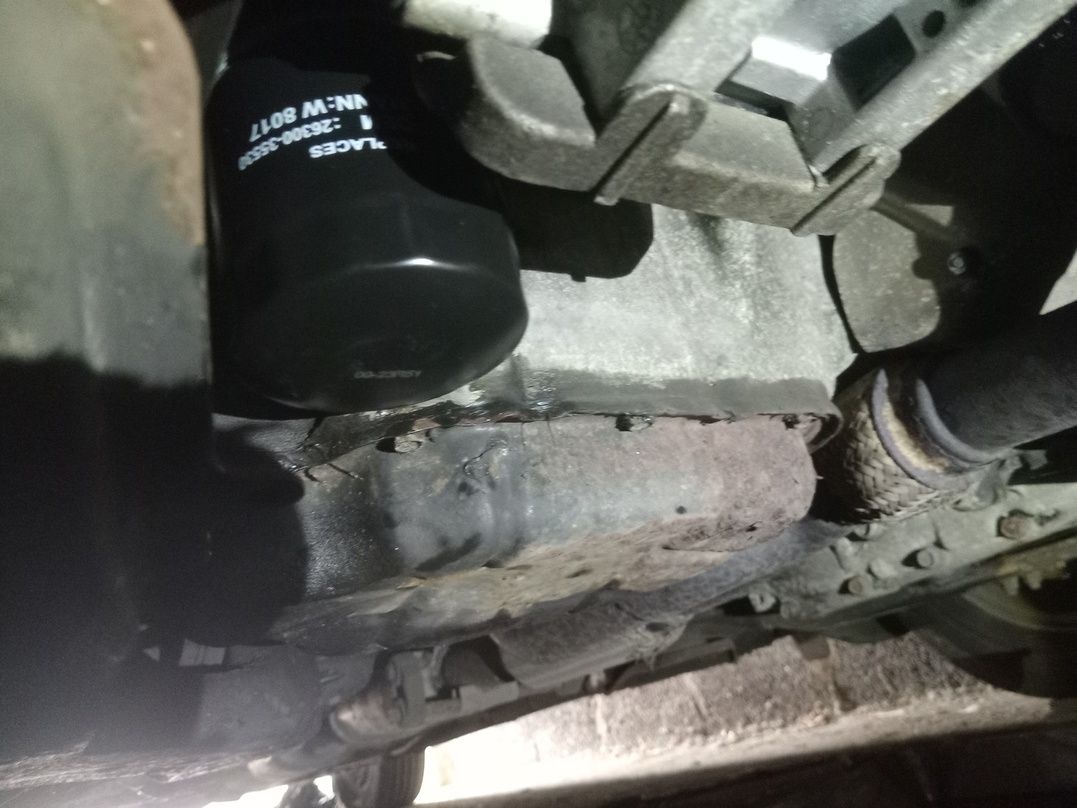
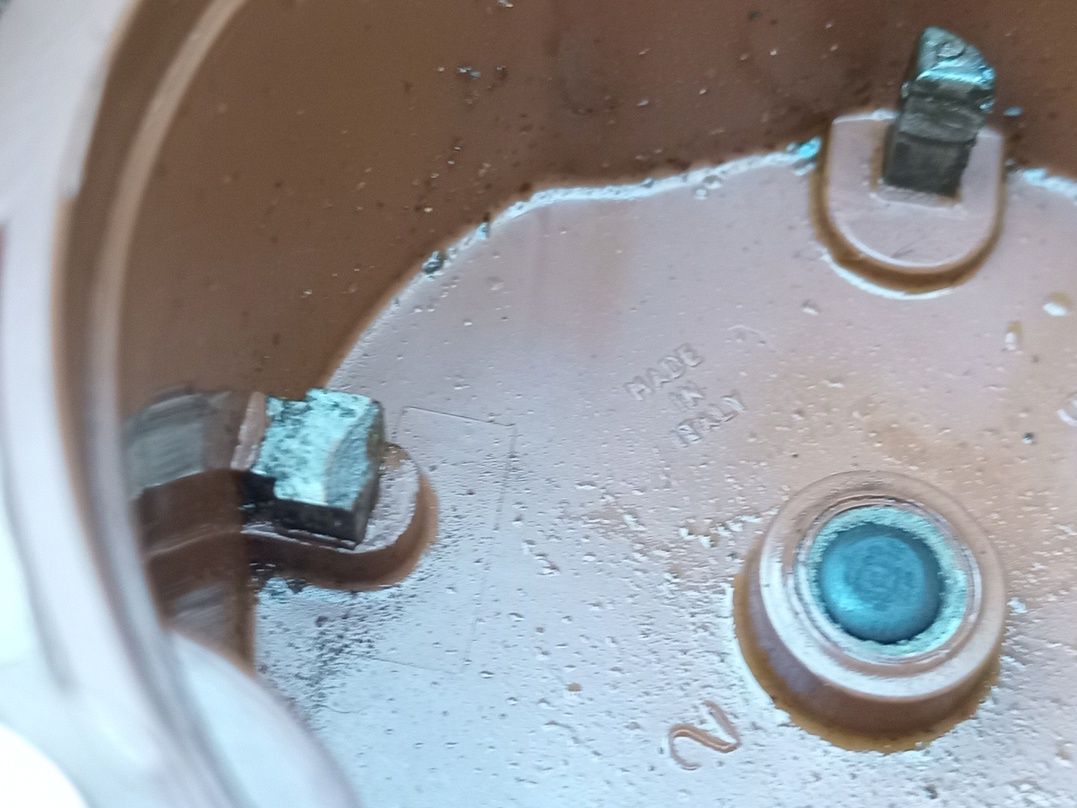
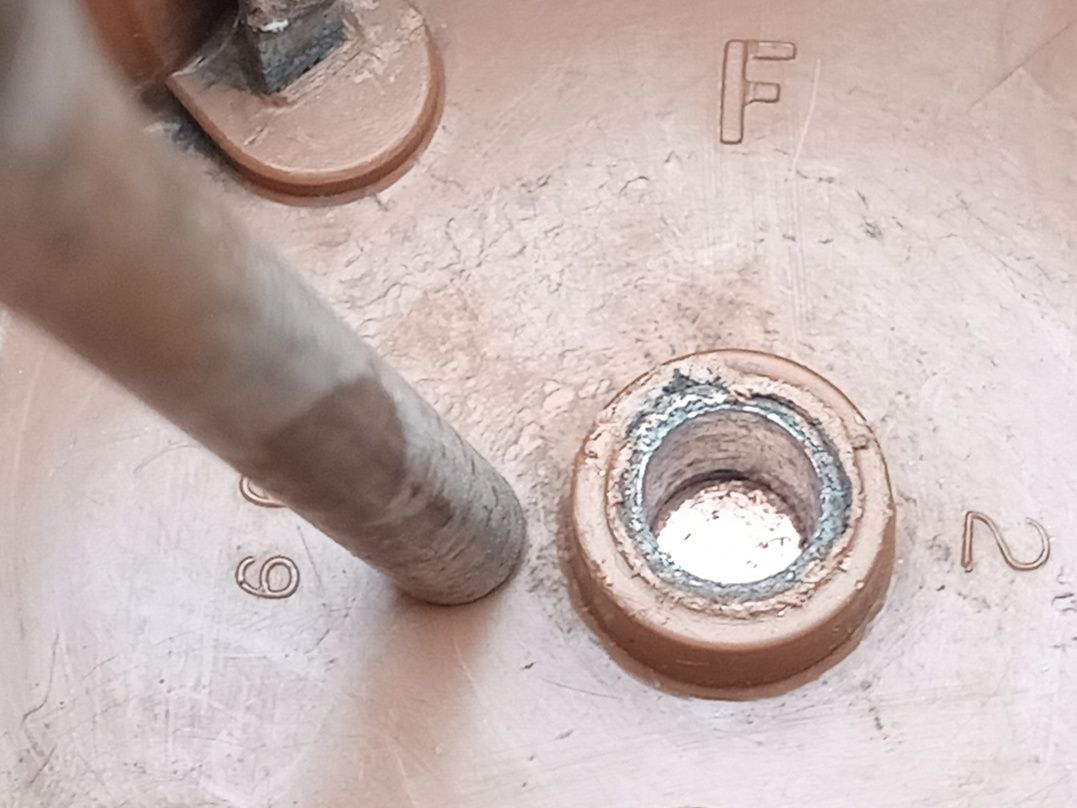
I end up thinking that there is something wrong with the hydraulics since the brake pedal is completely immovable, but it does move when I bleed the front brakes. However, the rear brakes cannot be bled at all - no fluid comes through and the pedal won't move even when the rear bleed nipples are loose. So I am thinking it is the brake pressure splitter which is then removed for a look-at.
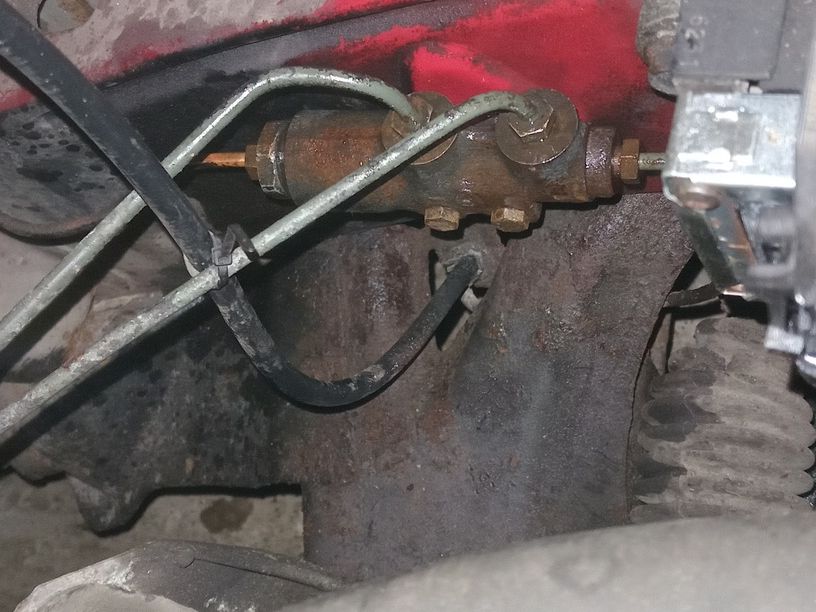
A bit of dismantling suggested it was locked up inside,
although, with a bit of tapping with a drift, the removable
parts came out.
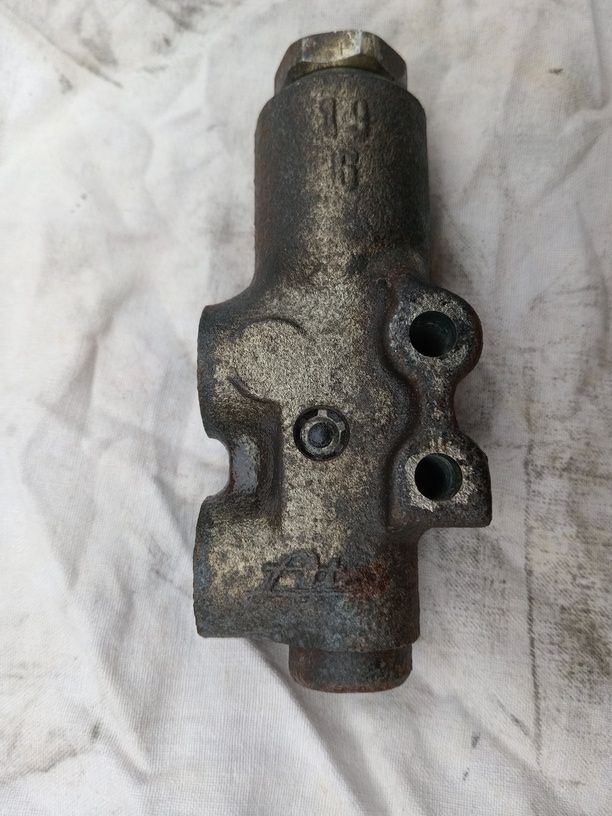

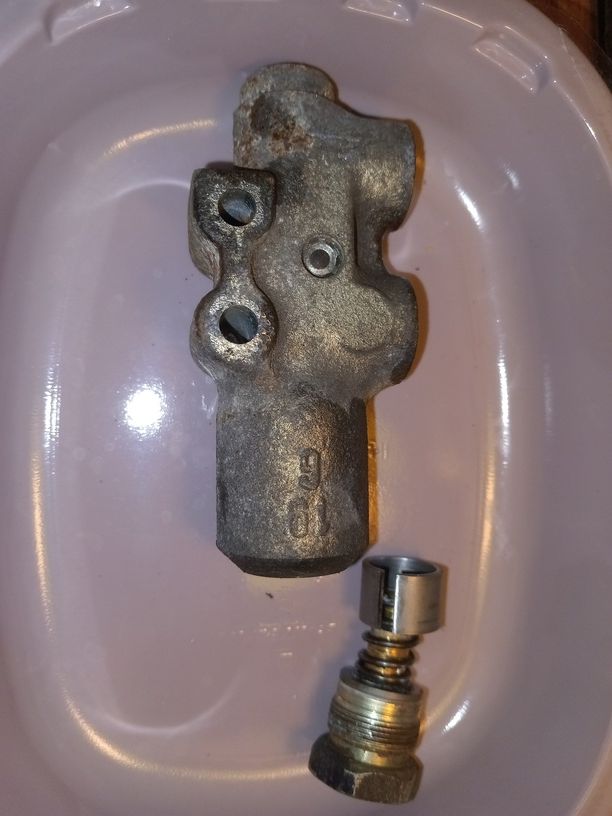
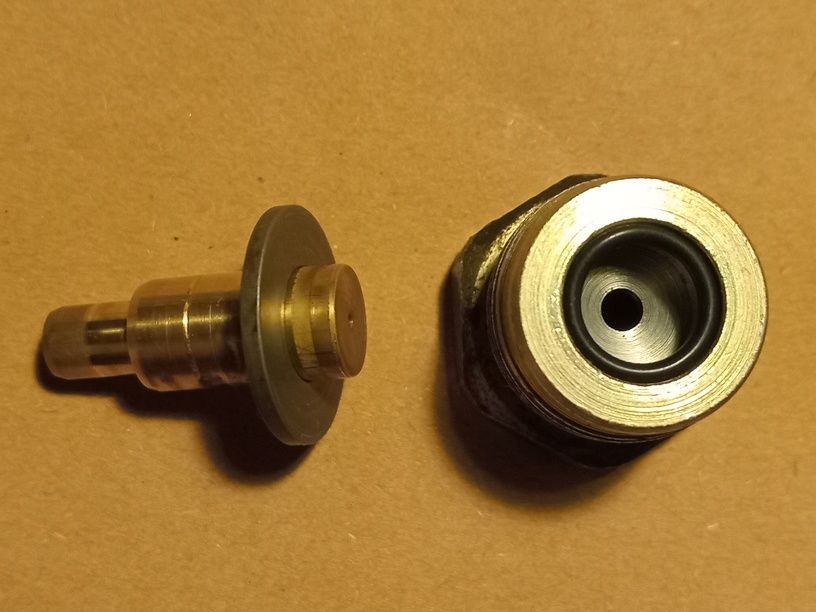
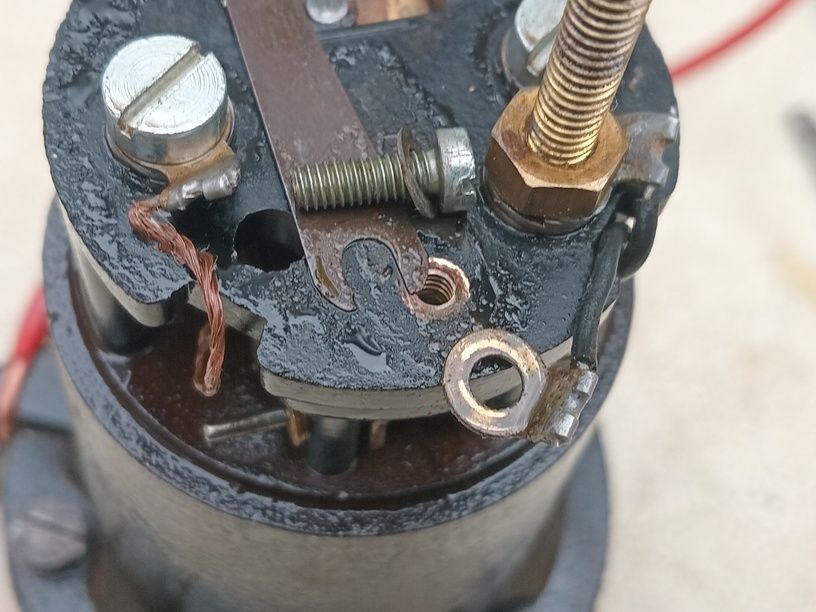
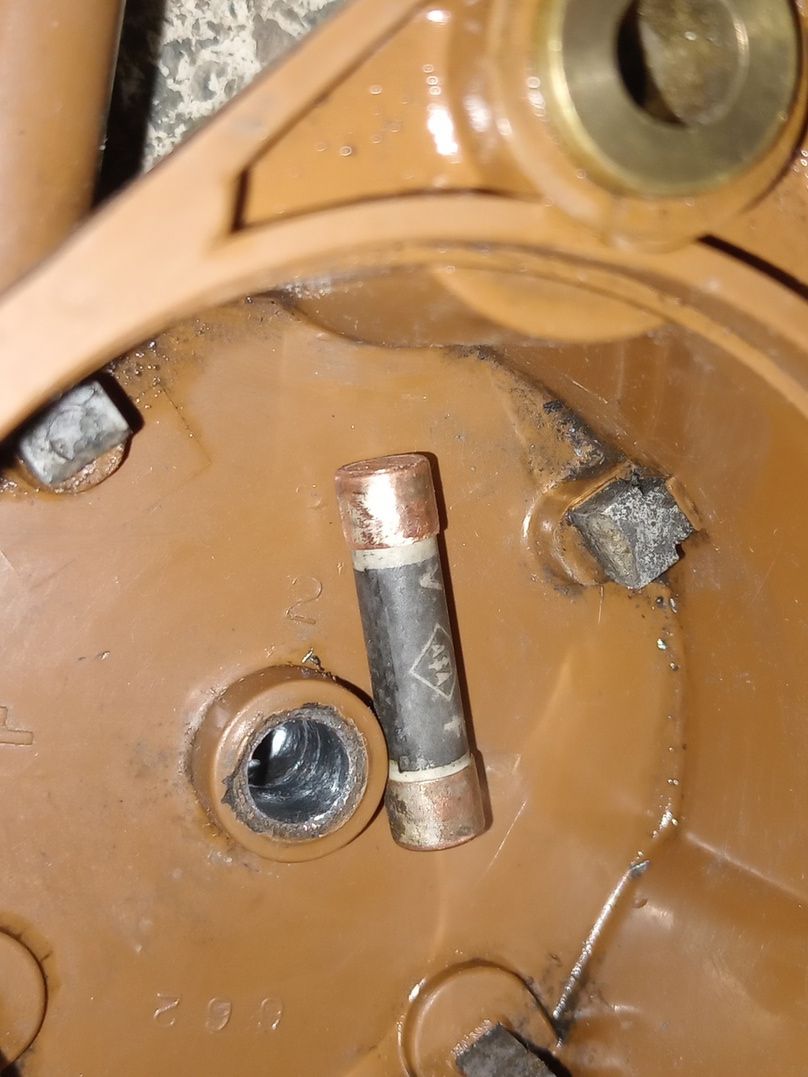
The shiny-looking washer thing at the bottom of the hole was not moving, but with a bit of judicious tapping it came out. These are the bits for the rear brakes.
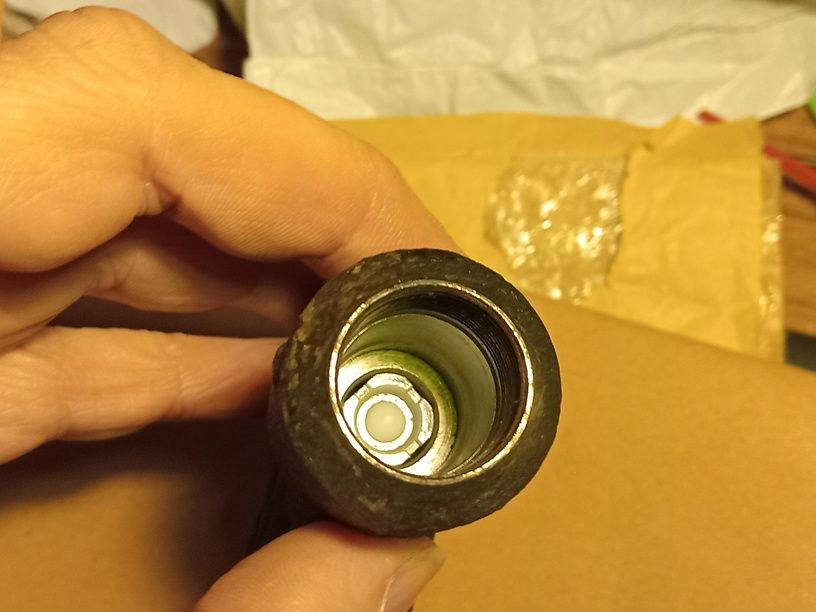
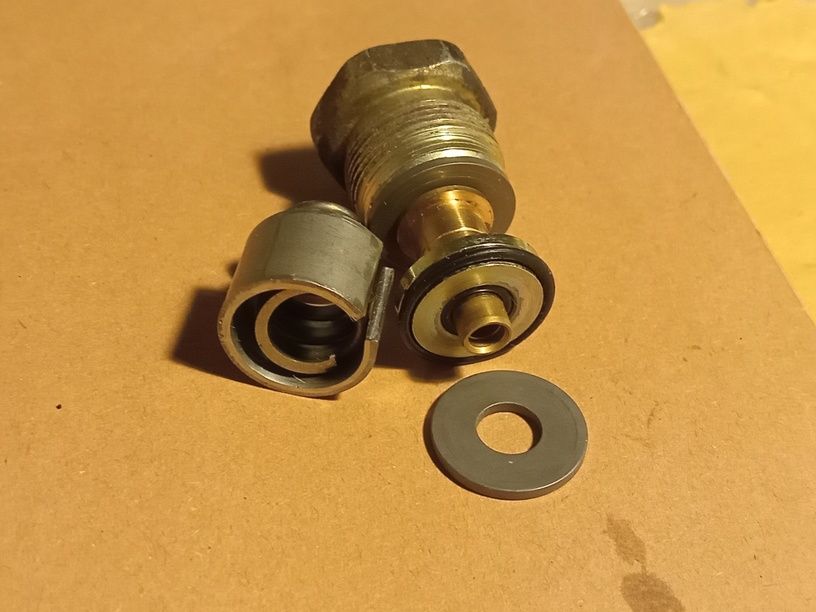
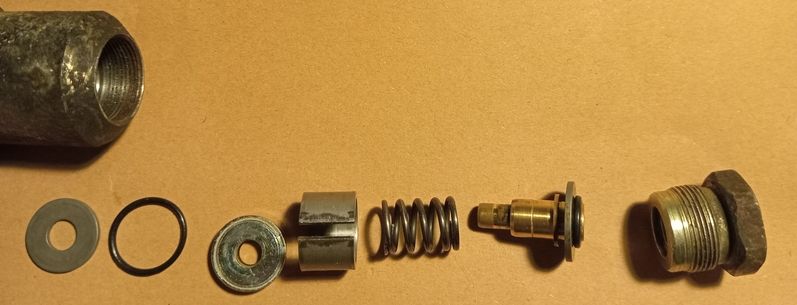
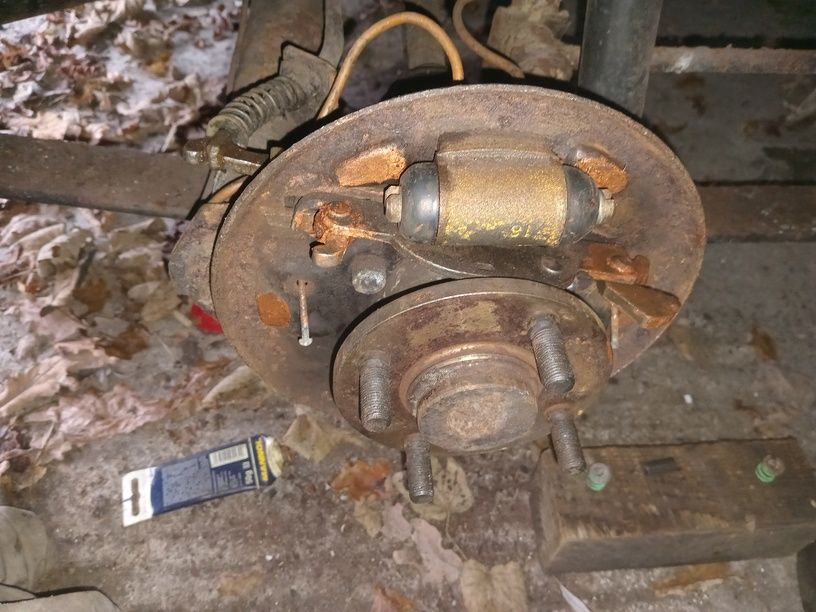
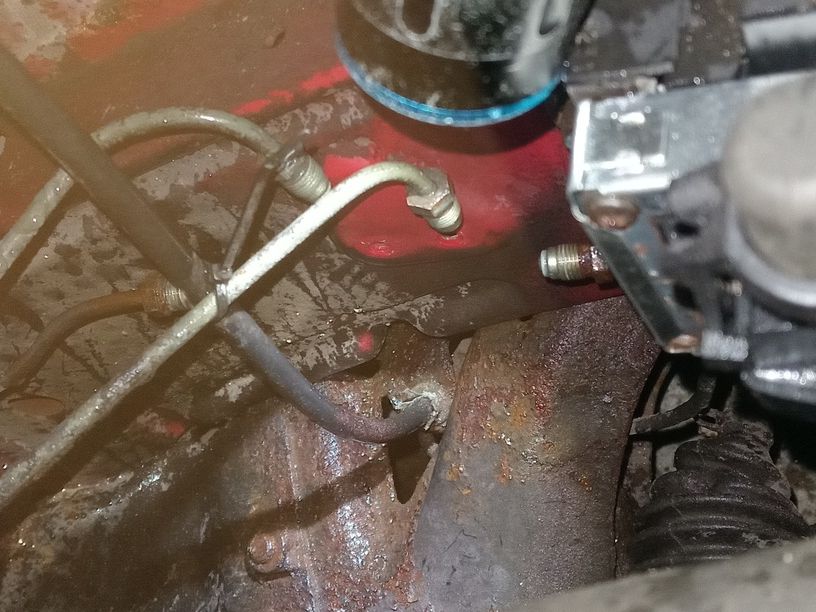
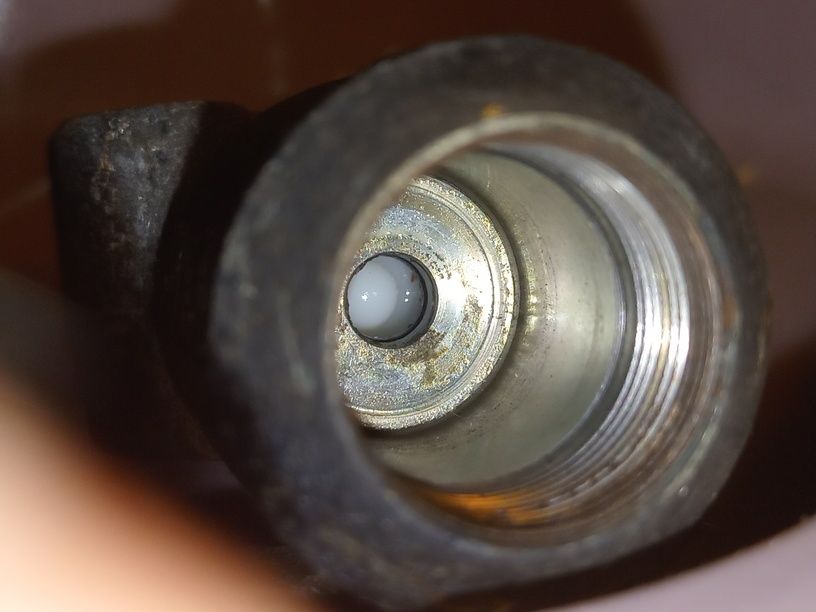
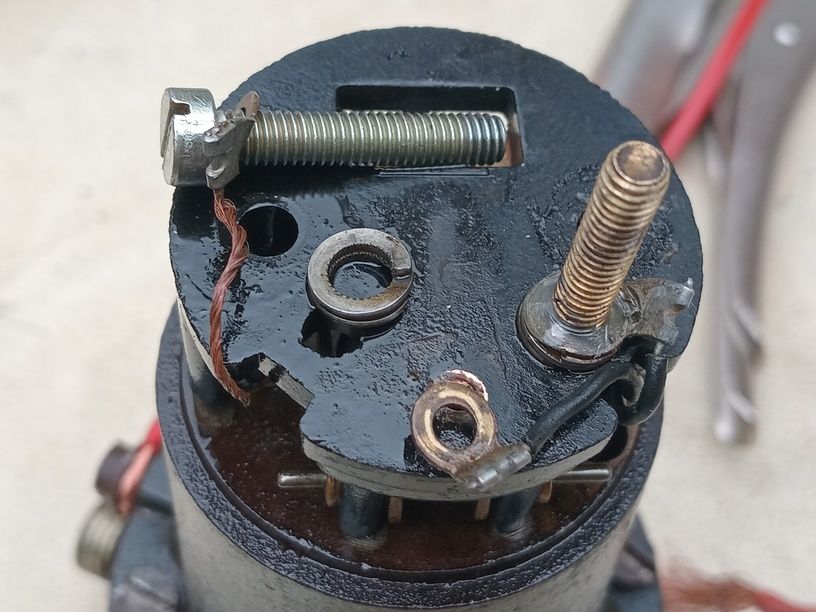
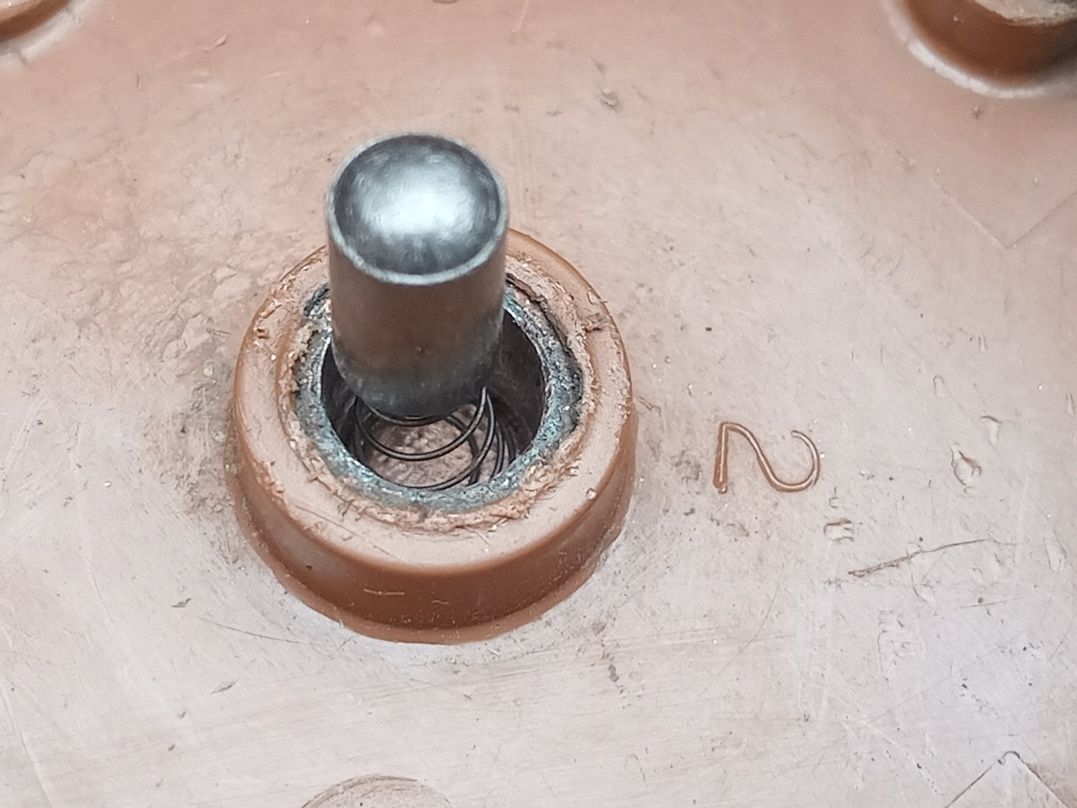
And that is about as much as I dare to dismantle it since removing the innards for the front brakes would mean removing the clip which seems to be holding in a black rubber jobbie. I can attempt it if it is really necessary. Time will tell. Anyway, after refitting the brake splitter and successfully bleeding the front brakes, it still proved to be impossible to bleed the rears. More confusion and half-baked tesing has convinced me that it is the copper pipe running from the splitter to the rear brakes or the rubber hose connecting the copper pipe with the rear brakes. Attempting to remove the rubber hose, ... yes, you guessed it, ... proved to be a bit difficult - indeed this was one hose which I left in place a few years ago because I could tell that removing it would wreck the long copper pipe since the connecting nut is so rusted. So, yes, we are going to need a new copper pipe and connecting hose so efforts at removing both are in progress.
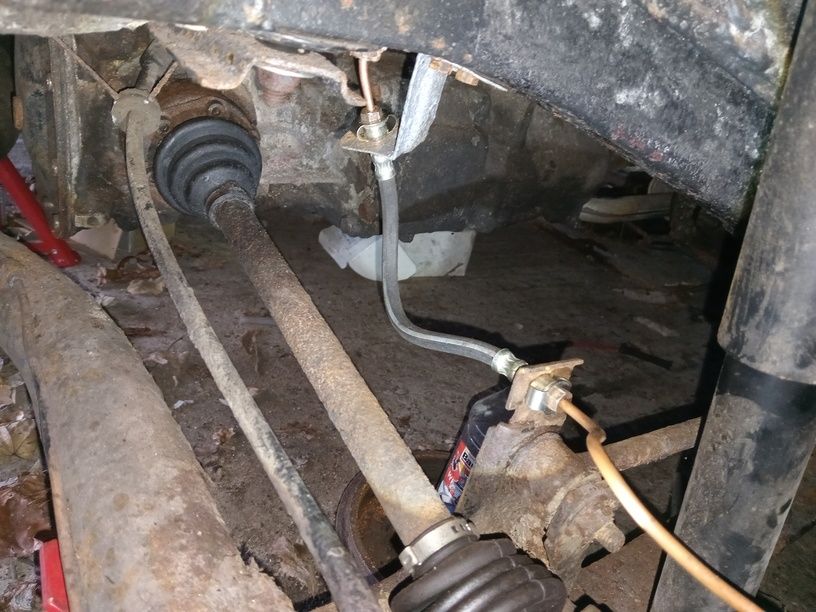
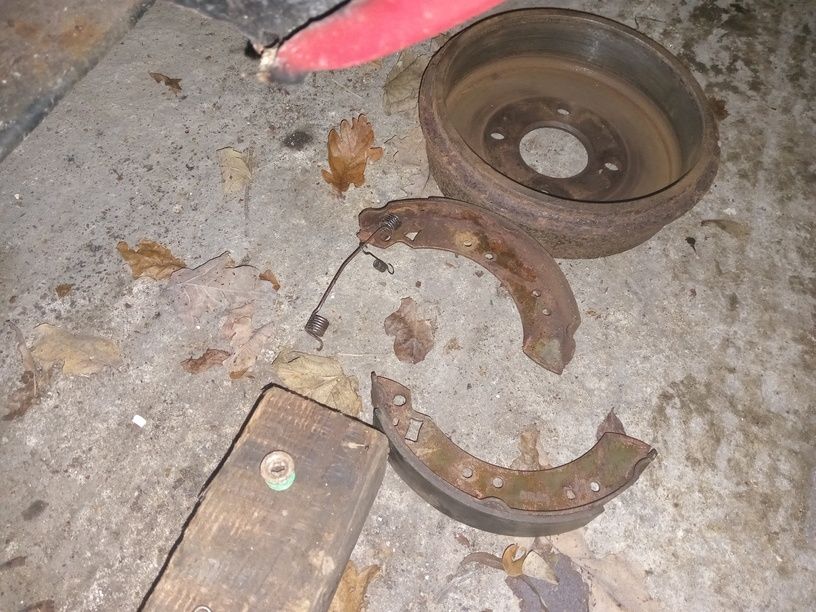
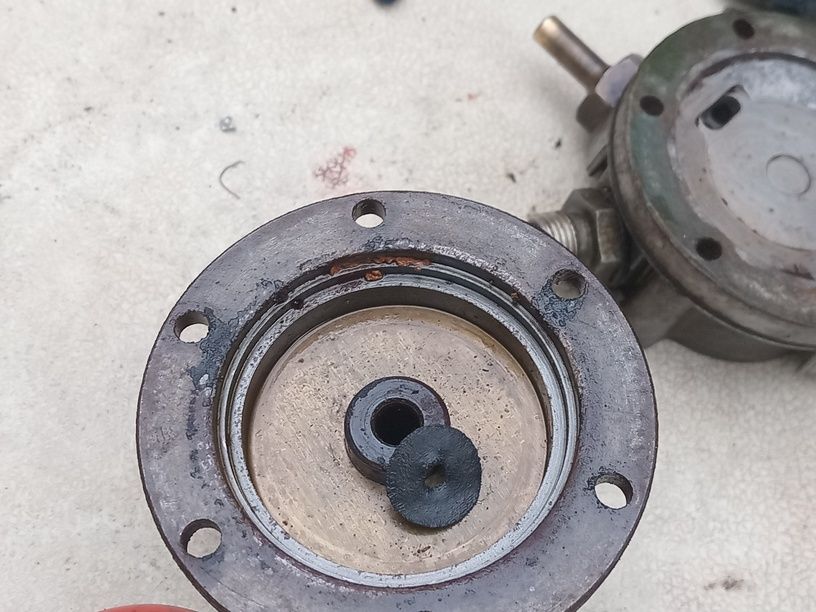
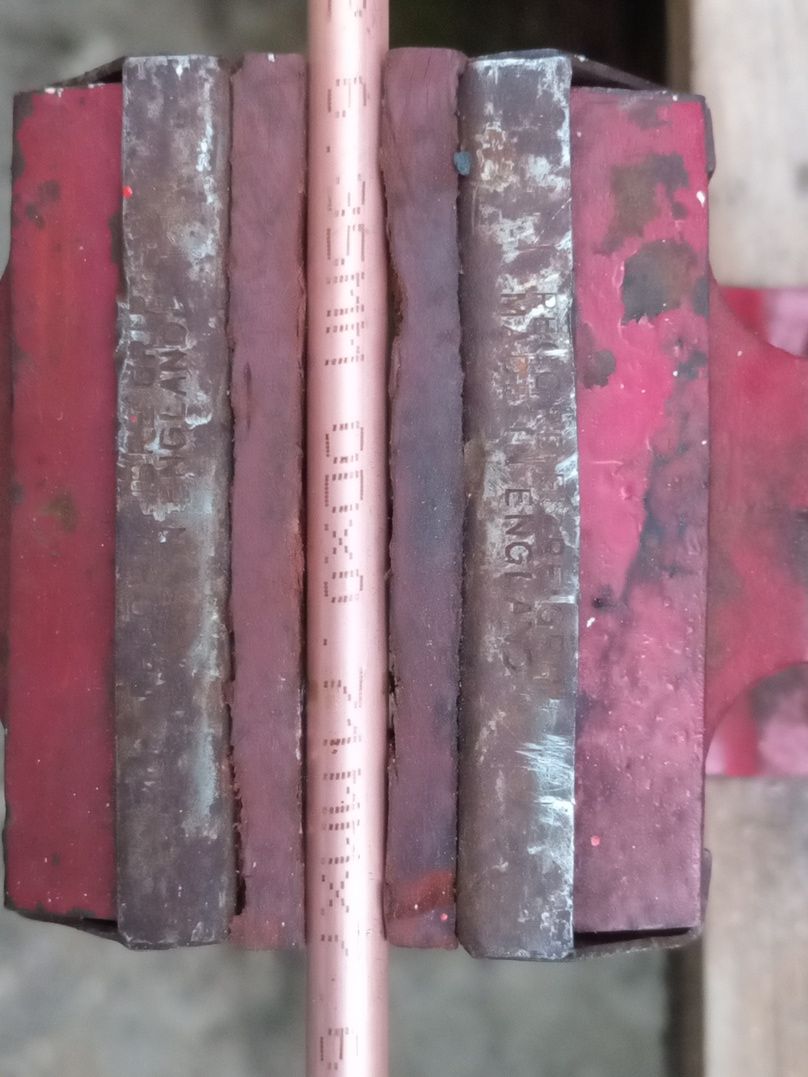
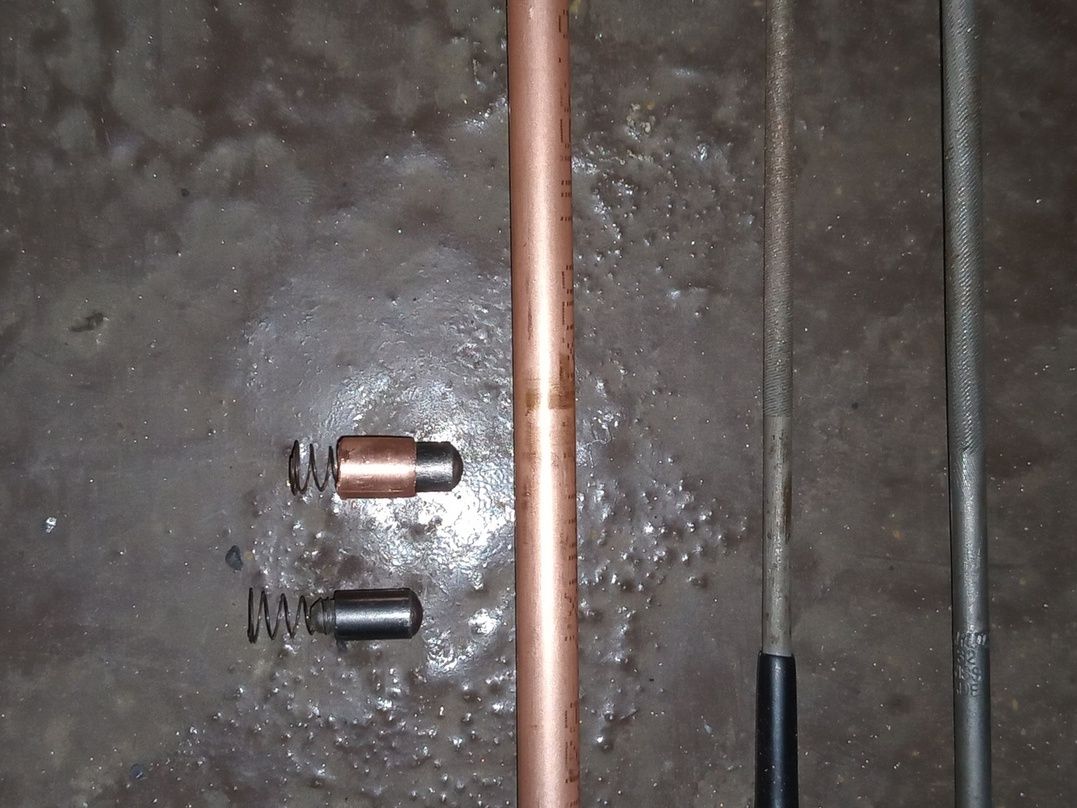
So over the next couple of weeks the long copper pipe going from front to back was replaced with a new one from Halfords with the rounded ends made by the local garage as a freebie. It was hard to find the special clips that tension the rubber hose shown above, which was replaced with a new (very) old stock item from the roof. Still they were found on ebay and the hose polished up reasonably well with some rubbing. The copper pipe is a bit wobblier than I would have liked but I just haven't got the strength in my hands any more to get it looking perfect ;-0 ;-0 Anyway everything was bled through with the ezibleed and its now perfect again. Awesome and evil.
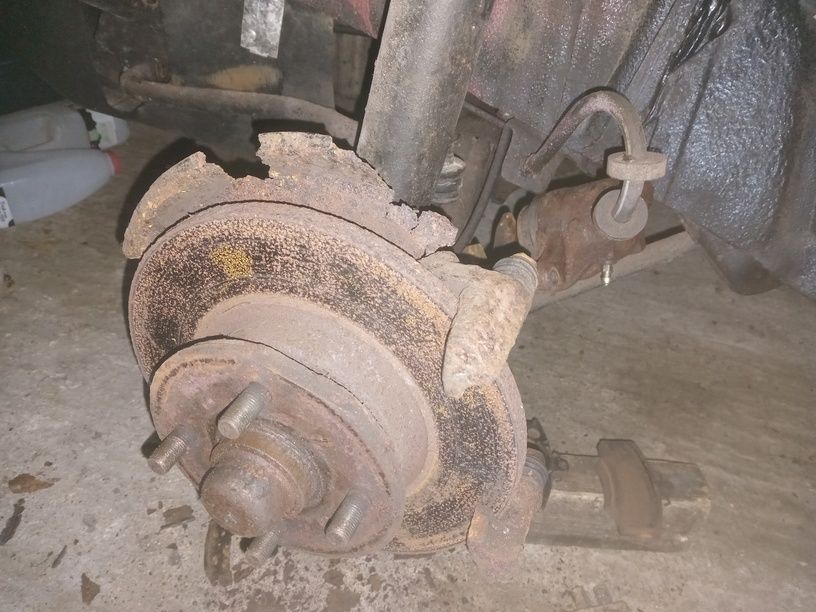
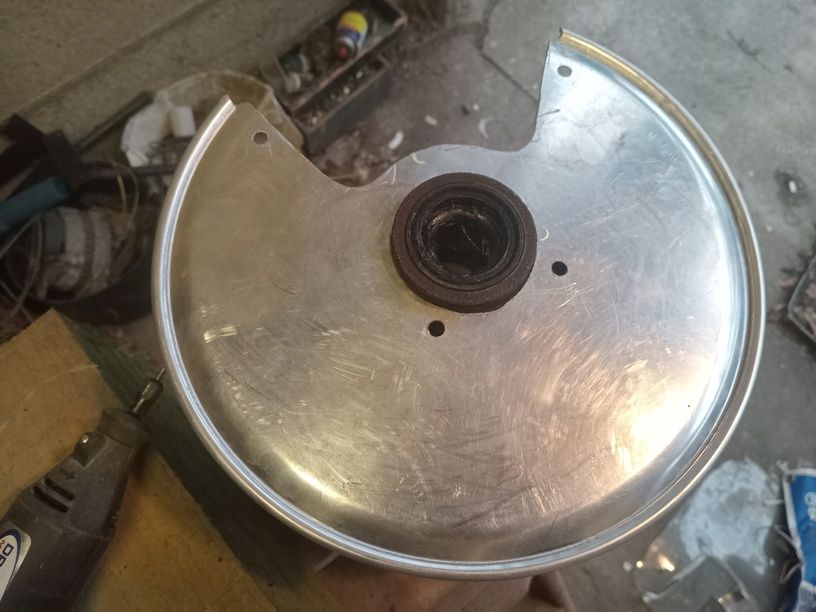
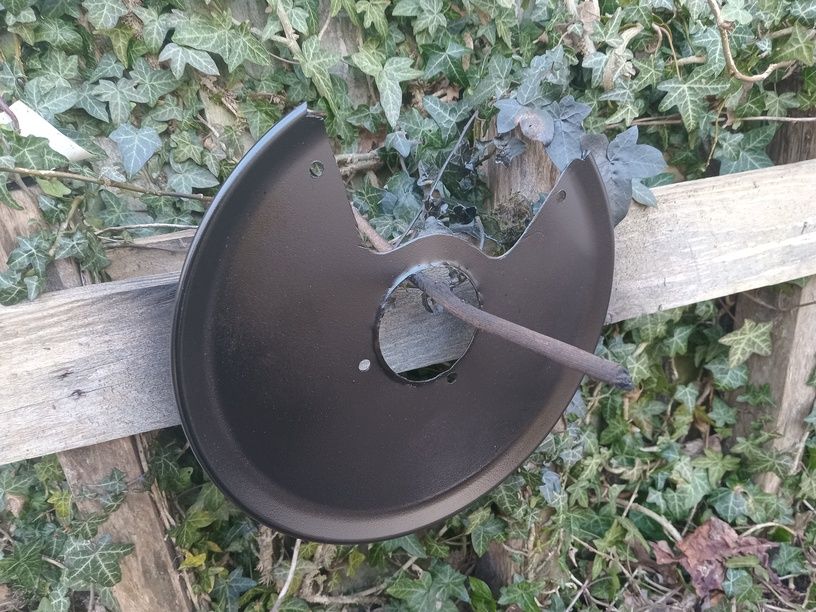
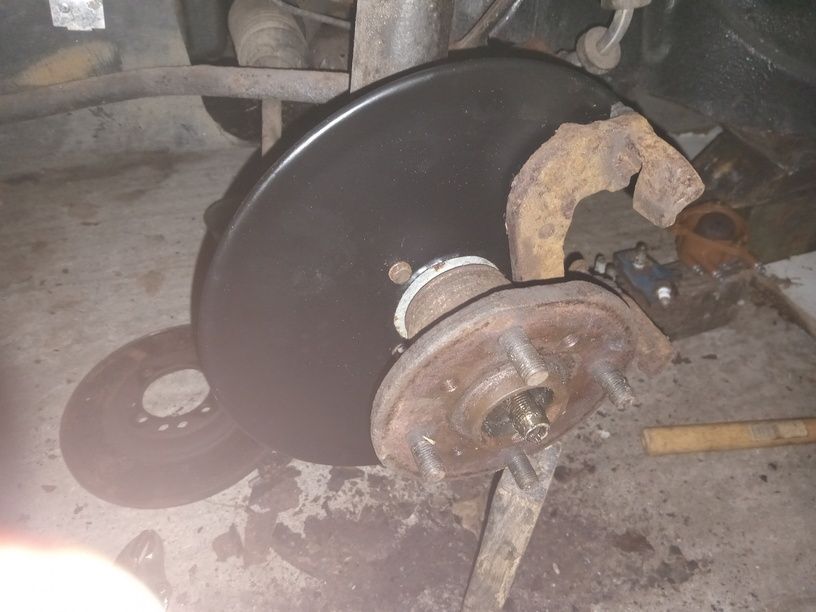
Some patching up of the waxoyl around the rear half of the chassis was done and on trying to put everything at the front back together the decision was made to replace the brake disk backing plate, but I couldn't face doing this with the standard replacement which is an MGB item that has to be cut to size, so I went for a 11" aluminium pizza pan (coupe model i.e. flat).
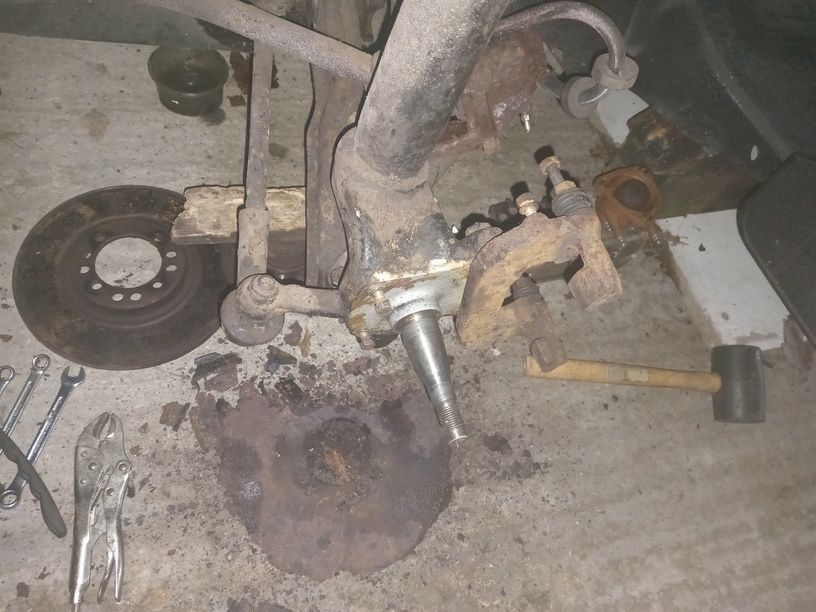

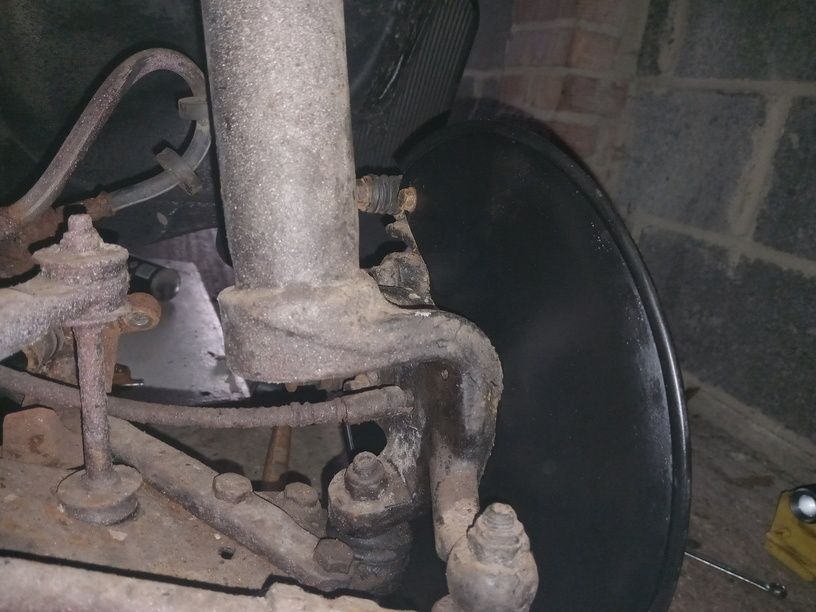
By now into mid-Feb 2025 and a few trial fits suggested it would be OK.

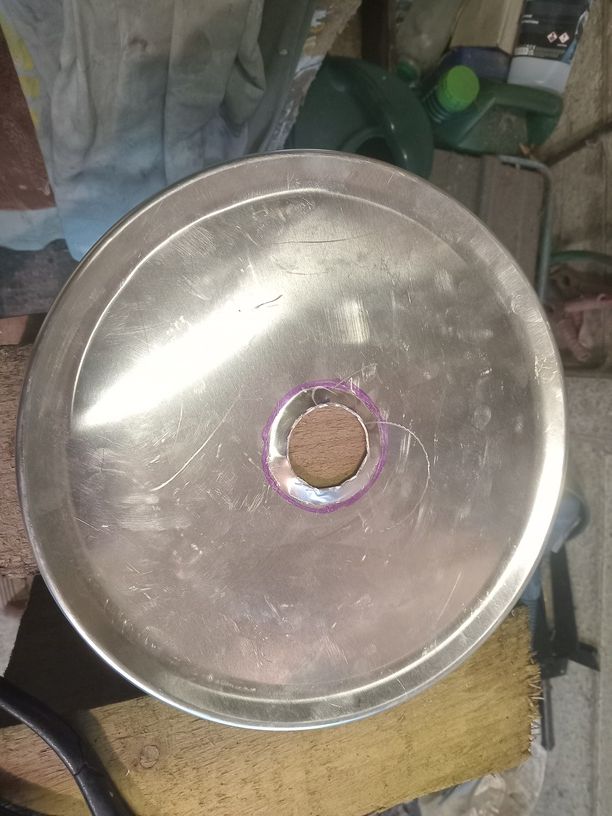
I then foolishly thought it would be quite nice to have it painted black, like the original. So here goes. Note that the hole in the middle ended up being a bit bigger than I originally made it. If I make another one of these in future, I will make the initial hole a bit bigger than I did with this one and try to bend out the lip more so that it covers the hub better.
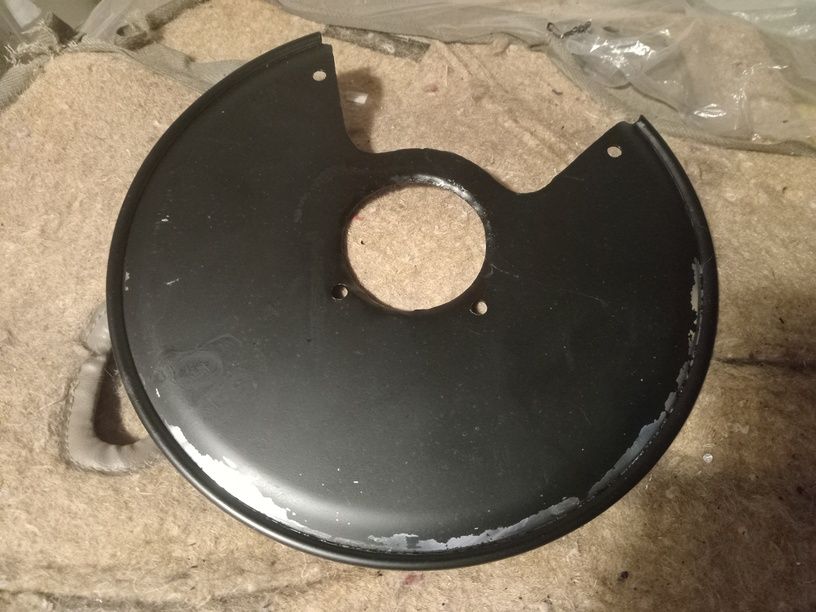
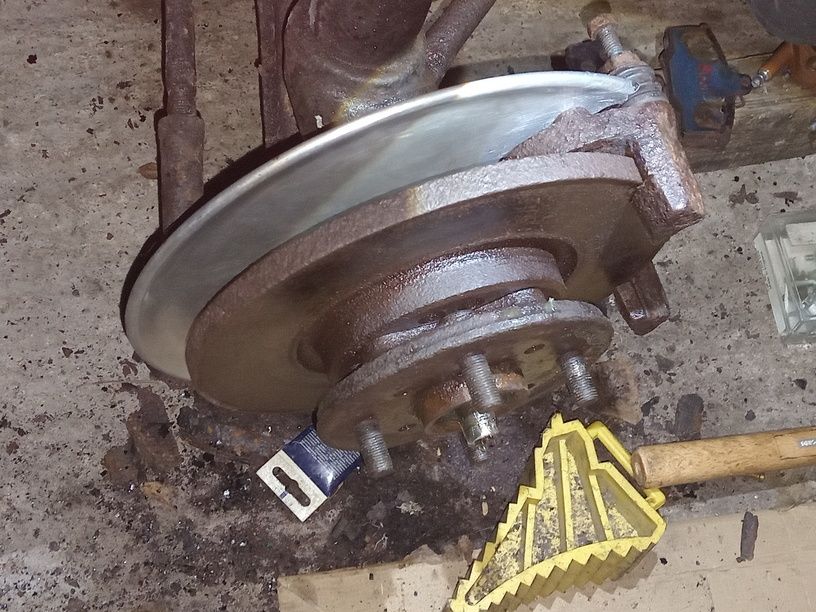
I did get the impression that the paint wasn't sticking too well but lets press ahead with fitting it.
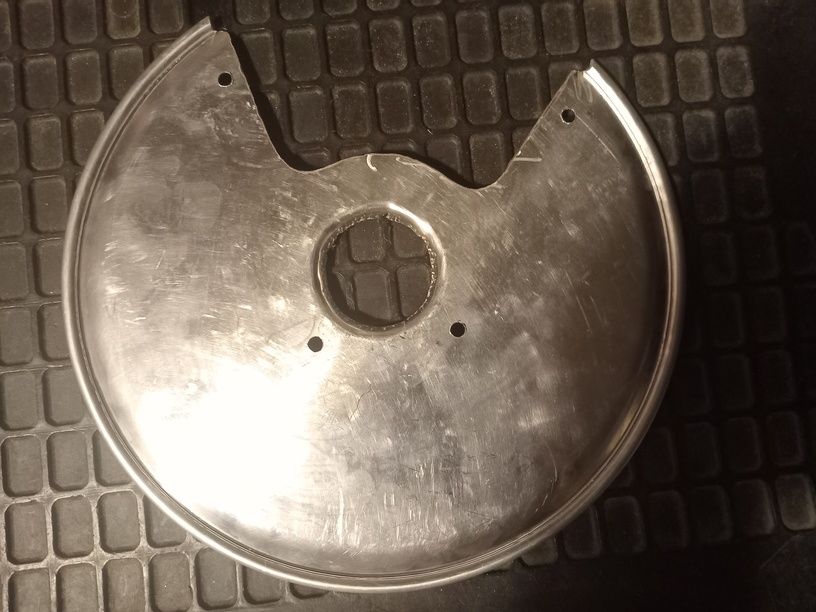
A bit of patching-up in situ and lets see if the paint stays on after a few days out in the cold of the garage. Oh dear, what folly.


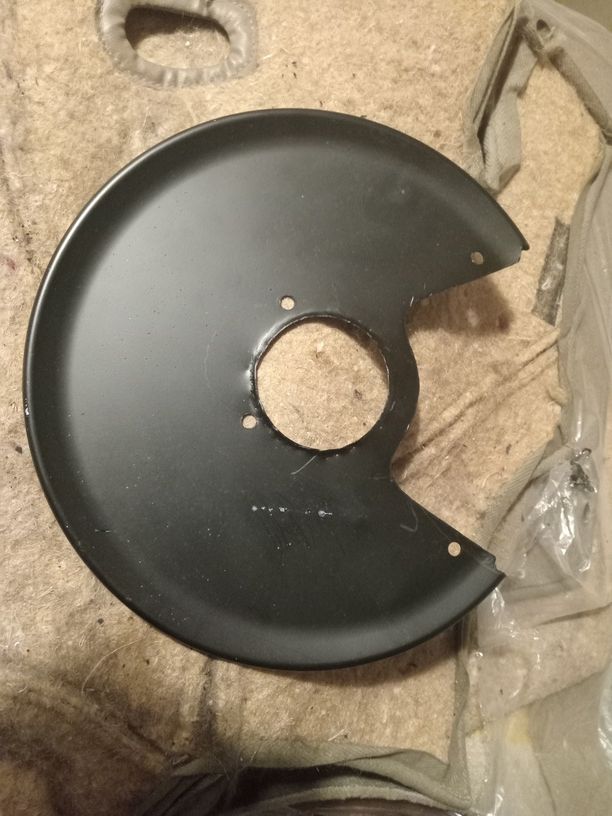
Oh dear, you can't beat a non-stick pan so we will have to scrub it all off and go the bling look. Now into late-Feb 2025 and everything goes back together steadily from that point on. Bling it on!

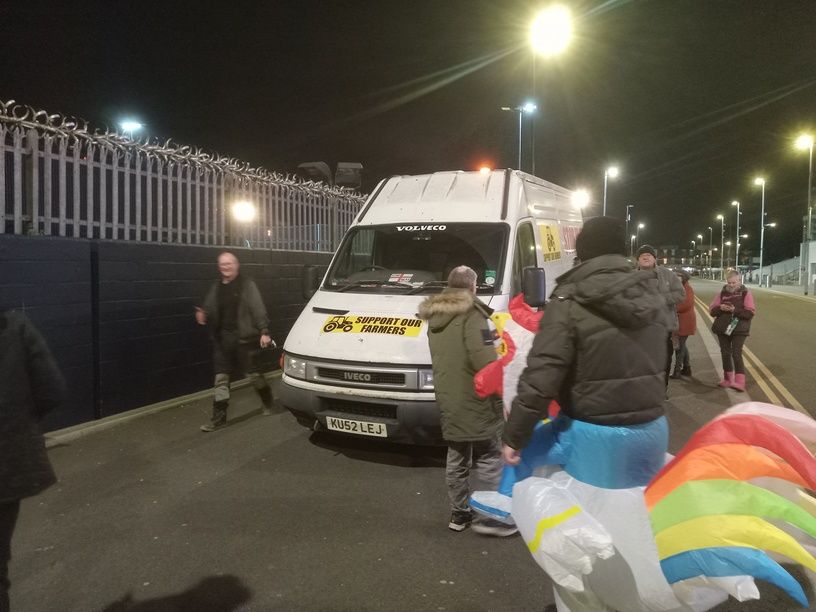
Now into early March 2025 and there's a bit more going down in anti-ULEZ town. People's Question Time at a football place somewhere. Needless to say a good time was had by all who stood outside for a couple of chilly hours.

Still, enough of those jollities, we need to get that car off its stilts and onto the ground.
And, as of early April 2025 that's exactly what we have done. She's running well, given a thorough clean and out in the sunshine.
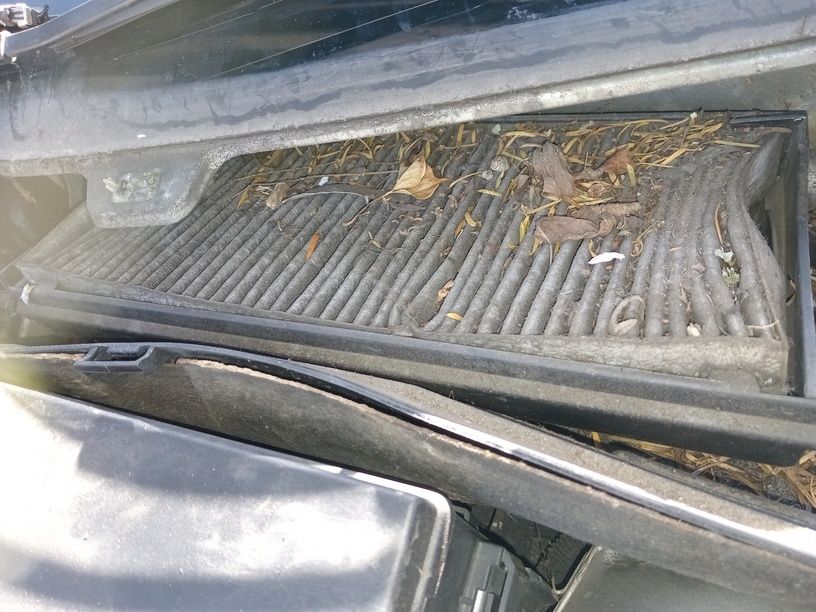
Likewise Deep Blue is given a start-up and a bit of a run-around, so that's two 1.7's up and running. One road-legal, and the other driveable off the road. Millions of ridiculous jobs were done to the silver Focus to get that serviced (oil-change, air filter, tons of lights, rear screen washer leak fixed, I hope very much). The only truly remarkable job was finding that I could cure the constant knocking sound by replacing one of the front drop links. I was so happy to have achieved that repair for £8, thinking it would probably cost thousands to have all the shock absorbers replaced if they were source of the noise. The only other interesting thing was replacing the pollen filter which evidently hadn't been changed for some time. The resident snail was rehomed.

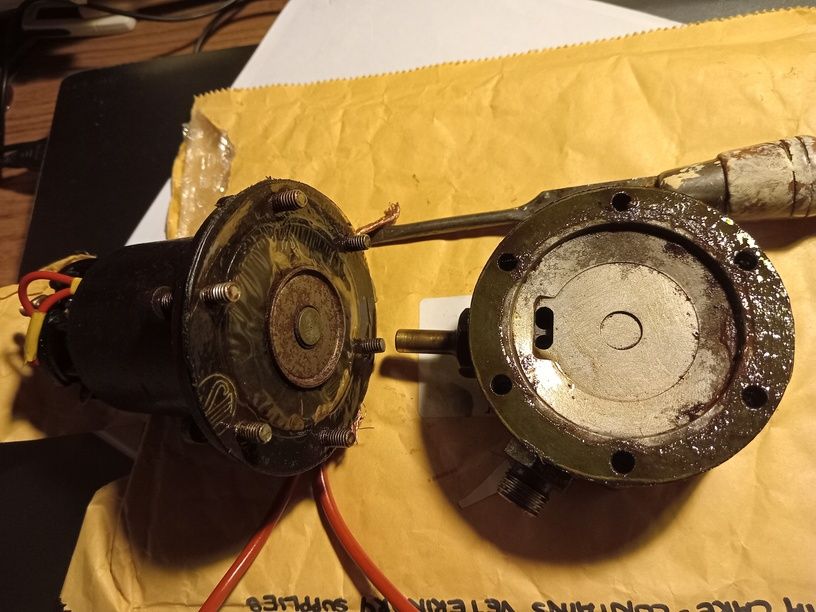
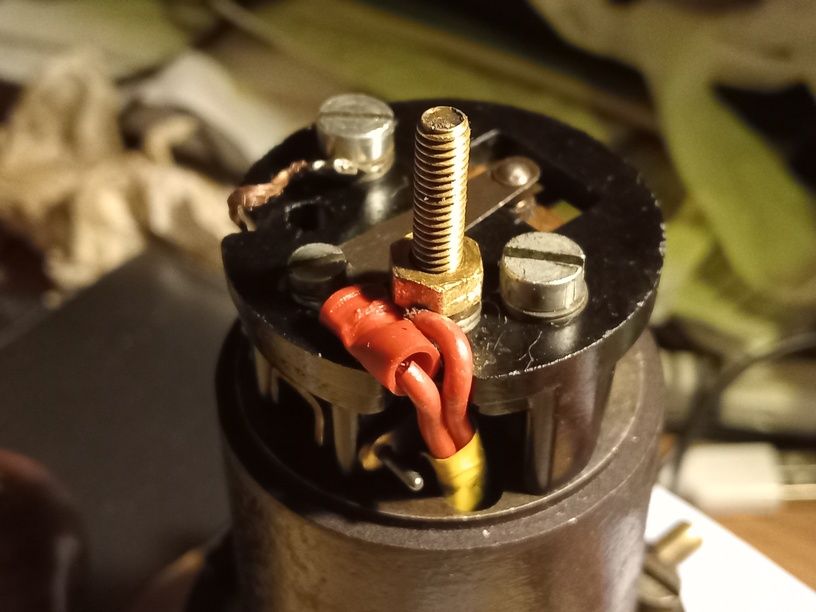
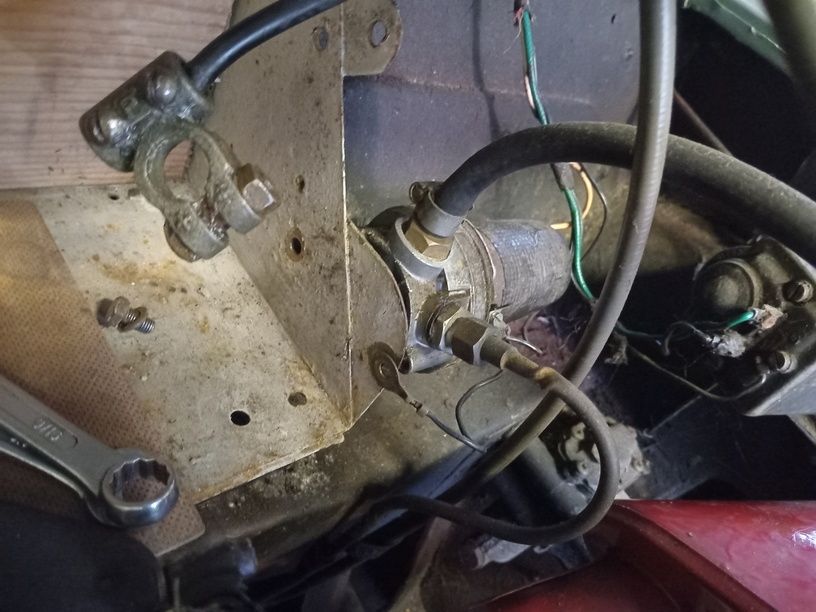
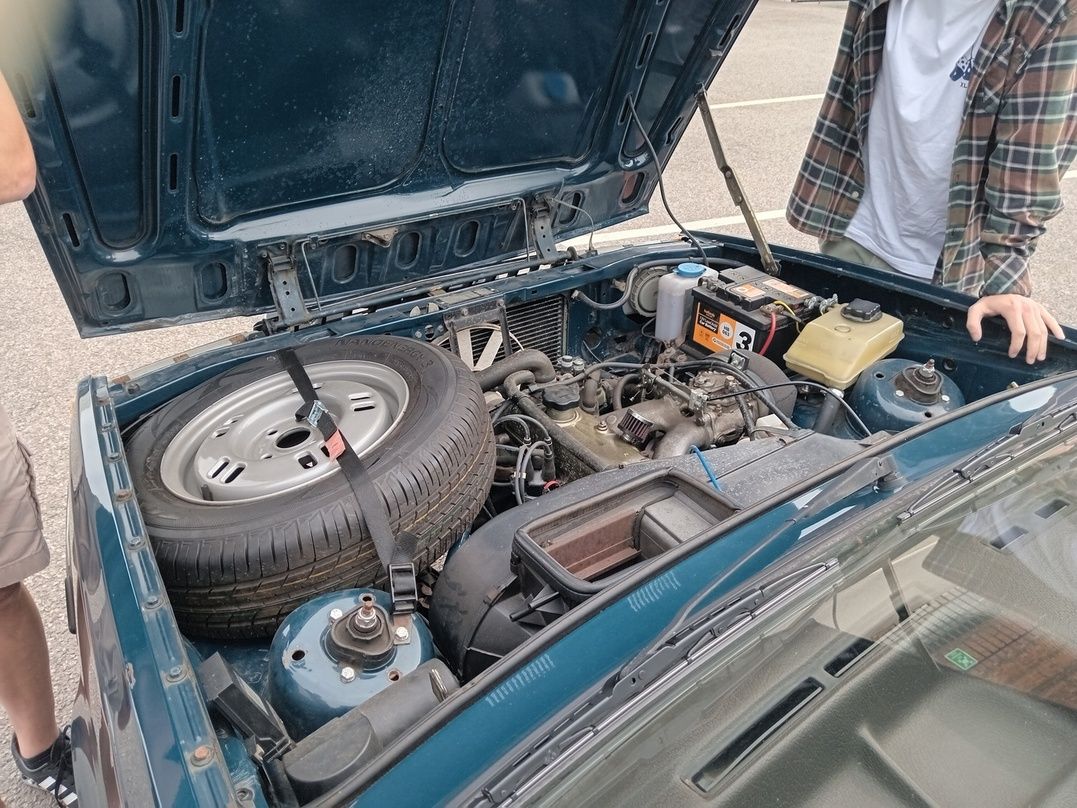
Mid-April 2025 and I am now working on the original Blue Bess 360 again - t'is true. Petrol supply issues resume. The non-return valve works on the weeks timescale but months and years are too long, so that calls for refitting a low pressure electric fuel pump. Once the engine has some petrol, it too starts and runs very well so the clean-up of that one is in progress while we watch the world fall apart.
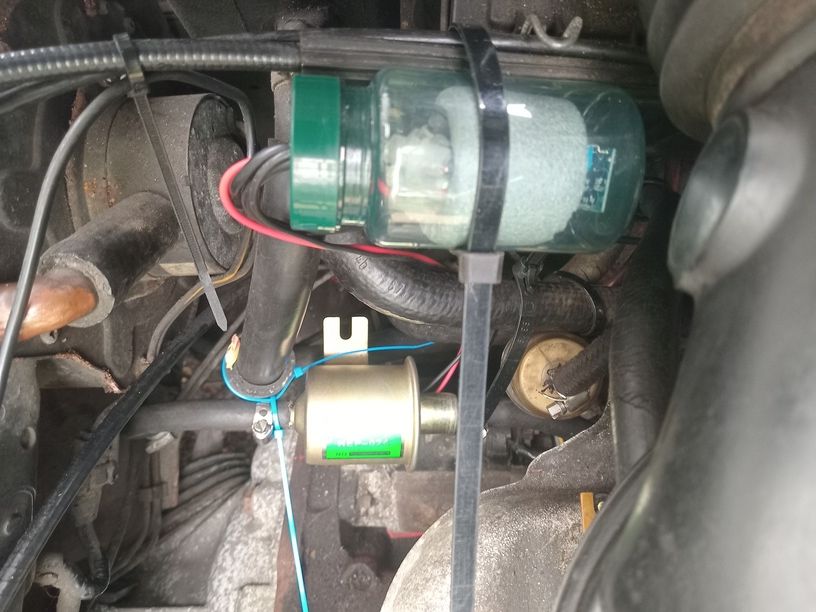
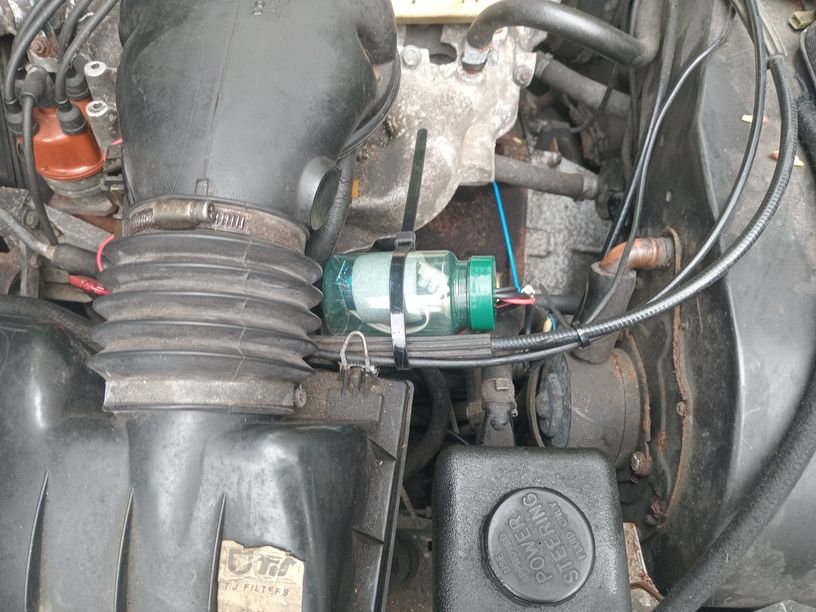
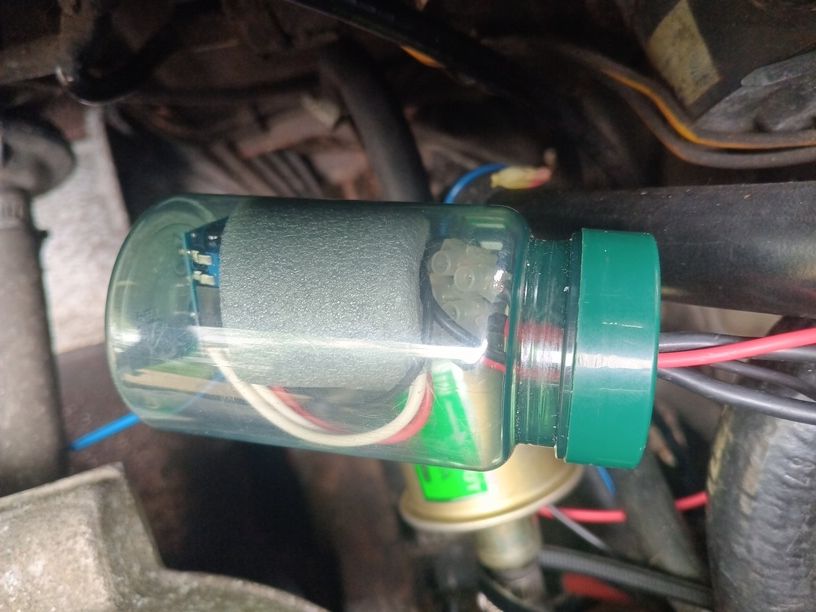

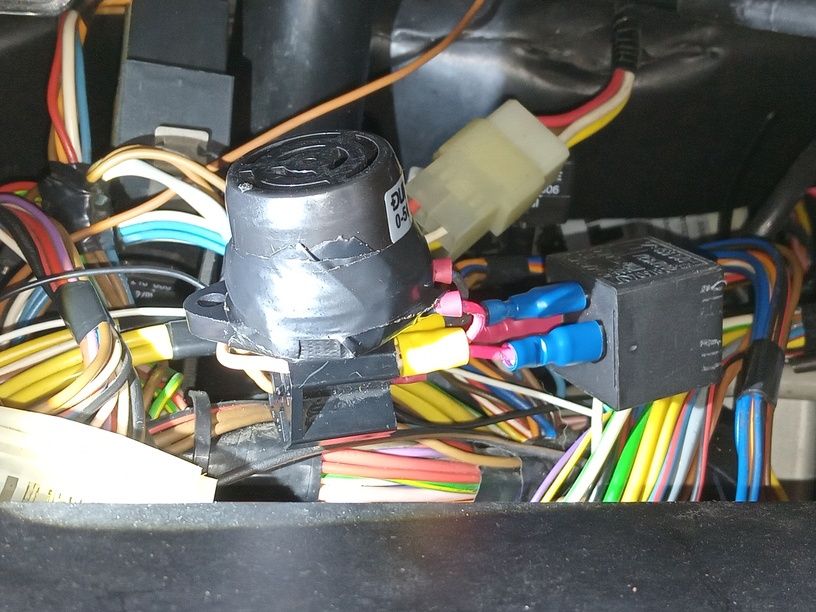
The new inline fuel pump can be seen above, but what's in that green bottle? The plan here is to have some way of switching the electric pump on only when it is needed, either with a manual switch on the dashboard or under the bonnet, or having a time-switch which turns the pump on when the ignition is turned on and turns the pump off a few seconds later. That is indeed what the little circuit board thing at the bottom of the green bottle does, more details of which can be found here. It is literally a message in a bottle telling the pump when to start and stop so that we don't knacker it by having it running all the time, like we did with the last one that only lasted slightly over a year. I was worried that the amount of electrical noise in the wiring would switch it on pretty much all the time, but some anxious testing showed that it was well-behaved.
All of the worry about electrical noise takes me back to the issue that trying to install a warning buzzer for when the indicators are on had failed because the beeper was simply beeping all the time which would have completely defeated the purpose. So thoughts are going through my head in early May 2025 about how to solve that problem, too, and they lead into all sorts of weird noise-filter-type circuits, a few of which I tested (below left) but which actually failed completely. However what did work was to look at this diagram on the below right which was cadged from an MG forum and shows a different way of wiring in the beeper.

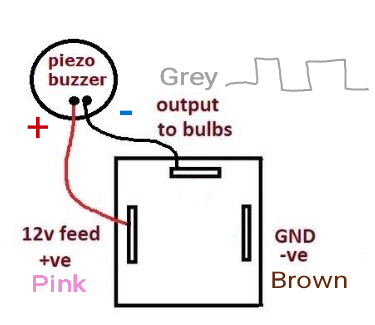
Instead of having it wired between the output to the bulbs and the earth, we wire it between the 12V power supply to the flasher unit and the output to the bulbs. The idea is that when the flasher unit turns the bulbs off, current will flow through the beeper from the 12V live supply to the bulbs, although it will not be strong enough for the bulbs to come on again! So the idea is that when the bulbs go off, the beeper comes on and indeed it seems to work fine, with none of the sporadic beeping and buzzing that it was doing before. Awesome and wicked stuff.


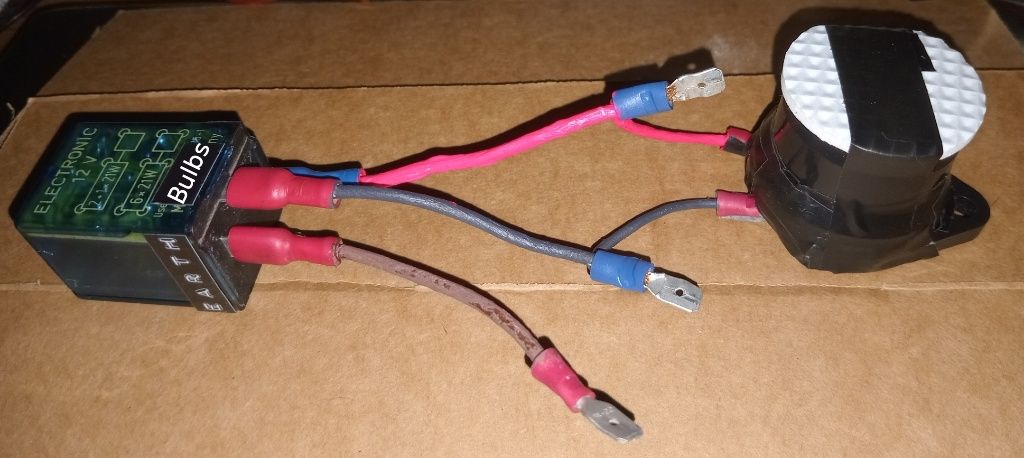
All of this is going to my head and sows the seed of an idea that I should return to Deep Blue and try to debug the beeper unit fitted to that one last year. Although this one was pretty good, it does suffer from beeping whenever you press the brake pedal, which can give you a bit of a Newbury (bypass) if you are not expecting it. Anyway, while playing about with wiring up beepers, I put together a minified version shown below with the idea being that this one could be fitted to Deep Blue in due course.

While all of this electrical wizardry (or lack thereof) is taking place in the evenings, the days are spent cleaning and tidying up Blue Bess in her end-of-terrace garage, to reasonably good effect, I think.
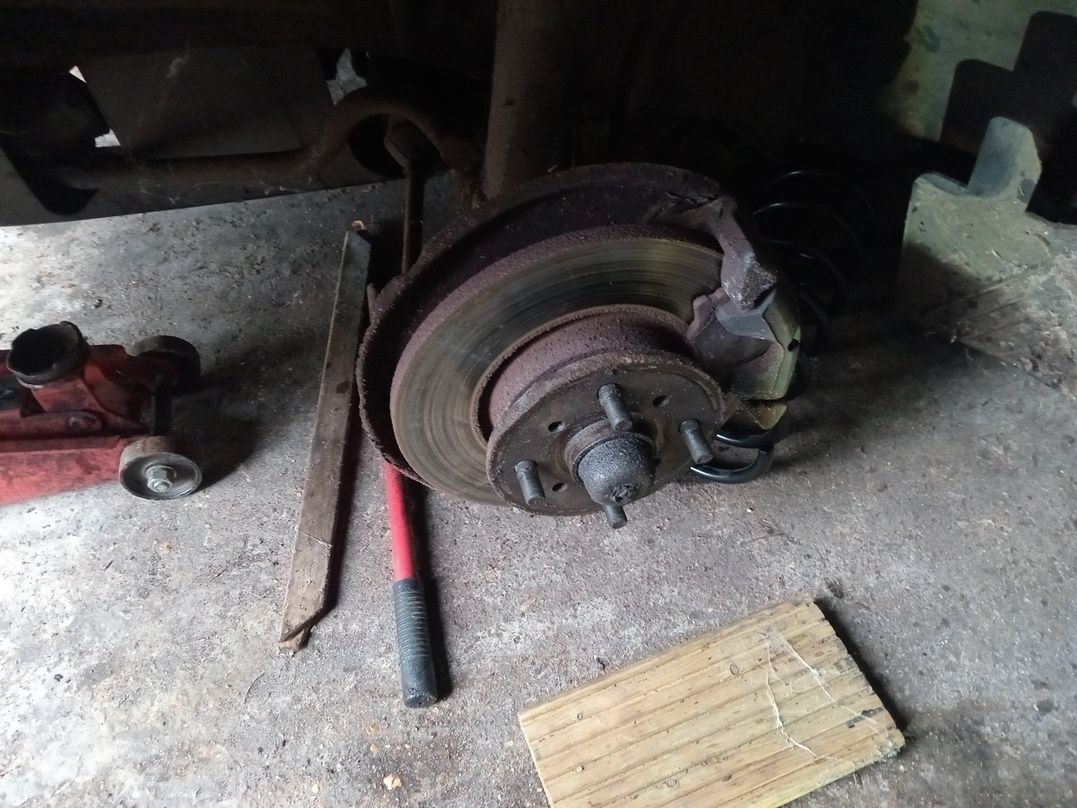
Lots more ideas going through my head about possibly trying to improve the gear linkage, but it doesn't seem too bad on one or two tentative efforts at driving her a short way out of the garage each day. Anyway, the idea is to shelve further work on Blue Bess for a couple of weeks to allow another two of my ruins to be given a spring clean, but before moving on to these beasties, I intended to give Bess a more ambitious drive up and down the garage yard. When the day for that came to pass, there were some odd booming noises from the front suspension every time I steered to the left or right, which sounded a bit ominous. Indeed a look under the near side front wheel are shows that we now have a broken spring!

I think from looking at the photo that the spring must have broken very recently as the break is rust-free apart from the small area at the top which must have been an old crack that rusted internally. It is possible that the car was making this booming noise 2 years ago when I laid her up, a few months before the start of the ULEZ expansion, but I simply can't remember, although the idea has a ring of feasibility to it. Never mind, that one will take a little sorting out, but hopefully we can have it done by 2028 when I should be able to drive the car again.
No worries, we move back to Deep Blue and see if we can indeed improve the beeper which provides a warning for when the indicators and hazard lights are on. The under-dash space is considerably more cramped in this car due to the EPS unit and this requires removal of the instrument panel for access to the flasher unit. For the first time in almost 30 years of 300 series ownership, I actually manage to remove the dashboard unit without removing the steering wheel, by following someone's excellent advice on the Book of Faces. This allows me to remove the old beeper and fit the new minified one. However, what do we now have? Beeping, clicking and buzzing at all sorts of sporadic intervals, whether the indicator lights are on or not. Duh. I think these differences must be due to the flasher units and beeper units being different in the two cars. So what if we take the old beeper that almost worked in this car and use that with the new minified wiring? A bit of swapping of connectors confirmed that this indeed is the solution and the old beeper does work reliably and does not come on when braking with the new wiring scheme from the MG forum. Awesome stuff indeed.


These pictures show the old beeper being wired in with the minified connections and taped-up to muffle it slightly. Painfully slow progress is being made, I hope.
May 2025 saw someone asking for a fuel pump for a Morris Minor but on looking through my stuff I could only find one which didn't work. They seemed interested in my trying to repair the old item so I gave it a bash. On dismantling it to try and find what was wrong with it, it seemed that one of the wires to the coil had broken.
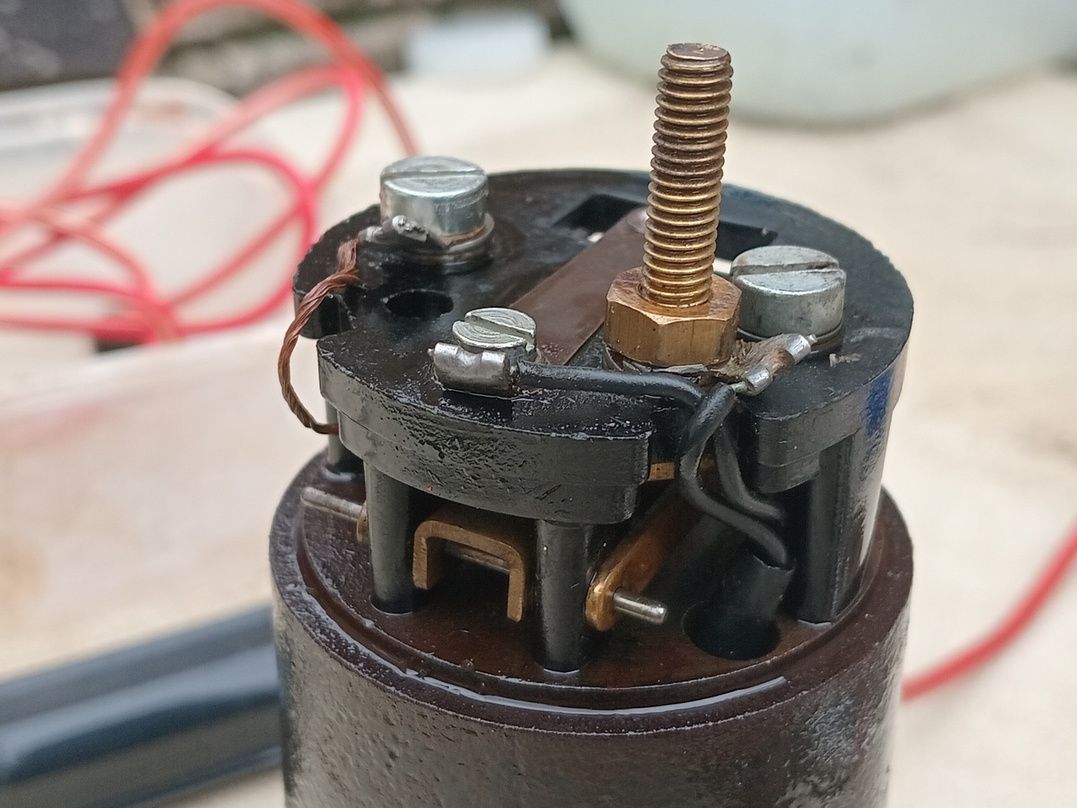
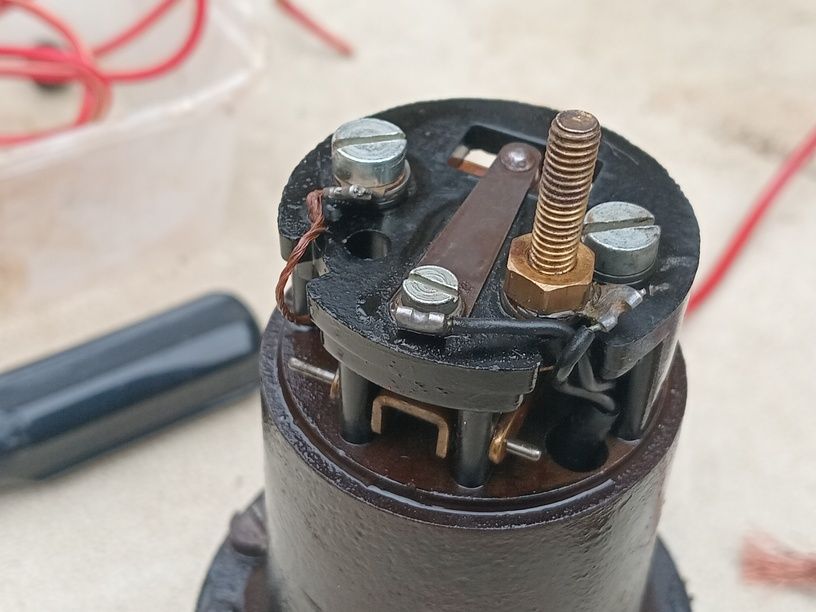
The wires which pass through the plastic base-plate for the circuit breaker were replaced with thicker items which were soldered onto the coil terminals. It was a bit of a nightmare getting it all apart as the coil had to be drifted out of the casting.
Anyway on getting it back together with new wires, the rate of pumping is still way too slow and unreliable. Time to order a new diaphragm to replace the old one which had pretty-much turned to leather and its layers had started to separate from each other.
The new diaphragm arrives but I didn't get any pictures of it. However on fitting it the pump was found to work perfectly so the refurbished unit was fitted to my own Moggie Minor for road-testing. Indeed it seemed to be working well, after replacing the insanely twisted metal pipe shown above with the old contactless pump which is now a spare. However it took me so long to do all this, by then the friend had already sold their moggie on so it remains as the fuel pump on my own moggie minor!
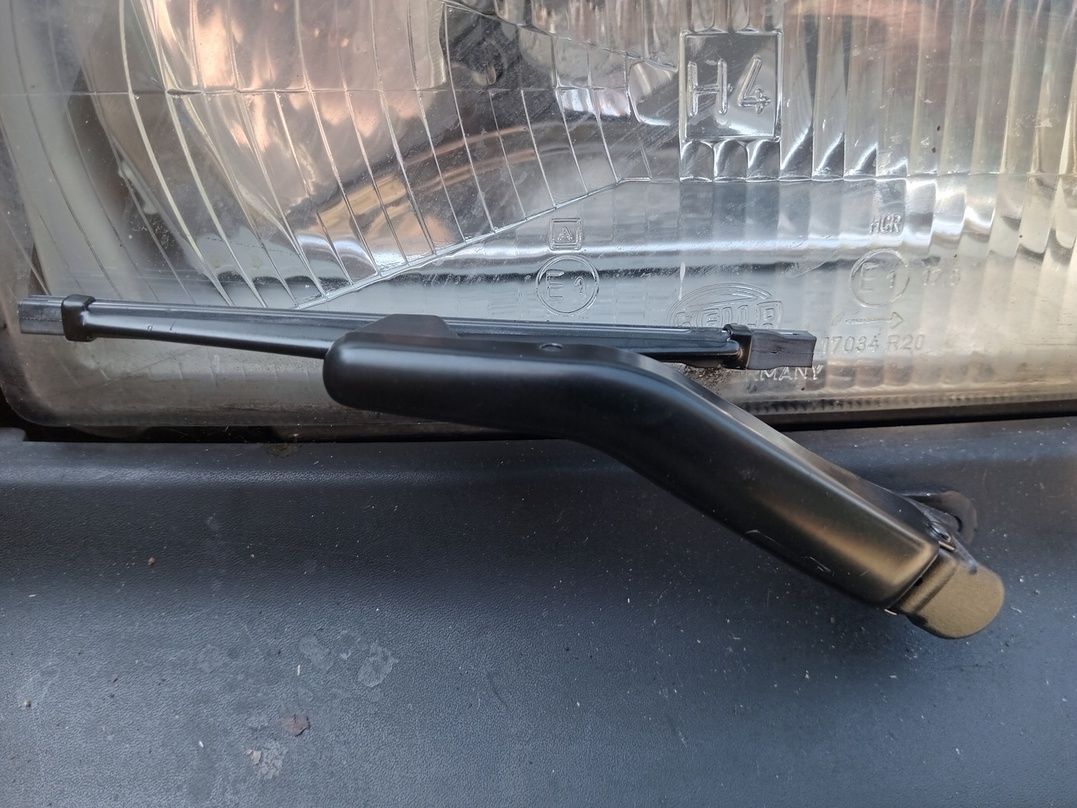
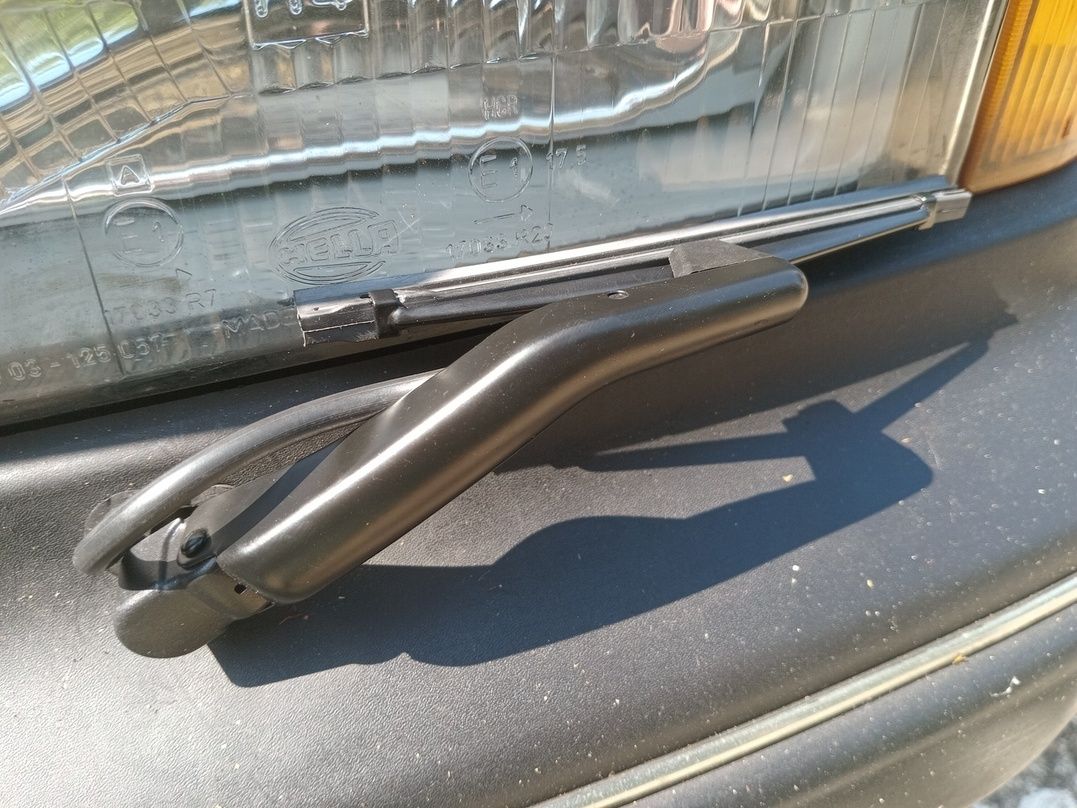
In this chaos the headlamp wipers on the blue 1.7 were replaced with more modern-looking items. I would have preferred the original style wipers but these are so expensive, the more modern-looking blobby style ones will have to do!
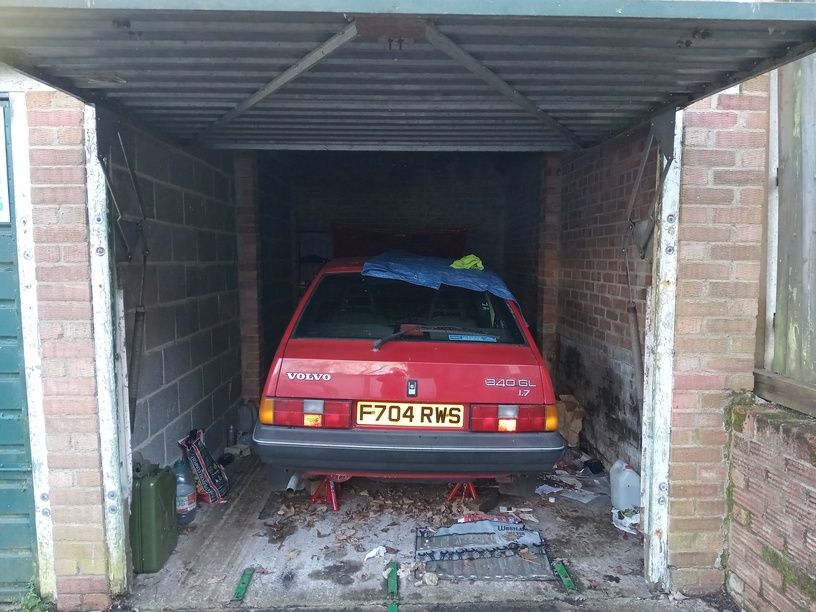
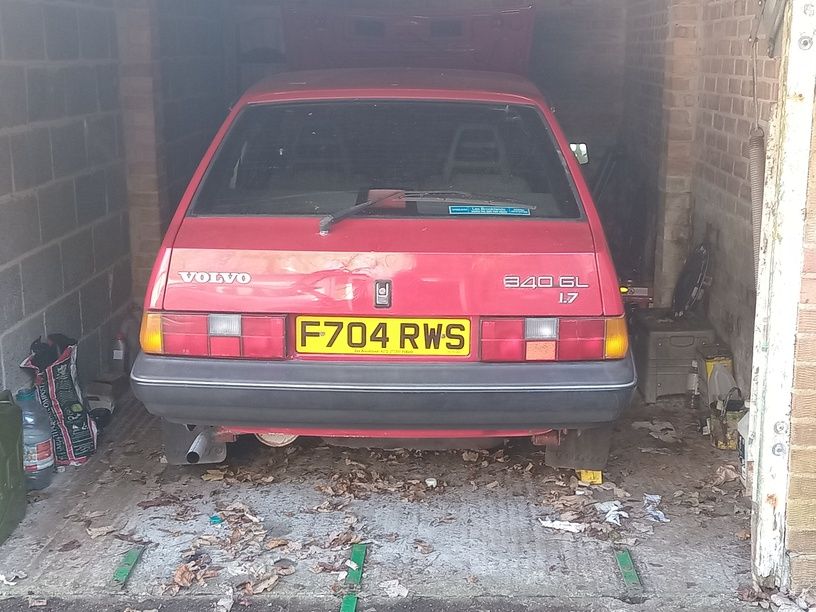
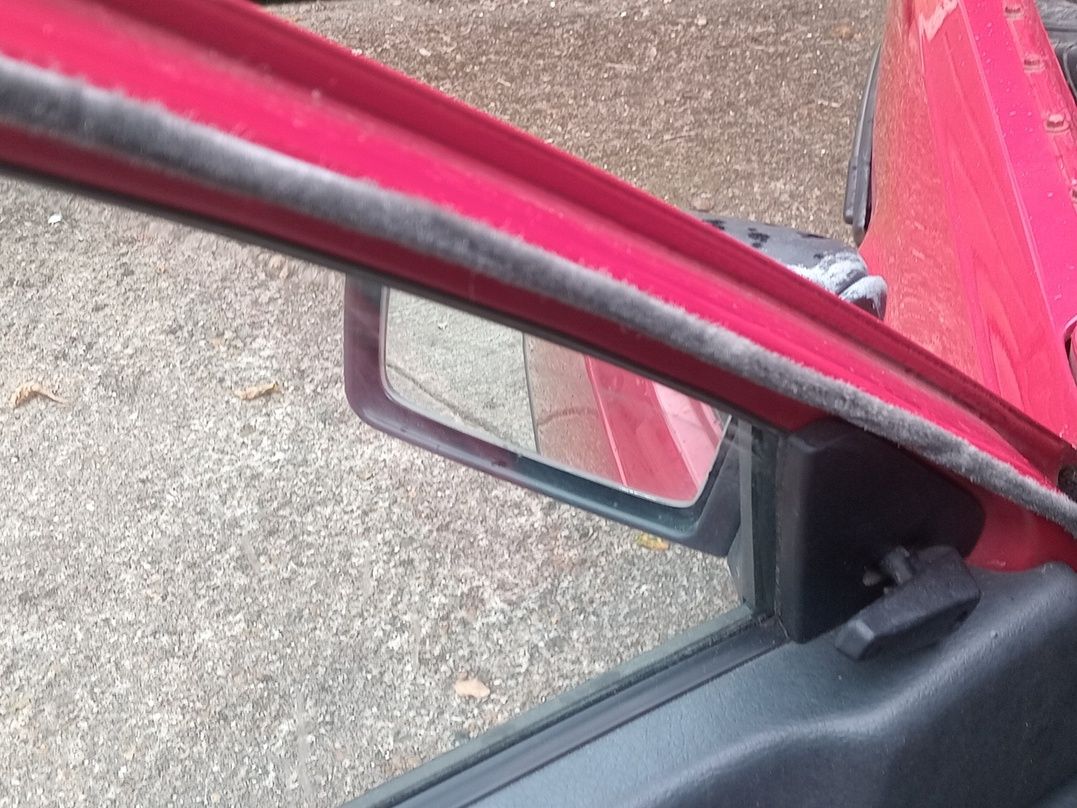
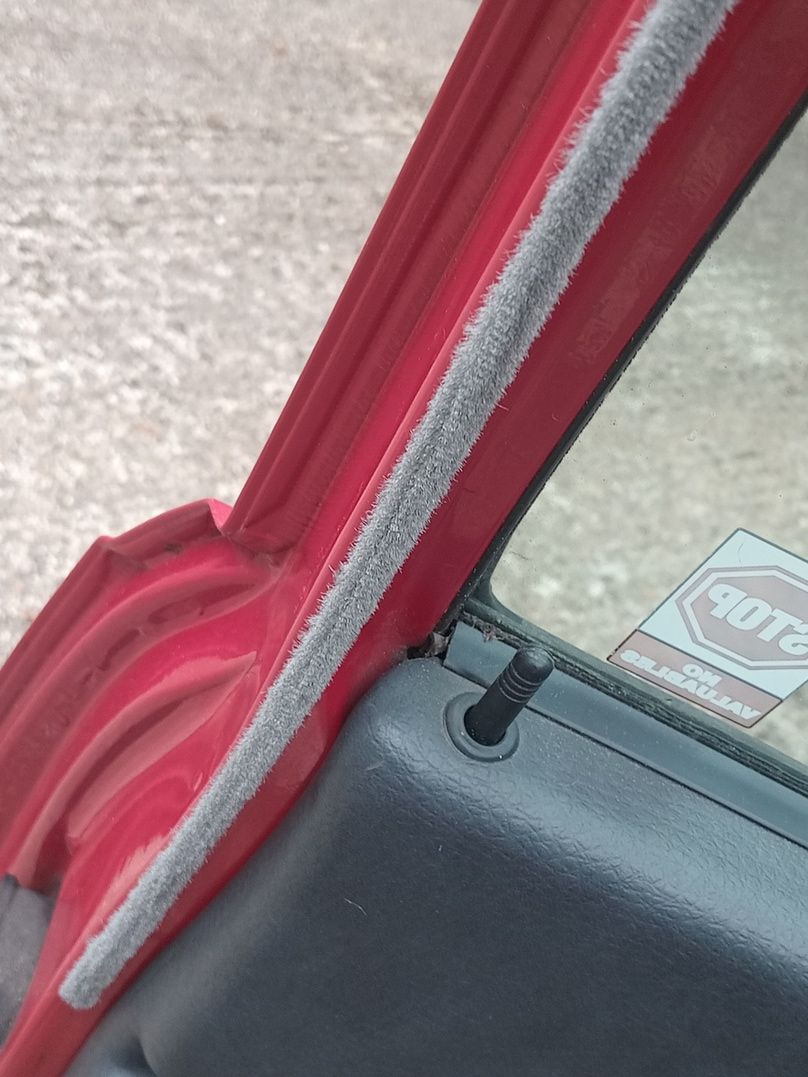
Around the same time, I was struck with the idea of replacing the draft excluders on the red 1.7 which had peeled off the doors. I won't drive this car due to ULEZ so it is very academic doing little jobs to it in the hope that one day I will be able to drive it around again (maybe late 2020's). So that is all this is.... a very experimental draft excluder for a red 3-door!!
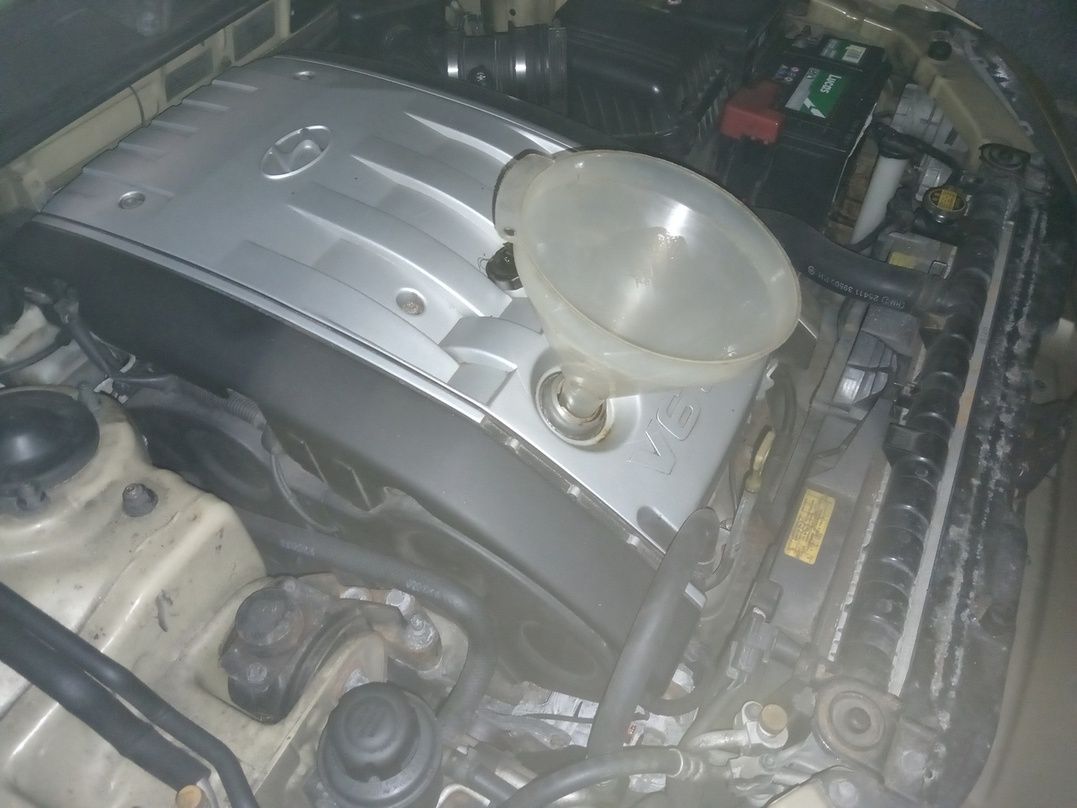
Its mid-July 2025 and the old Hyundai (another car I won't drive) gets an oil change and a new air filter.
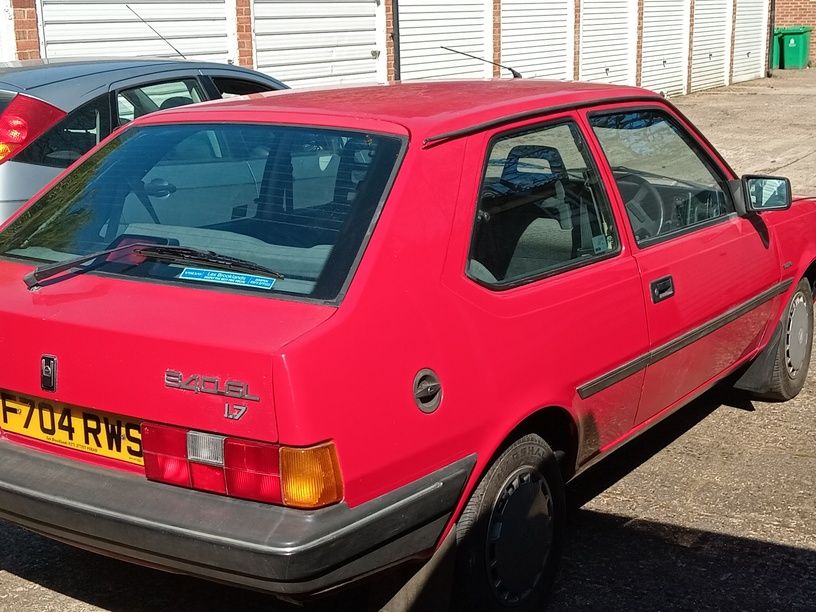
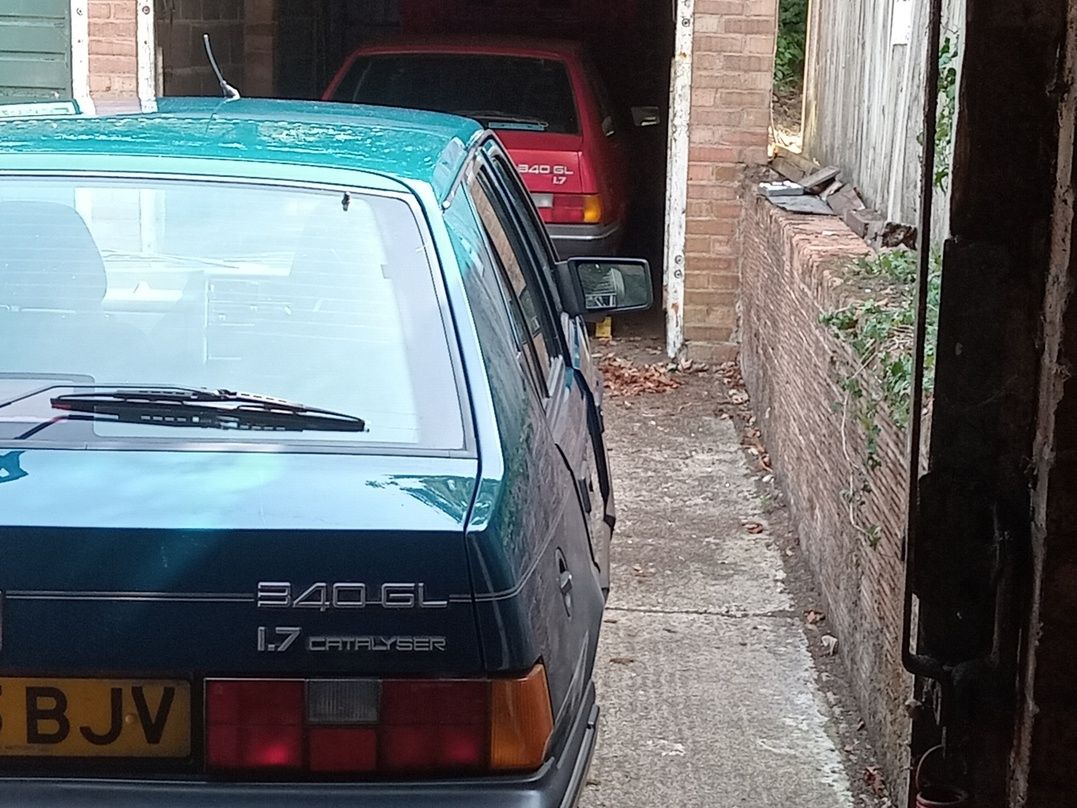
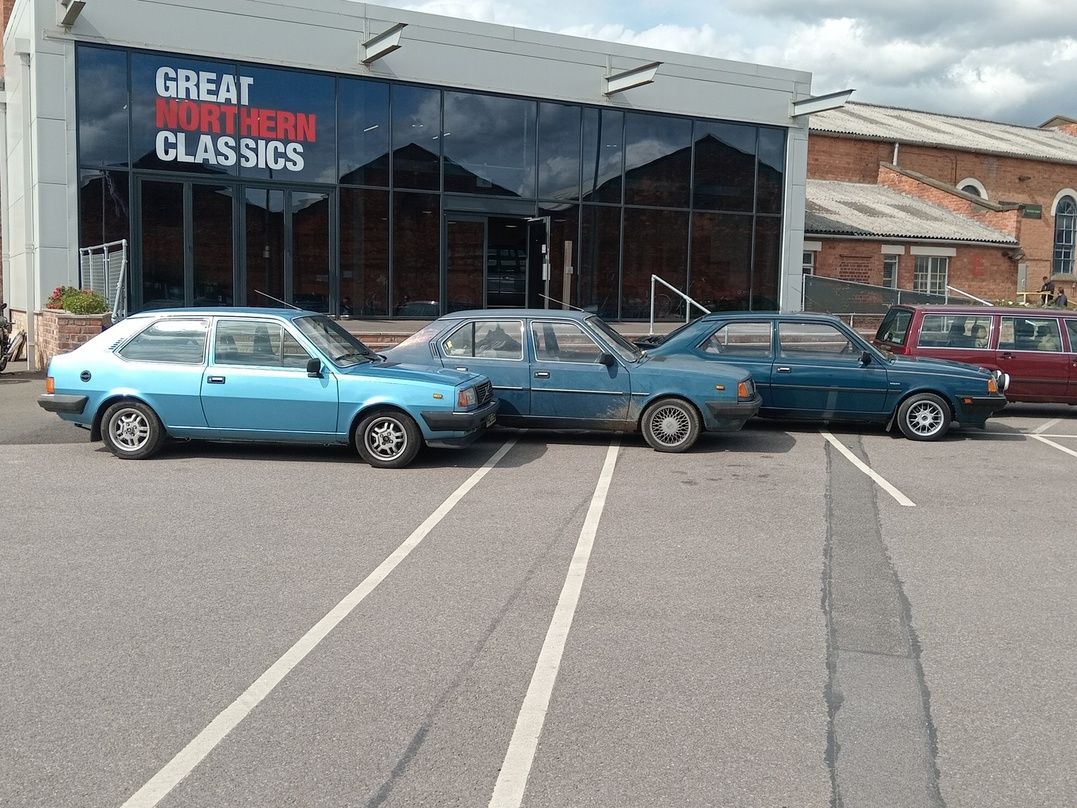
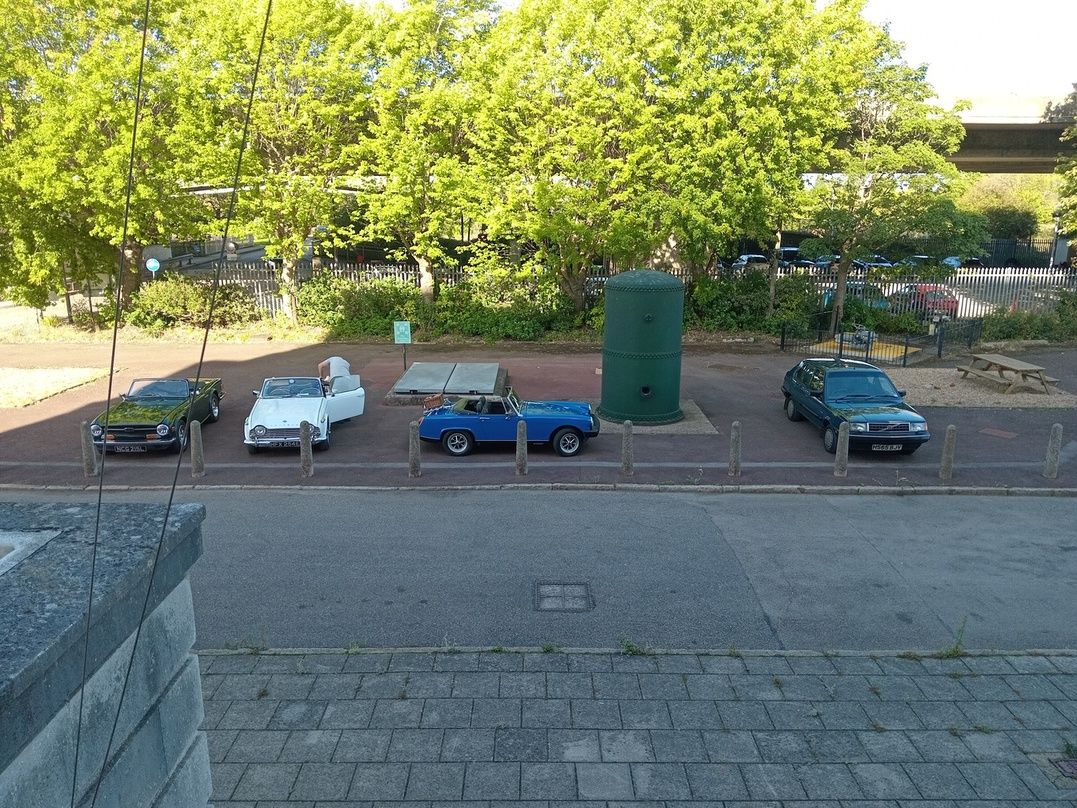
Anyway, we have two 1.7's looking pretty polished in the Summer sun, which can't be bad.
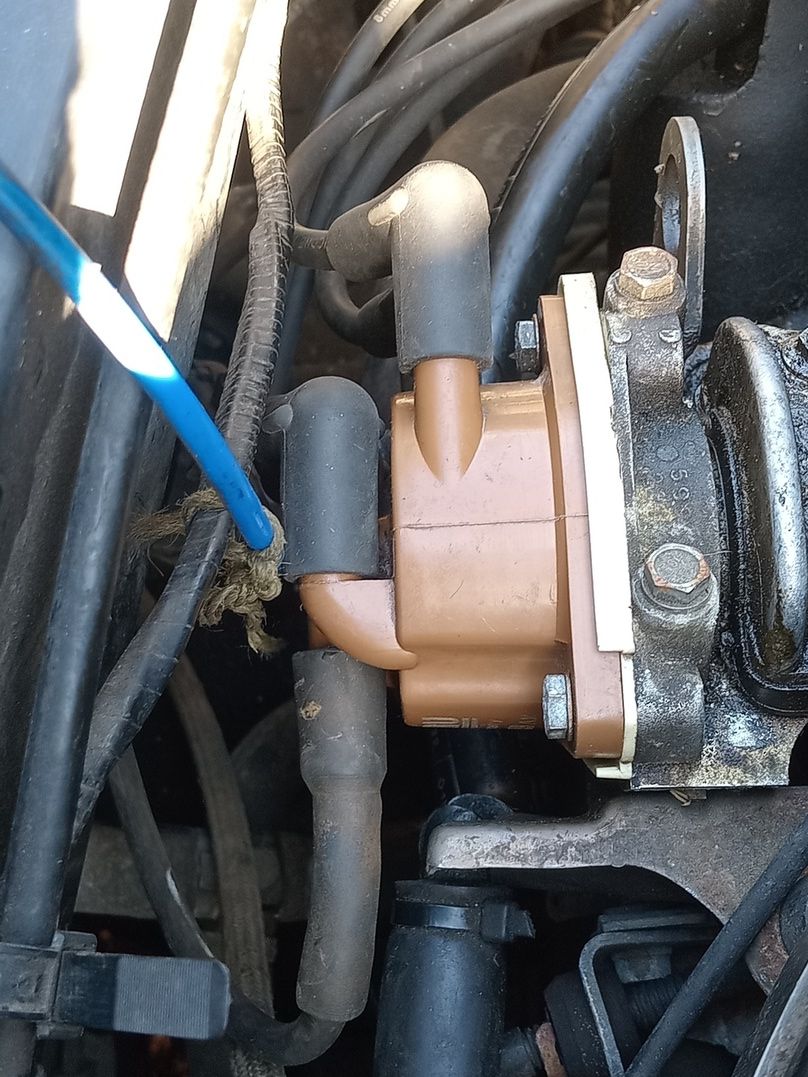
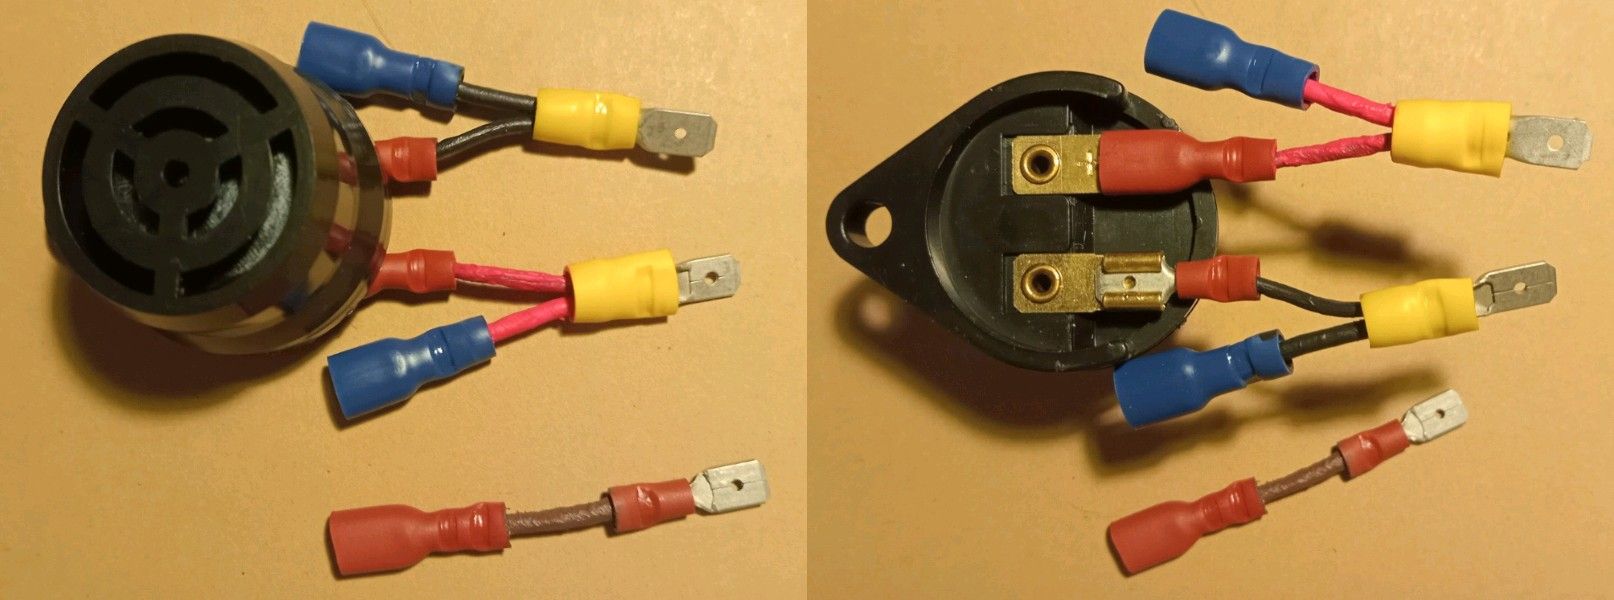
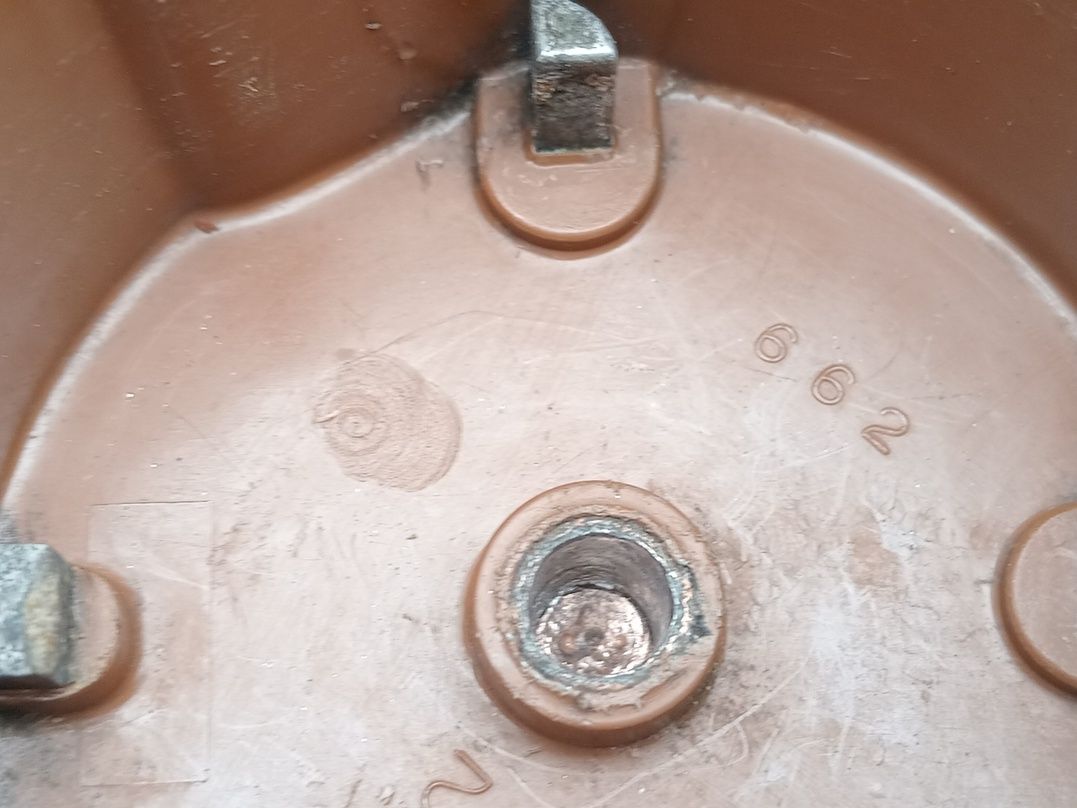
One question in my head is whether we can re-use old 1.7 distributor caps because the main thing that goes wrong with them is the carbon brush which burns away and/or gets jammed in its hole. The brush should look like the picture below on the left, but it usually ends up looking like the one on the right which is firmly stuck in the hole, and that is quite a good one as they are usually considerably more burnt and worn out than that.
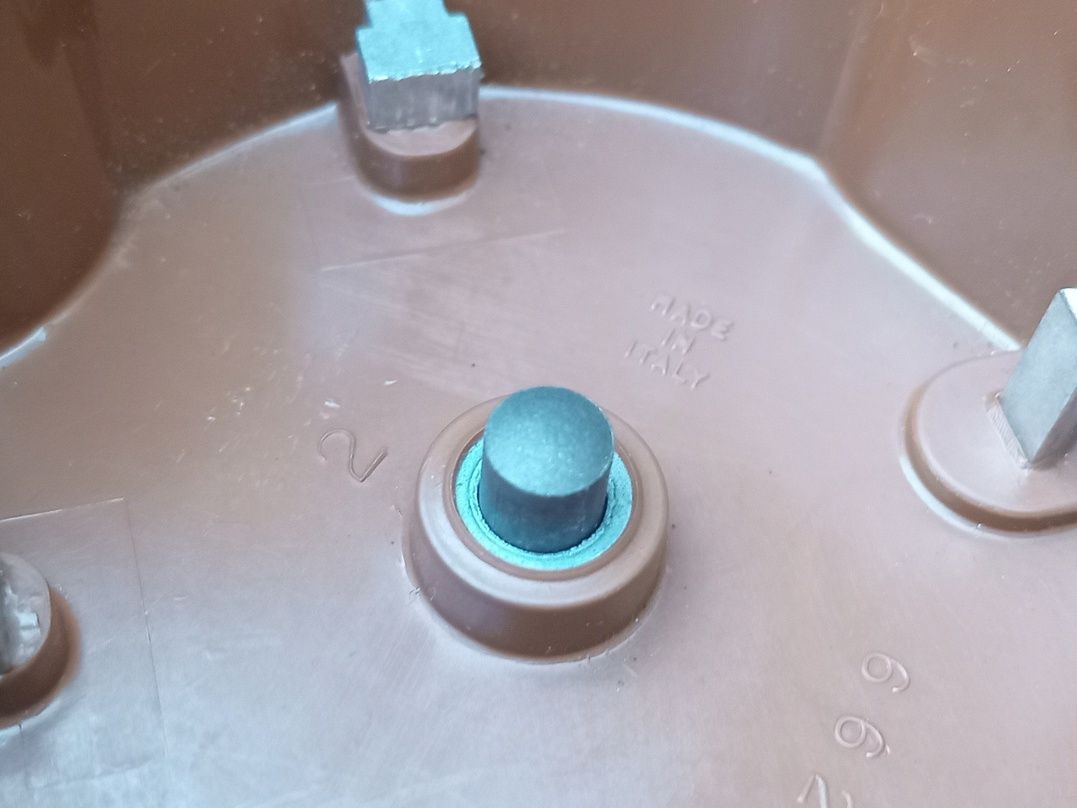
It's a 6 mm diameter brush but I can only find 5 mm (more like 4.7 mm) brushes and they are about 1 cm long or 2 cm if you include the spring. Oh well, let's drill out the burnt old brush with a 6.5 mm drill bit, pull out the old spring at the base, clean everything up and see. Oh dear our 5 mm brush sinks right to the bottom of the hole and there's miles of room each side. So we need to raise our smaller brush up a bit in its hole. On looking around for something, it looks like one end of a domestic fuse could fit. So let's break the old fuse, tap and scrape all the old fuse wire and ceramic stuff out of one end and clean it up. Nice.
A parallel pin punch allows it to be tapped into the hole, open end first. Tap it in pretty hard and check that the new brush pushes in all the way. It didn't, so I used some old bolts etc as punches to cave the end of the old fuse in a bit more to let the brush go into the hole fully.
So we now have a hole for the brush which is the right depth but there is miles of room all around it so it needs a sleeve. Enter 1/4" brake pipe which with an outer diameter of 6.4 mm is bigger than standard car brake pipe, but it's cheap and abundant and has an inner diameter of, guess what, 5 mm. Quality innit.
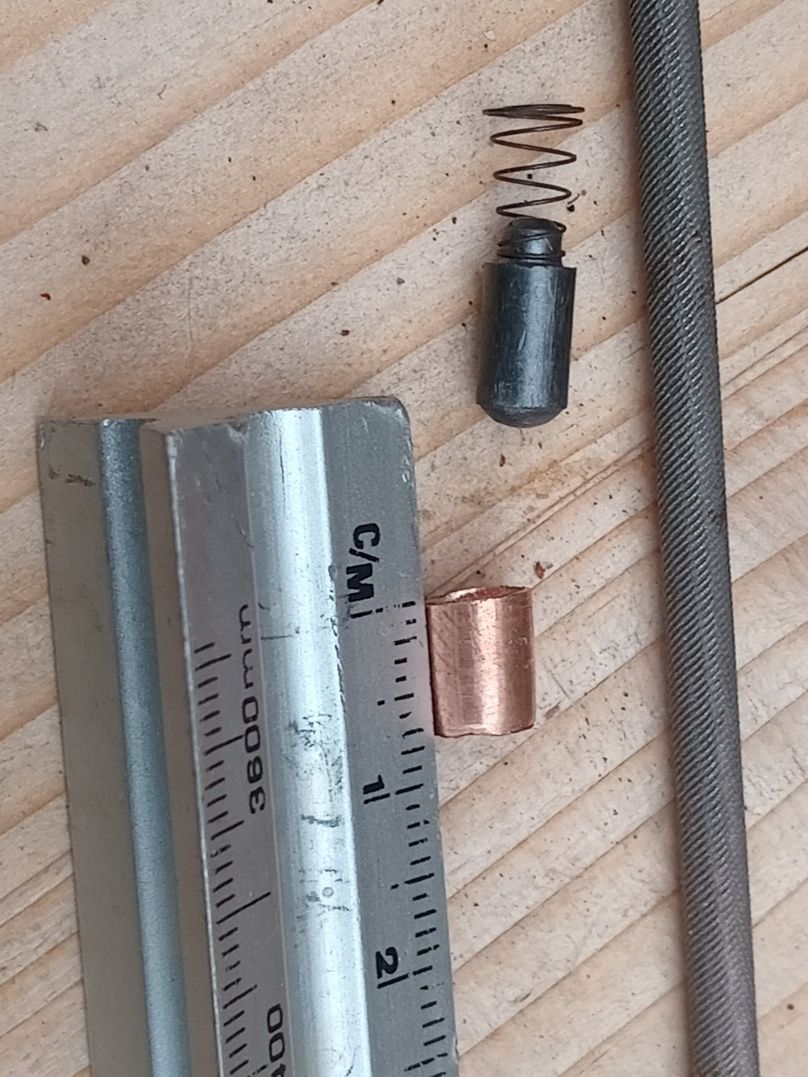
So we can cut off about 8 mm of this pipe, use a needle file to open it out a bit inside so that the brush slides about easily and press it firmly but carefully into the hole. Note that in refining this scheme it was found that the copper cap at the base of the hole needed to be peened in to allow the brush to sink to its correct depth without breaking.
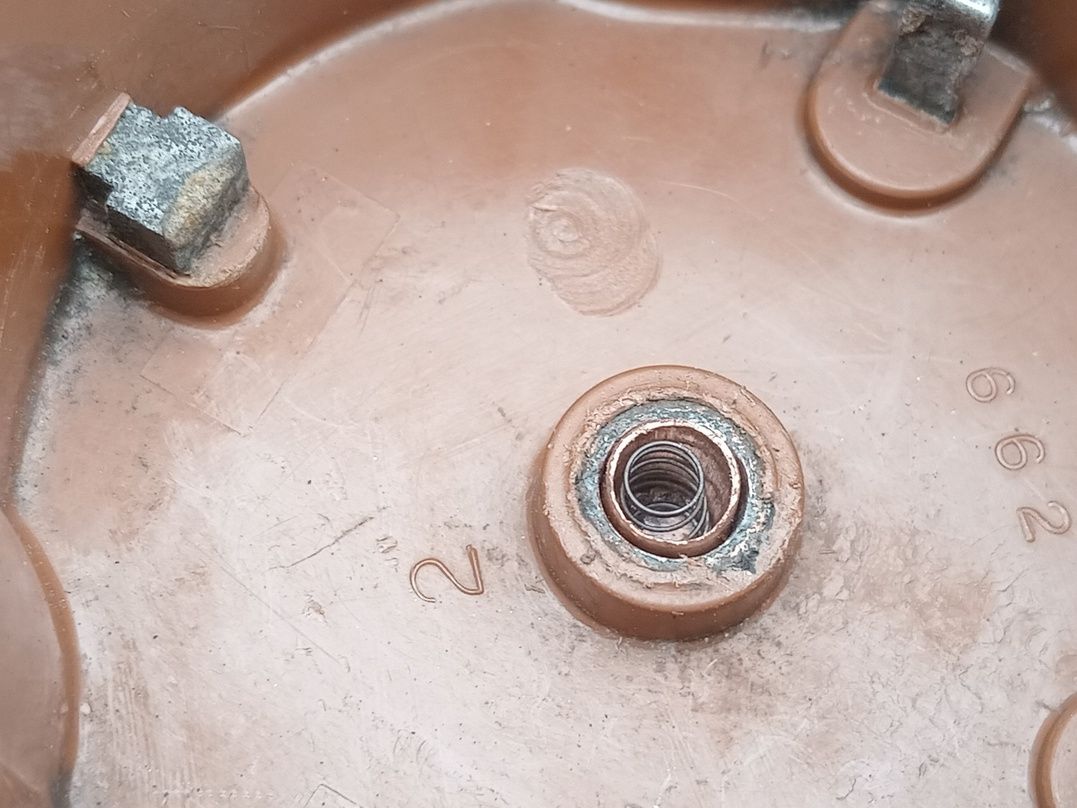
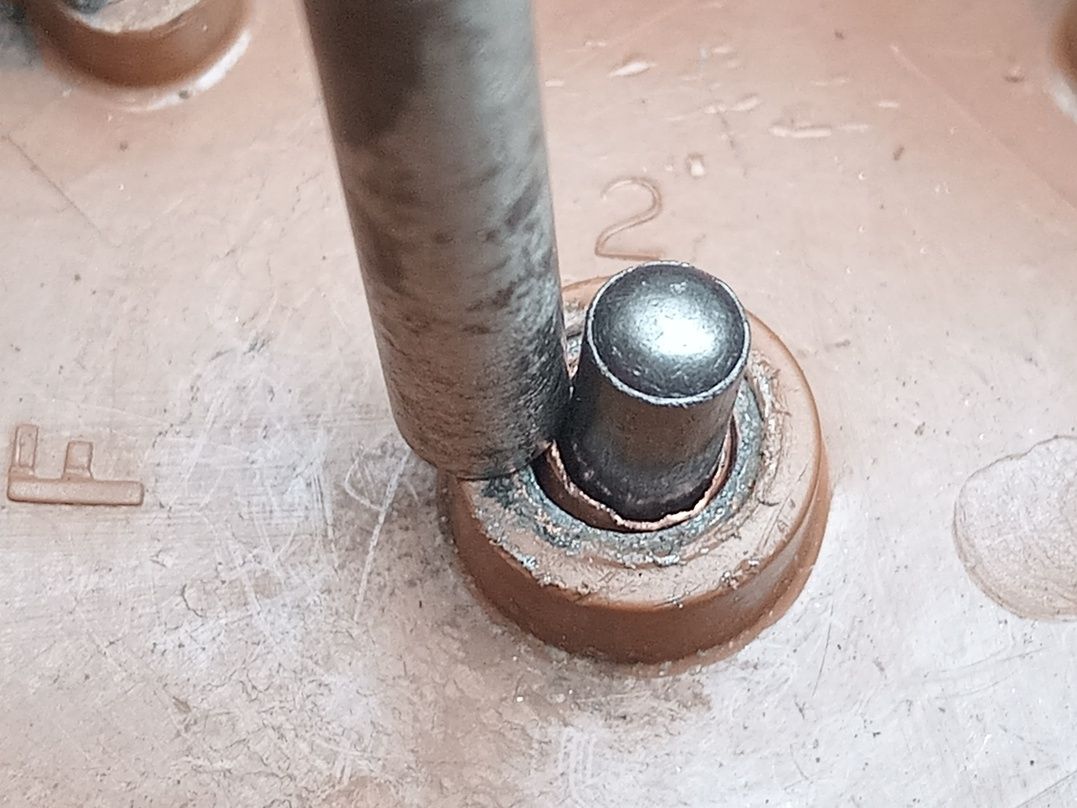
The 1/4" copper sleeve now holds the spring for the brush in and let's the brush slide freely. It even works on the car!! However, and its a big however because, I tried to repair a second dizzy cap and on hammering in the fuse end, the cap cracked very badly so I am thinking that it would be better to raise the floor of the hole for the brush by compacting in some thick tin foil. Tatty but probably safer.
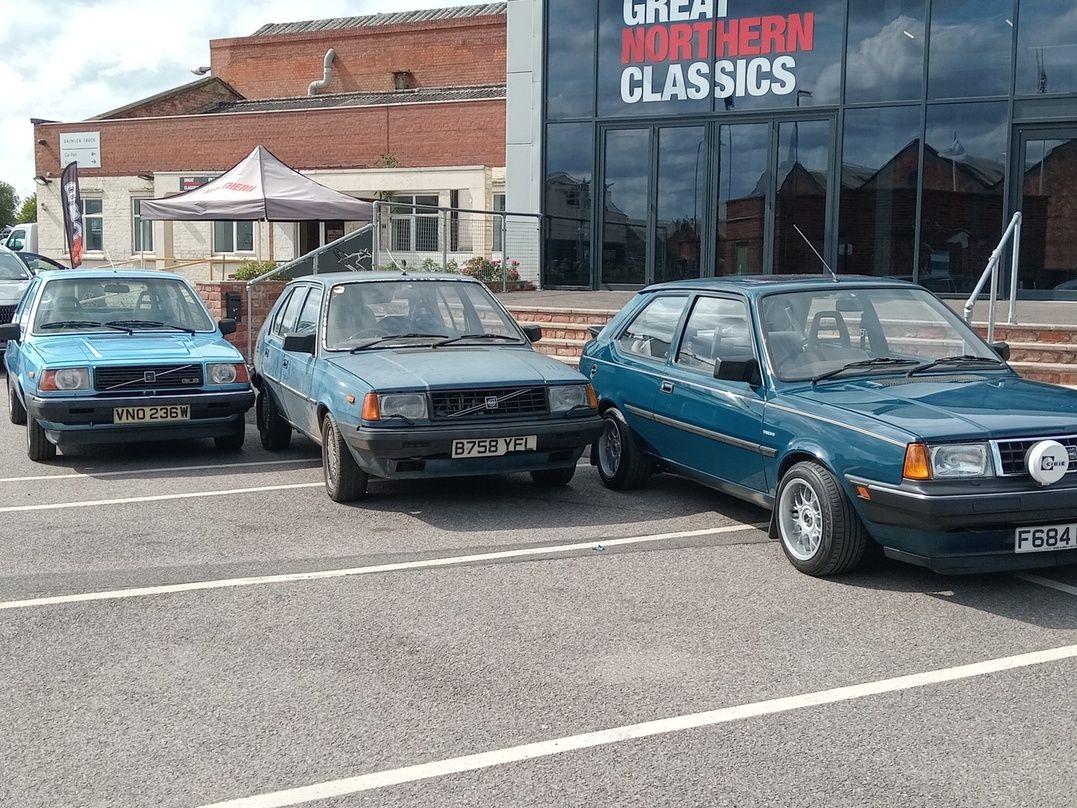
My interest in 1.7's is to try and get the one roadworthy example I have (Deep Blue, above) ready for a couple of shows so she goes off for an MOT in September but sadly they insist (probably wisely) they can't get her back to me in time for the first show so I buy train tickets to go there by public transport instead. They then ring me up the day before the show to say she is ready after all but I have it firmly fixed in my head to go by train as a few hundred miles of driving in a car that's roadworthy but not been driven very far for a long time seems a bit dodgy. Anyway, I go to that one by train and a few great 340's went, too, including a 1.4 in the same petrol blue colour and another of a similar colour but its hard to tell if its exactly the same due to the ravages of time and tide. Nevertheless a bit of polish will bring it up gorgeous, I'm sure ;-0 Awesome.
A week or two later, there's a fairly small local show and Deep Blue gets to go. The event was better attended than the photo below would suggest as it was taken before most of the other cars arrived. A point of note is that the indicator beeper I so carefully constructed for this car is by then completely knackered so it comes off the car. No idea why it pegged out other than to tee me off.
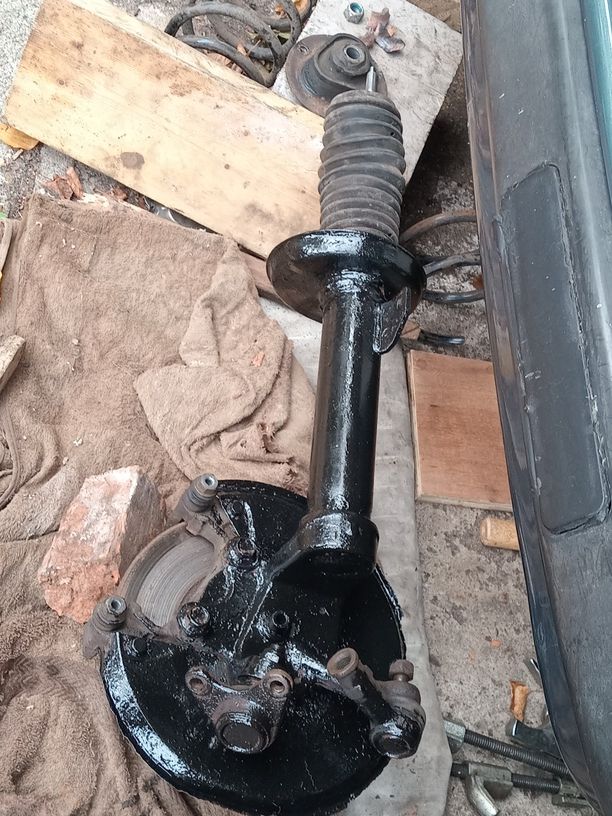
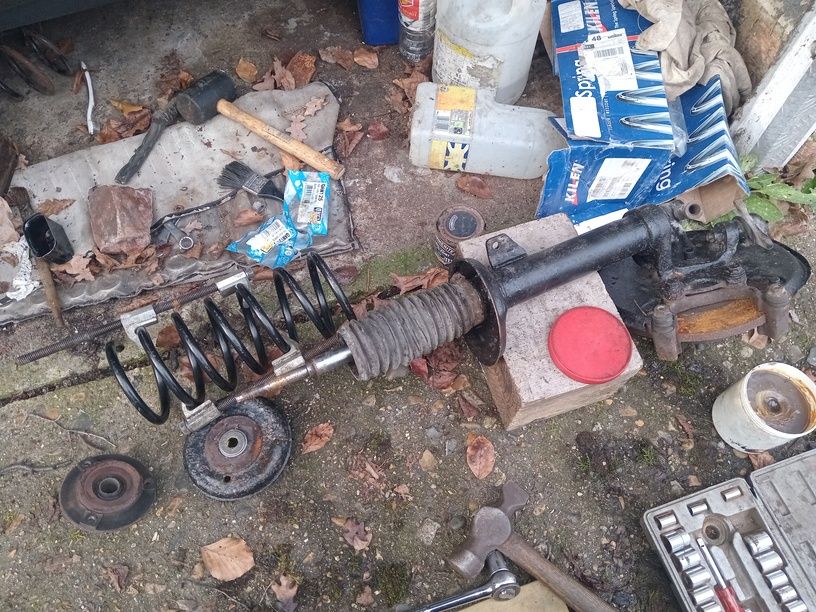
Anyway, its now Oct 2025 and work begins on replacing the broken spring which Blues Bess was found to have acquired.
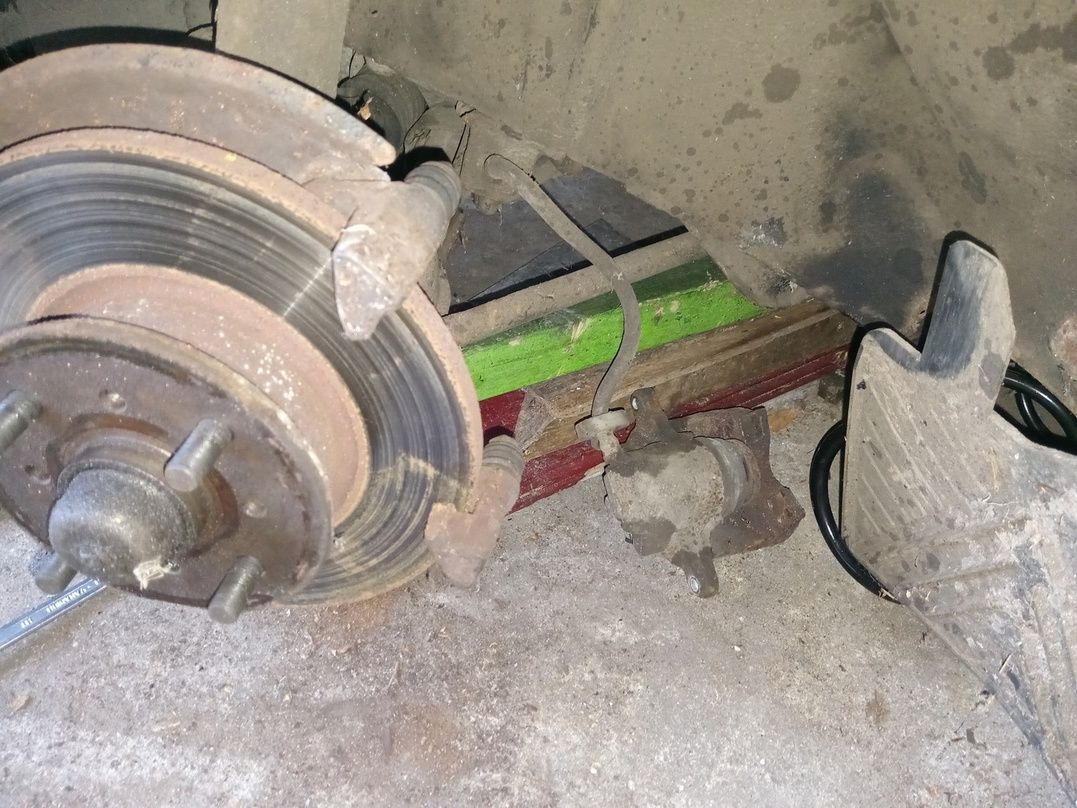
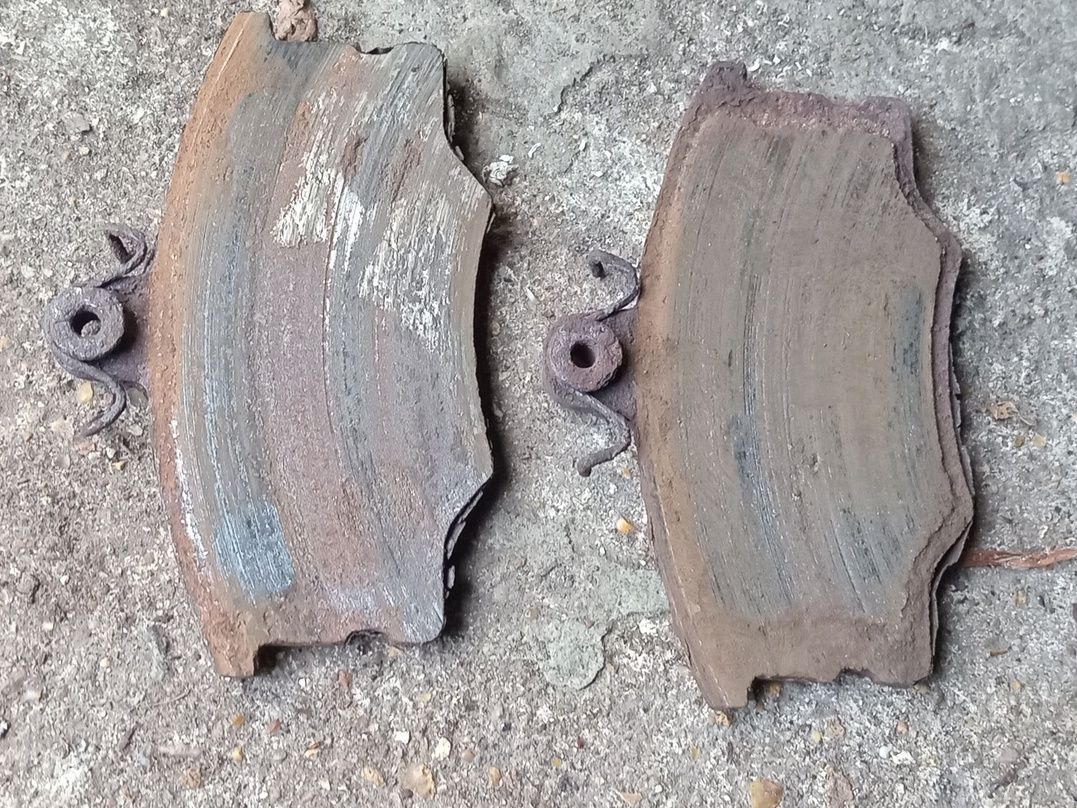
The brake pads seem to have suffered quite a lot of wear in the 20 years since I first installed them, so this will be a good opportunity to replace them.
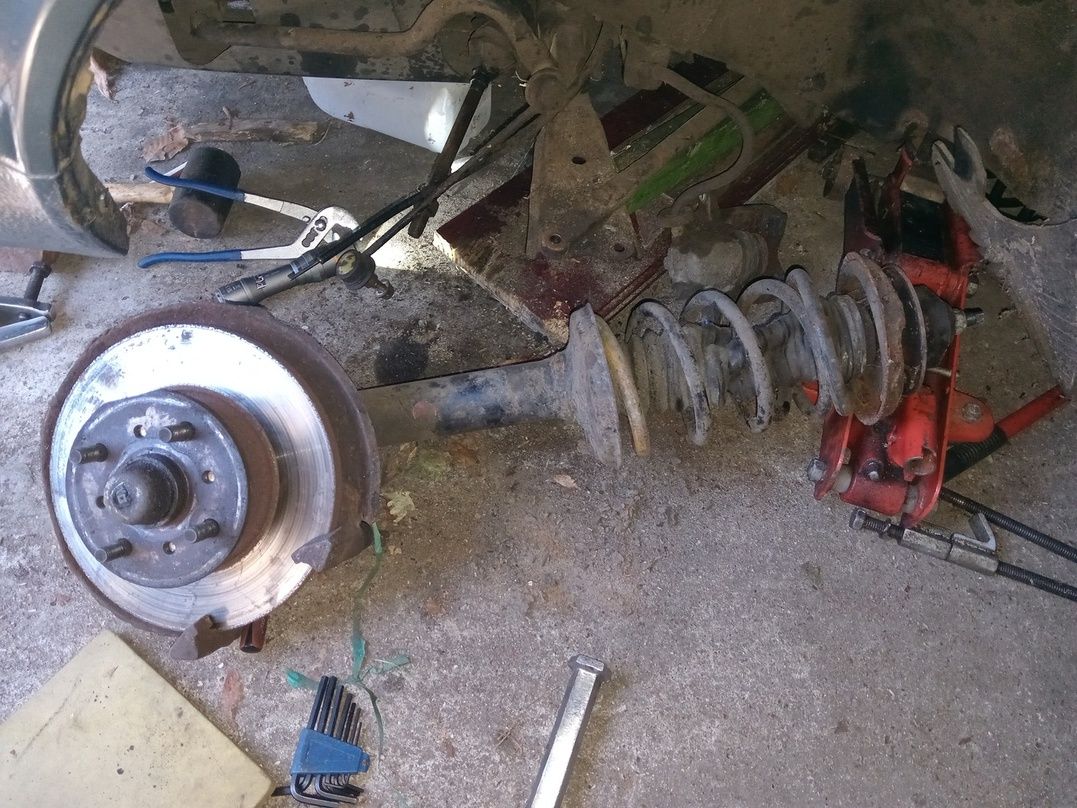
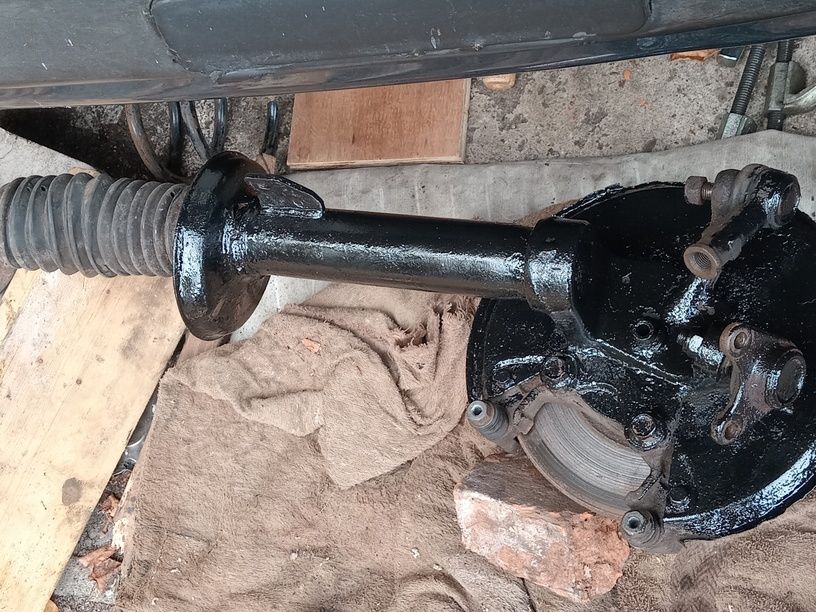
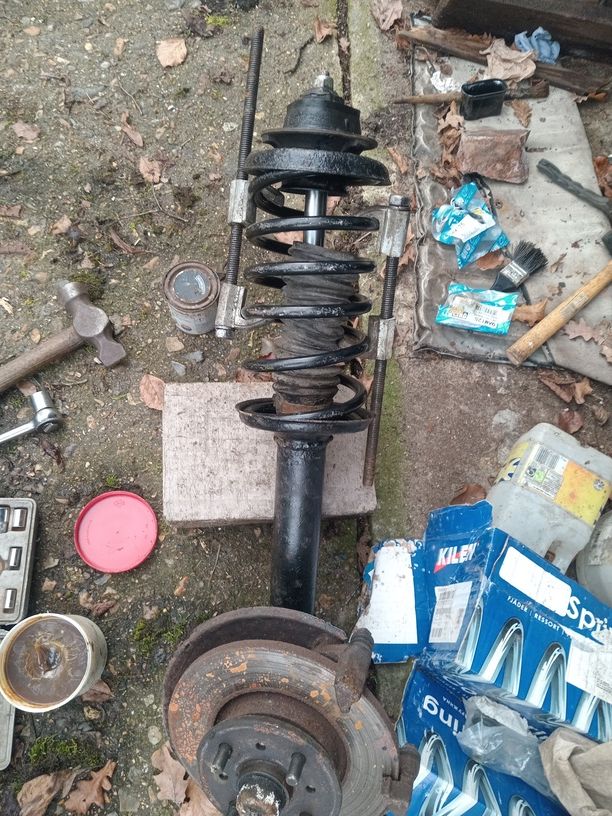
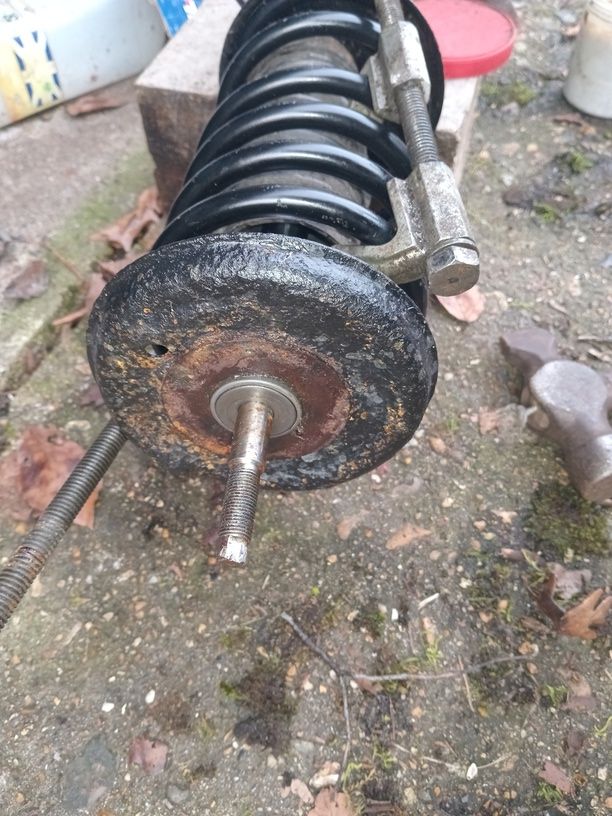
The strut is eventually removed and given a coat of paint. The strut top cap had suffered quite a lot of stress and had broken so this was taken to a welder for repair. More to follow soon.

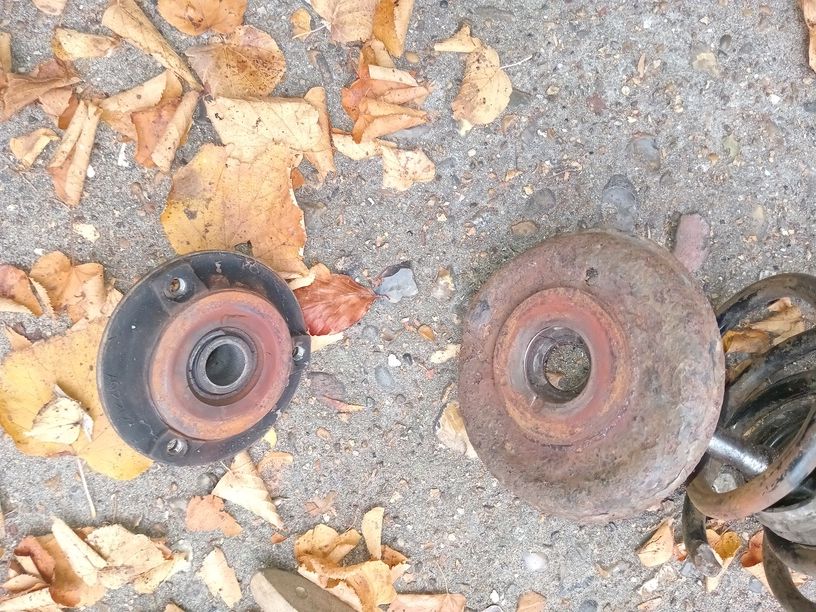
So, the cup at the top of the strut is looking a bit broken and rusted so the welder does a good job of fixing it. I didn't get any close-up pictures of the cup after repair, but you can see it a bit later on!! Everything else is given a bit of black Hammerite gloss.
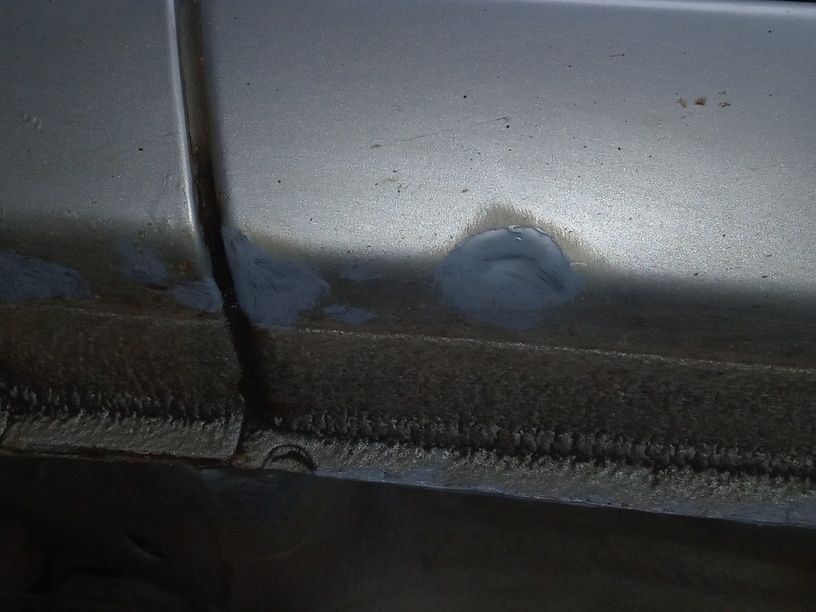
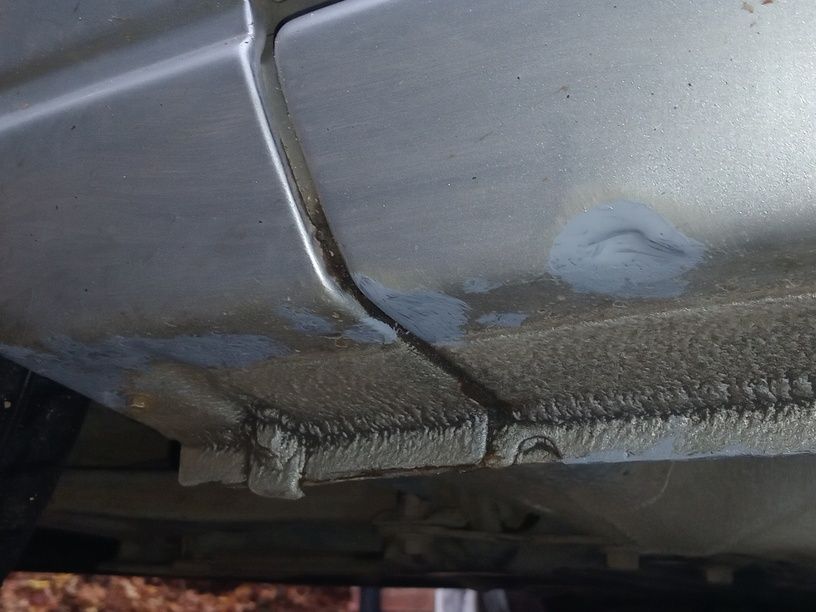
That's about as far as things got with the 360 in Oct 2025 while springs, bearings, bushes, etc, were being ordered, mainly because I dinged the sill of the silver Focus on a kerb at a roundabout, as shown below, which needed a bit of zinc primer, filler and eventually a spraying over. The sound it made suggested the damage would be a lot worse than it actually was, by the grace of the good Lord.
Actually we are creeping into the early weeks of 2026 here, but the strut was eventually reassembled, but as I write this I realise that I have missed out a rubber bush on the top of the shock absorber rod, so it will all have to come apart again. Damnation, but we really must must get it right.
Oh well, it's good to find that out before it goes back on the car, as that would have required a lot more disassembling if I hadn't remembered till later on!!
So now, let's jump forward a year.
top