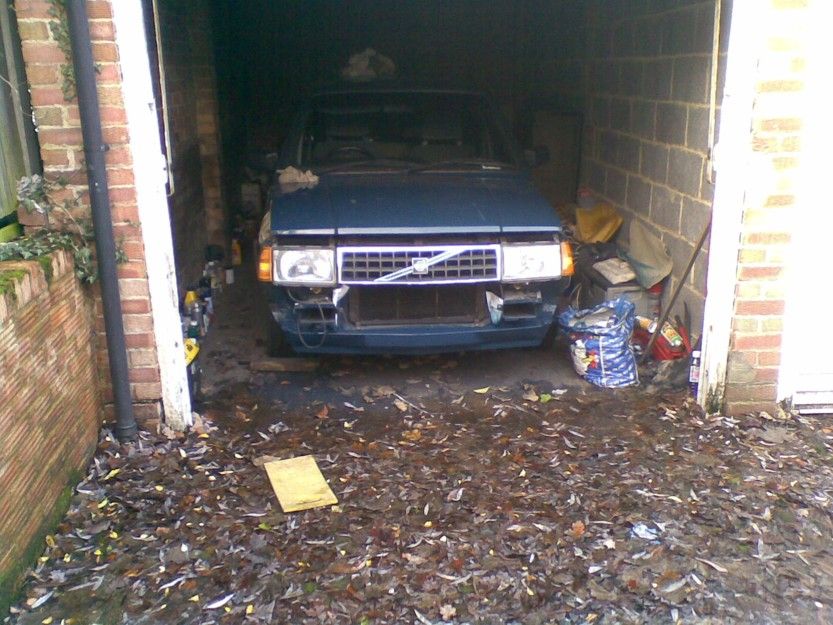
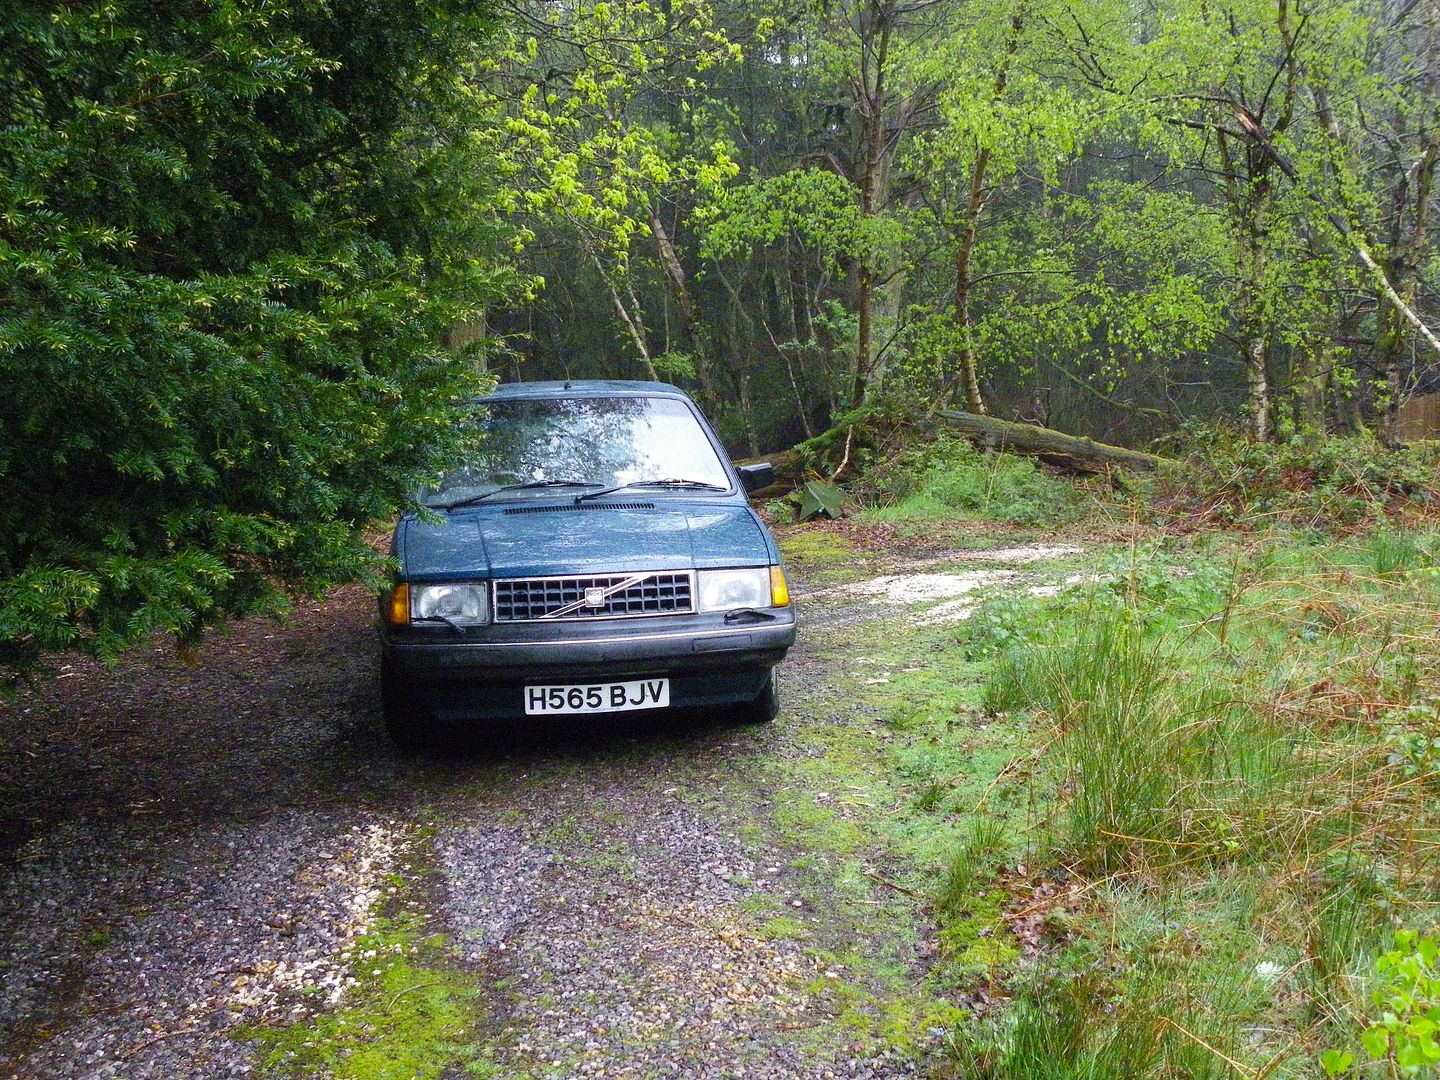
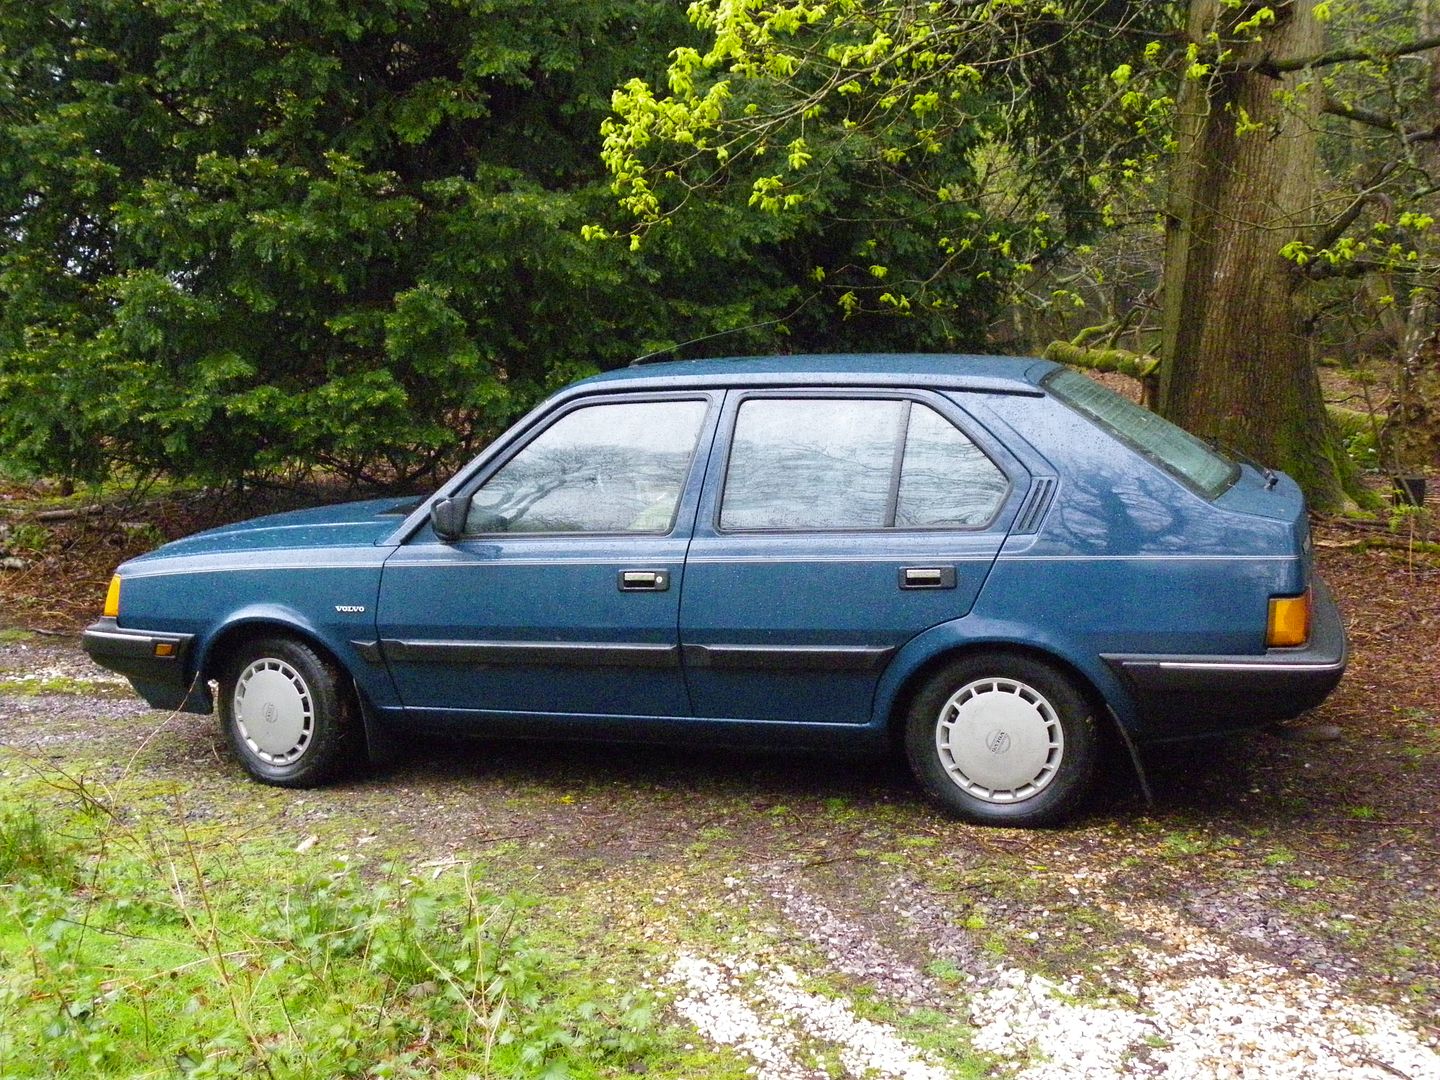
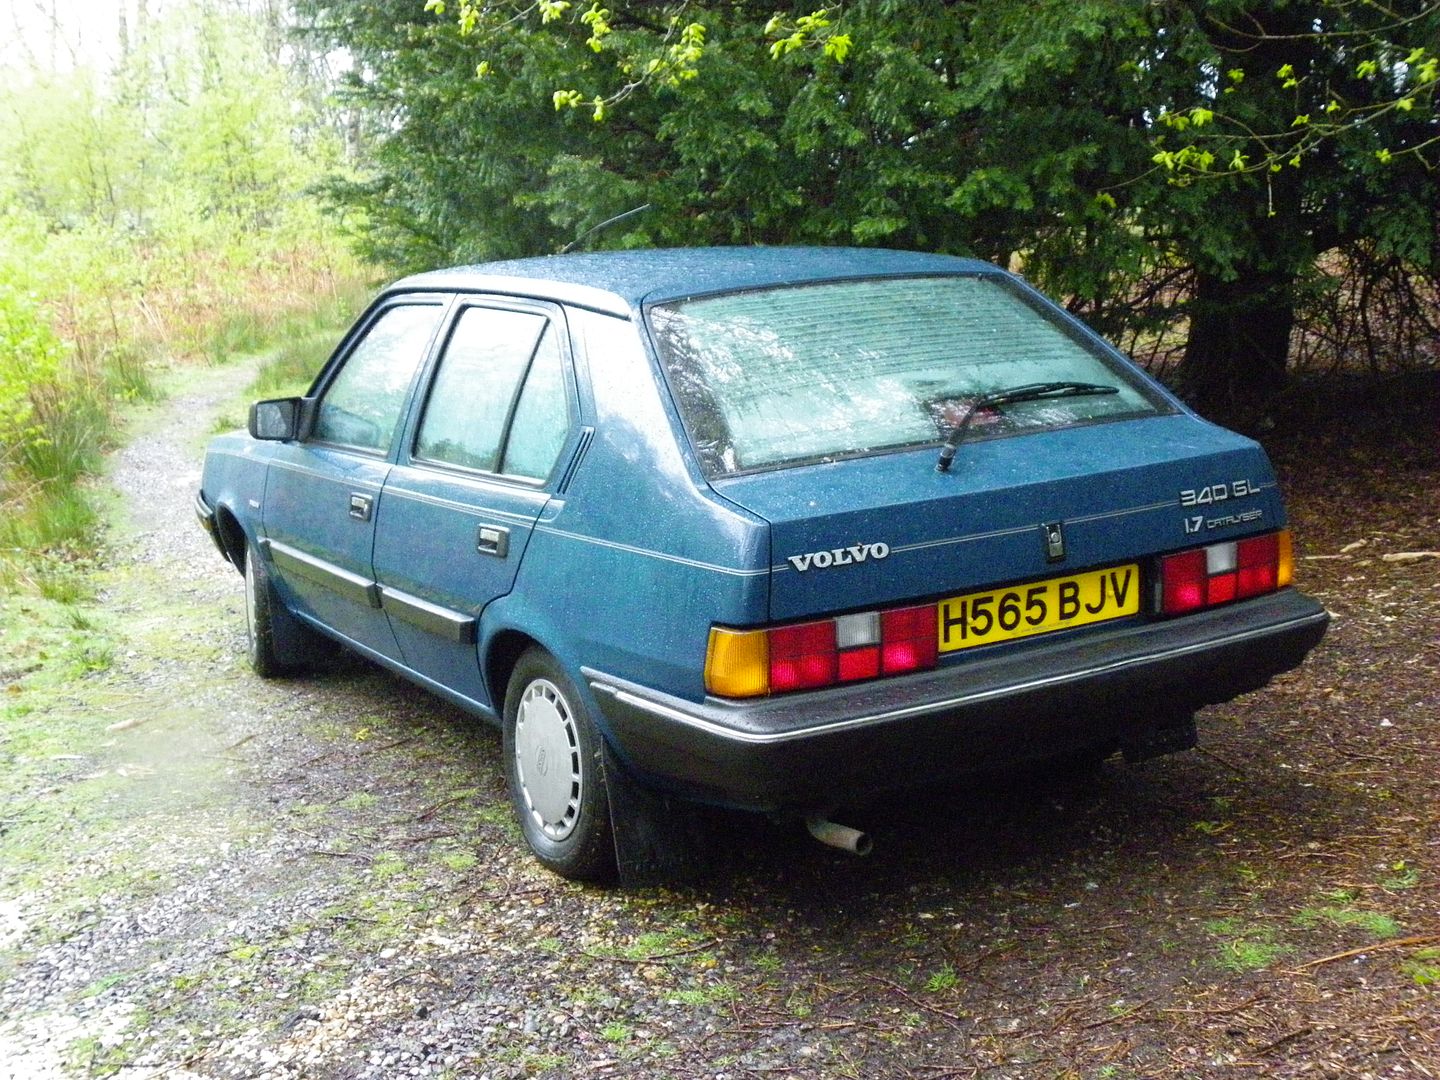
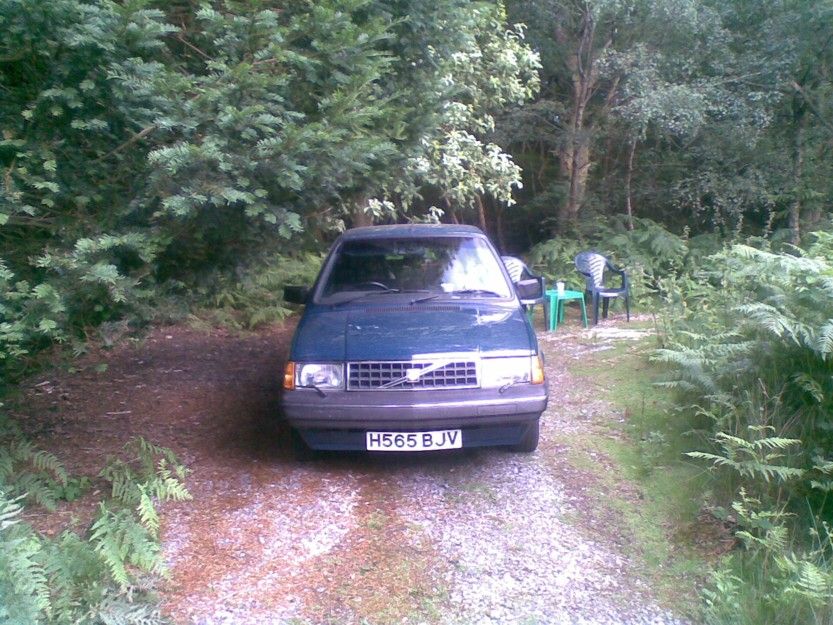
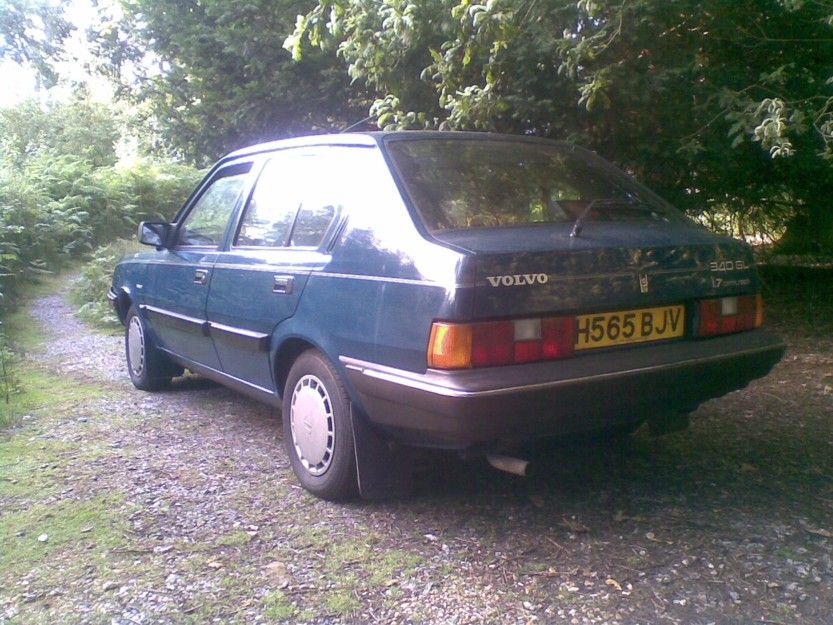
January - December 2014
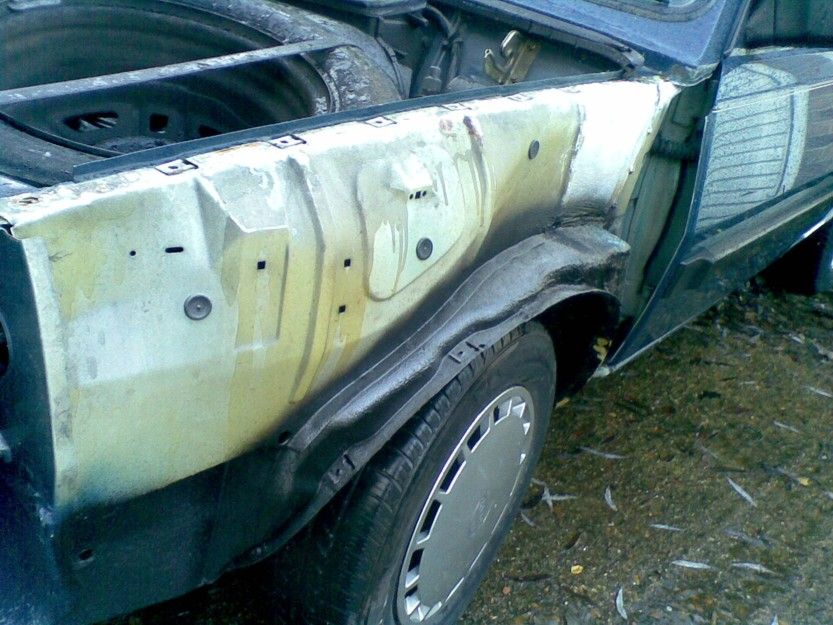
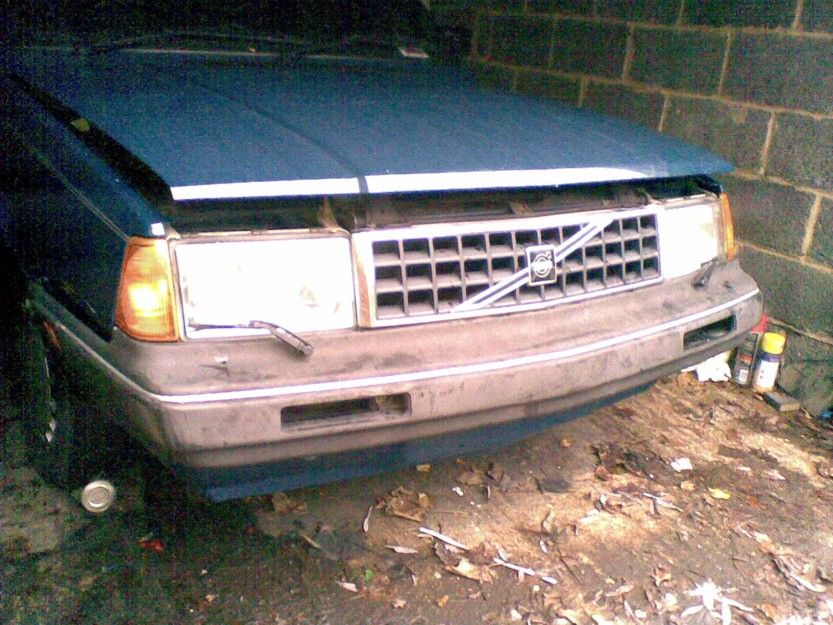
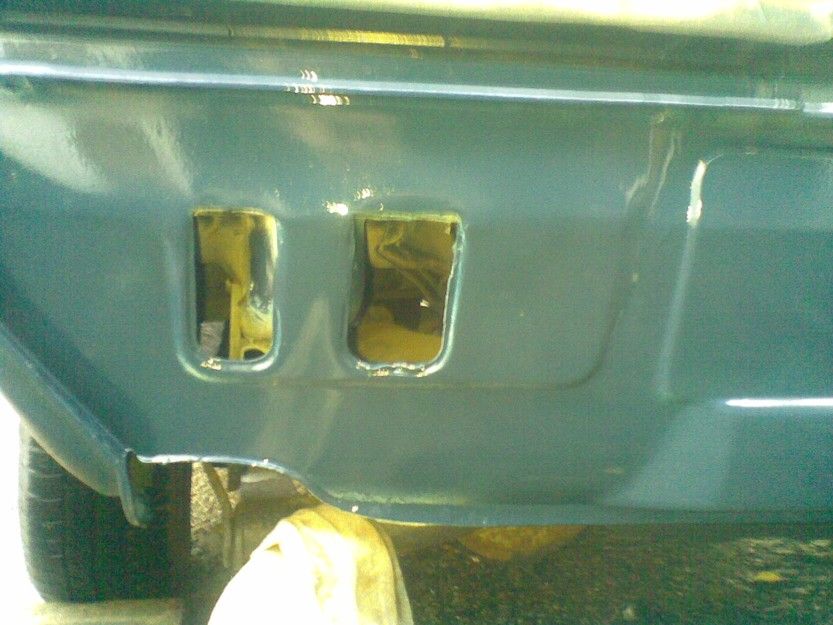
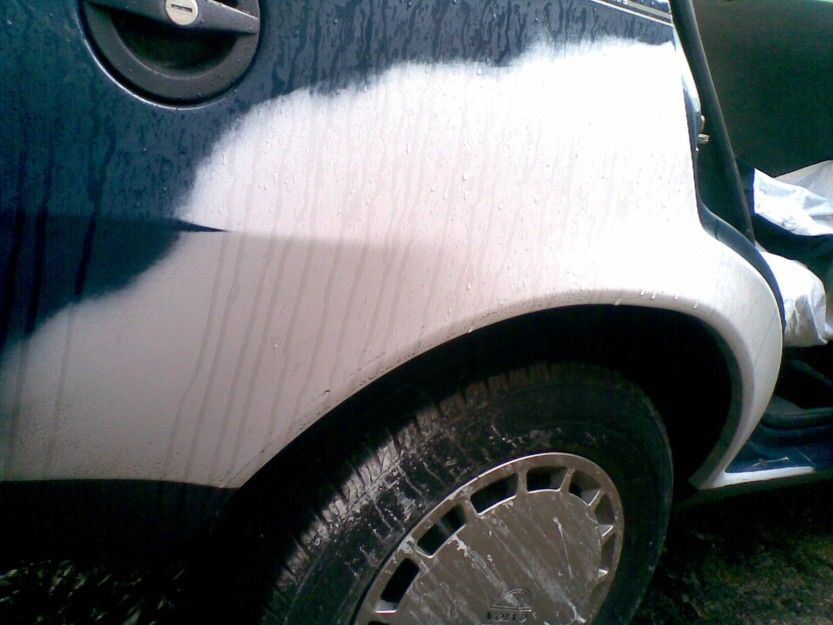
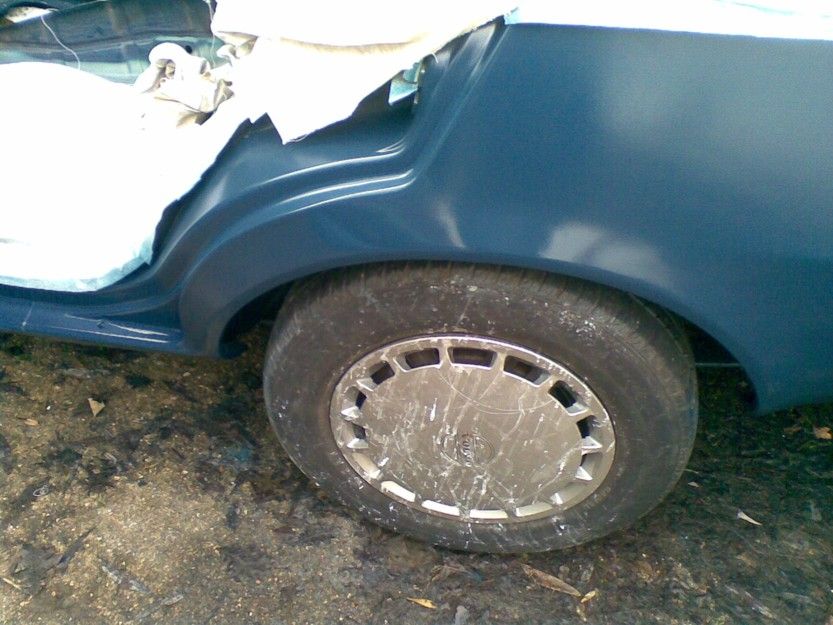
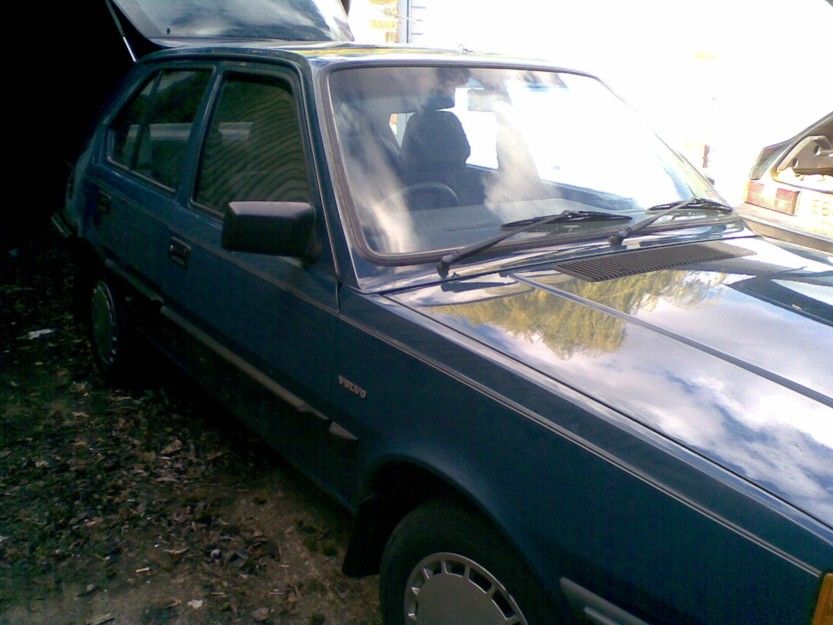
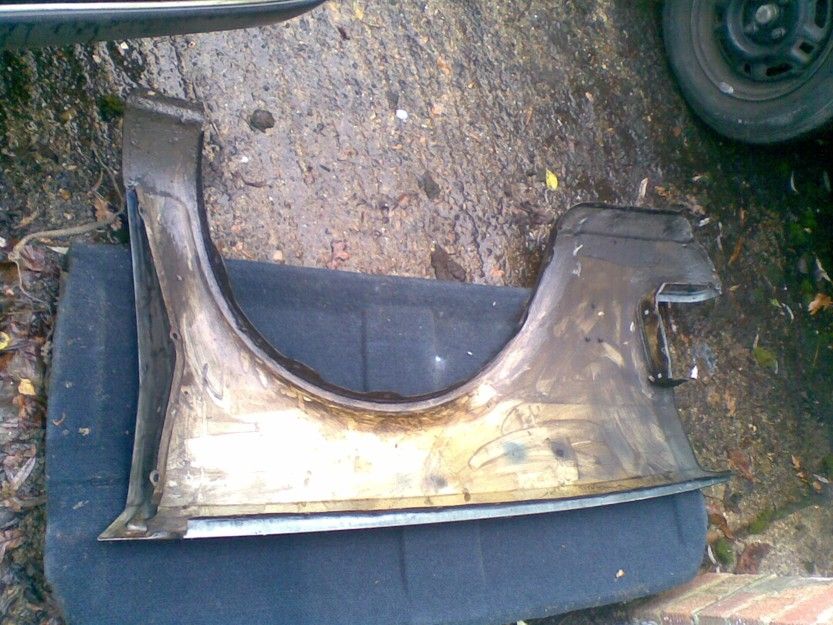
The weeks of late Dec 2013 saw Blue Jess returned from the
welder with a pretty decent set of repairs, as the pictures
show. He chose to re-spray the second-hand front wings which I
had bought rather than use them to repair the originals
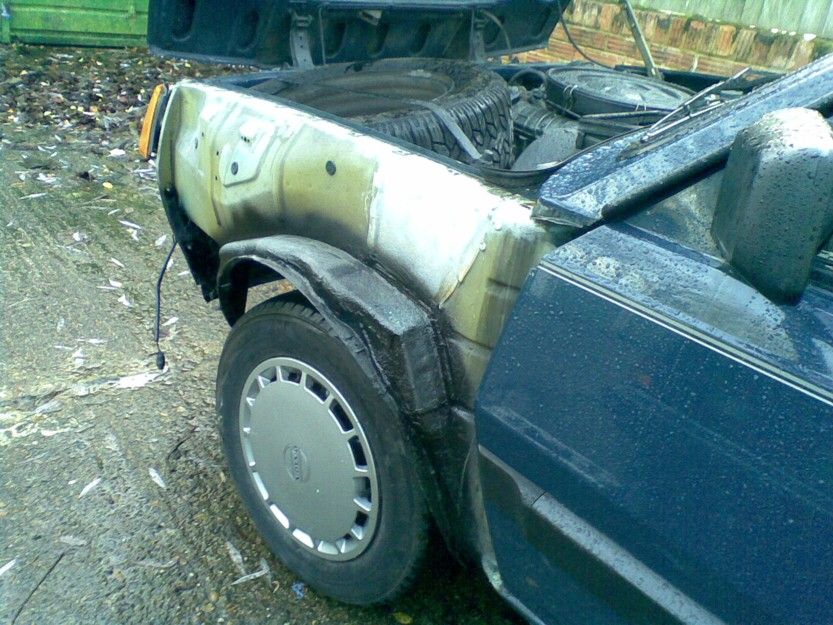
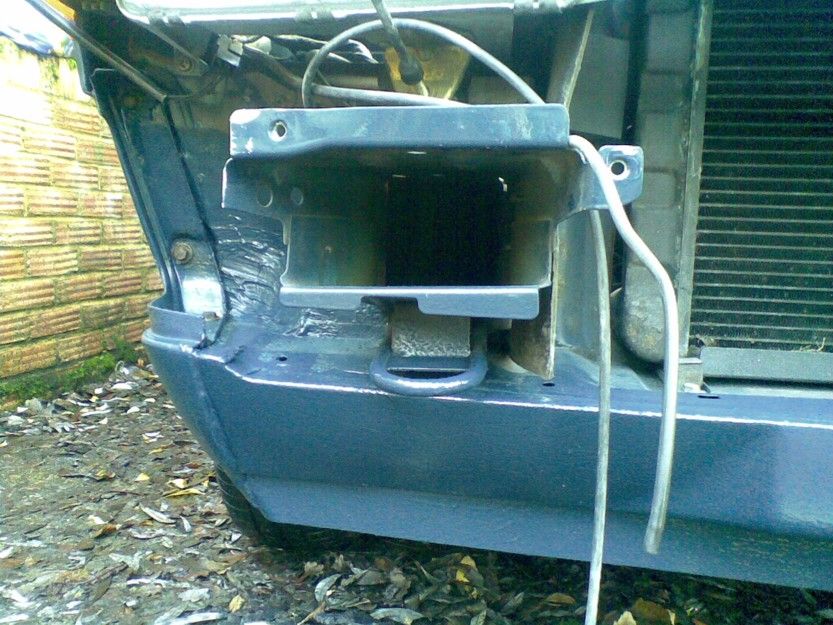
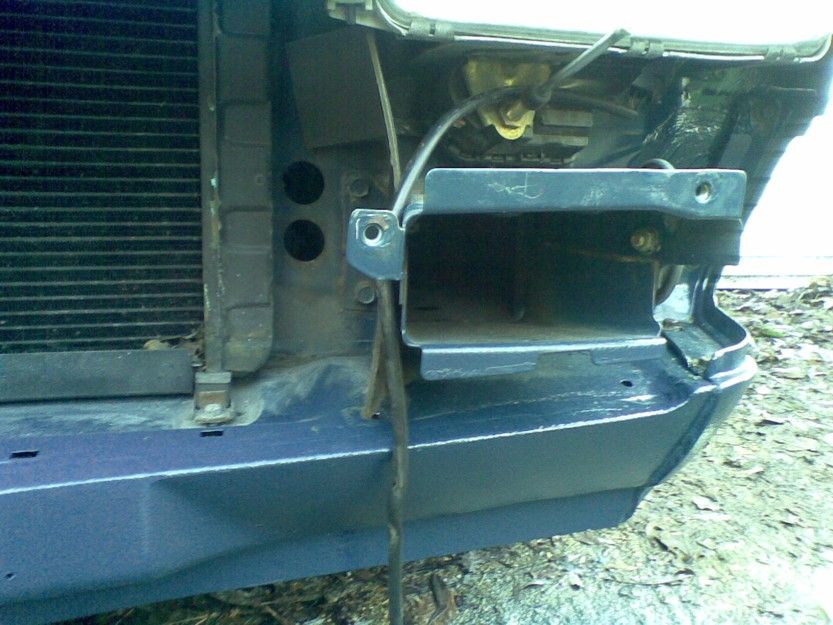
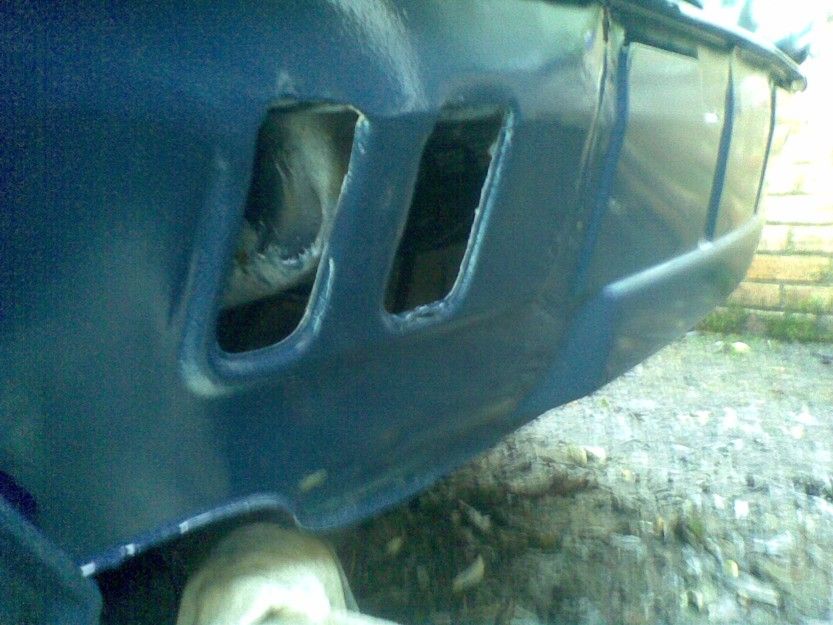
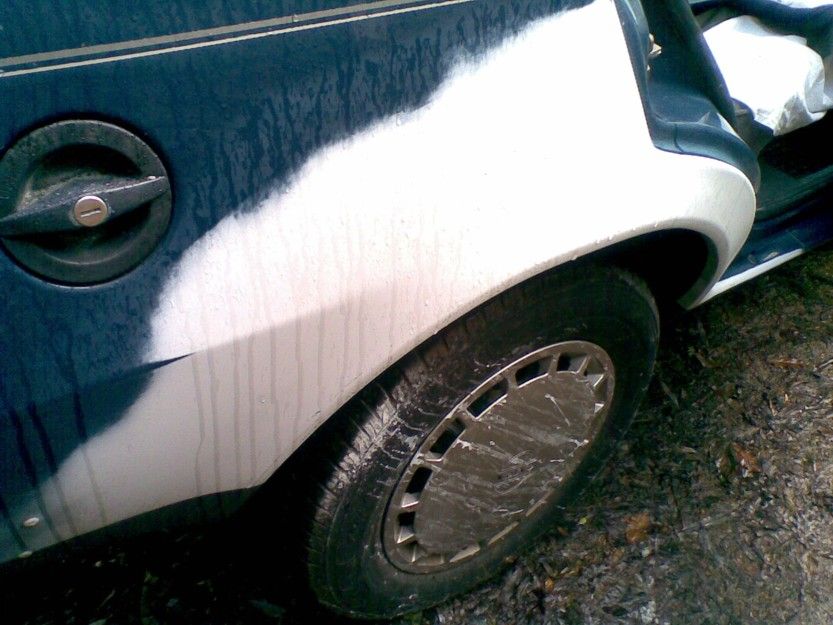
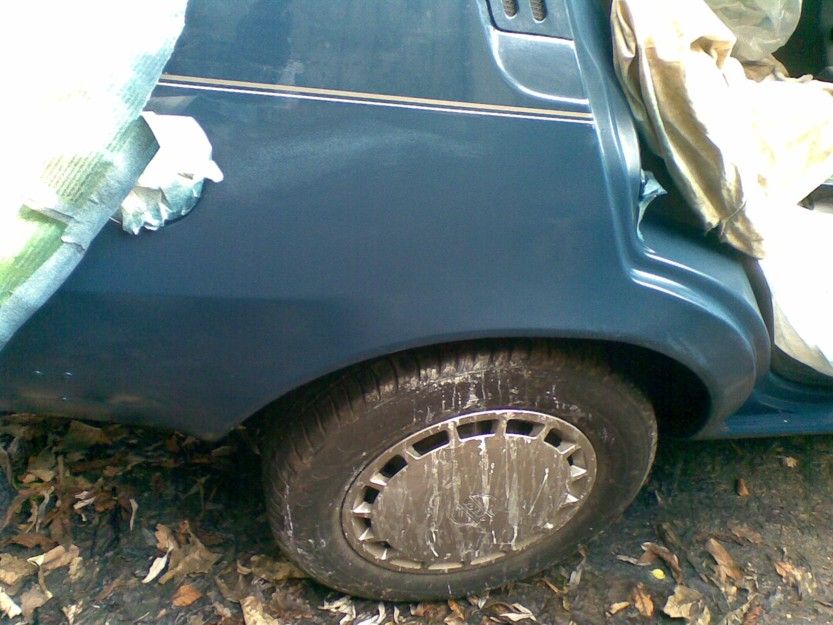
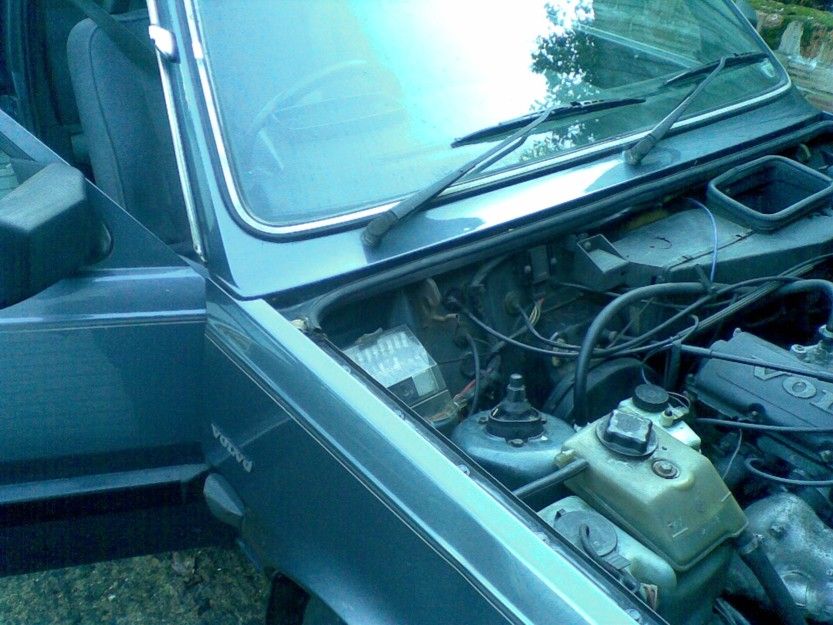
Work begins on removing the newly-resprayed front wings to
tinker with the underneath by waxoyling it and generally having
a nose at what's been going on in the weldery.
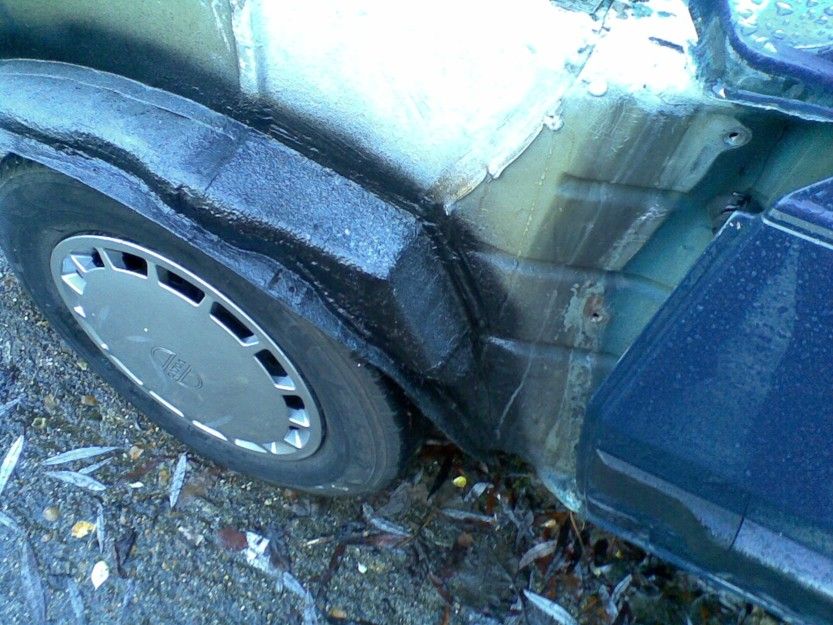
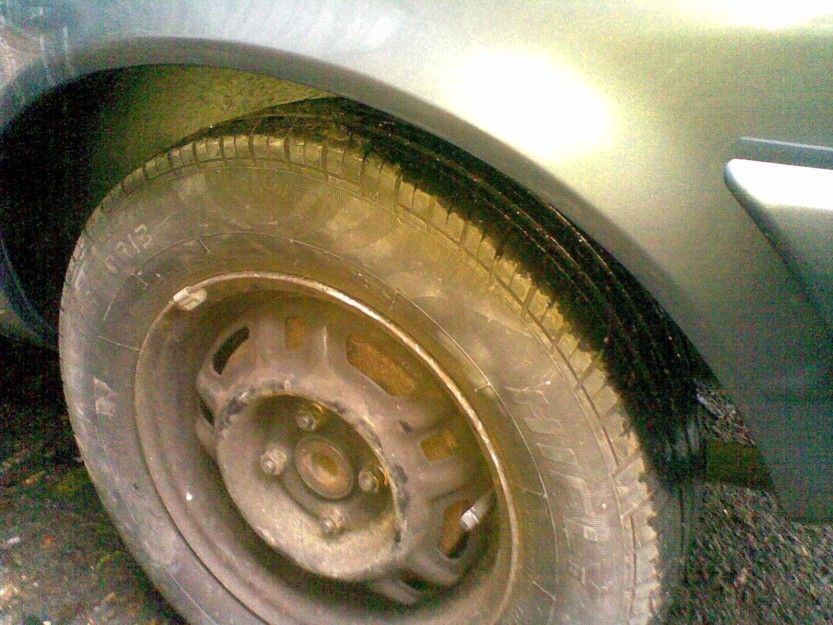
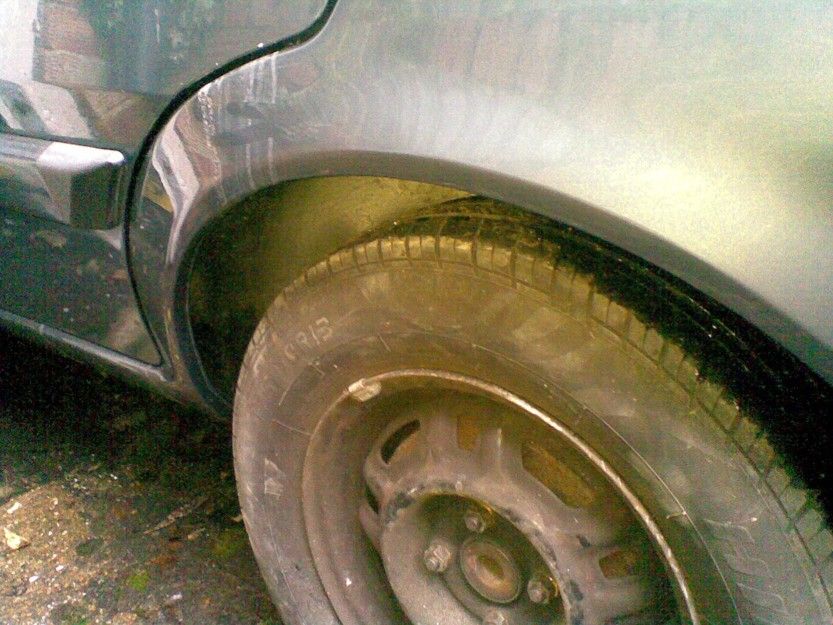
The wheel-arch repairs seem awesome so no grumbles there and the holes in the front panel seem to be filled-in, too.
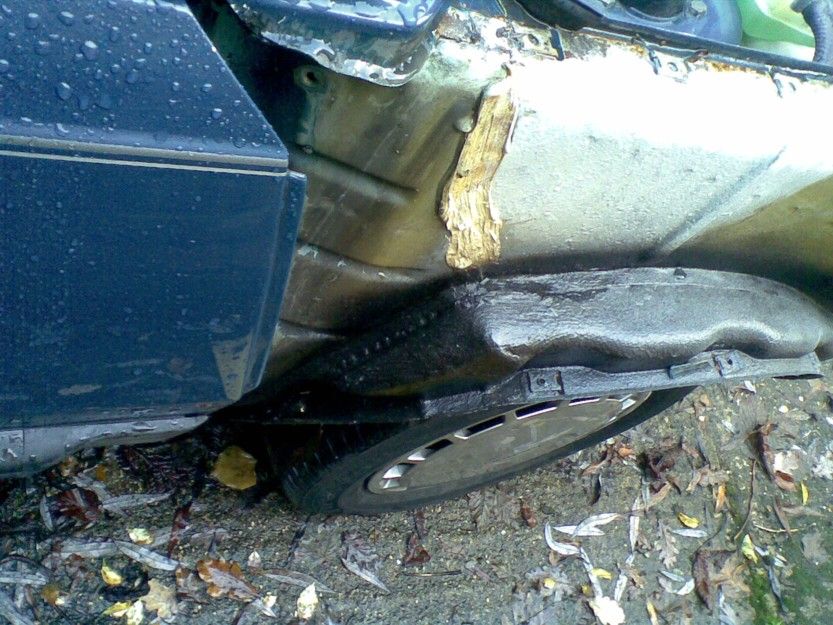
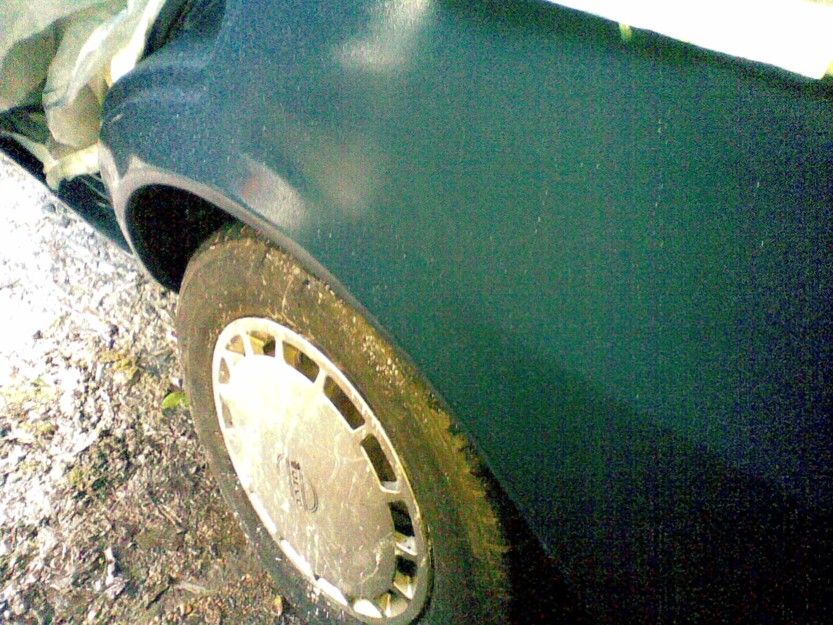
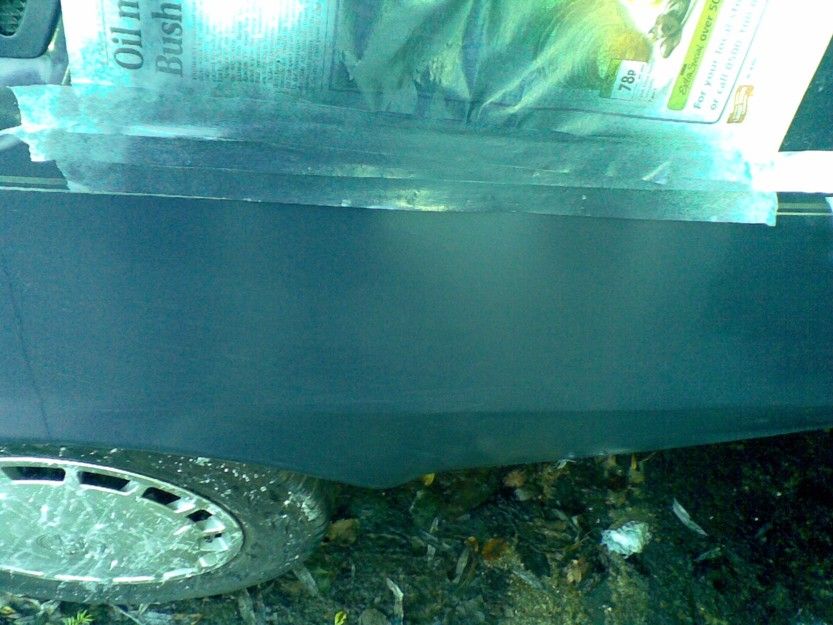
Well, I don't know who's paying for all this but there's more wheel-arch awesomeness to be found so why not photograph it and paste it up on here?
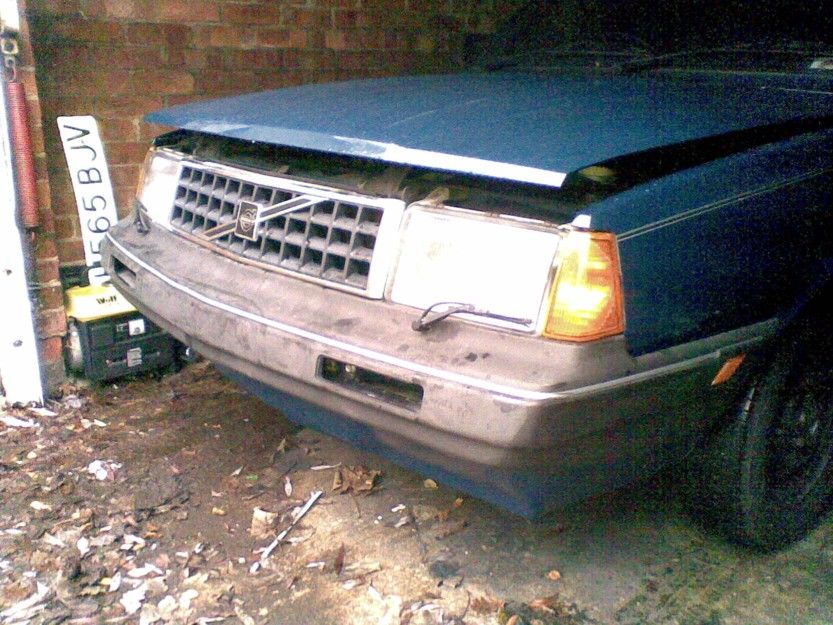
So work begins on spraying up the front valance panel, first with grey-primer and then with a bit of top-coat.
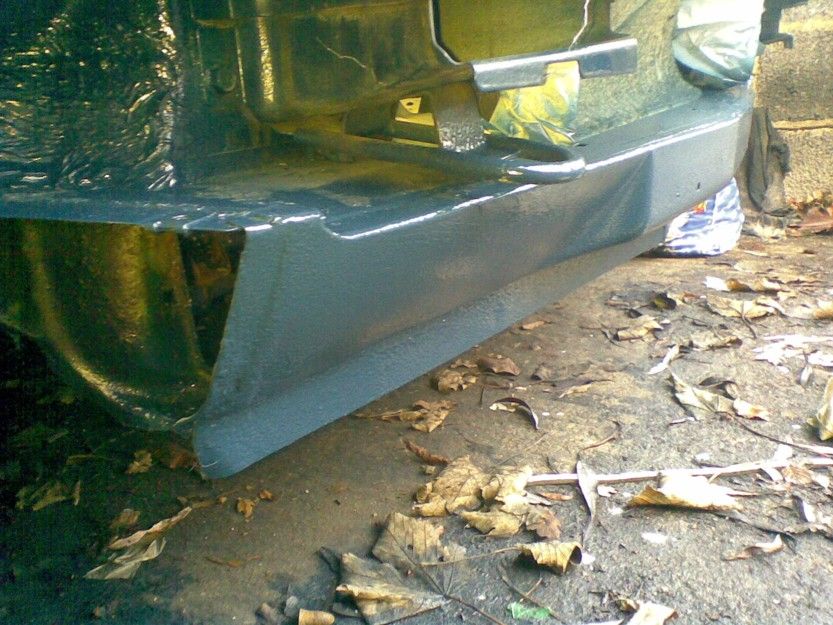
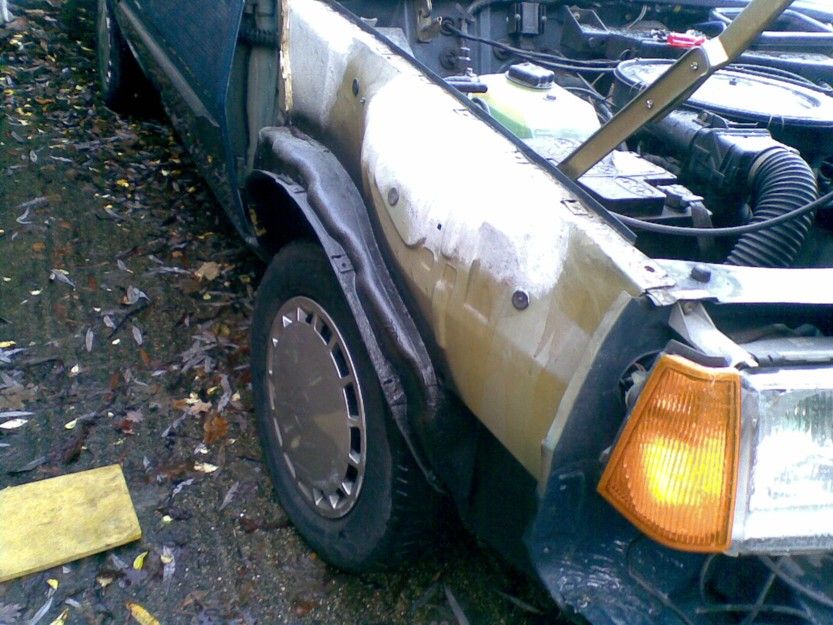
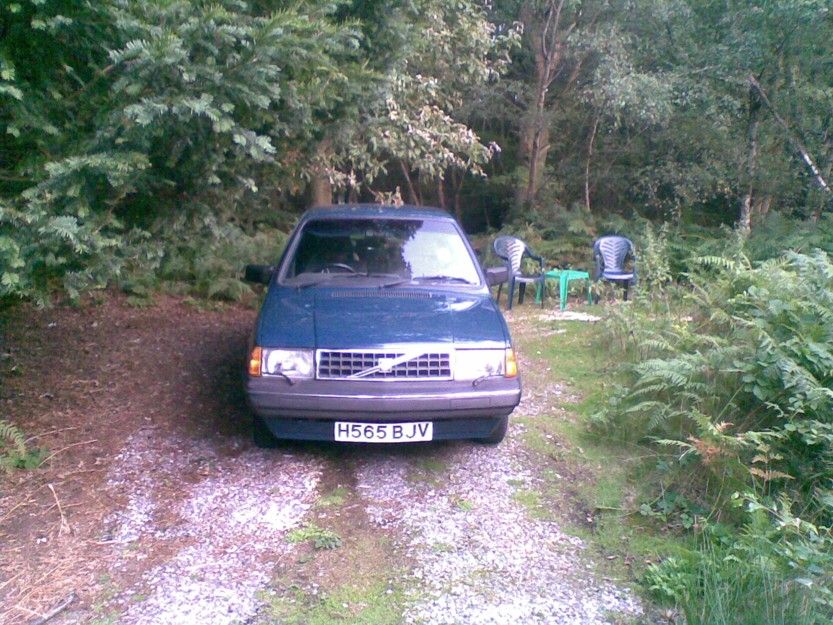
Overall, its beginning to look not too bad and the front wings are going back on. All we need now is better weather.
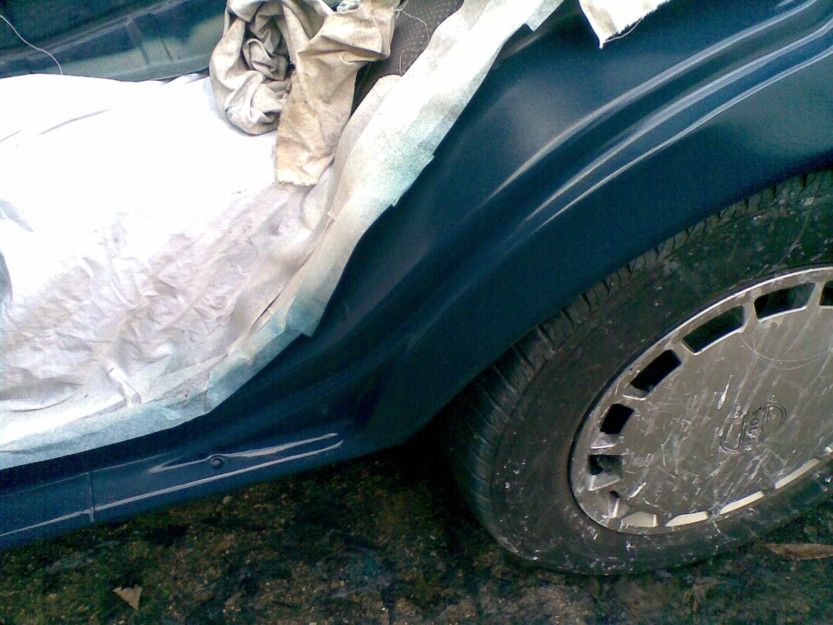
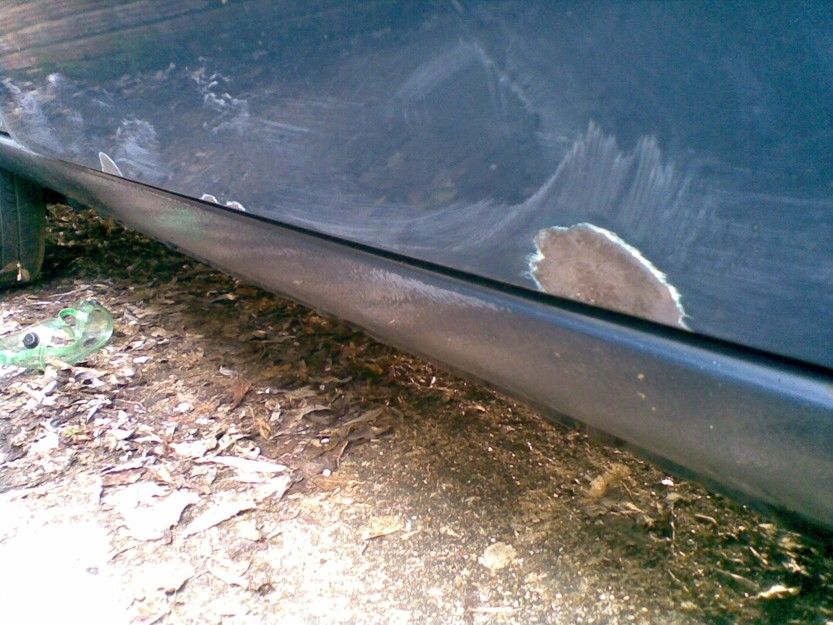
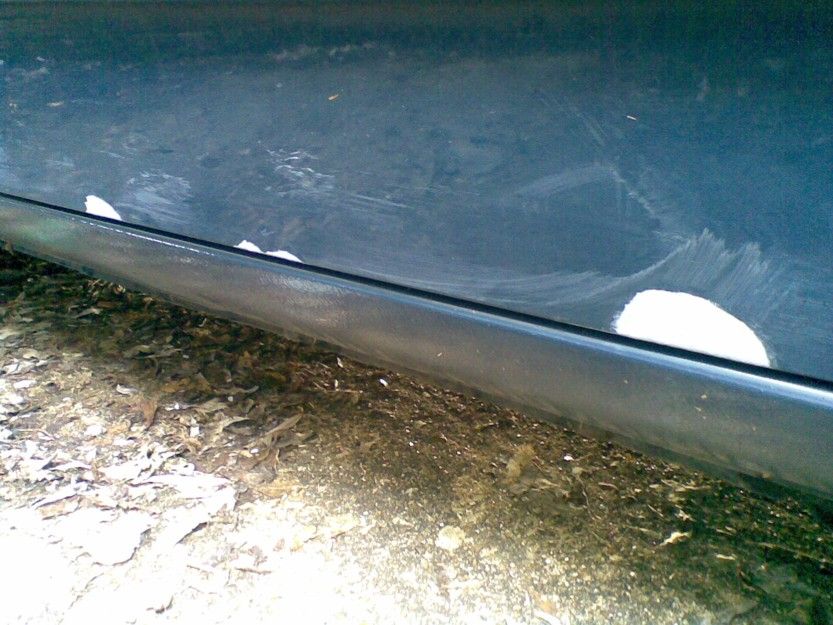
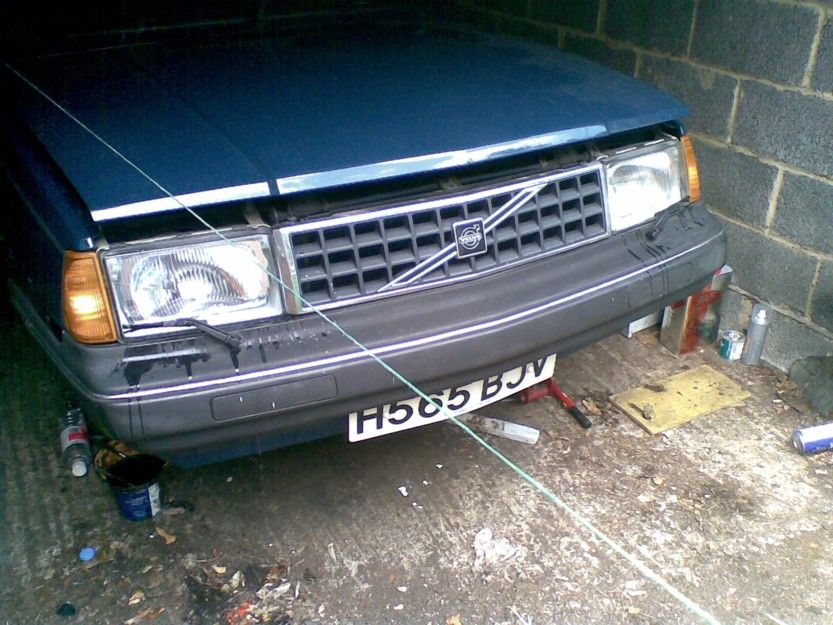
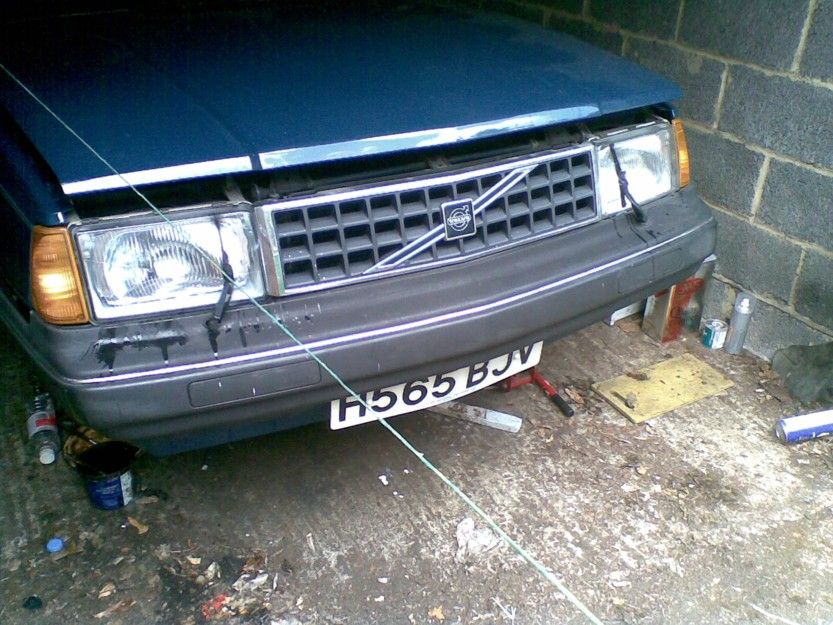
Still semi-early Jan 2014 and the front wings have gone back on and have been tightened-up. The join with the front valance has been perfected (not) with a self-tapping screw on each side and a bit of plastic padding in the gap followed by a quick spray over with the right colour. A few fairly generous doses of waxoyl around the seams have been applied.
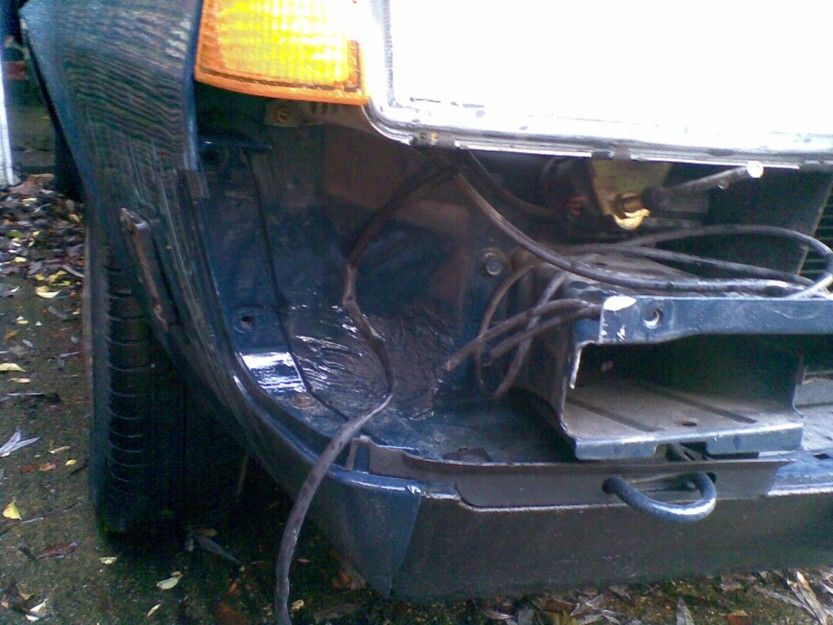
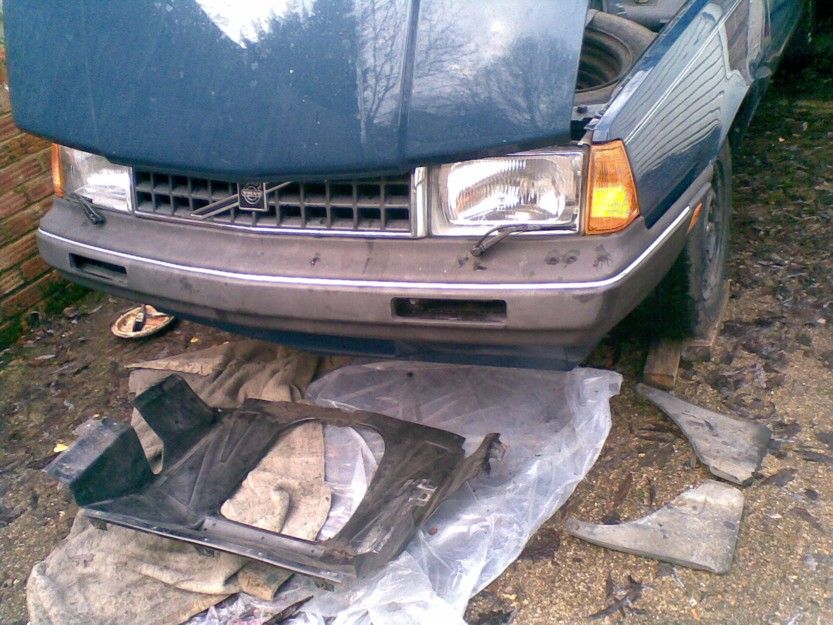
The front bumper has been refitted and the little wipers and hoses re-connected. Must check they still work! A bit of brush-painting under the bonnet with very thin paint has covered up the welding work quite nicely.
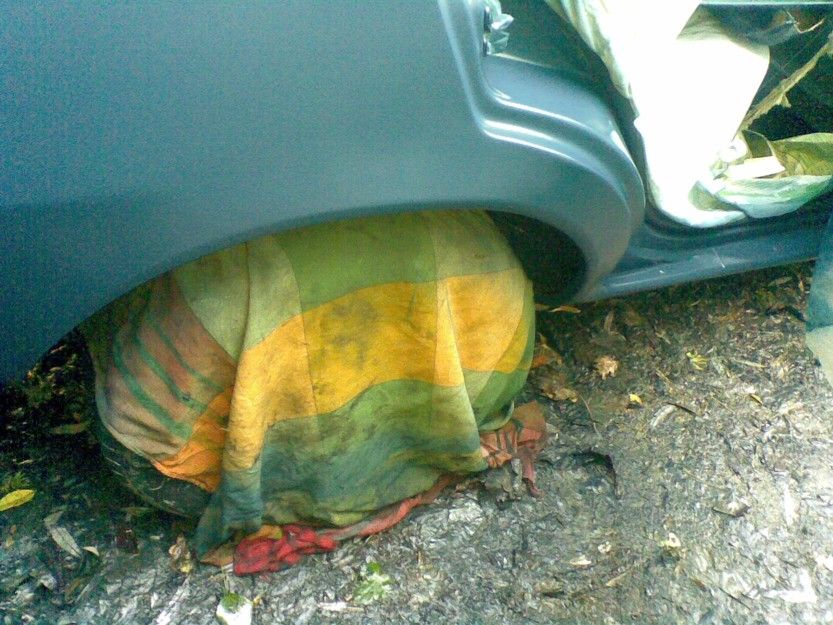
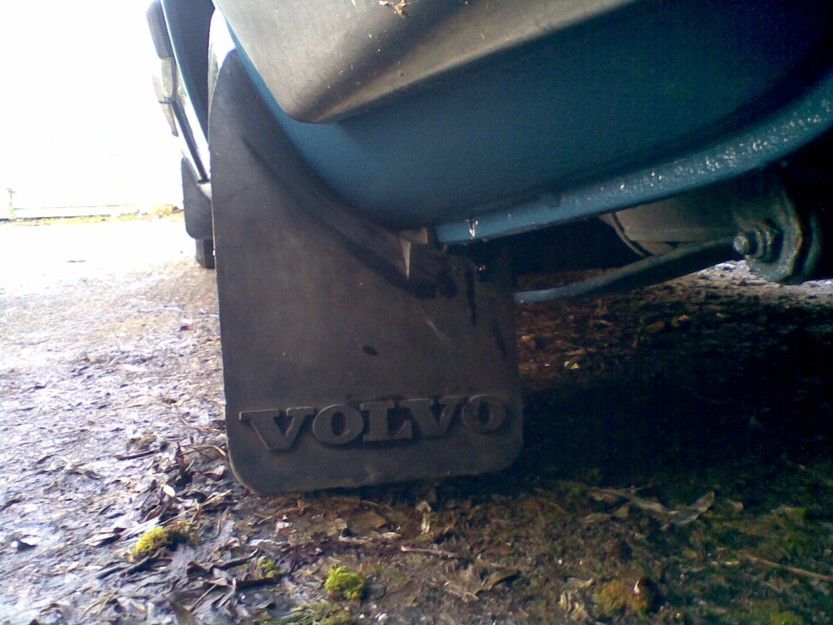
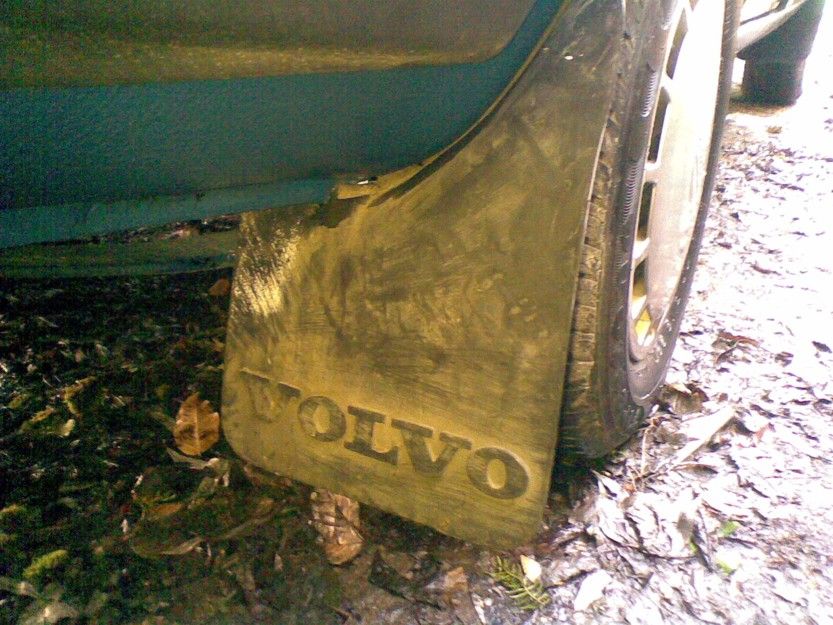
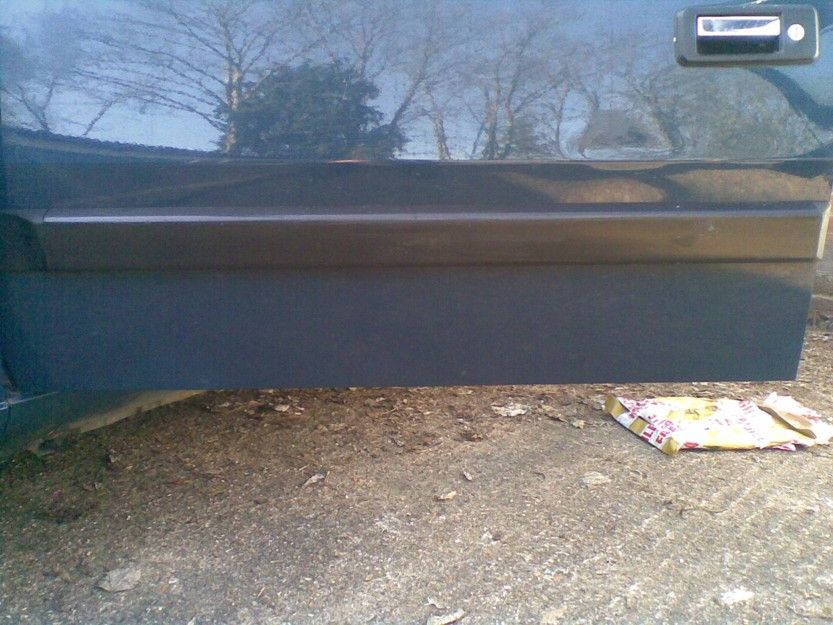
Hmmm, the surface of the old bumper looks a bit on the tatty side compared to all the luvvely blue paint but it should spruce-up OK with some cosmetics. The plan is to fit cheapie-style universal mud-flaps and re-fit the under-engine tray which has been waiting in the wings for a few weeks.
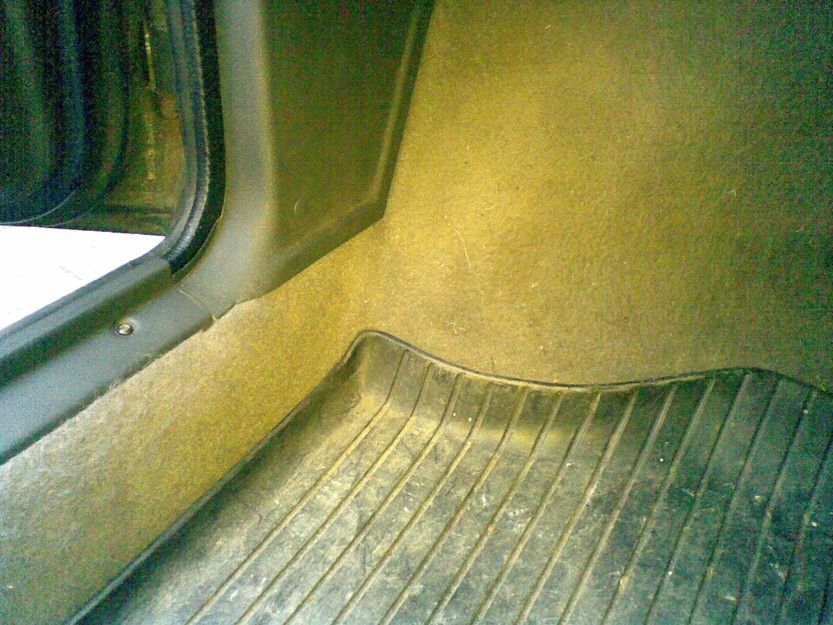
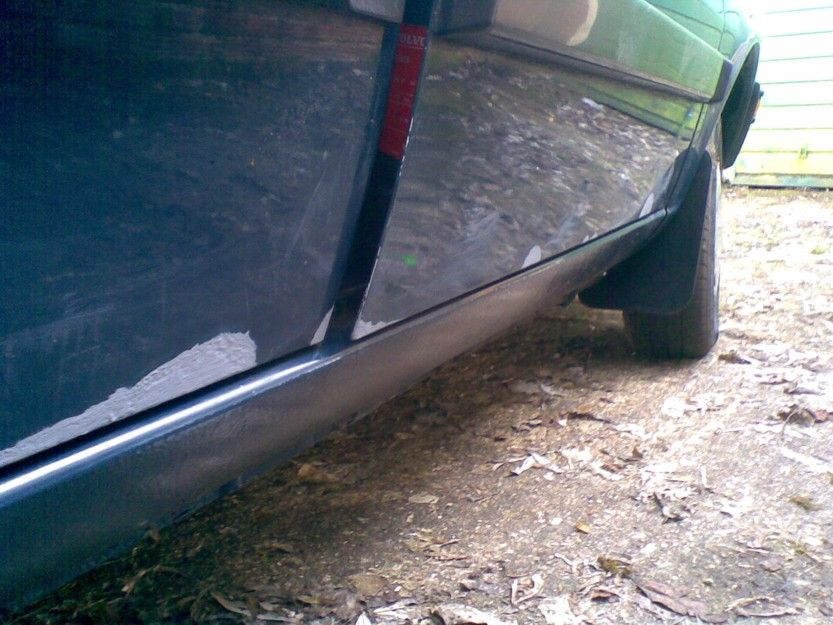
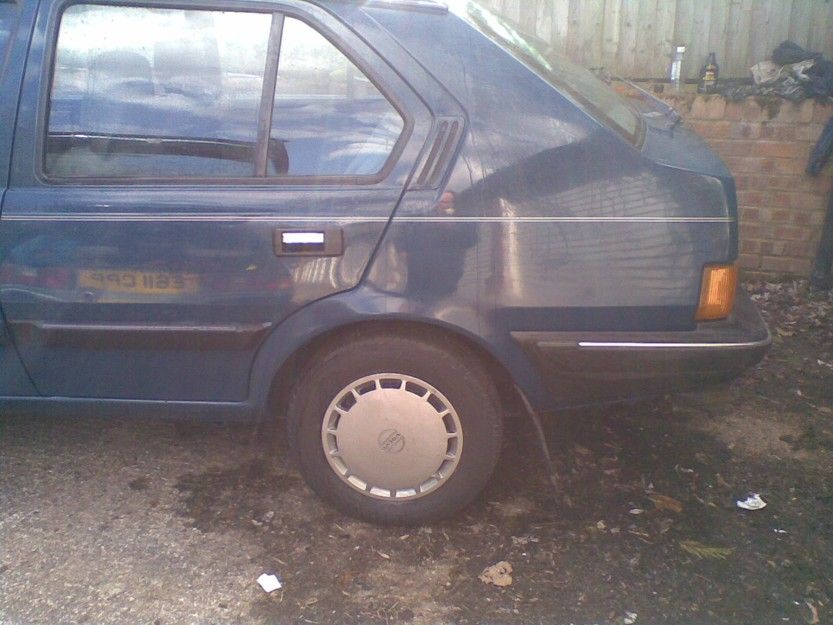
Mid-January 2014 has seen the repaired under-engine trim panel fitted, along with a bit of waxoyling around the front underside and wheel-arches. I had omitted to fit a couple of plastic trim panels beneath the front bumper, so this had to be removed to allow them to be re-fitted. The number plate has been popped back into place and a couple of new cheapie-style mudflaps fitted failry securely. The old ones (shown below) were a bit too far gone to reuse, although I tried.
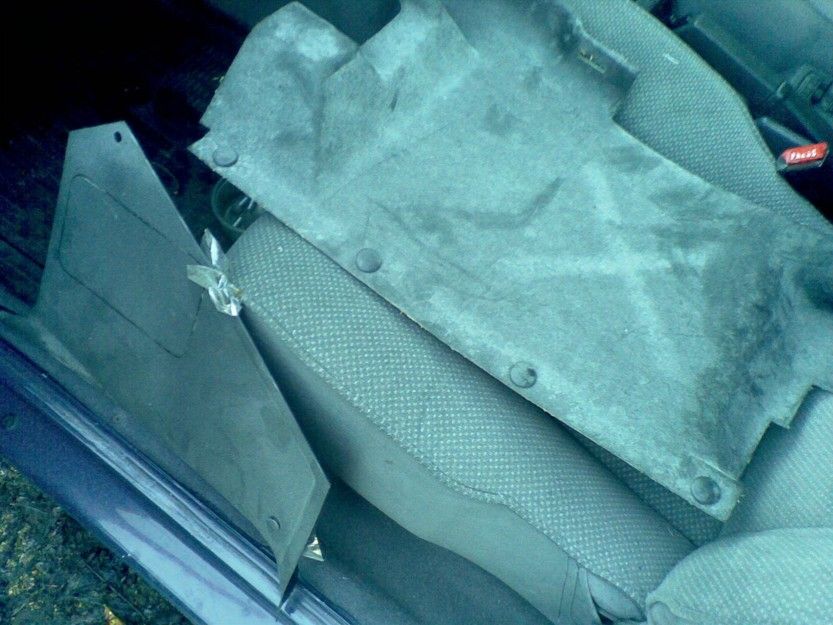
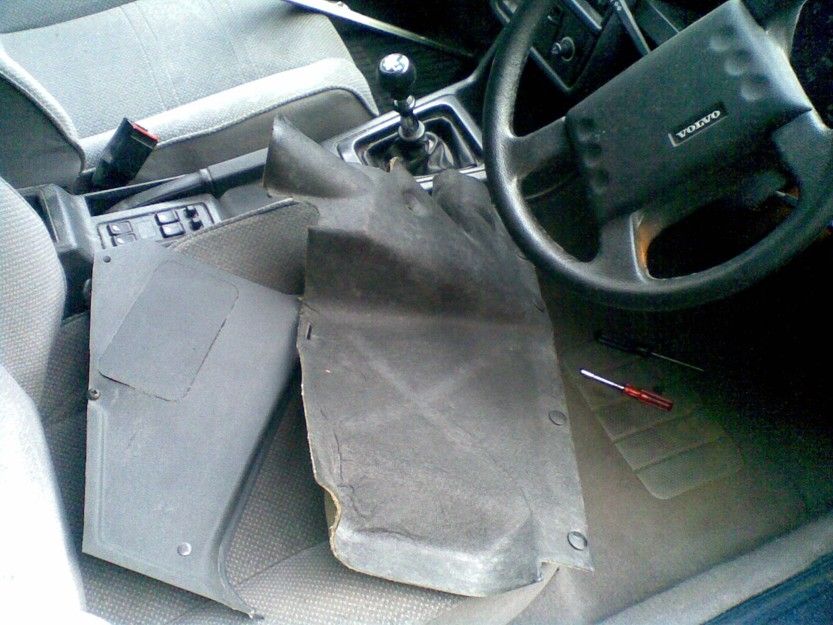
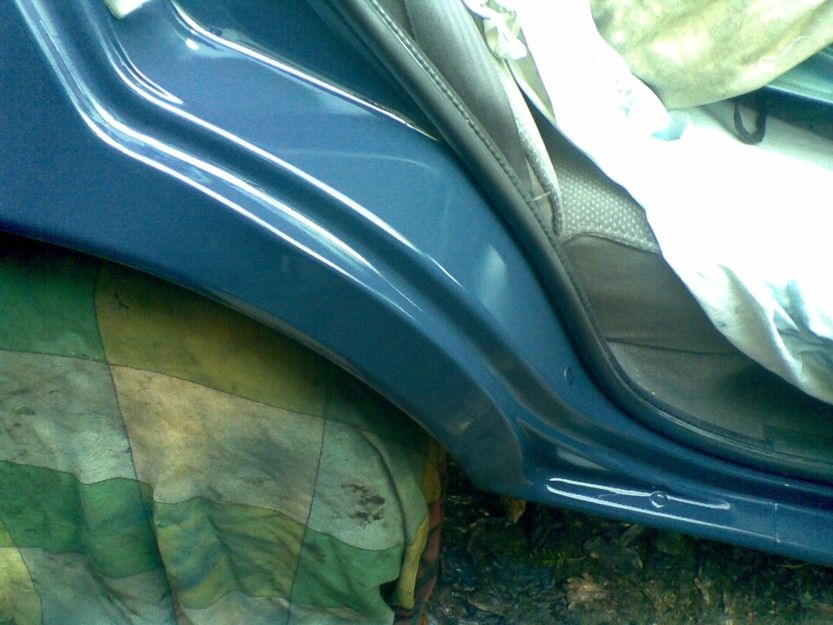
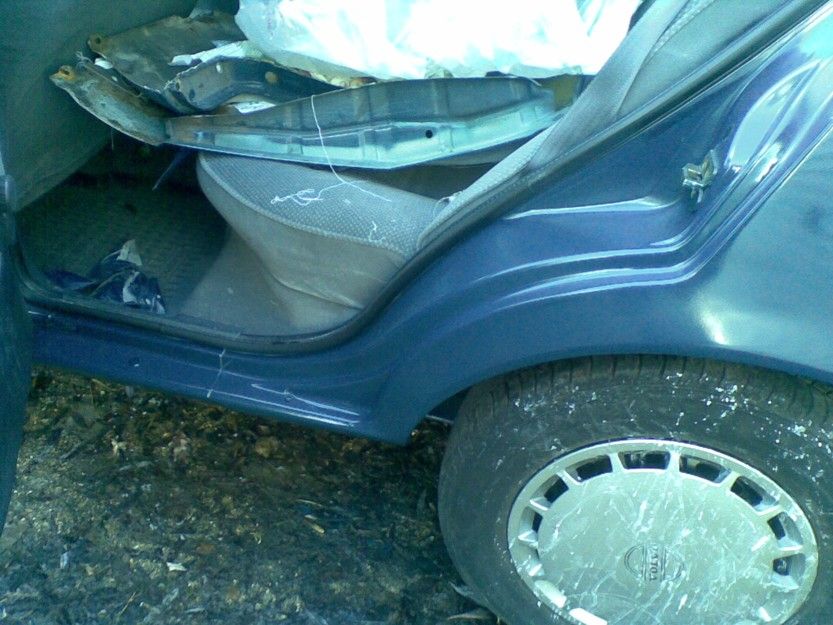
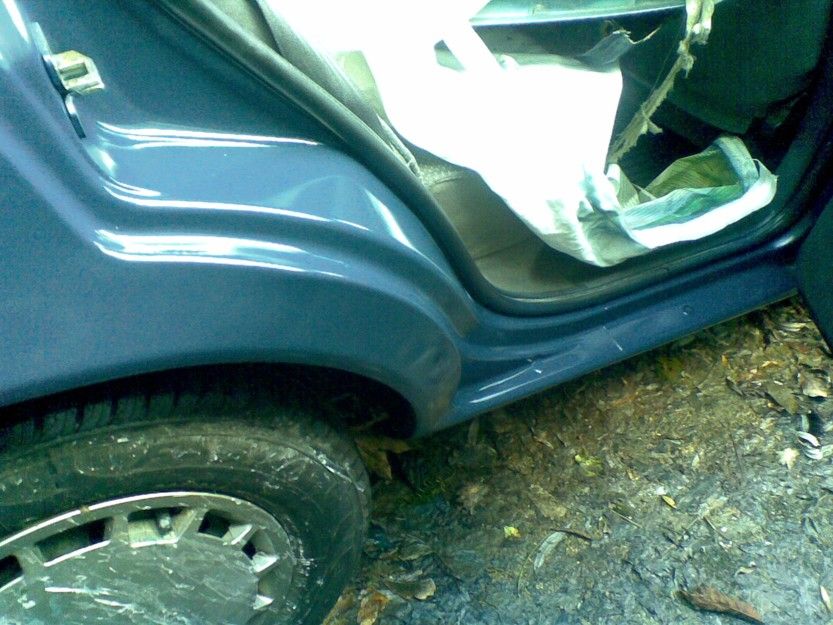
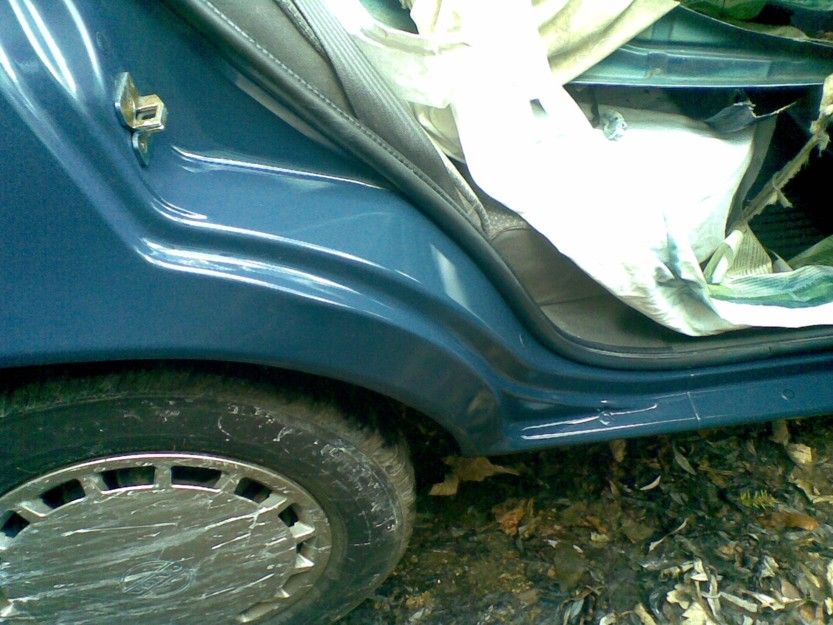
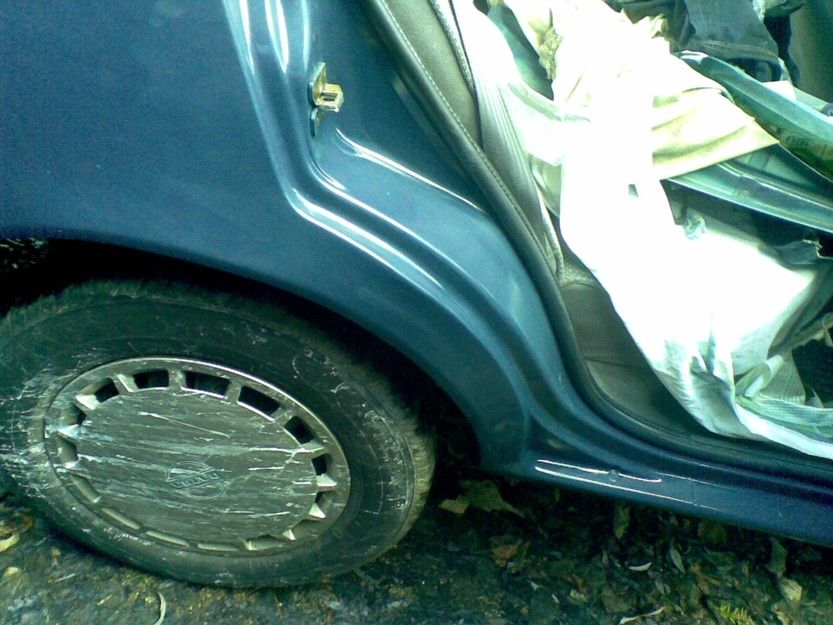
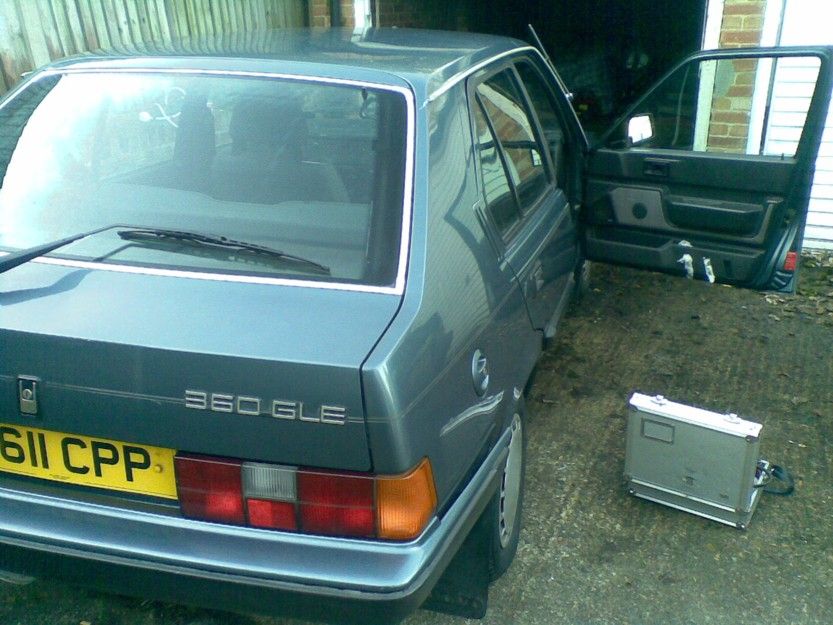
The interior trim panels for the passenger side front have been clicked back into place. Note that the term 'click' refers to the sound made by panels being expertly fitted together and not that made by panels being forced together incorrectly by some complete numpty. If you study the picture on the below right carefully, you will see a deliberate mistake involving the door-seal that was introduced purely for educational purposes. Nedless to say, thankfully, no major visible damage was done, I hope.
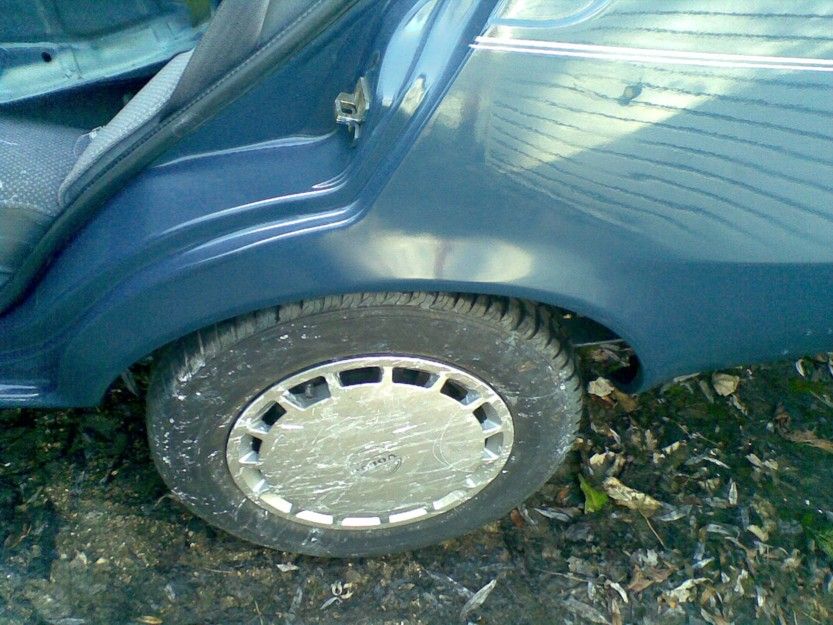
So the next weekend should, barring disasters, see the same work done to the driver's side trim panels and the fuse-box screws will, hopefully, be re-fitted.
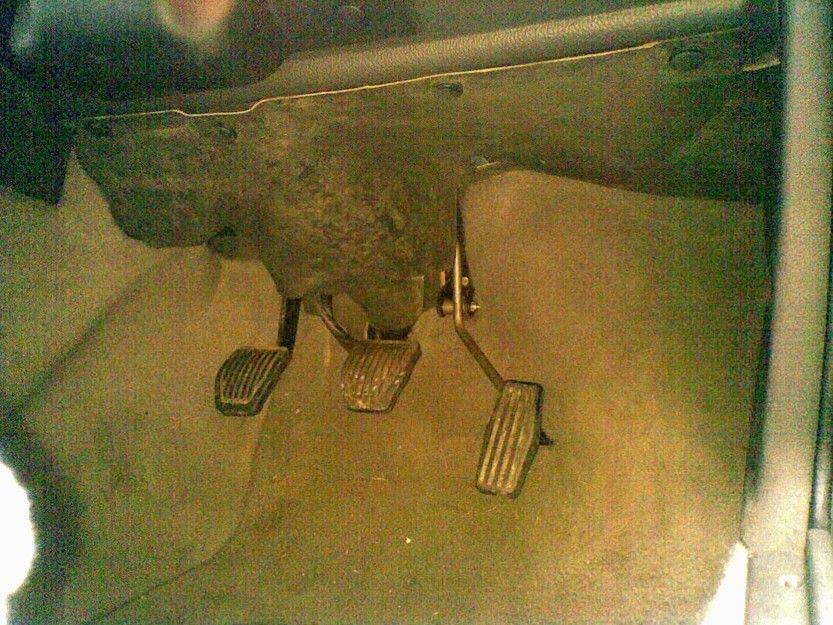
The weekend towards the end of Jan 2014 saw the dreaded process of refitting the fusebox screws finally completed. Since refitting the original screws is such a nightmare, what with having to limber into the driver's footwell and with the screws repeatedly falling off the screwdriver, I simply decided to ditch them for some bolts which could be fitted with a socket. However, bolts of the right length were not available at the local spares shop but he did have some of the right thread which were too long so these were simply cut to the right length with a hacksaw. Finally this allowed the fuse box to be fixed back in place with a mixture of the old screws and the new bolts. Following this, the trim items in the driver's footwell were refitted, with lessons learnt from the other side. Hence, hopefully my attentions can then drift to the rear end of the car in the forthcoming weekends.
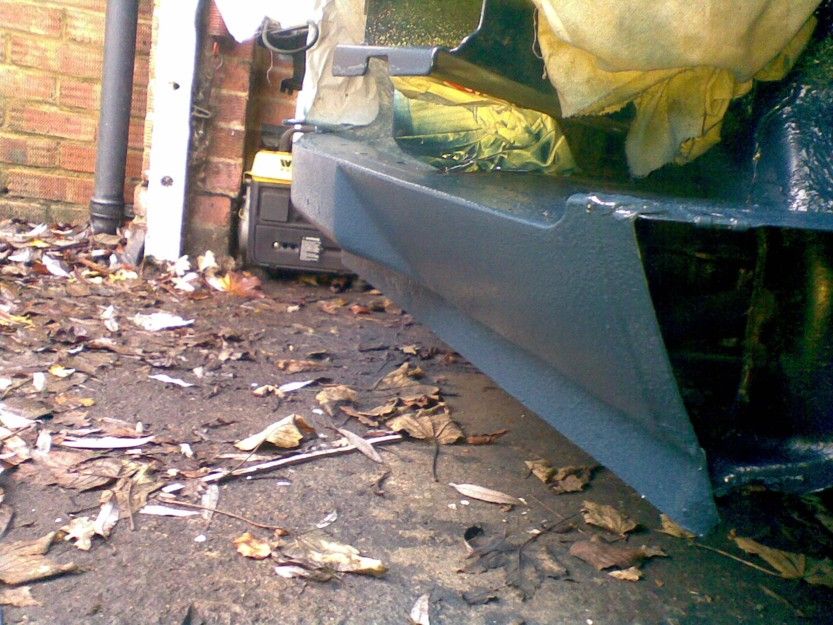
The rear bumper has been removed again and the valance beneath it has been resprayed with blue aerosol paint. It was not very carefully prepared as its below the bumper but its not too bad. Now in early Feb 2014and so far so good.
Success on these fronts has allowed the great rub-down of the rear wheel arches with fine emery paper to begin. Where there's a will there's a way.
As can be seen on the above right, a layer of blue top-coat is aersolled on but soon the skies open and very quickly turn it into a base-coat which has to be flatted down the following day. Still the colour is about right. The next day is a bit drier and the second coat of blue paint goes on a bit better (see below). Its as evil as orange-peel.
As its proving to be a much better day all round, I foolishly hope to do an all-in-one top-coat on the other side but my hopes are dashed, not by rain but by a new aersol can that starts spitting big blobs of paint which run (as I weep) rather than just spraying a nice thin layer. Bah, humbug, this one will have to be flatted too, and just as well because its a bit thin at the top, as can be seen all too clearly!
OK, so the next weekend is spent flatting and respraying these bits again to cover the odd bits that wore through. Spray, spray, spray.... with an old table-cloth over the back wheel...
Then we come to some laquering, starting on the nearside where the laquer goes on relatively smoothly bar a bit of a runny bit at at the top which you can just see against the reflection of the blue sky and which will need some attention later on.
And now laquering up the off-side too.
So its laquer, laquer, laquer...
...showing off my laquer, or lack thereof...
So a week later (getting towards the end of Feb 2014) its time to flat the laquer overspray and give these panels a bit of colour-cut and a polish.
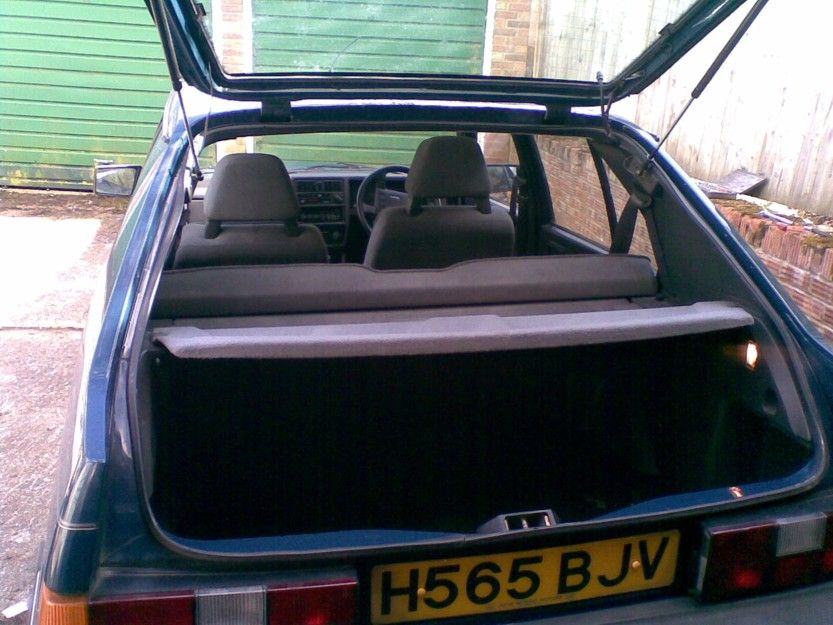
Its not too bad, not too bad... apart from all the junk piling up on the back seats.
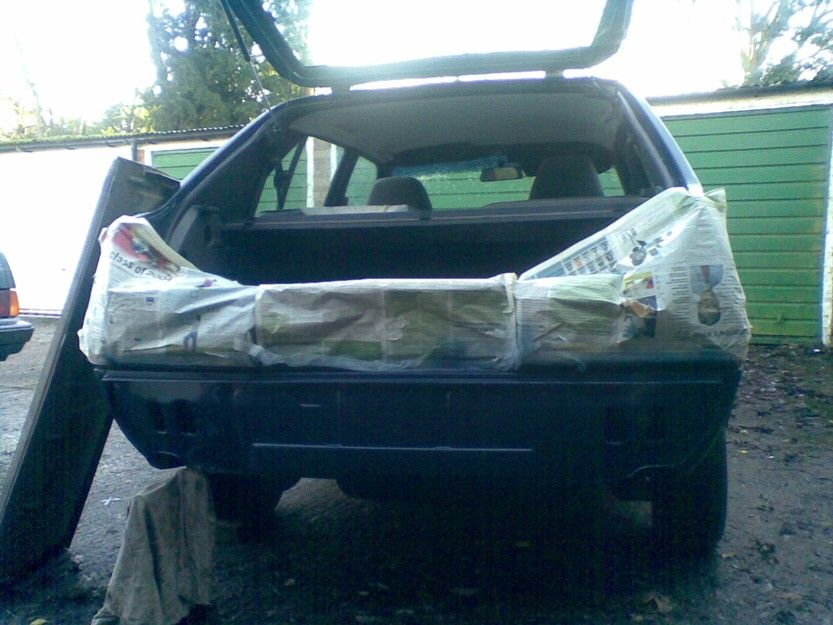
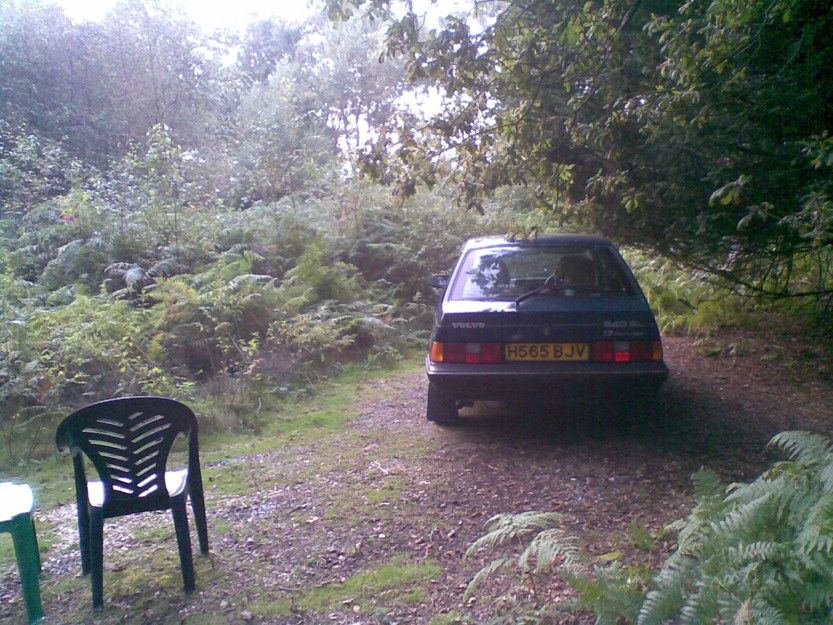
Time to get the back bumper back on...
... and hey presto...
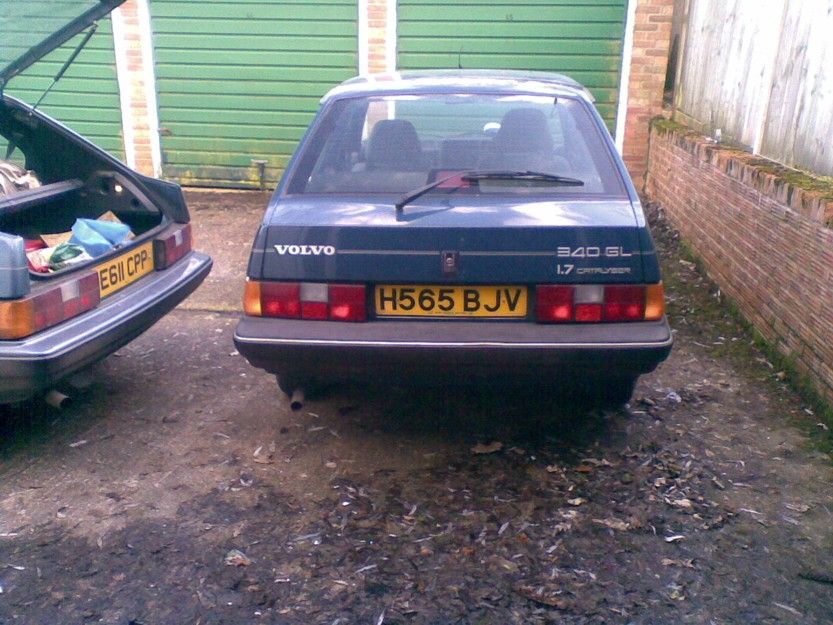
... so now its time to do something in the mudflap department which is in progress. The 'Volvo' badges on the front wings have been glued back on. Much time was spent trying to get my generator started so that I could grind the rust off the door-bottoms, but this was a complete flop so it will have to wait another week. A bit of a mental 'to do' and 'to get' list would include some standard rear mudflap clips (outer and inner) to replace the missing originals as well as number plate screws and yellow caps for the rear reg plate. I find a very old, algae-covered rear mudflap which I think will just about do to replace the missing one.
The first weekend in March 2014 has been spent fitting the mudflaps which clicked into place relatively OK-ly and the underseal in the immediate vicinity of the fixing screws and clamps was bolstered up a bit.
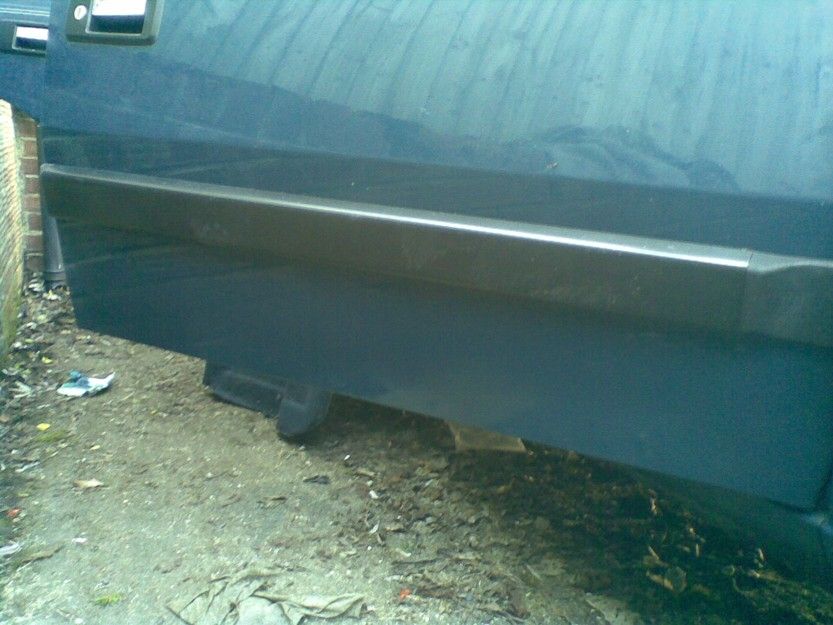
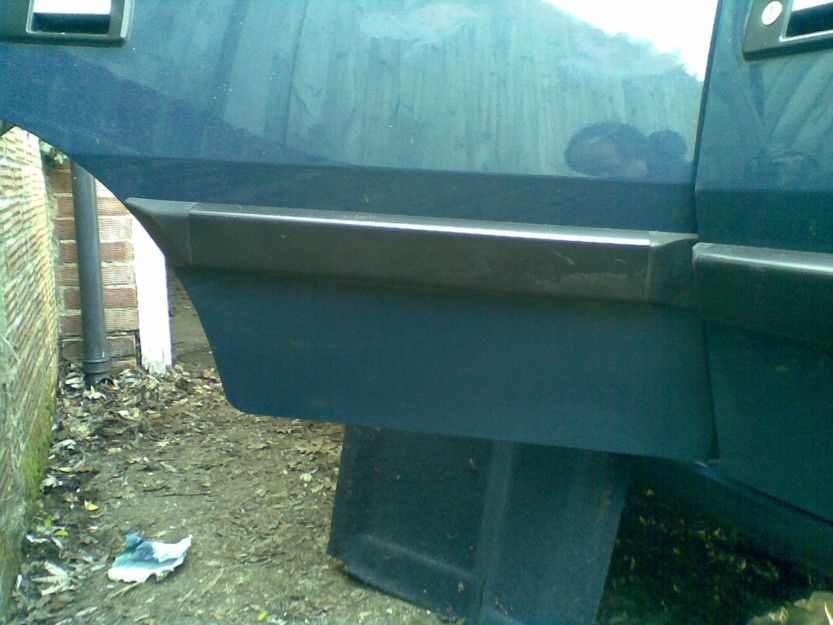
The rust on the door-bottoms has finally been given a rub-down by use of a little rotary wire brush on a drill. As a prerequisite for this, my generator which leaks petrol copiously had to be got going which was a job and a half. Unfortunately, towards the end of the door bottom de-rusting job, the wire brush became entangled in a piece of cloth and this picked up the mains wire for the drill which caused it to become twisted around the drill bit and subsequently damaged - my dodgy old drill does not stop when you let go of the handle. Nedless to say the drill will have to be fitted with a new cable (in progress). However, at the time, this allowed enough of the rust to be removed for a coat of naval jelly to be applied and left on for a week.
The weekends of early-to-mid March 2014 have seen the rust in the door-bottoms rubbed off with a gentle rotary wire brush type of thing.
This was followed by a coat of naval jelly which was left for a week to dissolve away at the rust, followed by another rub-down and another overnight coating of naval jelly.
Some time was spent sorting out the little generator which had an 'issue' due to a blocked needle valve in the carbie which was causing it to dribble petrol incessantly. Nedless to say its sorted OK now which has allowed the final rub-down.
Now to prime it all up with a brushing of zinc undercoat (yes, brushing is far-easier than spraying and its all low-down stuff so the coat doesn't have to be abso top-notch awesome). Note that some of this rubbing-down and priming has gone on under the door-bottoms, but not too much.
So this leads up to a mid-march weekend 2014 (15-16/3) when the last of my petrol blue aerosol is used to spray-up the door-bottoms, without much masking-up to try and smerge in all the colours as much as possible. An overnight dry and its ready to lightly flatten and give a layer or two of laquer interspersed with a bit of patching-up with the paint where necessary. Better weather gives time to spray and spray and wonder why aeroplanes disappear from the blue sky.

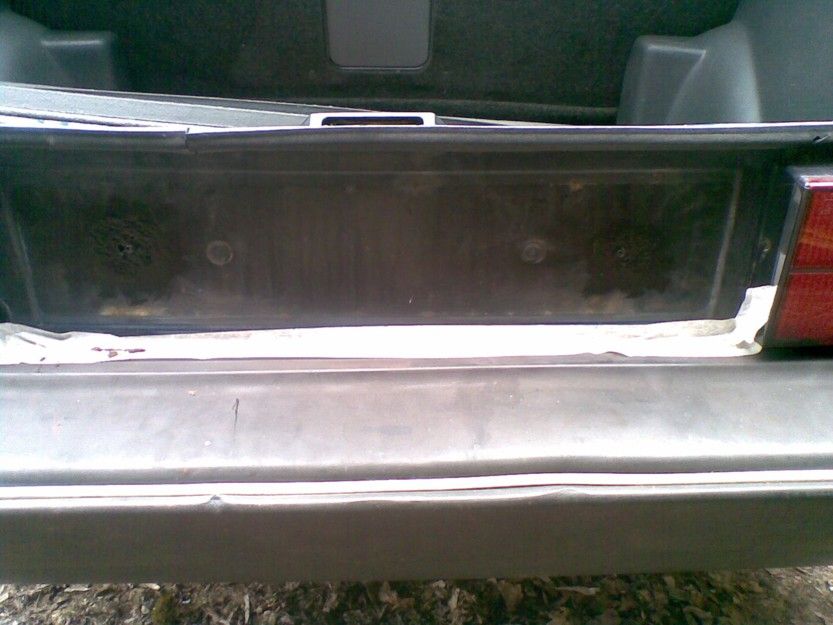
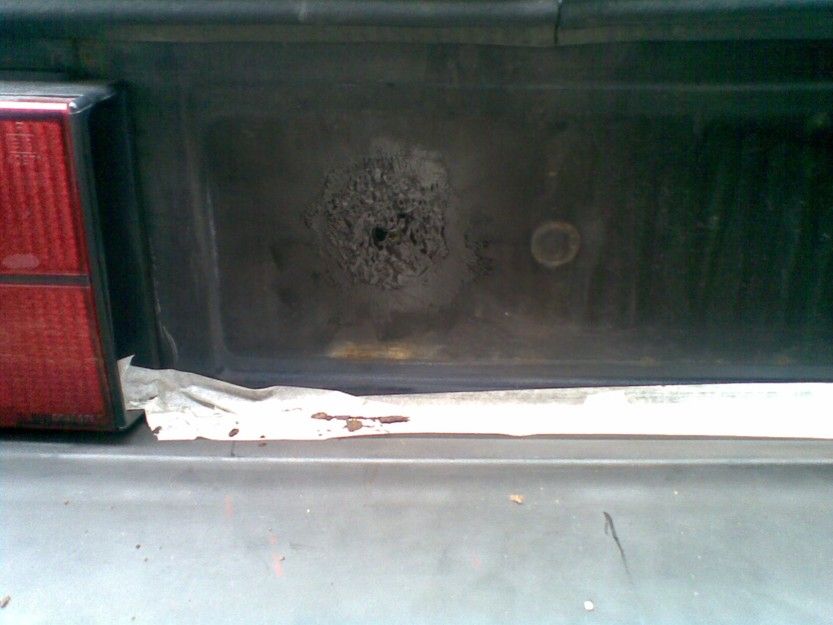
So far so good and now its time to pop in some new screws for the rear number plate. However on removing said plate, I find fairly copious rust around the screw holes which needs a rotary brush-up and some drilling out of the old screw stubs, too. The plan here is to coat the de-rusted patches with some Smoothrite and then bodge the slightly crumbling screw-hole on the left with a wall-plug device to give a semi-OK type of repair. Not ideal but I can't face more welding just yet.
We blunder on into late March 2014 and the rear number-plate has been fitted beautifully in my wholly unbiased opinion and the battery has been charged and re-fitted. A bit of polish on the newly painted panels brings them up relatively nicely in the bitterly cold sunshine!
The engine started OK and all the rubbish has been cleared out of the car. A bit more touching-up to the paint brings it out luvvely.
The car is taken for a short run around and a visit to the petrol station. All seems to be going OK with the general driveability.
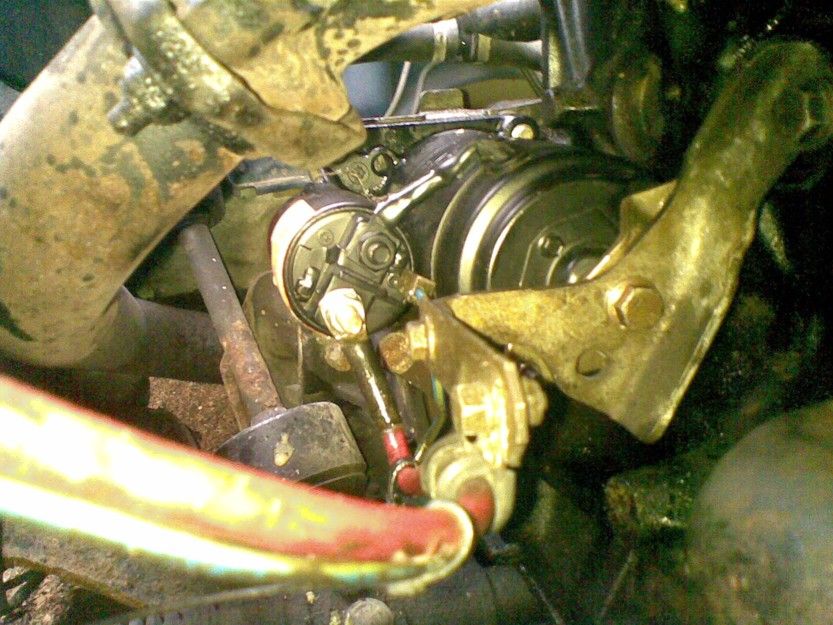
However, and however, on my return the car will not start due to the starter motor not turning over. Well, you can hear it trying to turn over, but it can only manage to do it very slowly and I remember this has been a problem several times in the past. I am assuming that it is a poor earth or another connection onto the starter motor which is causing this but only time will tell. Meanwhile, the car has to be pushed back into the garage.
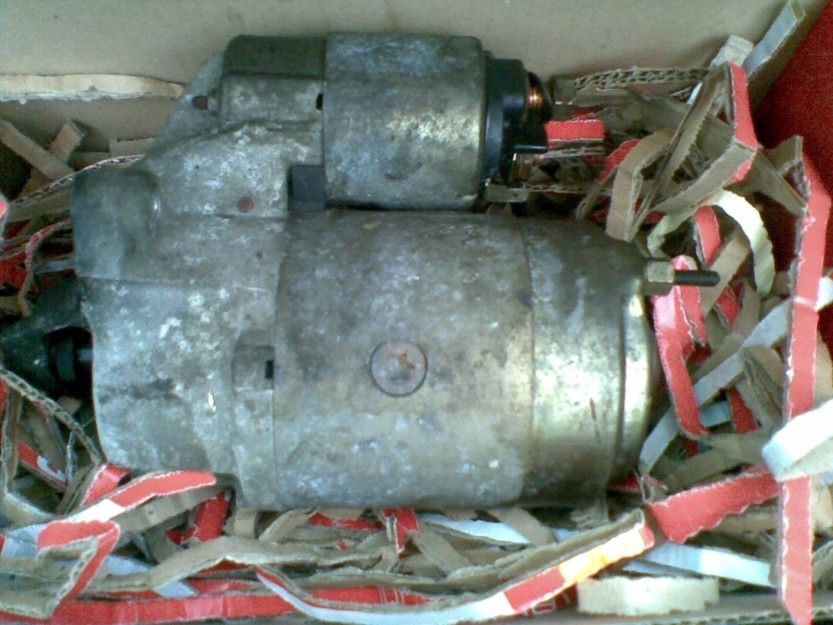
As of early April 2014 everything is evil-eyed and awesome (not) because the above problem has not been solved. I check the resistances of the wires to the starter when cold and hot and there is no difference so I foolishly suspect the starter is to blame and hence find a local spares shop that can do an exchange unit which is fitted to the car (see old and new below). Although better, the new one doesn't make a huge difference. Duh, oh well, the working old one has to go back to the shop as part of the p/x deal (weep and cry), but I won't think about it, I will just do it and its now done.
So next plan is to pop some carb cleaner and penetrating oil into the cylinders and leave it overnight. The next day the cyclinders are drained with a rubber tube on the end of a syringe and the plugs refitted. The car is taken for a drive for a few miles until its really hot and then I find that the problem is still there - the engine only turns over slowly or not at all when I turn the ignition key. So out come the plugs for a cooling down session and maybe more additives!
The excellent advice from the mania site is to turn the engine cold with a spanner or such-like with the plugs out and then run it and then remove the plugs and try again with the engine hot. If it really is sticking pistons, then give it a dose of engine flush and fresh oil. Now why didn't I think of that?
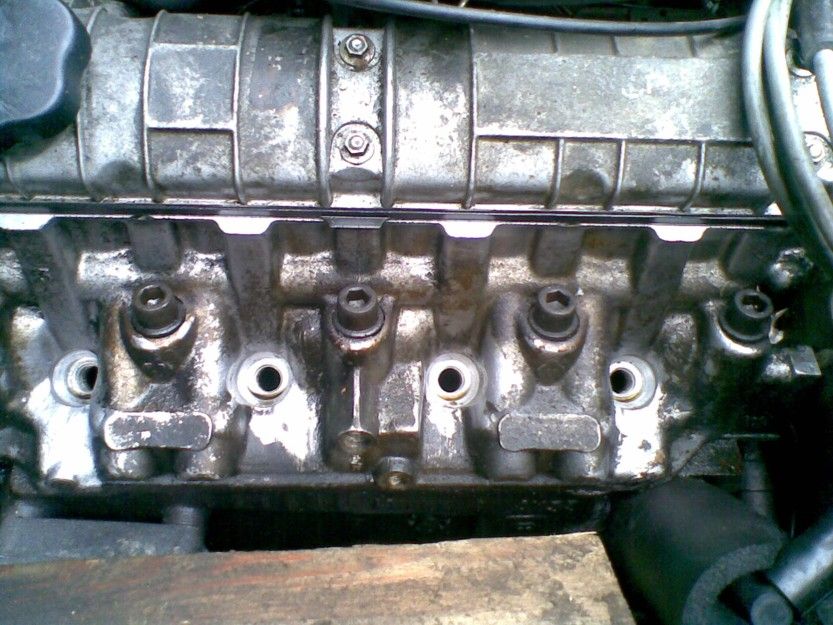
Well, I do as they say and its hard to tell if the engine is stiffer or not when its hot, so lets give it a flush out and an oil change and hope. Job done, sorted and, yes, to my great relief, by some miracle the car now starts reliably from hot and cold. Ambient awesomeness abounds, but the cam-belt noise is worryingly still there and yet more nagging of folks on the mania site leads to a much-appreciated suggestion that I might have actually fitted the wrong cam-belt and that the extraordinary tightness of the belt is also due to it being the wrong one!!! This is all badness and so the photos are bad, too.
So the correct cambelt (Dayco 94120 i.e. not 94126) is procured from the internet and I find that it fits just lovely with no stress to either it or me. Ambient awesomeness abounds everywhere and all the usual trickery is used to set and check the timing marks.
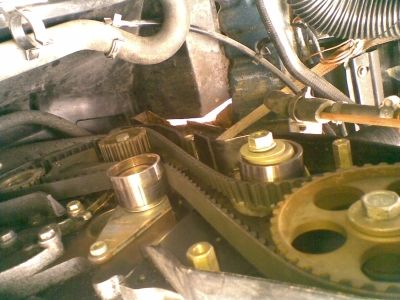
So everything gets tightened-up and fitted back together again and the engine is given a quick test and its found to be running fine without any of the odd cambelt noises that it was making before in abundance.
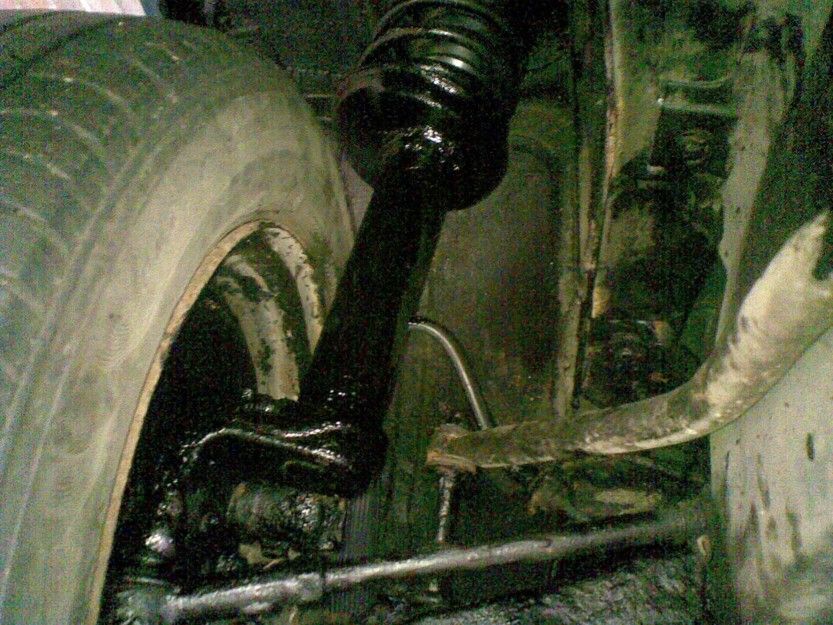
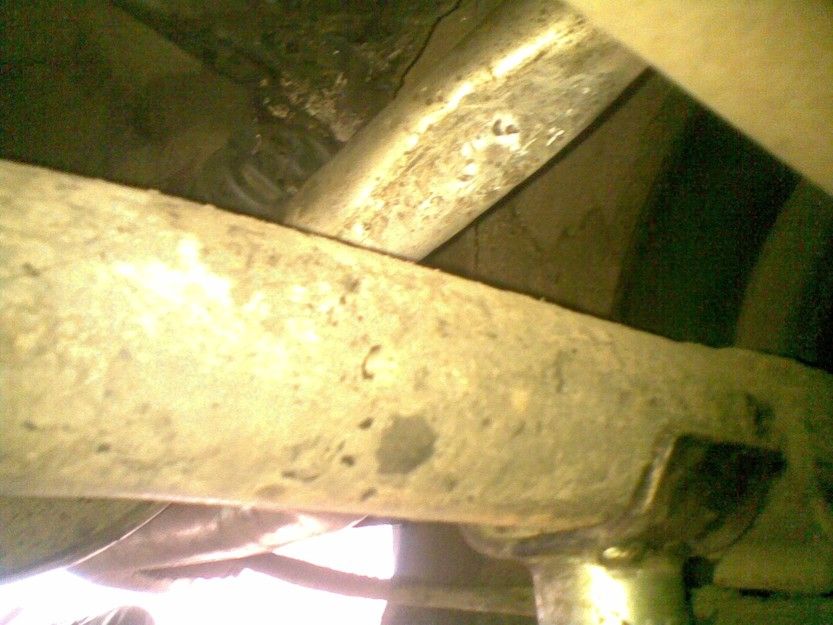
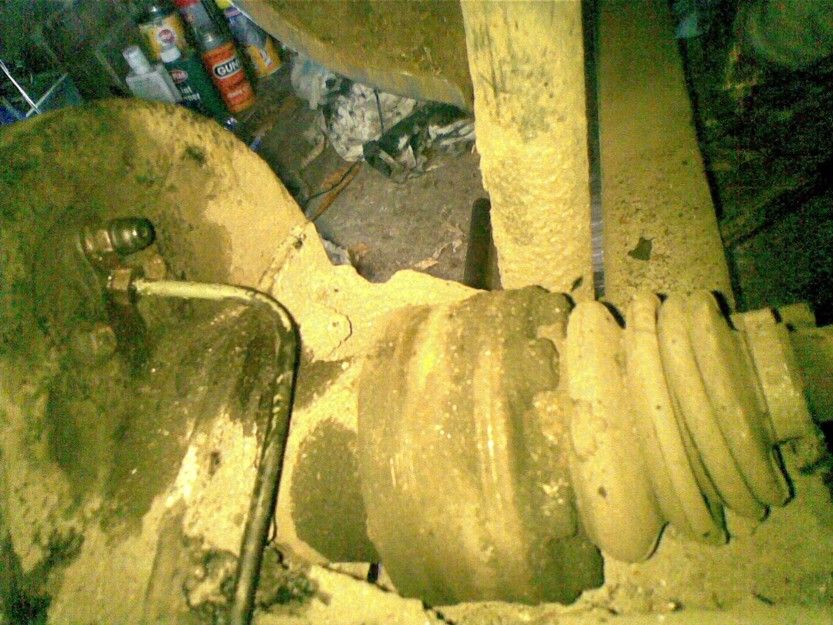
A quick bit of waxoyling in some places that were missed before such as the driver's side front suspension and one or two extra bits of attention given to the windscreen wipers, the antifreeze and polishing the bumpers allows the car to be pressed into everyday use, as of Easter weekend 2014. A 50 mile run is pretty uneventful apart from a tiny bit of stalling due to my lack of experience with the clutch - maybe I'll give the cable a bit of adjustment in the near future. The suspension is quite smooth and swimmy which gives me a bit of car-sickness (ahhh) or maybe its stress, but hopefully I will adapt. Carry on murdering (not).
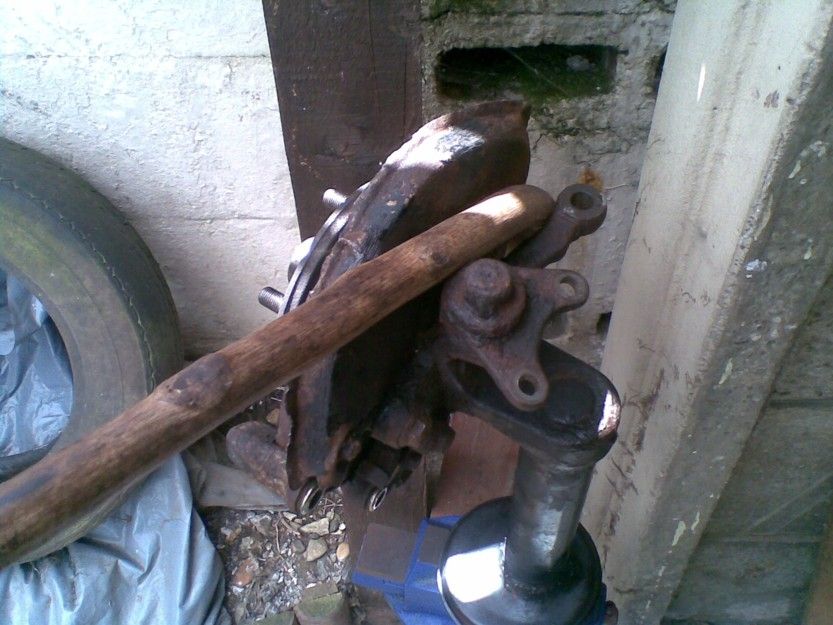
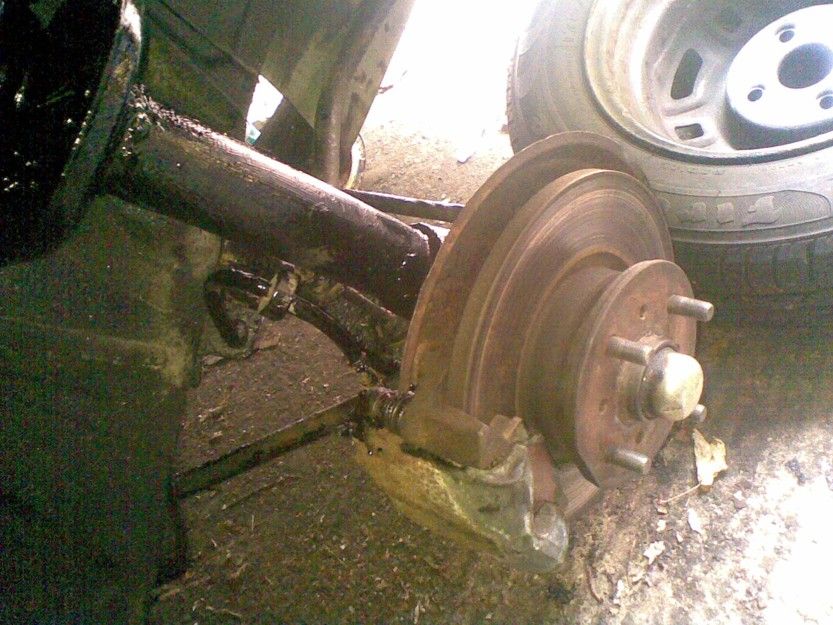
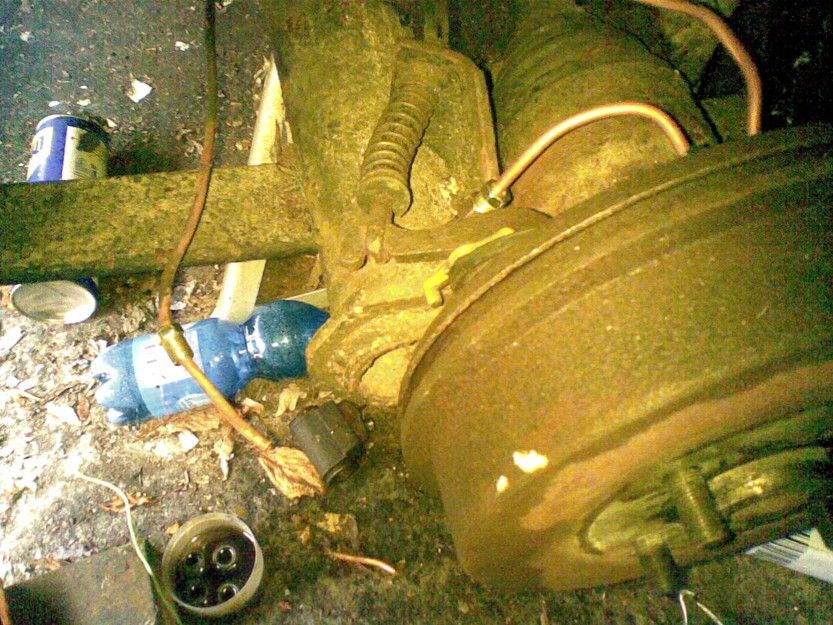
Its still Easter 2014 and isn't it luvvely? Indeed, the same trip to the sticks is repeated the following day and all goes well apart from the last quarter of a mile when the driver's side front strut collapses. It had to happen. The rest of the journey is done at walking pace to save the tyre and a couple of days later she's on the back of a lorry again (boggler, boggler, boggler...) being trailered back to the pit to be worked on for a few more months, no doubt. Anyhow, the two days that I have spent driving her about have given some clues as to things that will need to be sorted while the struts are being repaired. How's about?
- make the electric mirror motors more reliable,
- adjust the clutch,
- bit of paint on the front valance,
- passenger-side headlight wiper,
- leaky boot seal,
- more to come
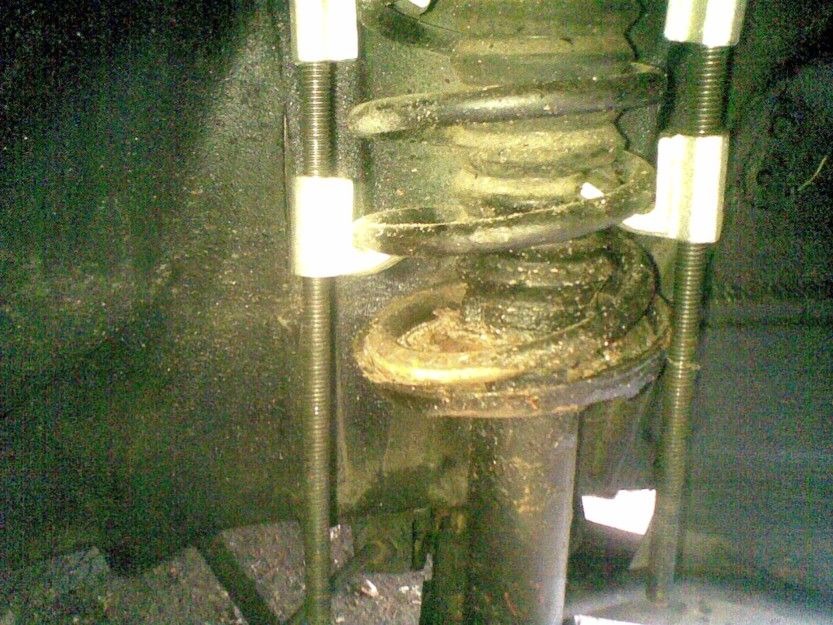
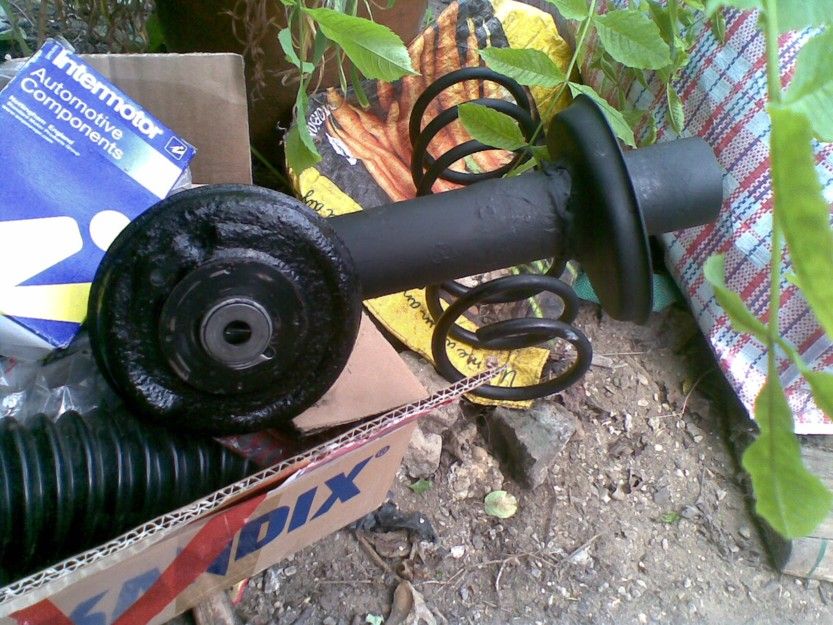
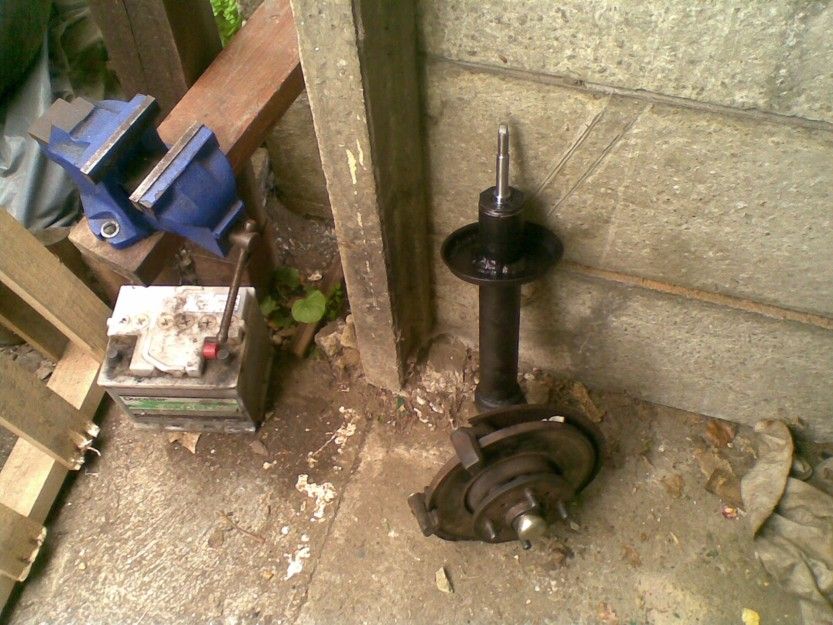
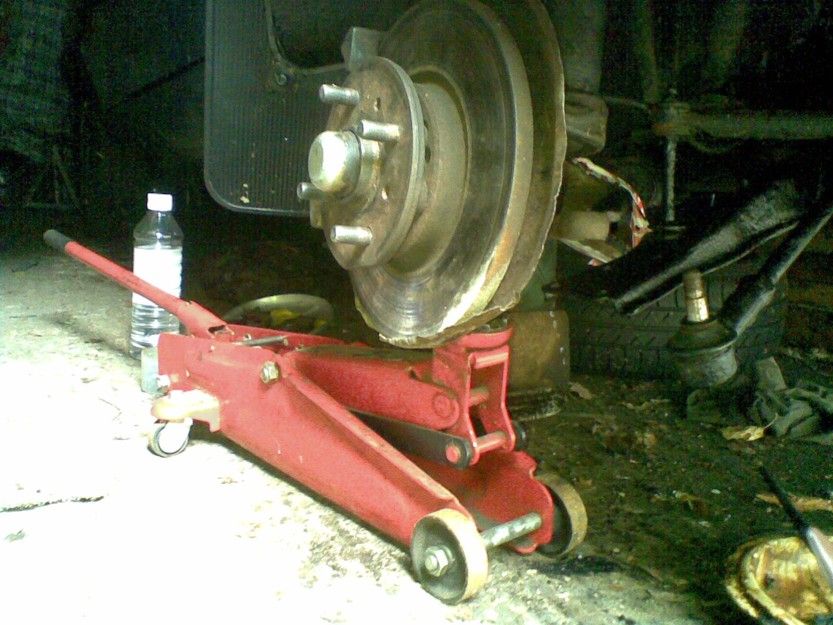
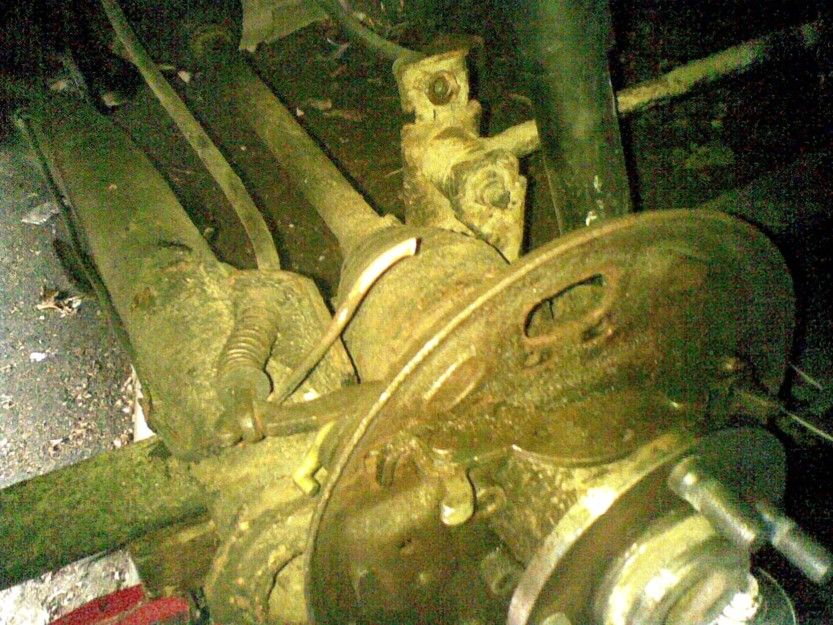
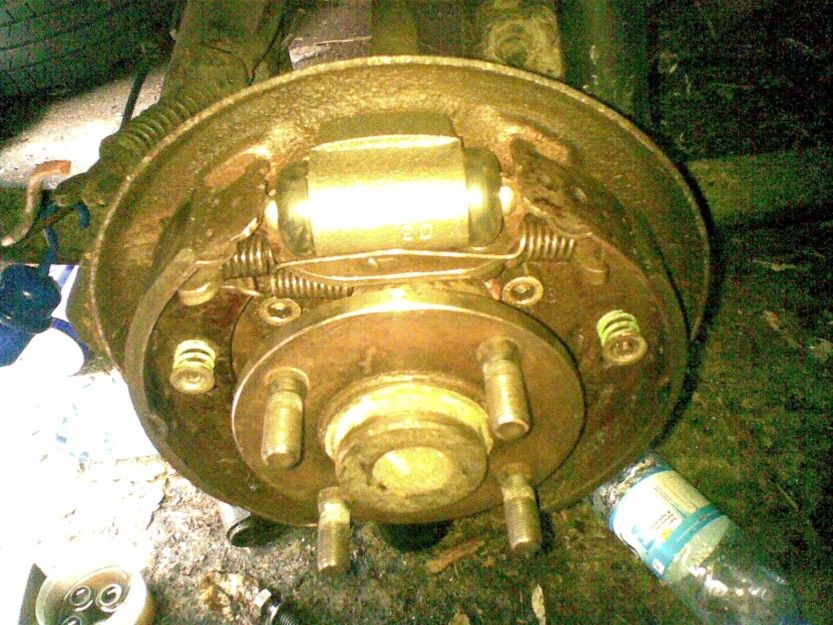
While the car is up on stilts, I have a hammer away at the unbroken strut and decide its relatively solid so I will leave it in place. Also, to save trouble I will leave the disk and the brake calliper mounting all in place. However this raises the weight of the strut quite a lot and so will need some careful planning of a courier type of operation to minimise the costs of sending this to Anglesey for repairs.
Anyhow, when the strut has been undone and the oil emptied for posting, I will have a bash at wire-brushing and painting-up the remaining suspension parts on the car which are looking a bit rusty, but not too bad, really, hopefully.

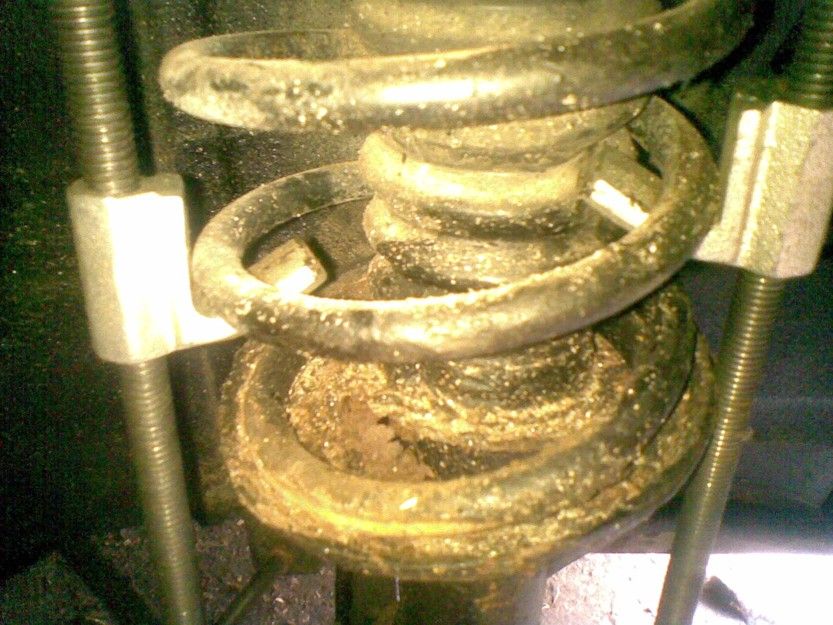
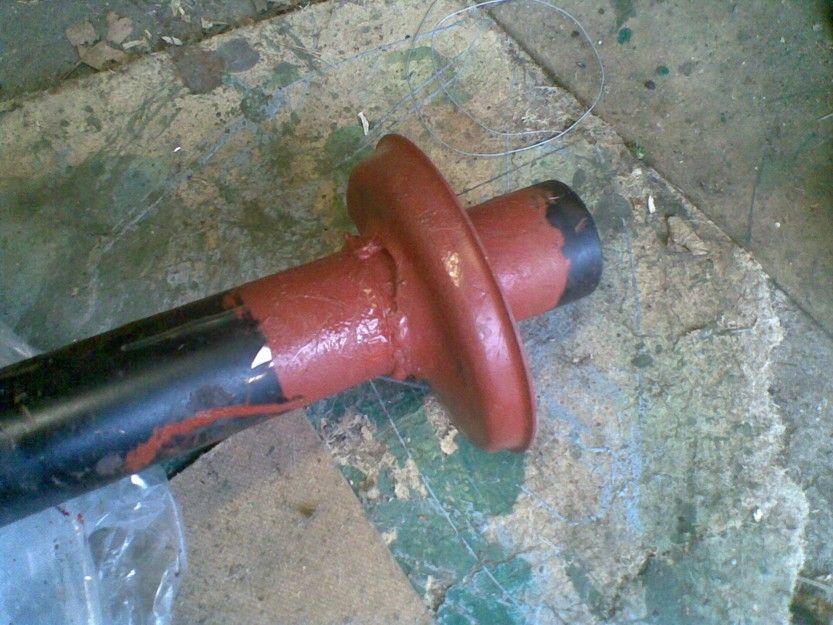
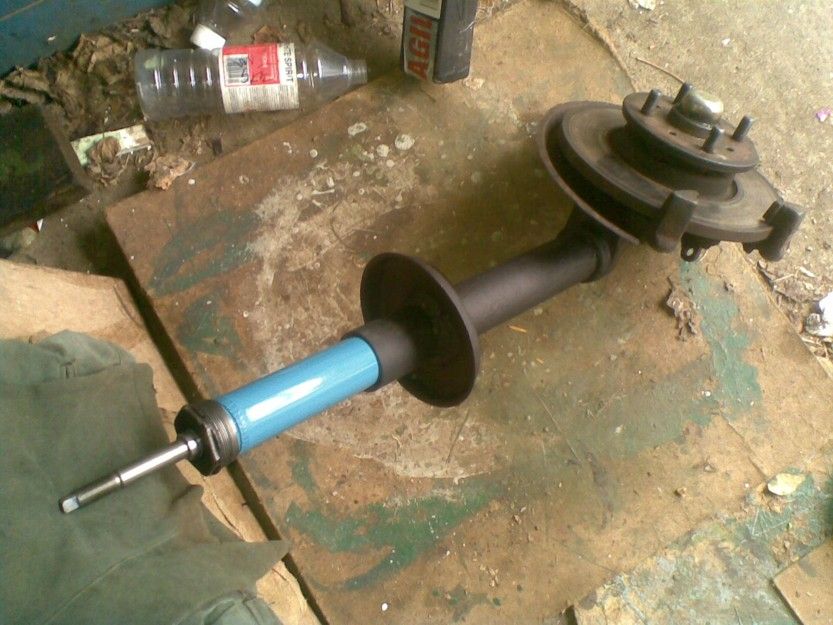
Early May 2014 and the strut has been dismantled, emptied of oil and Yodeled up to Anglesey for repairs. I have saved the old oil, pooled it with the oil from the 360 struts and filtered it all to re-use - you never know it might be OK? Awesomeness abounds.
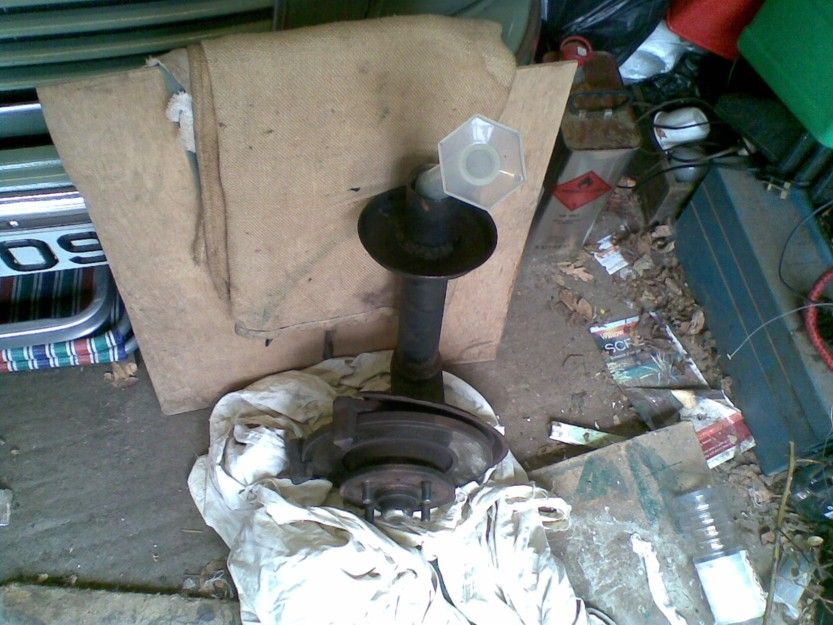
Well, the repaired strut comes back from Anglesey a lot fast than I expected, so still in early May 2014, we need to think about getting it all back together again. The main thing is that the welding looks awesome, as only an awesomist can say.
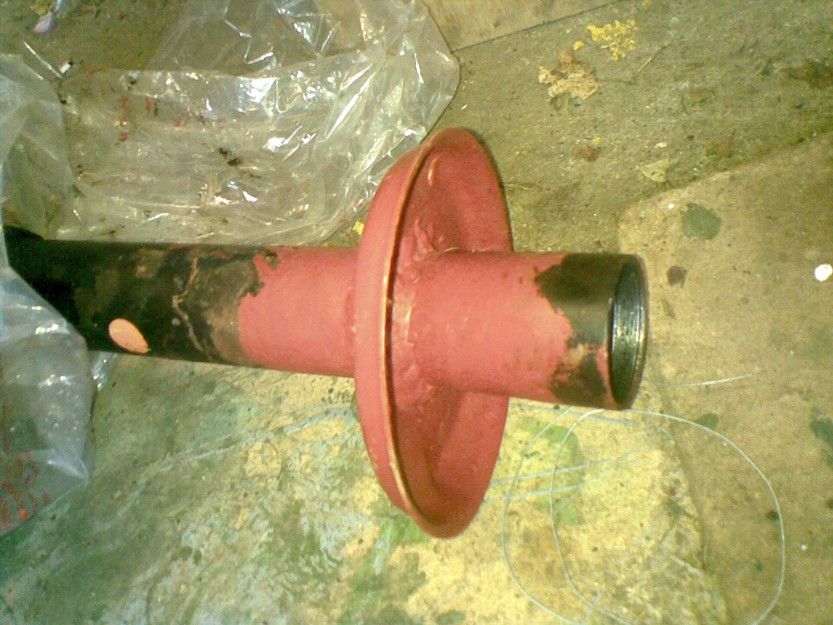
The various bits get a bit of a wire-brushing and a coat of hammerite, while the already-primed strut itself gets a bit of a top-coat in matt-black. Gothic stuff man.
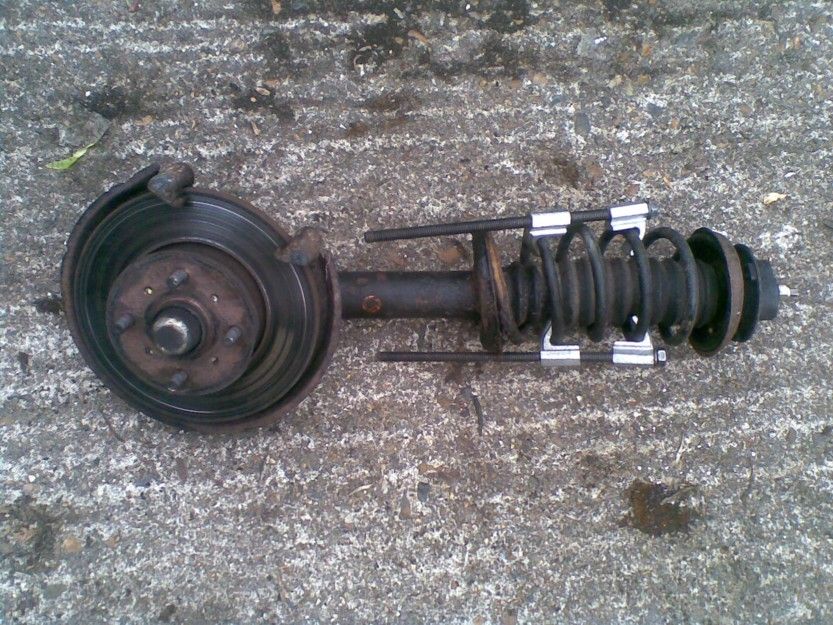
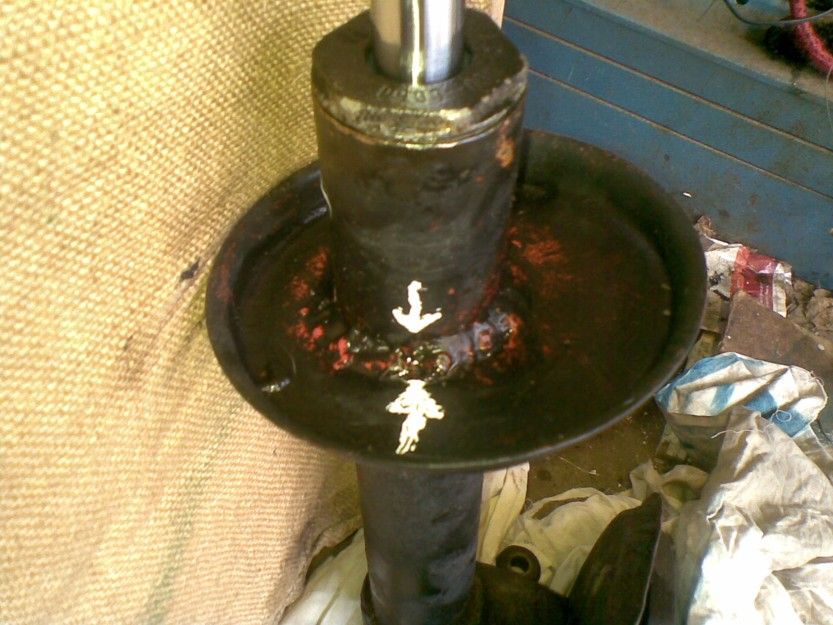
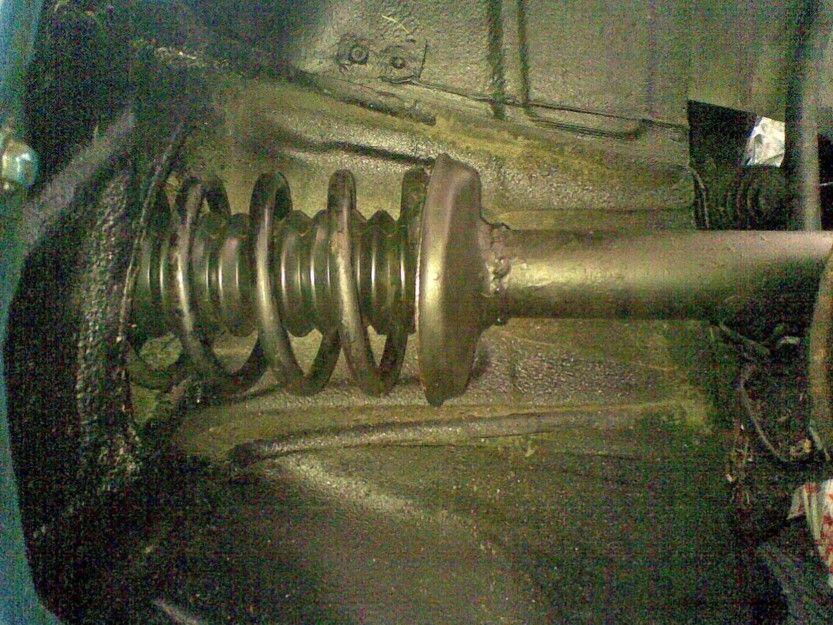
Heading towards the end of May 2014 now and everything is going strutacularly well with the strut being refilled with 320 ml of some old but filtered strut fluid.
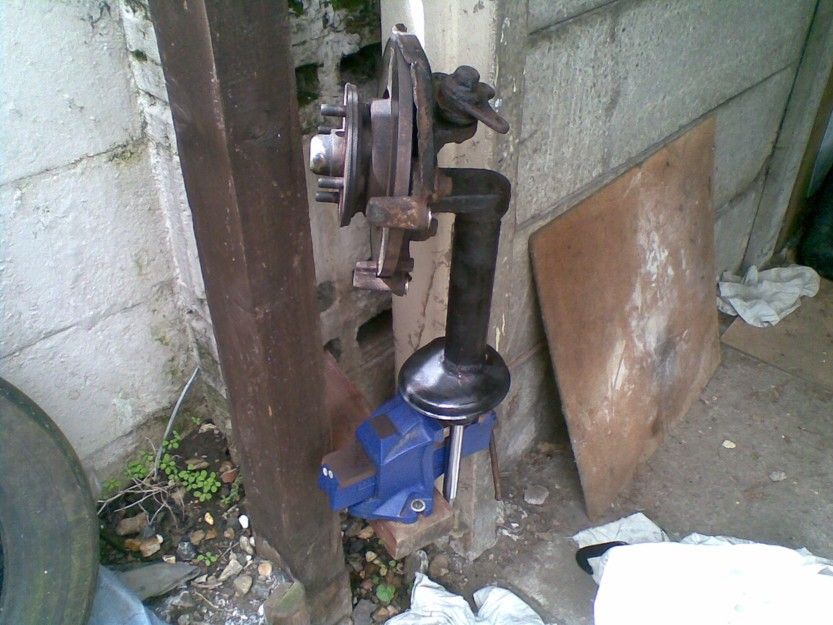
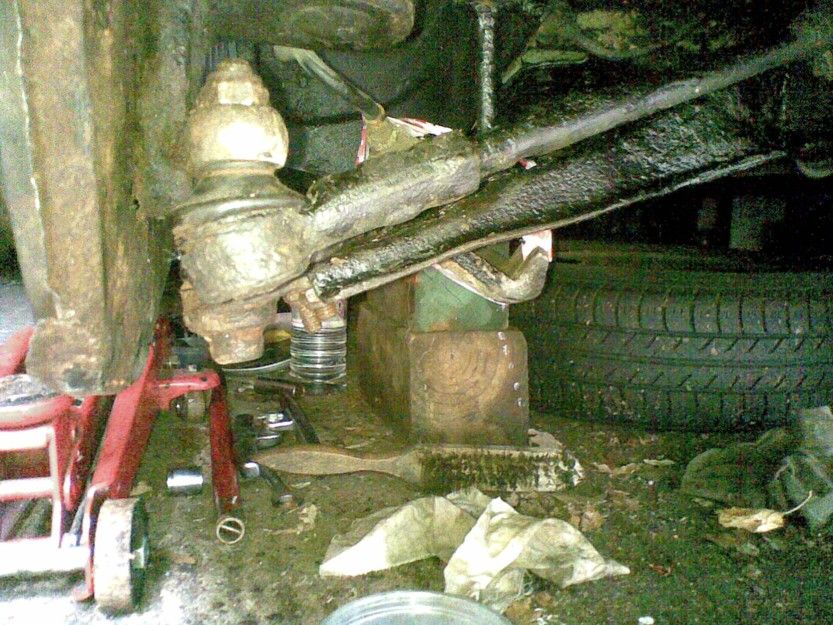
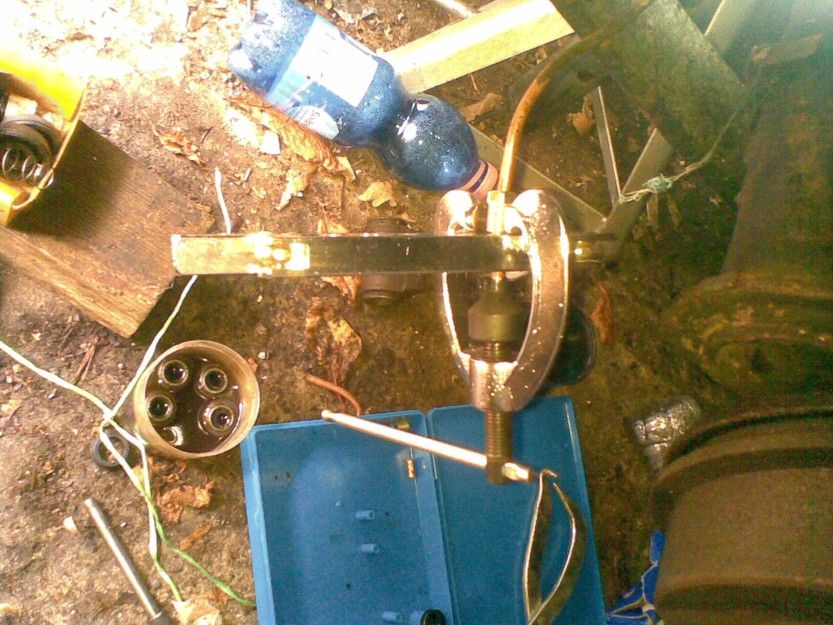
The strut innards were cautiously refitted during the refill and the strut nut was then replaced loosely by hand, before being tightened properly while being held in a vice-like grip. To achieve the right tightness necessitated the use of a specialised torque wrench device (well, a slightly worse-for-wear walking stick actually) that perfectly fitted the bells-and-whistles that hang around the back of the wheel hub.
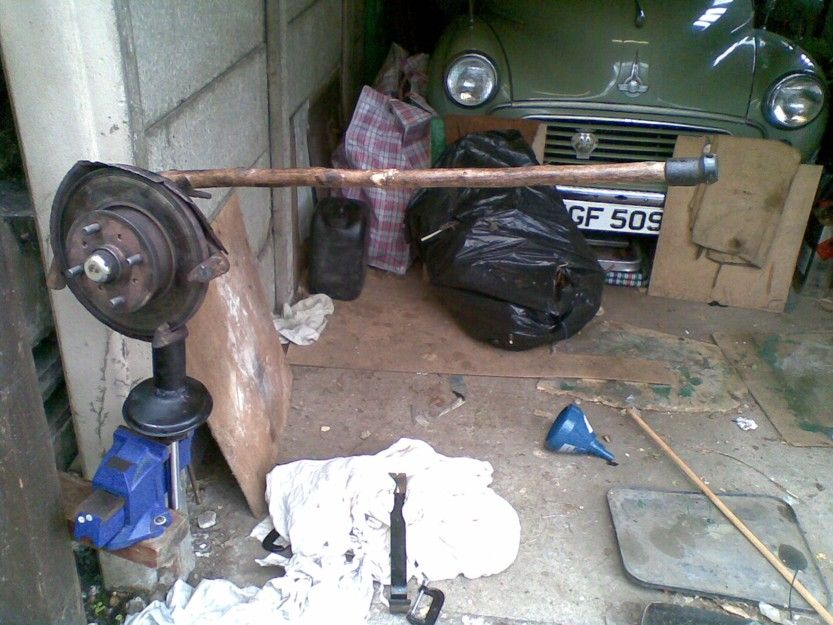
Anyhow, this process revealed that the repaired strut needs to be repaired a tiny bit more and therefore it is disassembled, drained and quietly couriered back to the specialist for a tiny bit of key-hole surgery.
Meanwhile, the free time that this creates is used productively to re-paint the bits-and-pieces that the strut will eventually bolt onto and to tackle some anomalies with one of the headlamp wipers which does not return to its ground-state properly when switched-off.
In addition, the clutch has been adjusted and the bonnet and front valance given a bit of a touch-up and laquer where needed.
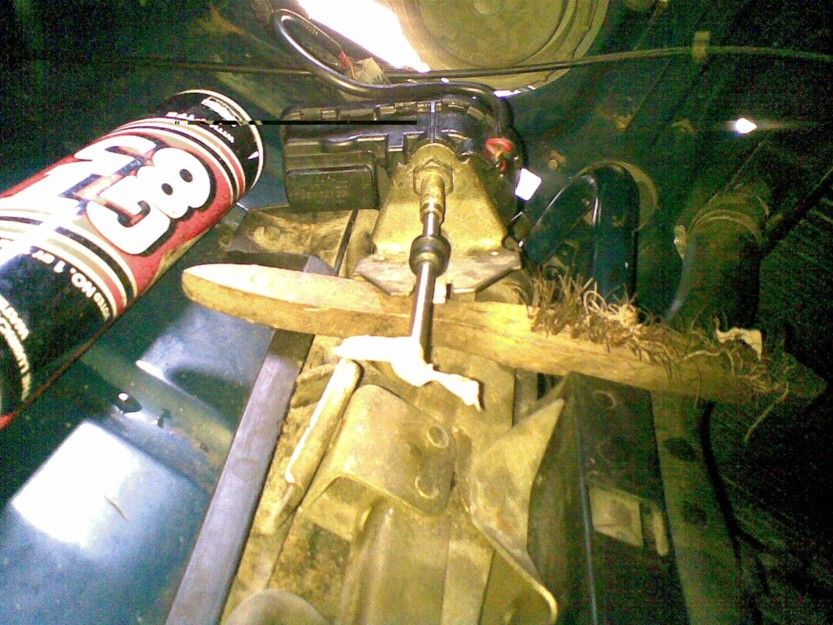
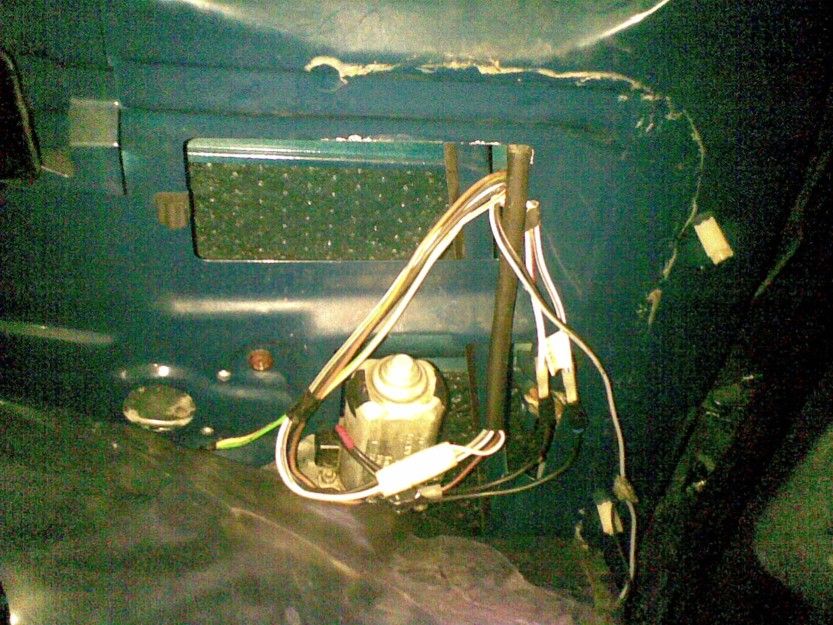
Very early June 2014 and much awesomeness abounds as efforts are made to rectify the dodgy windscreen washer jet on the passenger side which refuses to jet water in the right direction. Indeed on closer inspection it is clear that someone in the past has bent the innards (presumably to try to unblock it) so that the water will always squirt out sideways and bounce off the plastic vent panel. Hence, a spare jet was found and popped into place, thus effecting a perfect cure for this little issue.
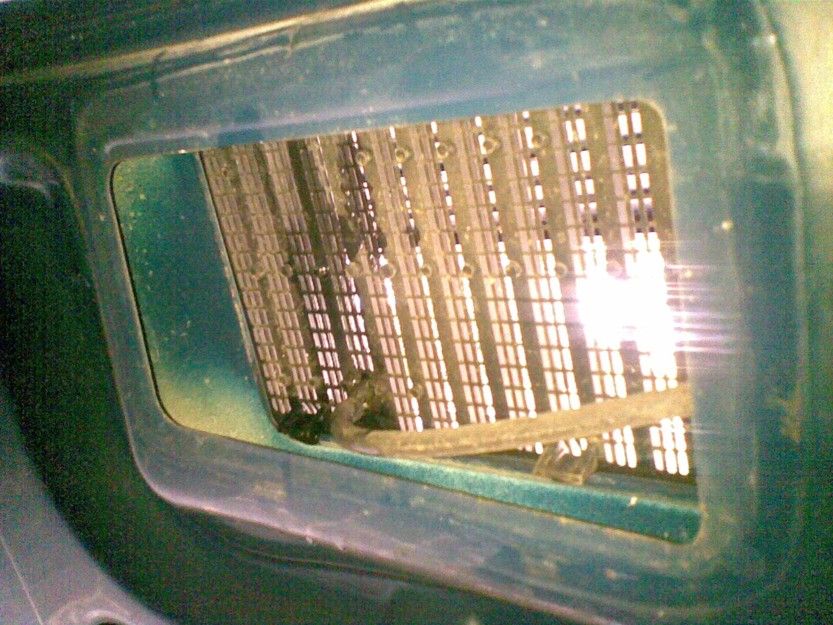
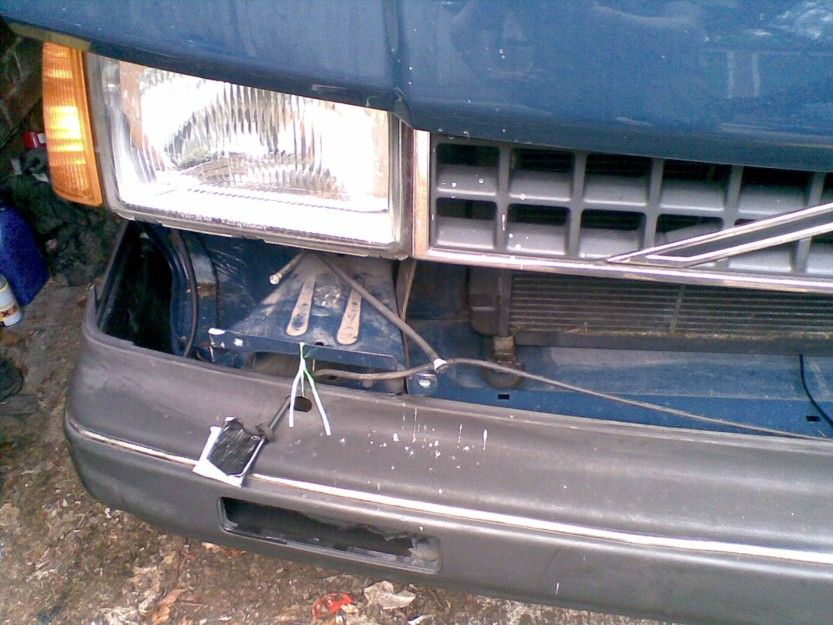
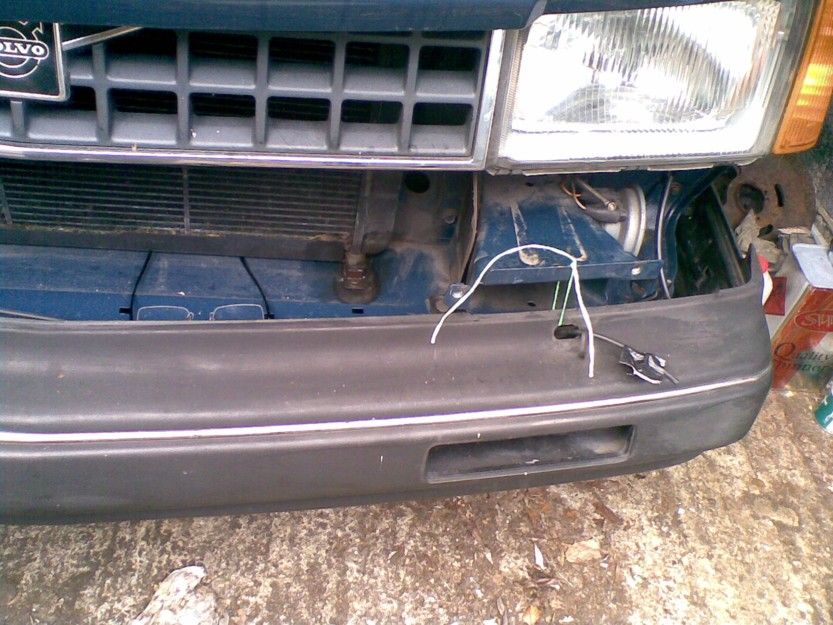
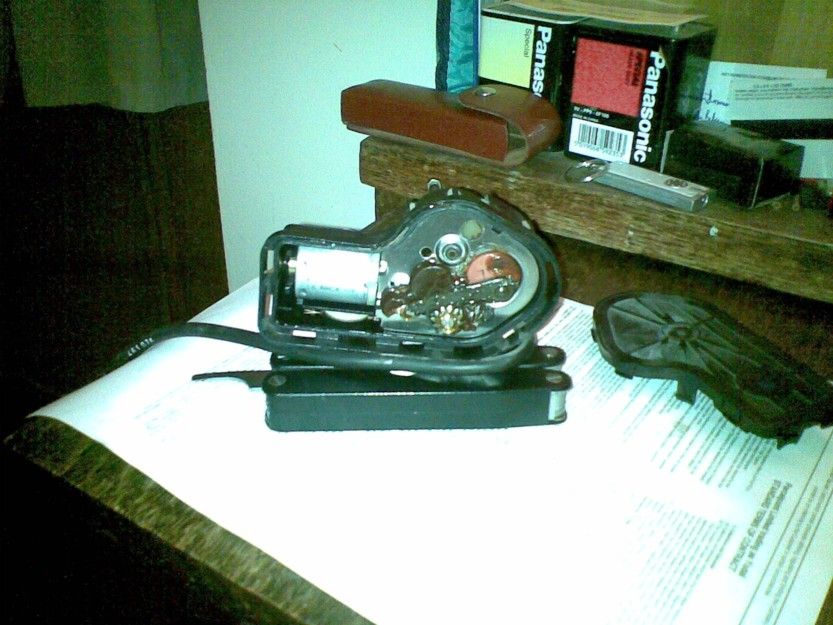
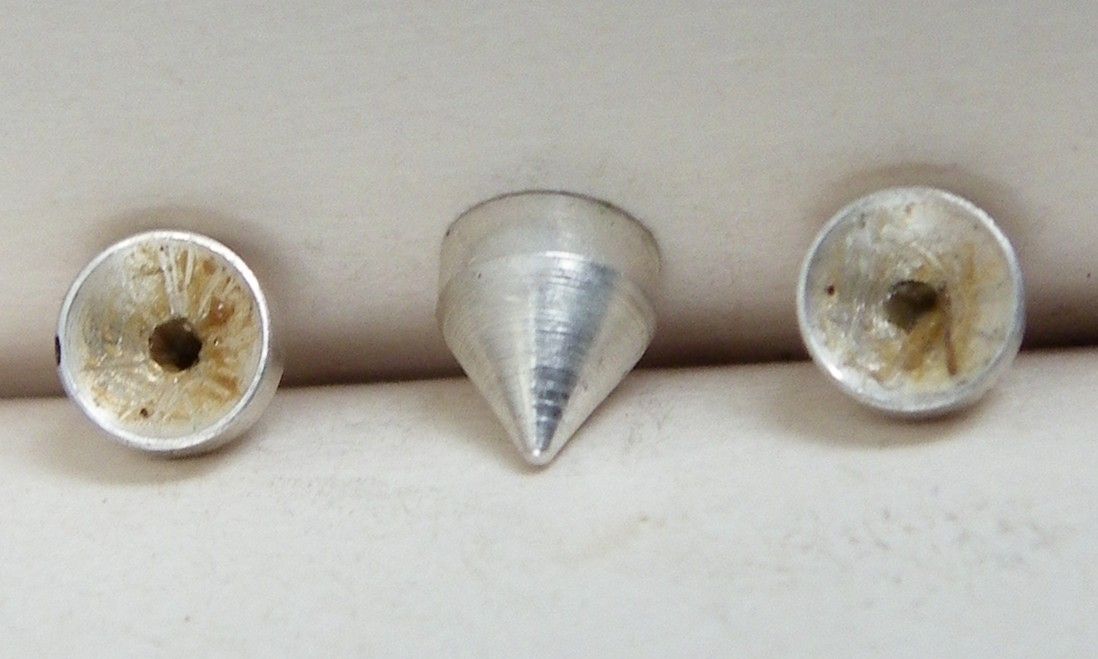
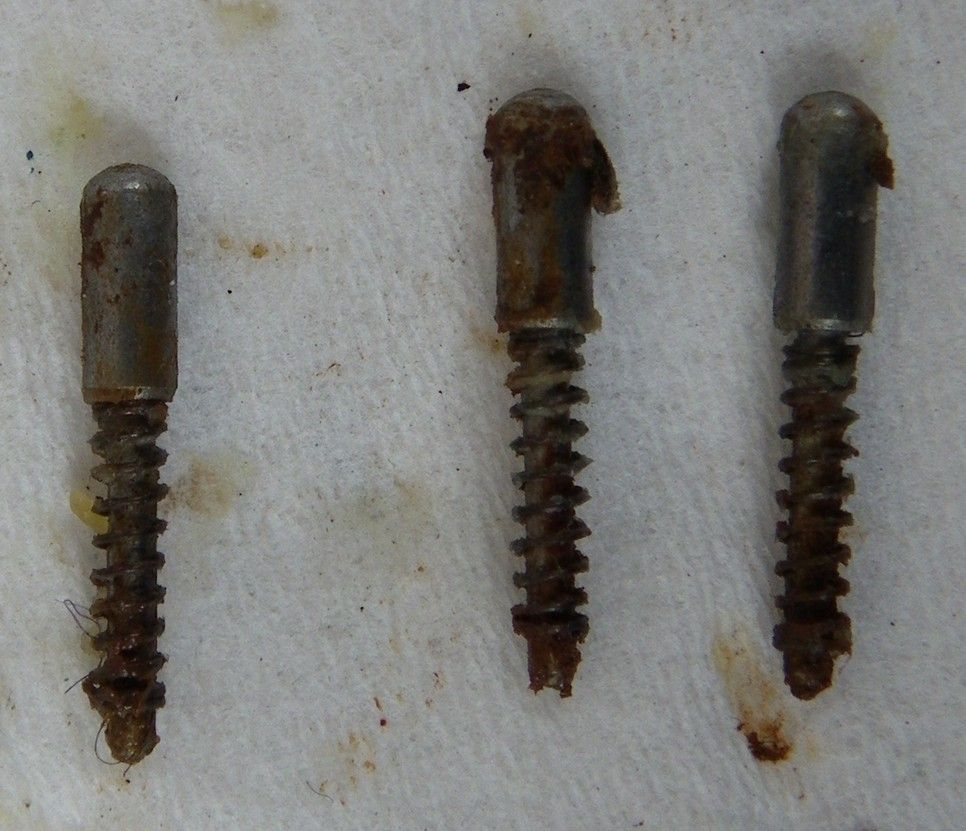
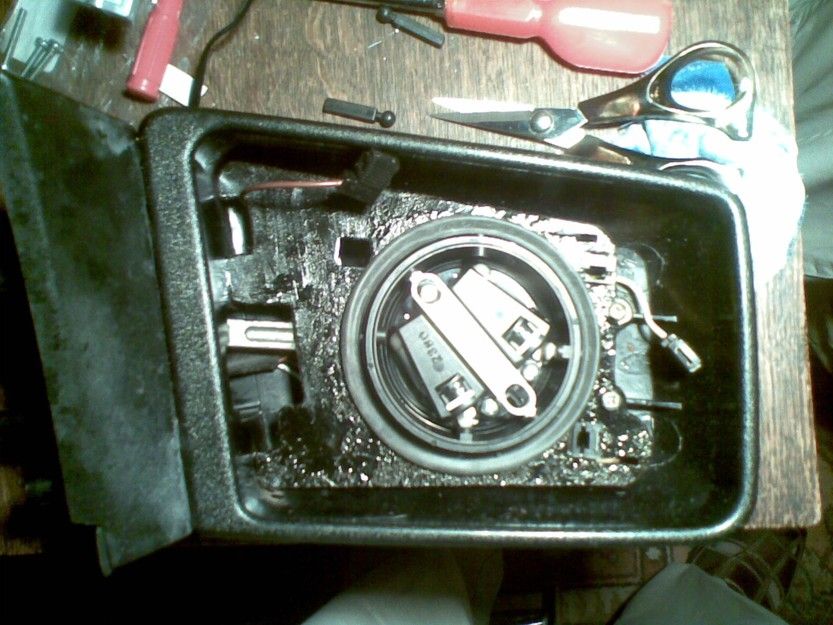
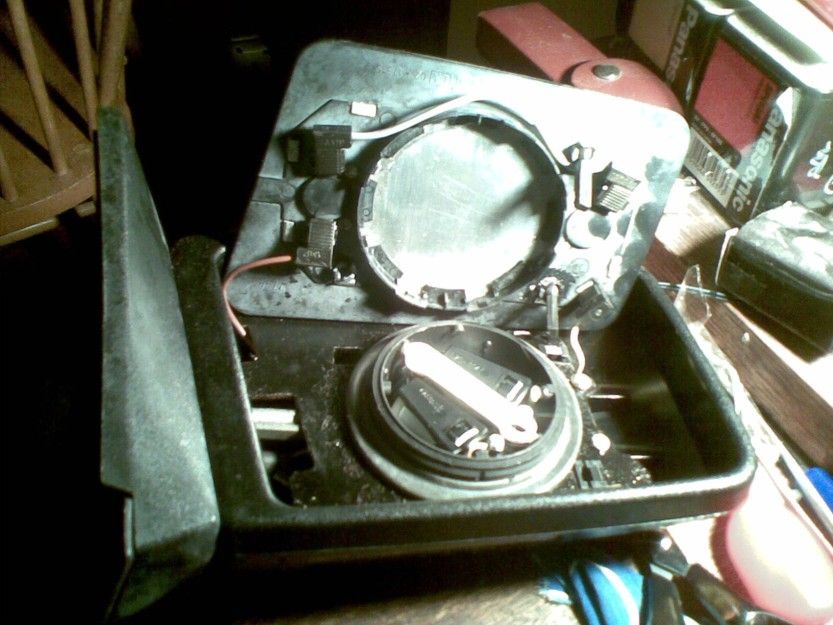
Meanwhile, efforts continue to repair the dodgy headlamp wiper that doesn't work very well. First step - off with the bumper, again, to allow the little wiper motor to be removed, too.
Then a few spare wiper motors were found in the roof and sorted into ones for the left and right sides. Then the ones clearly marked 'L' were connected and tested, one-by-one. However, none of them seem to work properly, so one of them is partly dismantled, the innards are fiddled about with, re-greased and generally put back together in roughly the right place, the backing-plate is refitted as tightly as possible and then the unit is tested and found to be working perfectly. Awesome, again.
Finally, putting the repaired motor back in place, as well as refitting the bumper and the little wipers allows everything to be tested in situ (with a bit of string tied to the wiper switch and threaded round the steering wheel so that the wipers can be seen in action). Thus, it seems the wipers, etc, are working fine too, so that's another little blessing in disguise for having a broken strut.
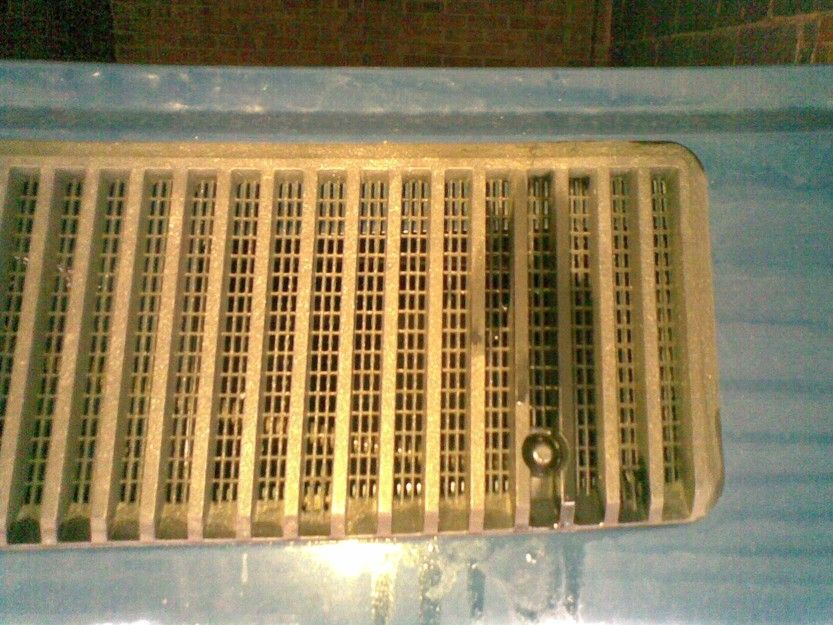
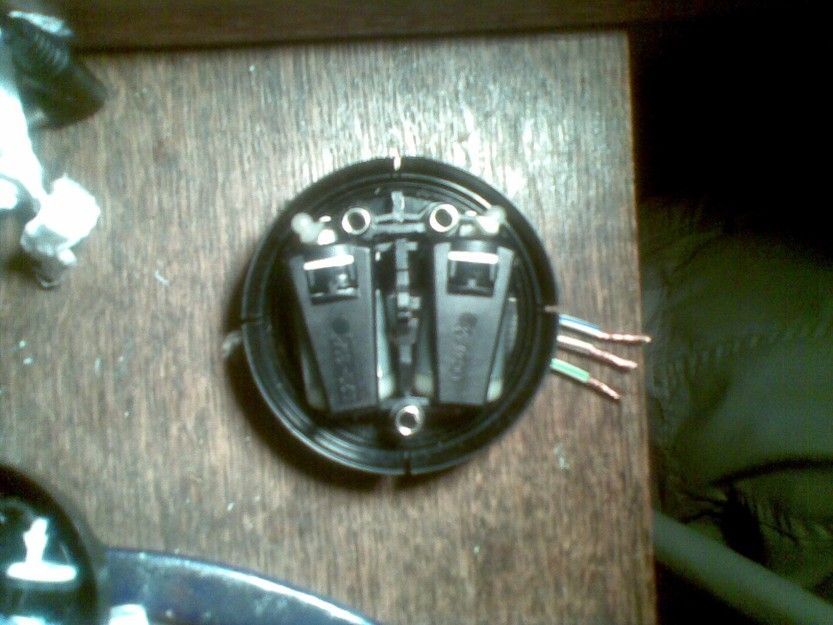
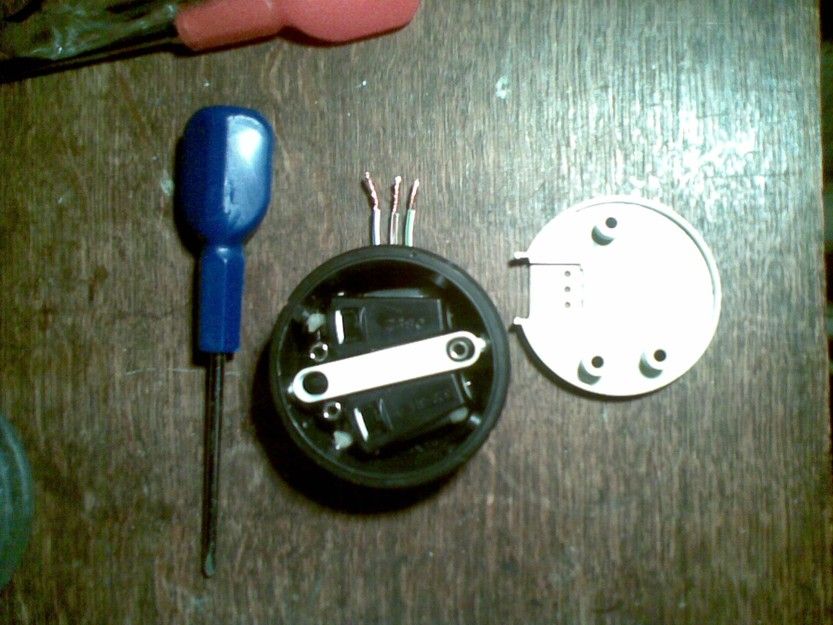
Yet more bulletins from the annals of evil-eyed awesomeness. A retrospective fiddle with the headlight wiper motor which was behaving badly on the above motor car shows that its problem may have been an abundance of grease which had accumulated around the contacts within the the motor. Anyhow, the photos show that, once the clips on the plastic backing had been very carefully undone, the inside of the motor was found to look as though it had only just left the factory. Awesome. I have degreased the contacts, reassembled it while taking care that the marker on the brown wheel retains its alignment, and will test it at the weekend. If its OK, it'll go into storage and if its not OK, it'll go into storage, too, so its a no lose situation and what could be better?
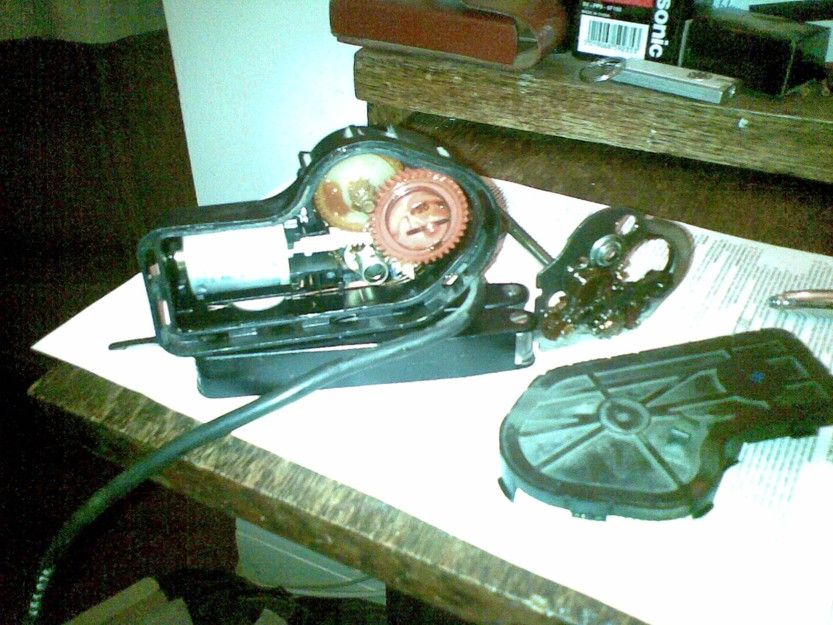
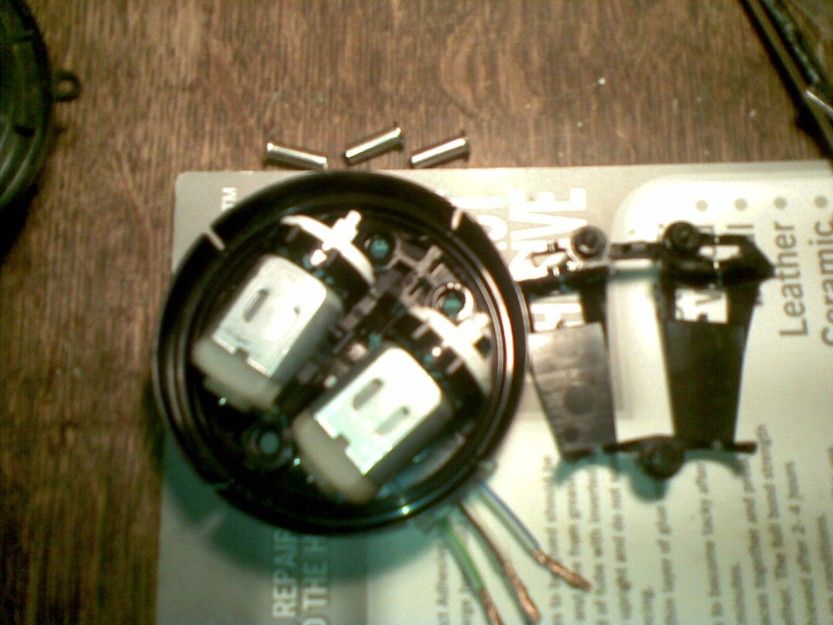
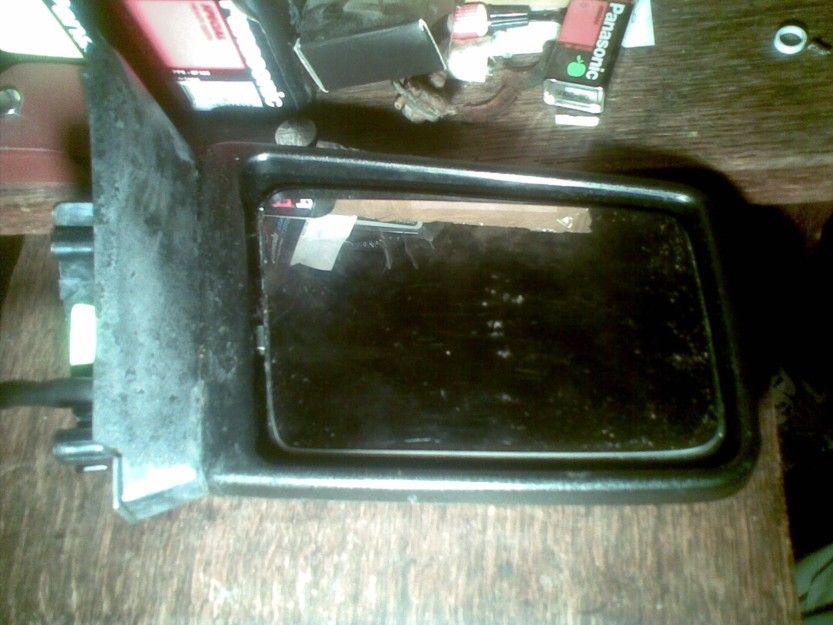
It mid-June and time to evil-up this website with some more news of nothing useful going-on no where. Anyhow, efforts have been made to make the electric mirrors more reliable and this has been achieved with great success on the passenger side by cleaning the contacts within the connector block behind the door panel. However, efforts on the driver side have gone slightly Pete Tong due to the fact that one of the motors was sticking and apparently only working at its extremity. Naive efforts to spray WD40 behind the glass to lubricate any mechanicals which I then tried to loosen-up by manually moving the mirror by hand resulted in the mechanism breaking. Hence it all has to come off and is dismantled with further unremitting and irremediable numptiness. A number of similar looking Volvo mirror motors were procured from the internet and now I have quite a prestigious collection of mirror-related bits of junk from which I will try to 'pheonix' a working unit.

Some Hammerite will have to be brushed onto the rusty metal panel inside the door mirror and work is in progress to remove the grotty old glue which will be replaced with new stuff when it becomes necessary to stick the glass back in place. Working out how to dismantle the motor units is a bit of a mare but I think I can fiddle enough of the bits to go together in a relatively OK sort of way after testing the motors with a 12V power supply but maybe not. Time will tell.
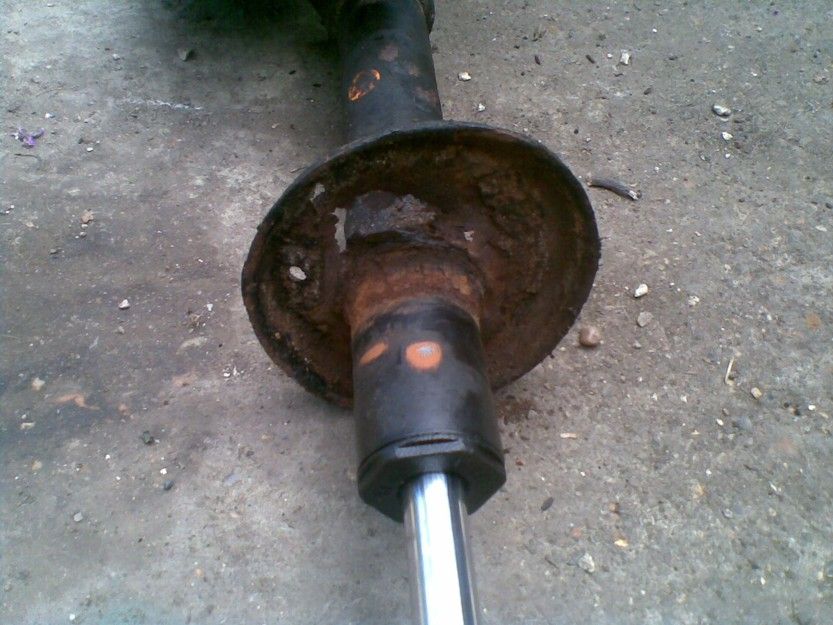
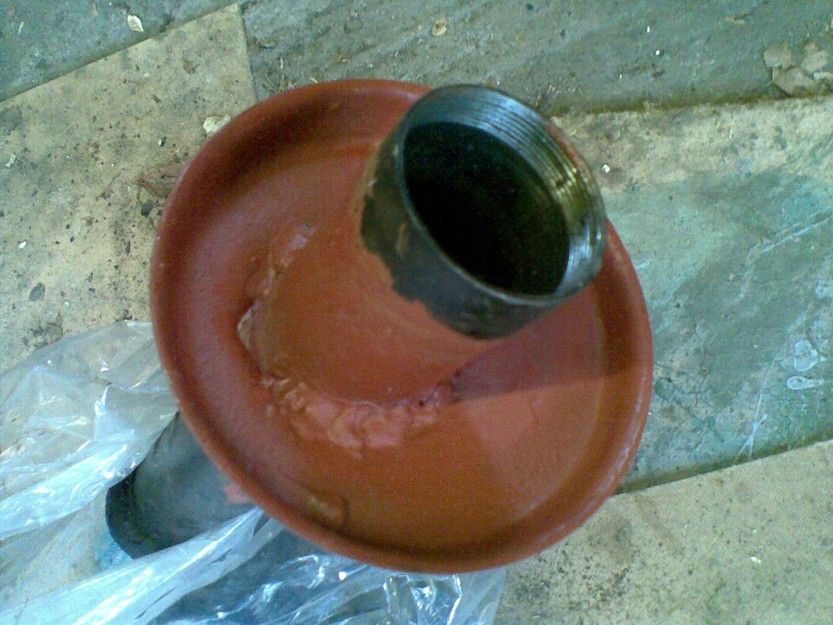
Firmly in mid-June 2014 and the twice-repaired strut comes back and is given a bit of a clean and a refill which shows that it has been expertly welded (if only I could weld like that) but, alas, it is leaking from two different places now. Hence, a strut insert for a 340 is purchased from the fleabay and will be used instead because I can't face delaying too long on this one.

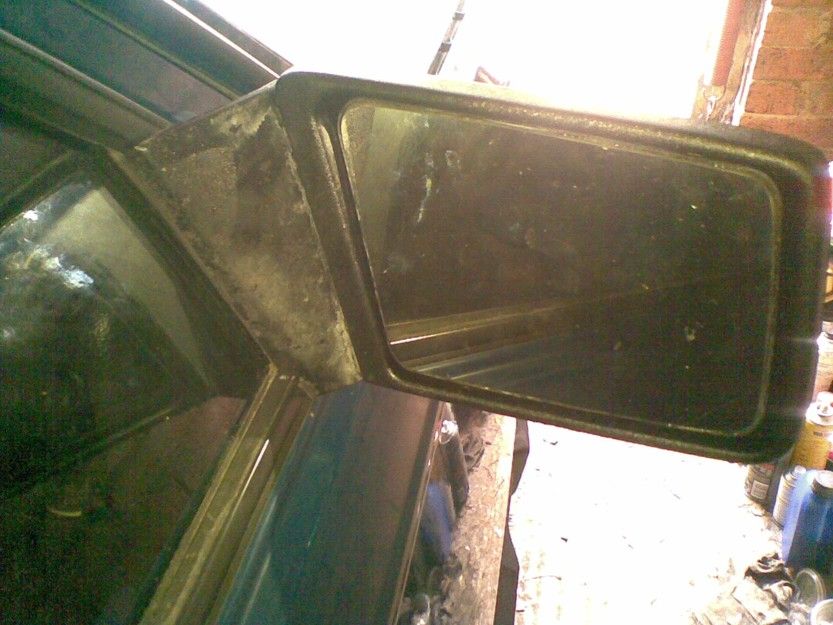
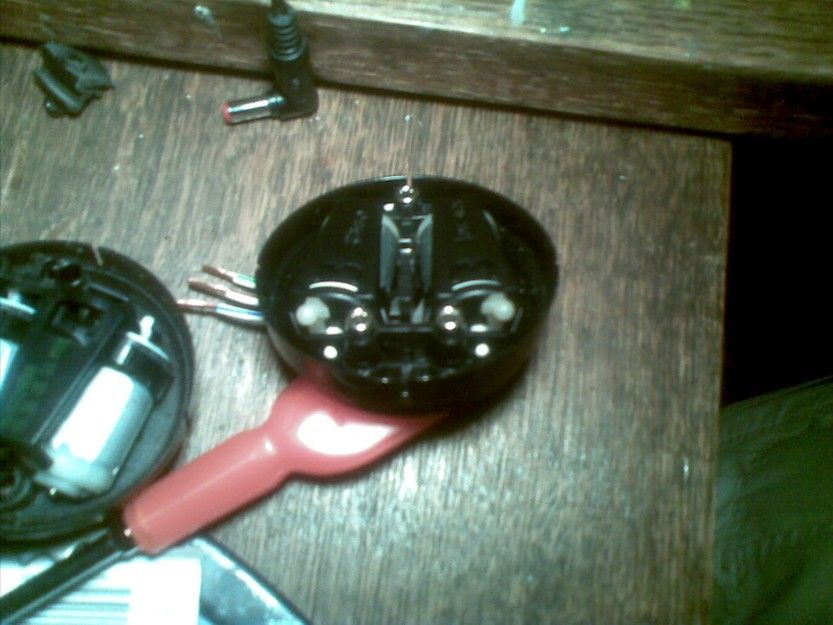
So, efforts are diverted to the driver's electric mirror which has been cobbled back together with the motor unit from a 440 and a bit of dismantling and swapping of parts. The metal plate has been painted with Hammerite and the new hybrid motor unit has been fitted along with sawn-off 440 screws and the original rubber seal, too. However the 440 motor is thicker than then 340 one and so the mirror glass sits slightly proud of the surround and although fitting it to the car shows that it isn't too bad, the glass has a habit of falling out, which isn't good for glass, but it survives, thanks to the wires for the heating panel at the back. Testing it also showed that it still does not move downwards, so there must be a problem with the electrical supply, probably from the switch unit on the transmission tunnel, which is tackled next.
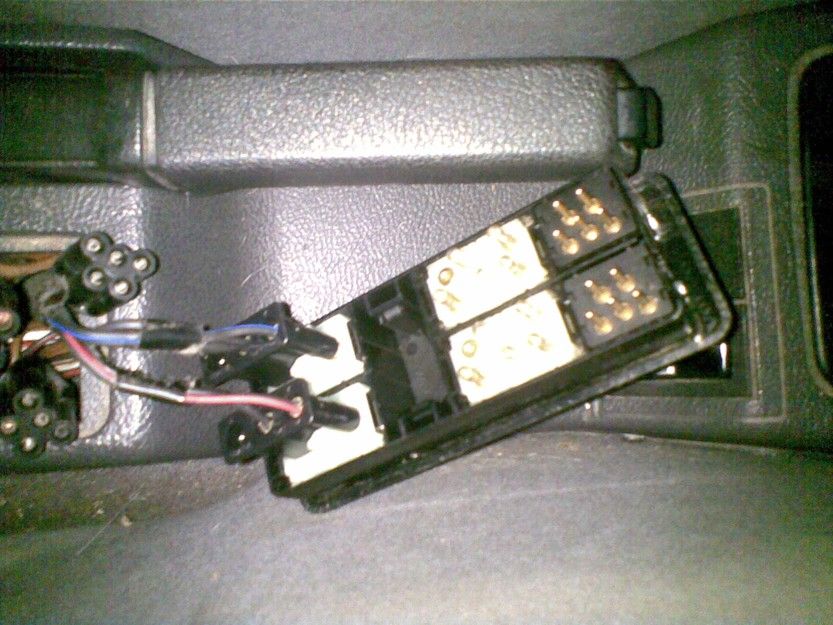

Swapping the connection block onto the other switch (great idea from the mania site) shows that it is definitely the switch itself which is dodgy and so it is removed and eventually popped open for a clean out to remove old grease and the quite stubborn corrosion from the contacts. The tiny, weeny bits of metal inside are a source of some amusement if not worry that one false move will result in one being lost, permanently.
Anyhow, after a slightly fraught effort to clean and re-grease all these little microscopic pieces of metal, the switch is put back together and refitted to the car which shows that, with a bit of pressure to the button, it is definitely working as it should. Still in the back of my mind is a worry that the hybrid mirror unit is a bit dodgy so I am working on a better solution which will involve taking apart the 340 motor unit more and eventually I discover that one can do this by popping out the hollow metal pins which hold it together and then unclipping the clamp which helps to hold the two motors to the base-plate.
As can be seen, I have issues focussing on the task at hand, but I am hoping that with a bit of luck I might be able to replace the little plastic runners which I broke.
Still in mid-June 2014 and more late-night fiddling plus an early start is making me super-hyper-active and probably in need of psychiatric help but, more importantly, I can report that I have indeed managed to use the 12 V power supply to wind some new plastic runners into the 340 mirror motor unit and have popped the clamp back in place and re-fitted the hollow metal tubes that supposedly hold everything together. So things are going in the right direction.
Hey man, the upper part of the original motor unit which the runners pop into with tiny ball-joints is now retrieved from the hybrid 440 one and slotted successfully back onto the original 340 one shown above. All the ball-joints and bits-and-bobs click back together awesomely well and the rubber seal is re-fitted.
Fortunately the thread in the holes which the motor unit screws into in the mirror housing had not been damaged by the wider 440 screws so that with a bit of bodging the original screws all do up nice and tight. Then we just need to hold the mirror itself in place with a bit of silicone sealant so that it sticks to the drive unit relatively tightly. One of the little plastic sliders which can be seen dangling off the back of the mirror does not want to stay in its ball joint so I will probably have to do without it, which might be OK, but then again it might not. Time will tell.
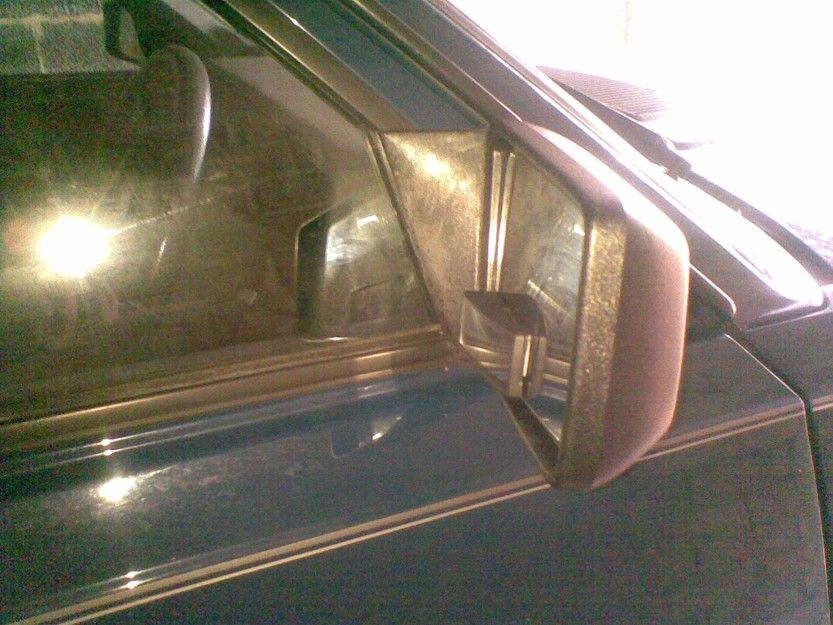
The getting-back together of the driver's side electric mirror is finally achieved with some contact adhesive which is needed to hold the mirror back-plate firmly onto the motor unit. Refitting it all back onto the car along with a little overtaking mirror leads to an unremitting ambience of abounding awesomeness, as shown below.
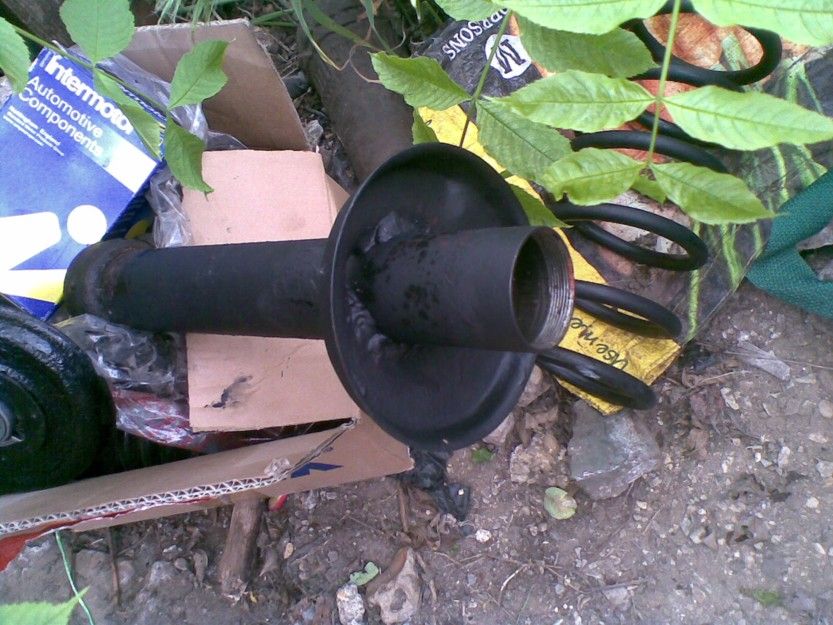
Meanwhile, a quick trial-fit of the new front strut insert shows that it is looking relatively promising, too, and this matter will be worked on over the coming weekends.
Indeed, the first weekend in July 2014 saw the strut reassembled and torqued-up precisely using the walking-stick method amid great rebuilding works taking place in the back garden.
The following day or maybe a couple of days later the strut is popped back into place on the car, the calliper refitted and the various nuts and bolts are torqued-up with reference to the Haynes manual.
Finally, the strut and various other bits and pieces around the front suspension are given a coat of thick black waxoyl, the car is lowered back onto the ground and we shall hope that it goes OK when I test it the following weekend. The new strut feels a bit tougher to bounce so this will require some careful checking on a few test drives around bends, on braking heavily and going over bumps, etc. Time will tell.
My efforts to get the car going again at the following weekend (early/mid July 14) are slightly thwarted by the fact that the battery is too flat for it to start. The battery has to be removed for an overnight trickle-charge which does the business and the following day the car is taken for a test-run which goes very well.
Hence, I decide to try and run it as an everyday beastie so all the junk in the 360 is swapped across to the 340. All goes relatively well till I find that the electric mirror motor on the driver's side has stopped working. A quick removal of the door car reveals that I have foolishly threaded the wires so that the connection block has been popped-apart by my opening the window!! Nevertheless, that one is sorted quickly and the beastie makes it to the sticks and back without an issue. Evil it up!
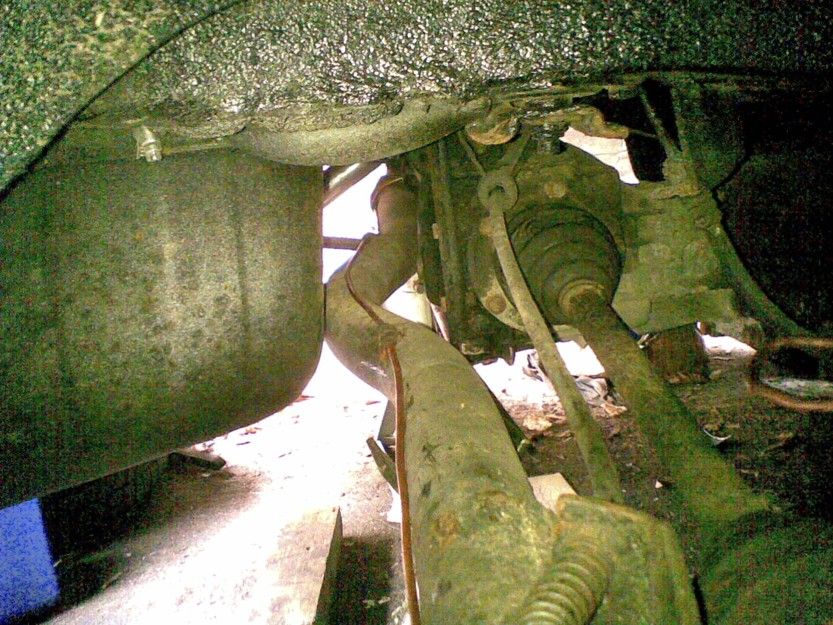
And evil it down, because after a couple of weeks, one of the rear brake cylinders starts to leak, so its back in to the garage for a bash at changing the seals but that all goes Peter Tong so we're back to getting a new cylinder and removing the old one with much twisting and breaking of the old brake pipes into the bargain.
Almost in mid-August 2014 and my mind is torn between the alternatives of removing the whole piece of pipe that goes across the back axle or just doing a local fix with a connector onto the old pipe. In the end I decided to do the latter, but that necessitates getting a brake pipe flaring tool, which is a new thing to me and time will tell if it works. Anyhow, the new cylinder can be seen on the right after everthing has been put back together again with much cursing.
Indeed time did tell and it didn't work because I couldn't get a decent flare onto the old piece of pipe that goes across the back axle, despite a number of attempts. I can get a reasonable flare on new copper pipe from the shop, but the old pipe on the car seems to be a bit thinner or a bit slipperier and just won't let the tool do its job properly.
So its time to give up yet again and the old pipe along the back axle is measured-up with a tape measure and a new professionally-flared one is ordered. However, yet again I make a bloomer by not ordering one that is long enough so although the old pipe is now firmly removed from the car (which is at least one step in the right direction, as of late Aug 2014) the new one does not fit, even though it has perfect flares. Bah humbug, so its back to the shop again with humble pie to ask for another pipe that is 5 inches longer than the last one they made for me!
Job done, sorted, and fitted back together again, nipple sawn-off where needed again, new nipple fitted in its place and brakes bled. A quick adjustment to the handbrake so that its now perfect, and finally ambient, wheel-less awesomeness abounds everywhere.
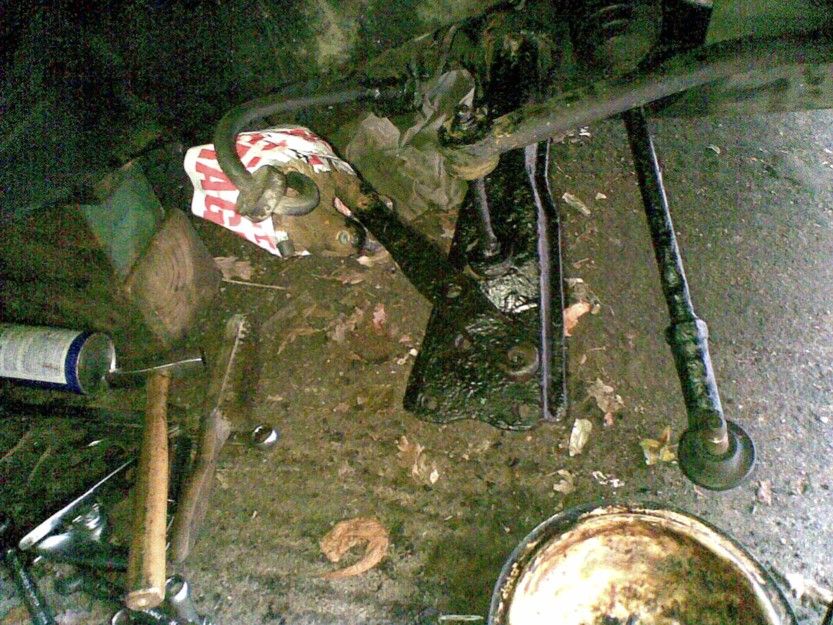
Thus, early Sept 14 and the car is back on the road again and off into the sticks. Works starts again on the 360 to remove the rear section of the exhaust and with the help of a blow-lamp and a heavy hammer, the part which bashes on the back axle whenever I go over a bump is bashed in so that driving on bumpy roads will hopefully be less annoying in future. Evil-up that September awesomeness.
Now slowly creeping towards the end of Sept 2014 and efforts have concentrated on the good old 360, where it all started from a decade ago. The main focal point has been the exhaust pipe, the rear section of which was removed and hammered in to attempt to stop its insistent banging on the back axle whenever the car goes over a bump whilst heavily laden. The pipe showings its hammered-in section is shown below. Its also clear that there is a fair amount of rust around!
Hence efforts are made to give it all a coat a waxoyl with a bit of the thicker black waxoyl underseal mixed in.

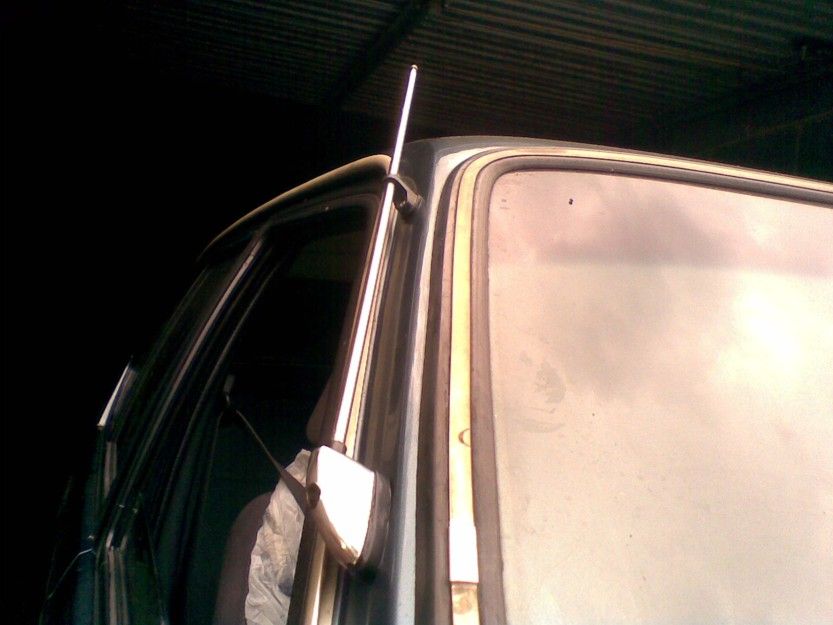
Whilst looking at some of these pictures I noticed that the banging on the back axle seems to have knocked one of the bleed nipples loose so that it is leaking brake fluid very slightly, as shown below. Hence the car goes up on stilts all round and is given a full brake bleed and the offending nipple is tightened more thoroughly this time so that similar problems are hopefully averted in future. A final touch has been to re-fix the radio aerial more firmly to the windscreen pillar so that it hopefully does not flop about in the wind, leaves and low-flying sticks that dither about in the rural atmosphere where this car sometimes ventures.
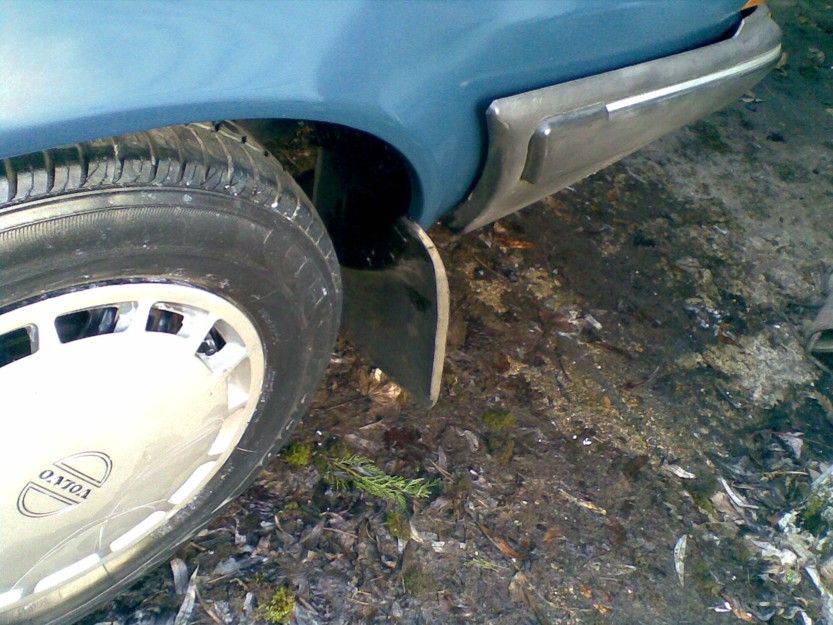
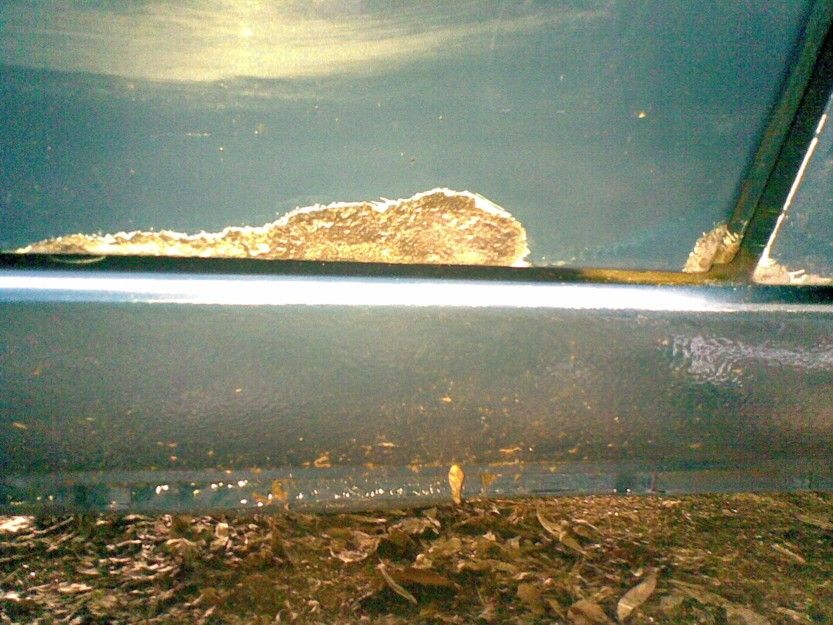
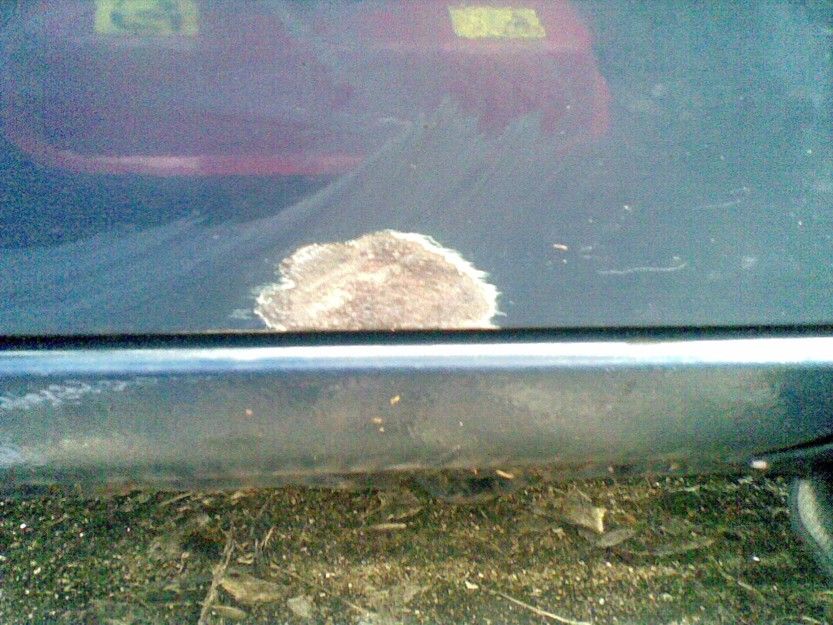
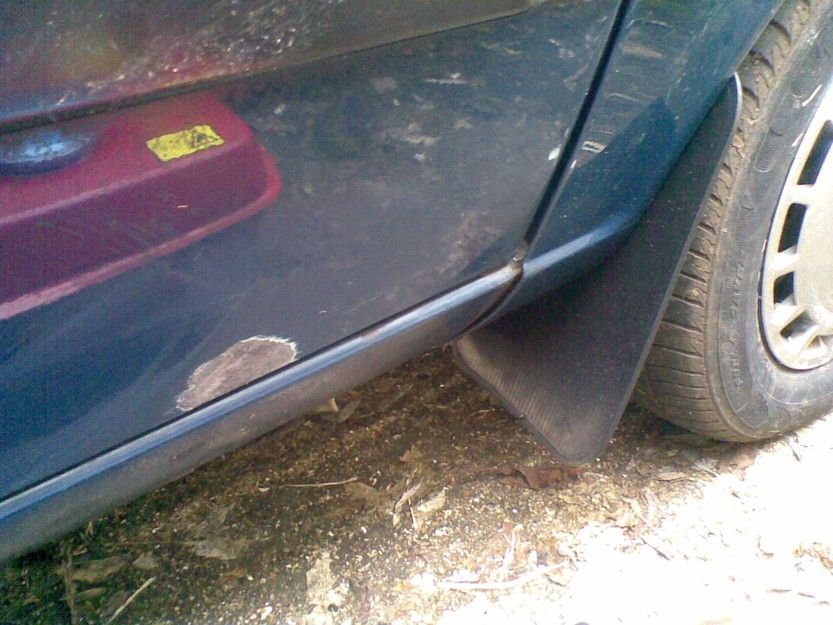
The last few visits to the blue beastie have been spent on re-waxoyling the passenger side front wheel arch, having the puncture repaired and refitting the long fallen off mudflap.
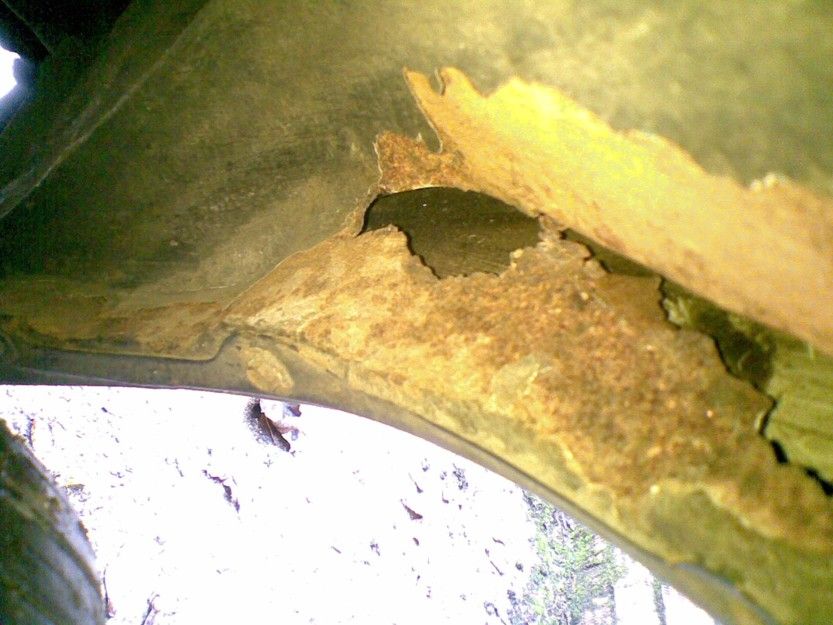
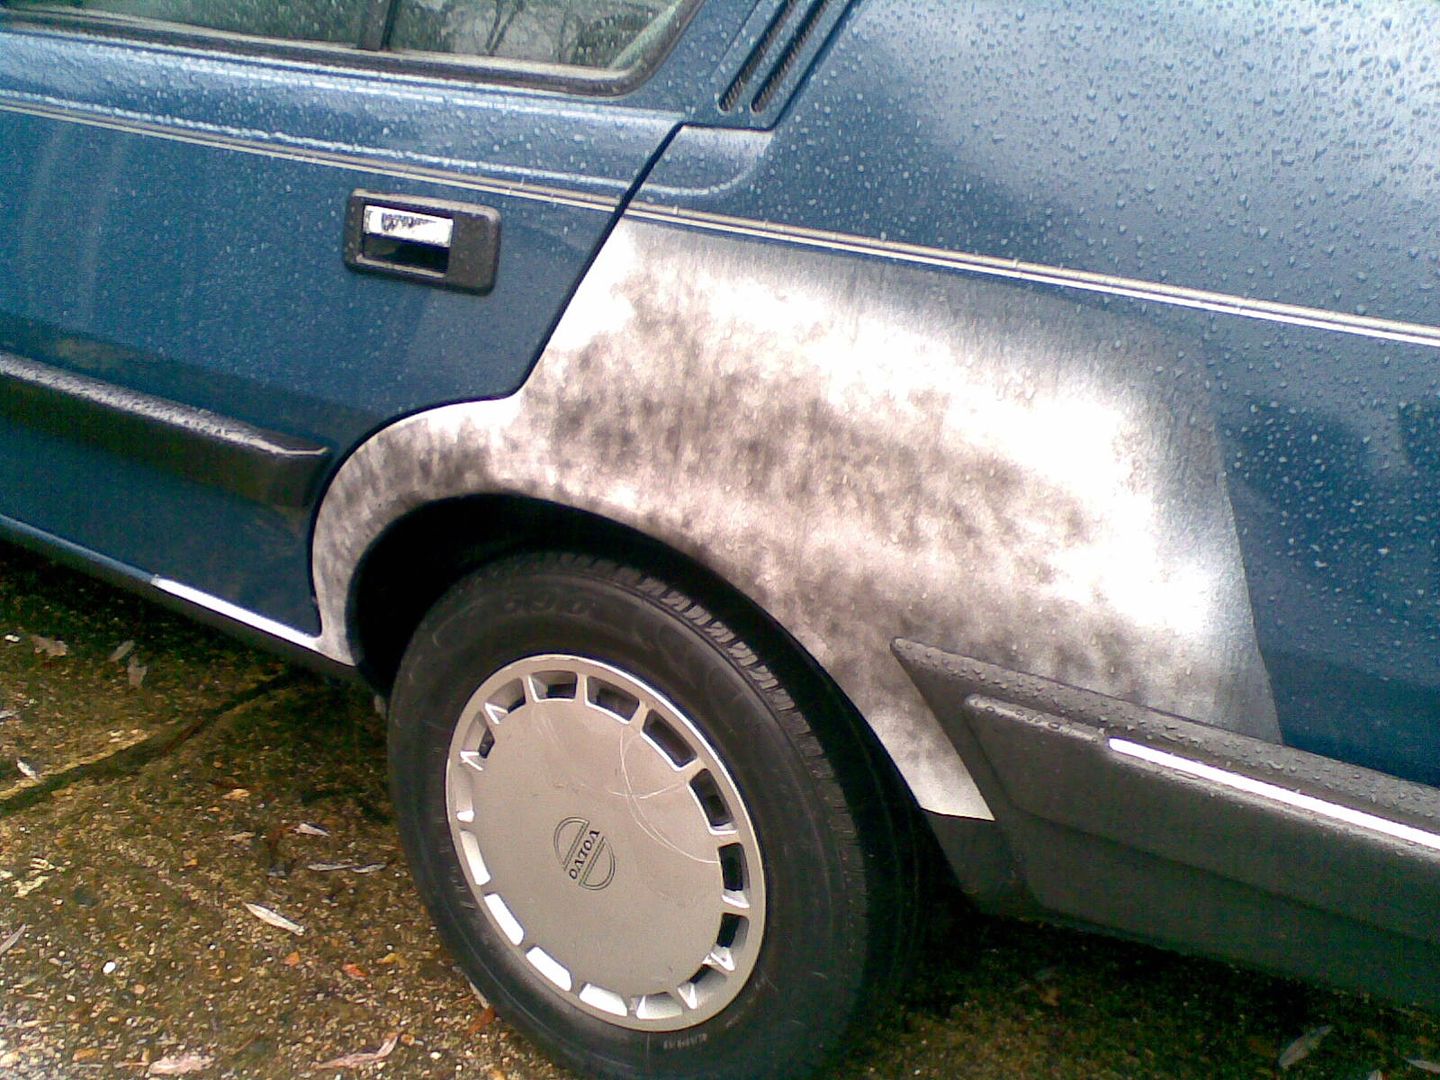
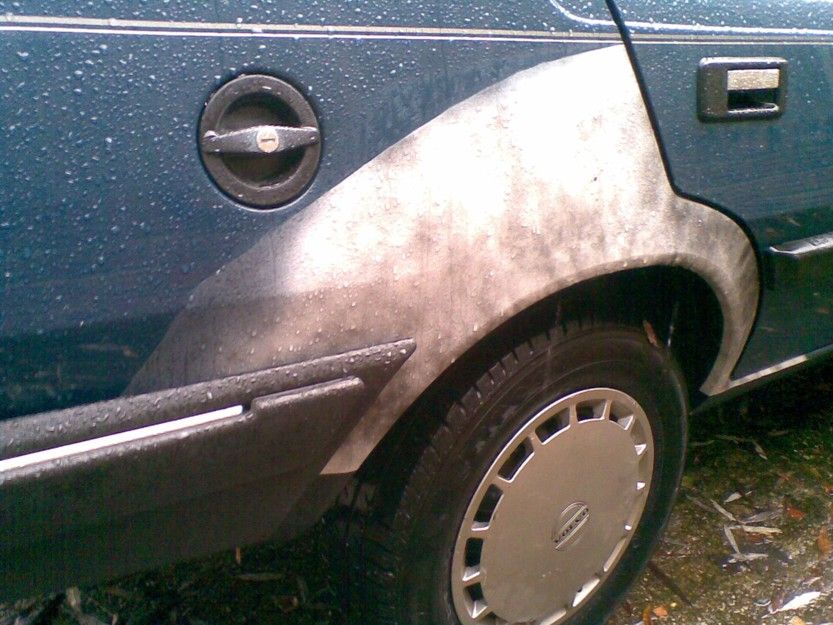
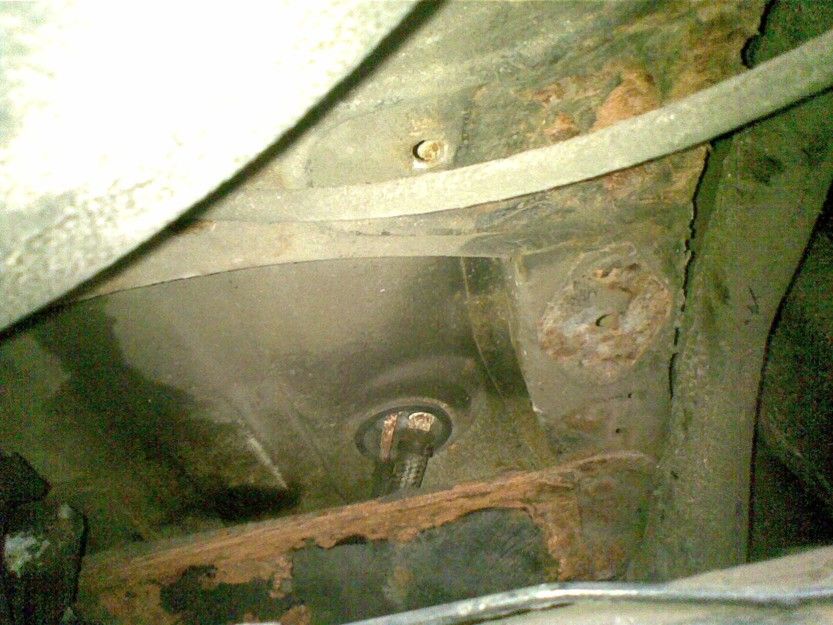
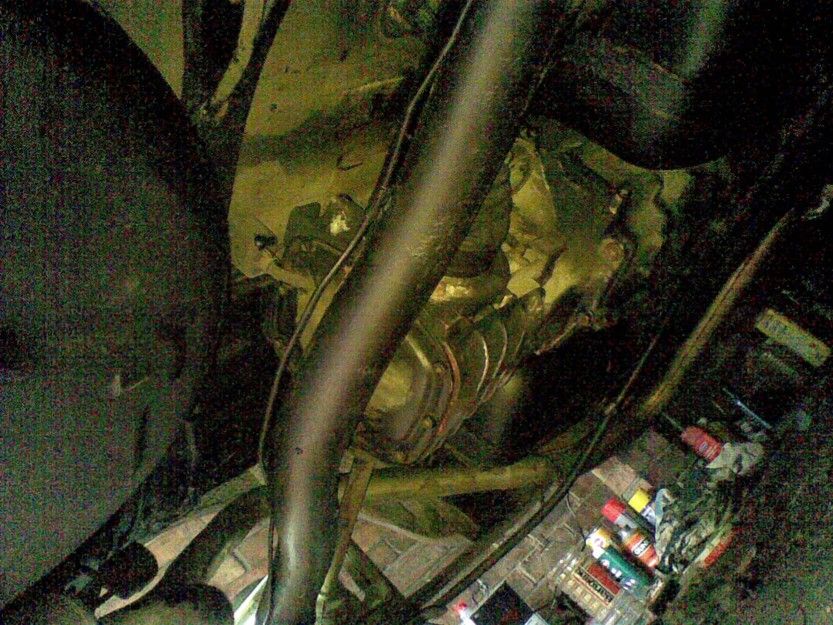
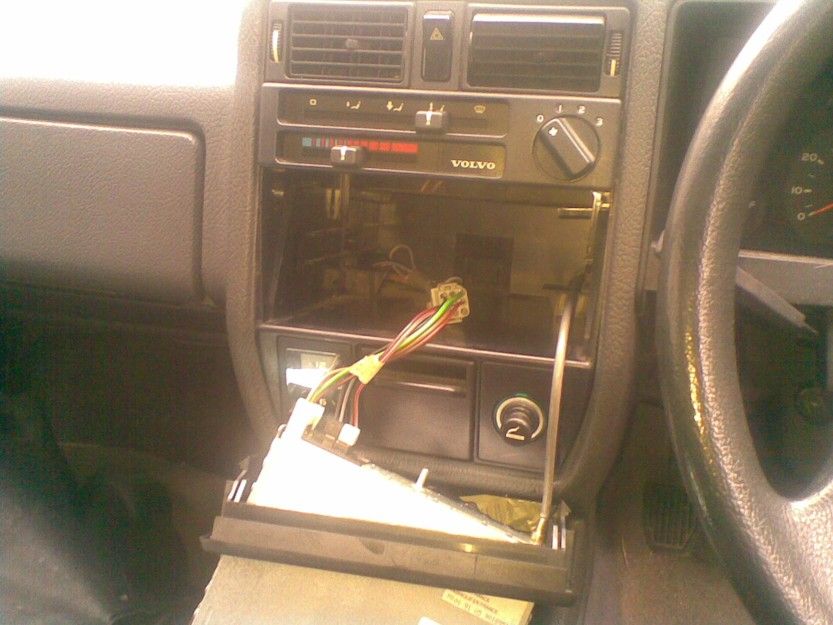
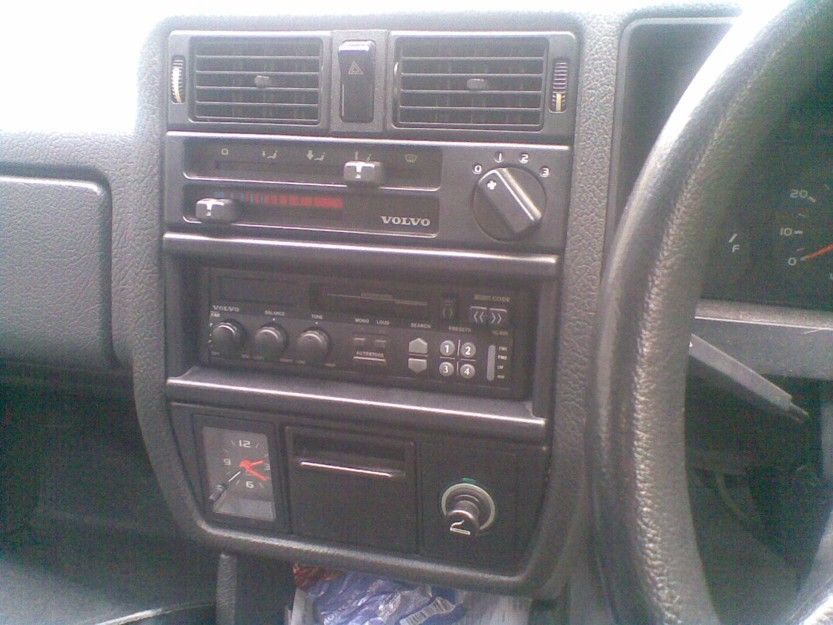
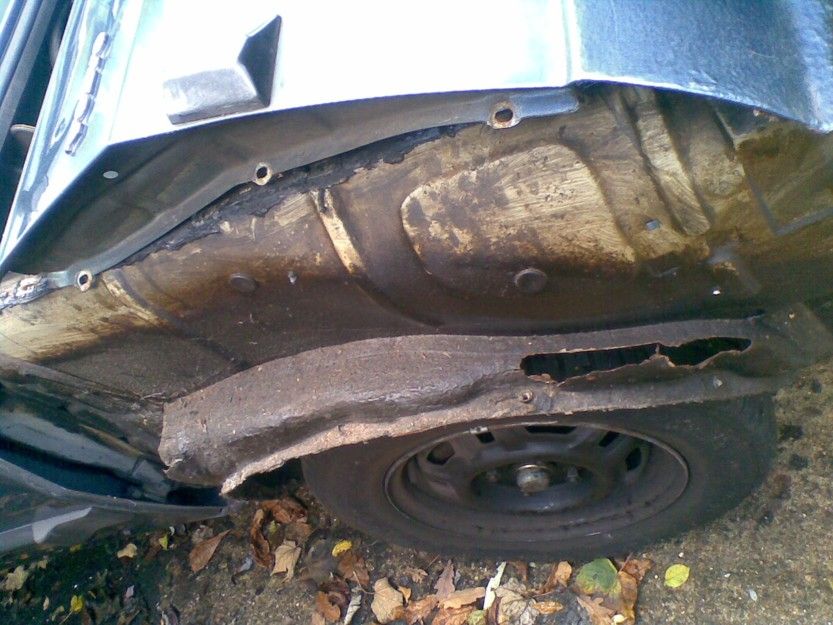
Efforts to waxoyl the driver's side, front wheel arch in mid-Oct 2014 have been a slightly game-changing exercise as my efforts to wire-brush off the dried mud revealed at 10-inch long hole which will need to be welded (see above). So this isn't going to be a half-hour job after all and will necessitate removal of the front bumper so that the wing can be removed. Meanwhile, a number of the dashboard and centre-console light-bulbs which were not working on the dark blue 1.7 have been replaced with much dismantling and removal of the radio and surrounds.
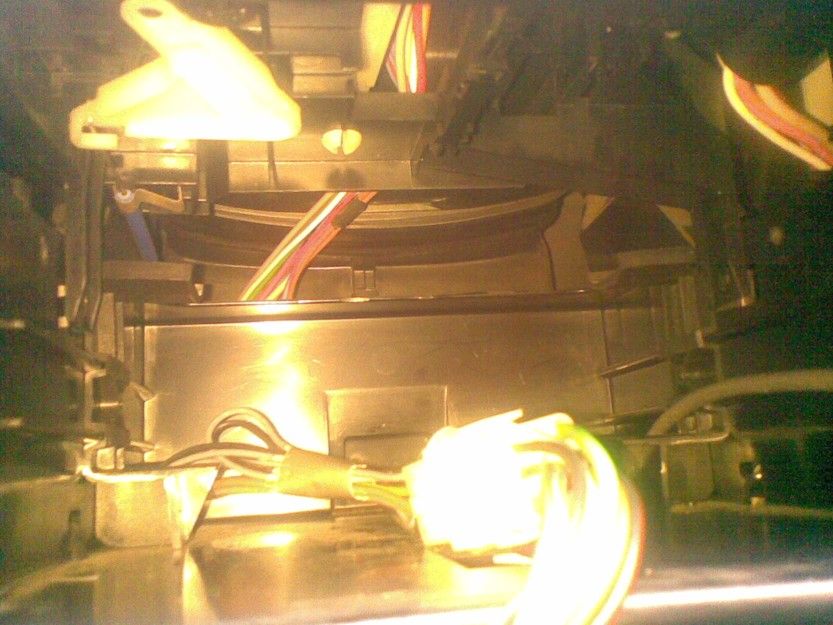
The lights and fittings are, very thankfully for this time of year, now all back in place and working fine.
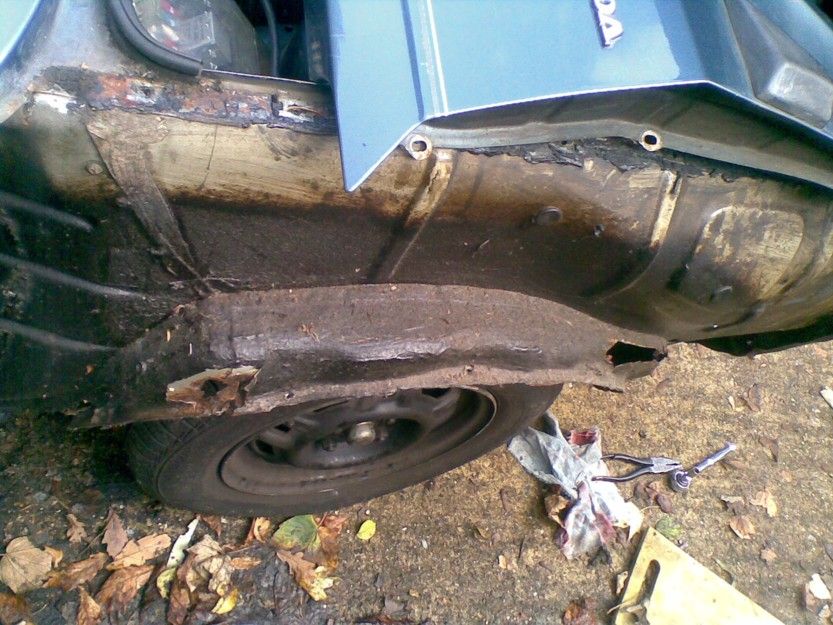
Its hurtling towards the end of October 2014 and things are eviling-up with removal of the front bumper and the driver's side wing over the offendingly rusty wheel arch. Said wing has been bolted back loosely, ready for the welder and attention will soon turn to removal of the rear bumper so that the welder will have an easier life trying to repair the rear wheel-arches too.
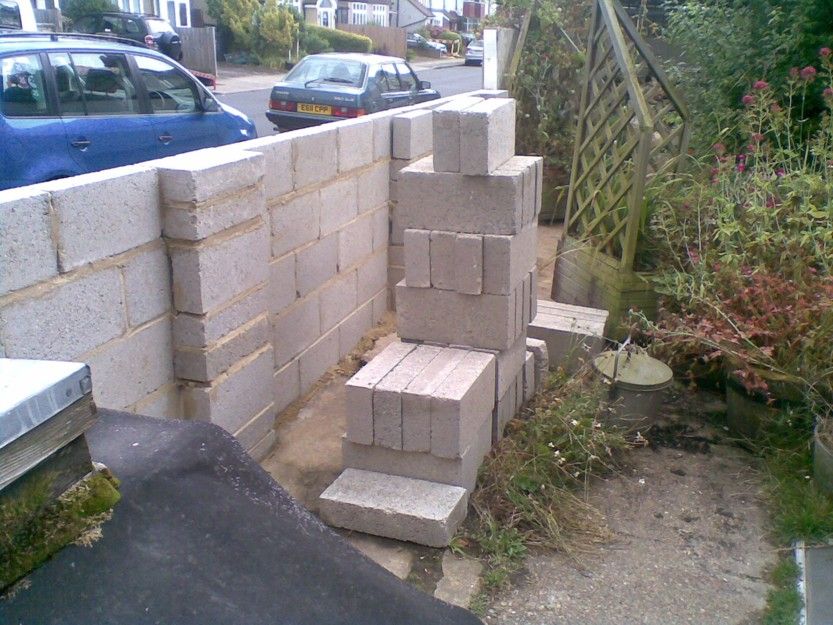
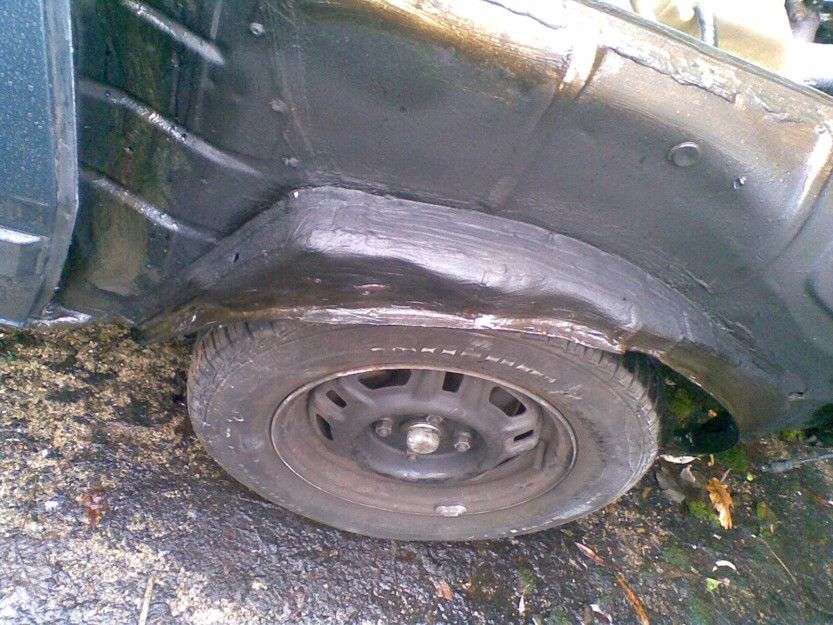
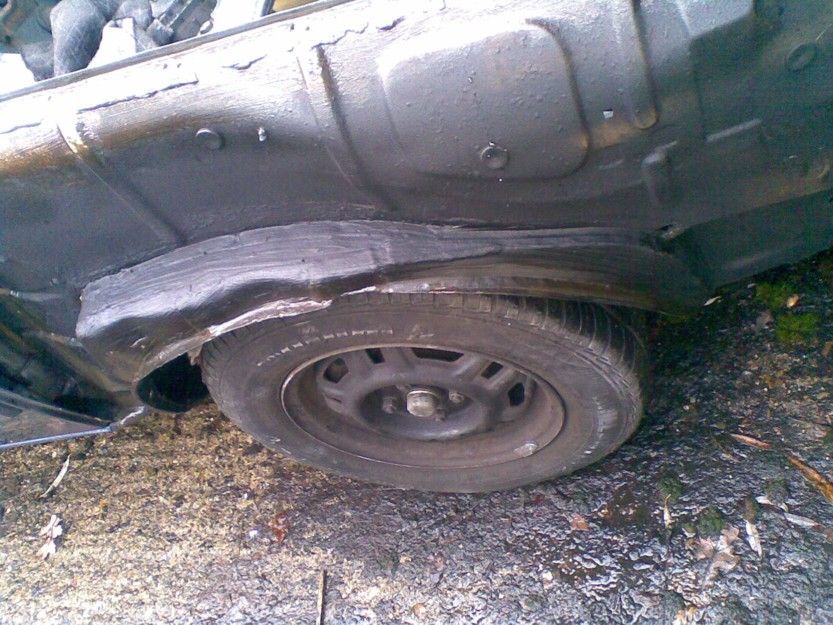
Mid-to-late-November 2014 and the welding of new rear wheel-arches onto this illustrious motor of outstanding awesomeness is complete as the photos below should show. The welder is unhappy about the colour-match but I think it is OK, to say the very least!!! Hence the car can, as of early-Dec 2014, be slowly put back into driveable form by having its rear bumper bolted into place. Soon to be done are the front wing and the mudflaps. Then it'll get a big clean-out.
The first weekend of Dec 2014 saw the rear wheel arches refitted and the front wing removed for an inspection of the welding work which looks awesome, as far as I can tell anyway.
The waxoyling is given a bit of a patch-up, both to the inner wheel arch and to the inside of the wing. Trouble is brewing at'mill with the dark blue 1.7 which is developing trouble with its rear lights and with the thermal cut-out in the heater resistor box. The lights are fixed by cleaning the contacts, etc, and likewise for the bimetallic-strip in the heater cut-out but the latter very soon becomes unreliable again. Hence pondering replacing the bimetallic strip part with a new one but have replaced the whole unit with a working second hand one that seems OK for now.

The heater cutout device was eventually repaired by soldering in an ETA-1620-1 switch and this seems to be working fine. In the run-up to the end of Dec 2014, the front wing has been fitted, as have the mudflaps and a few bits of re-spraying done here and there with an aerosol.

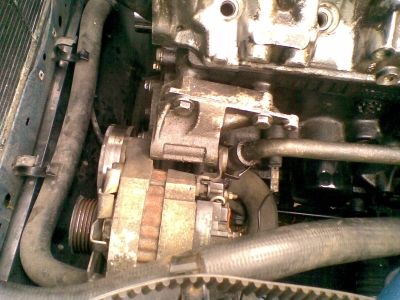
The car is given a clean-out and pressed back into everyday service (with new antifreeze), hopefully, to give the 1.7 a much-needed rest. Jobs to do on the latter motor car include fixing a dodgy electric mirror on the passenger side, some bulk-head rubber seals, a dodgy electric window on the driver's side, the choke warnng light which does not come on and the thermostat which does not seem to work properly, or at least the engine does not seem to be reaching the right temperature in the now very cold weather. In addition, it would also be nice to have the front seat belts re-sprung since although the webbing is in great condition, the belts do not recoil very well. Anyhow, a trial run with the 360 suggests that its alternator belt needs tightening-up, too, which should be fixed fairly soon to stop the ignition warning light from coming on all the time! Mind you, I will forgive it because it is looking pretty smart. In the longer term the plan with that one is to try and tighten or replace the detent spring (if that's the right name for it) on the gearbox selector plate to try to reduce slack in the gear lever.
We are still in 2014 and trouble brews with the 360. On attempting to retighten the alternator belt, the adjusting bolt snaps in half. A quick bodge is put together using a jubilee clip which seems to do the business and is held on by the nut from the original adjuster. Anyhow, a better solution will be to replace the bolt and this will be done as soon as the shops are open again. Another problem is that this car seems to be overheating, or at least the dials says it is getting very hot! Maybe I have not tightened the alternator/fan belt enough or maybe the thermostat is getting a bit long in the tooth or maybe the amount of K-Seal that has been put in the cooling system is reducing its efficiency too much. Another problem leers its head when I turn on the heater fan to try to cool the engine a bit more - the thermal-cutout in the heater box dies and so this will have to be fixed with another ETA device!
So what's next? top