January - June 2005
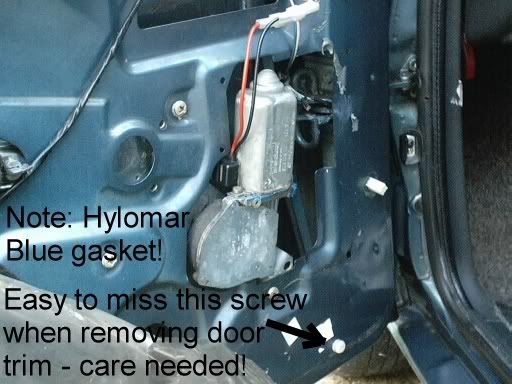
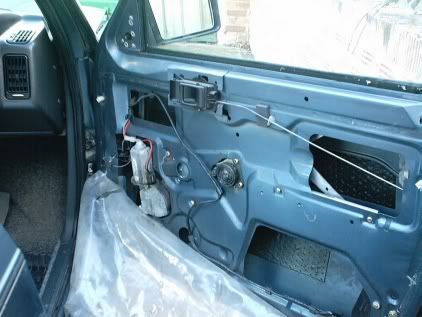
Weekend of 8th Jan 05 saw the nearside front electric window
fixed by
opening up the unit and greasing it copiously. The wing mirror
was
replaced with a second hand unit. All fairly
straightforward but
note that removal of the door trim was hindered by a screw not
seen
below the storage compartment in the door trim panel - luckily
it did
not break on my inept removal assuming it was just a clip that
could be
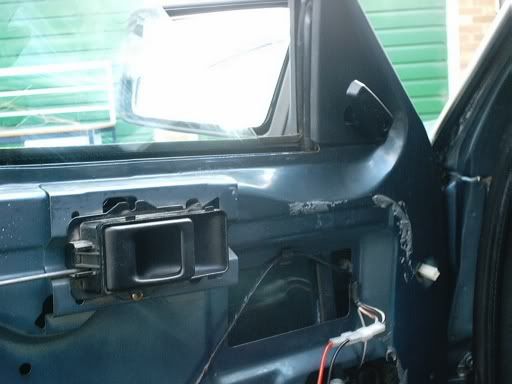
pulled out. Oh what foolishness. The new door mirror was only
dropped
once and very luckily survived. Door hinges, catches and window
mechanism oiled and greased and other bits of trim sorted.
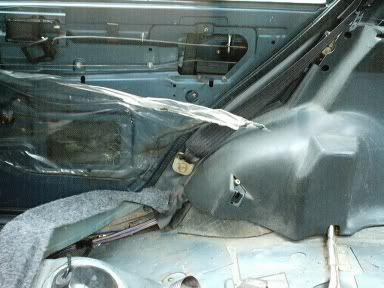
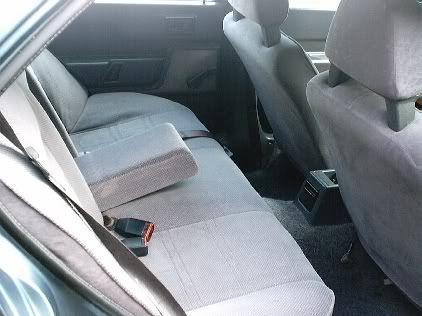
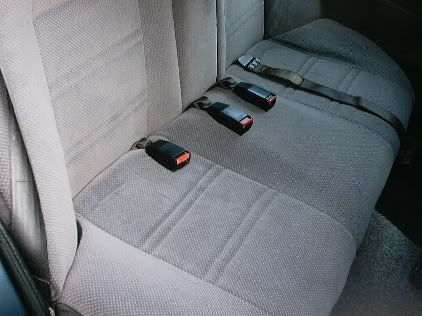
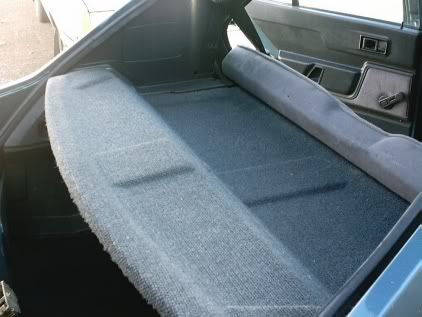
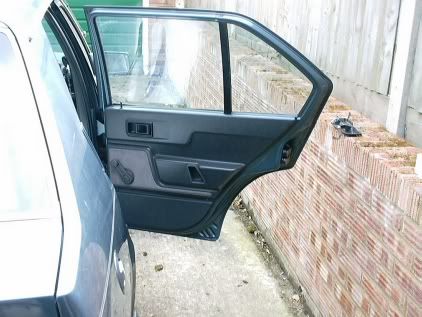
Weekend of 16th Jan 05 saw the start of work on the offside interior and removal of rear seats for vacuuming and washing. The picture shows them drying out after their clean-up. The dirt and junk under the rear seats was cleaned out.

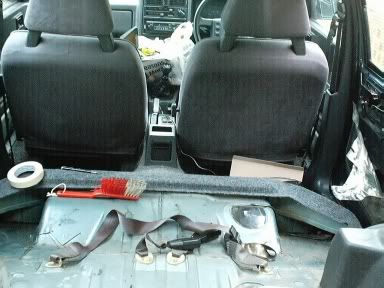
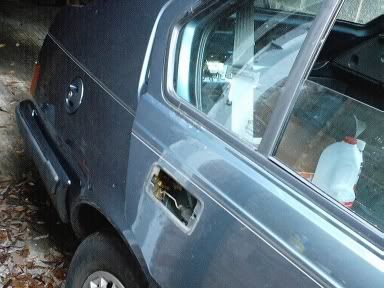
The rear offside broken door handle and interior door-pull mechanism (which was also broken) were removed for replacement with second-hand units. Other cleaning jobs done to headlining and rear carpets.

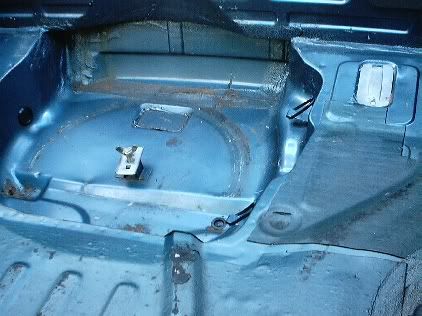
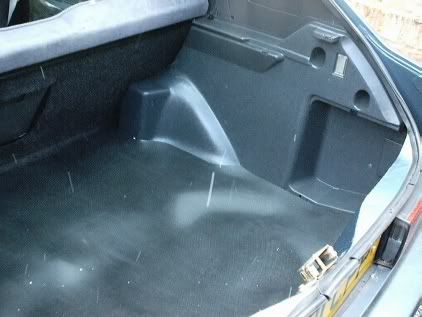
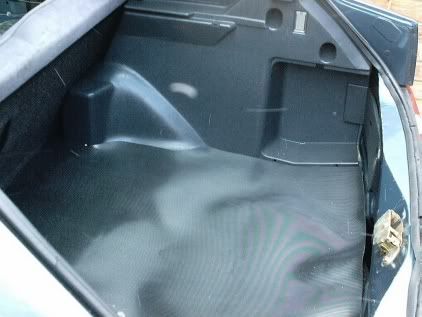
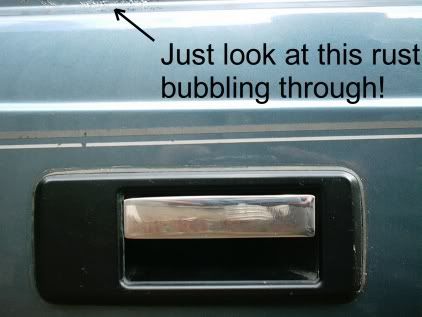
The weekends of 22/1/05 and 29/1/05 saw work to the boot
including cleaning out, rubbing the plastic trim with
colour cut to tidy up the many scratches, washing the boot rug
(plan
is to make a smarter rubber cover for the old rug), start of
work to
the hatch, including replacement of the wiper motor. Removing
the spare
wheel revealed some spots which have rusted right through.
Backseats were re-fitted and second-hand plastic floor-mats. Perhaps Blue Bess is starting to look how she should.
Weekend of 5/02/05 saw some work to trim e.g. cleaning front
carpets
and new glove box which arrived in the post, sadly with some
damage
which was repaired with superglue - will not show. Rear wiper
motor,
new blade and trim cover panel now fitted and working fine. Rear
screen
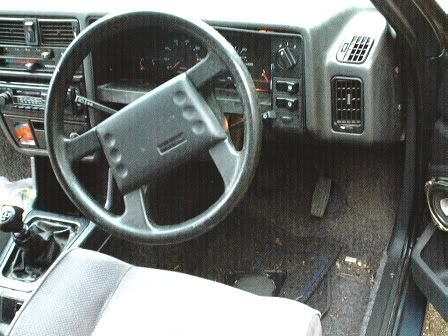
heater and washer both tested fine. The plan is
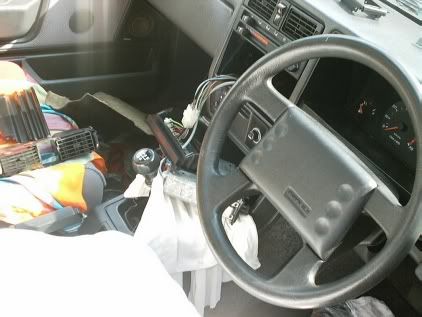
to move on the transmission tunnel cover and the driver's
instruments
which the pictures below (don't) show still have considerable
grot
to be dealt with.
![]()
Weekends up to the end of Feb 05 have involved cleaning out the
transmission tunnel trim as well as work on repairing an
old boot board - a gift of a colleague from a burnt out 340
found in
a kent scrapyard a few years ago. Use of glue, clamps and papier
mache
technique plus a coat of paint restored it to a reasonable
condition
and it fits. Alas, its not the original colour (blue) but it
matches
well.
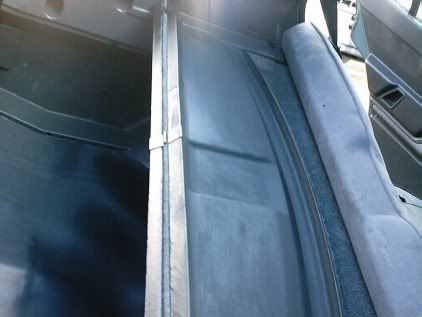
Feb 05 has also seen a new rubber boot mat, cut to the pattern
of the
original felt mat. Secondhand trim items arriving in
the post that have been fitted include front near side speaker,
smarter
ash trays and gear lever gaitor, strut top trims under bonnet
and the
plastic panel above the windscreen. The latter marks a minor
achievement
- finding this panel broken was one of the most despairing
factors when
I first bought the car and was coming to terms with the scale of
the
work
needed to tidy it up! Front near side underdash soundproofing
and trim
re-fitted and plastic door hinge caps fitted all round. The
pictures
below
show the new boot mat and the white streaks.... yes, they are
are
falling
snowflakes.
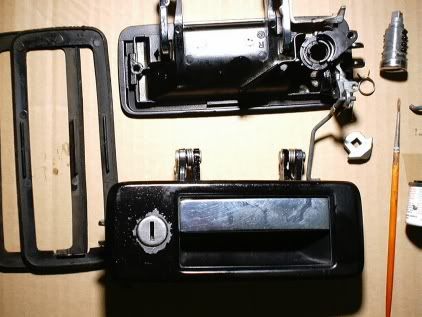
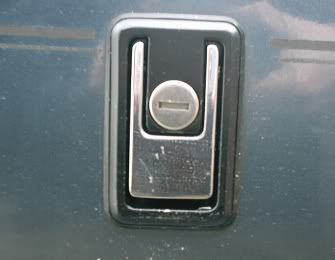
The weekend of 6 Mar 05 saw the repair of the drivers door lock
which
had been somewhat knackered by someone's efforts to break in at
some
stage (clearly a thief without an eye to his street cred). What
should
have been a smart keyhole was a mangled cavity - another
despairing
factor when the car was collected. However a few hours spent on
removing the old lock, swapping the levers into a second hand
unit, a
touch of paint and re-fitting it to the car has finally restored
the
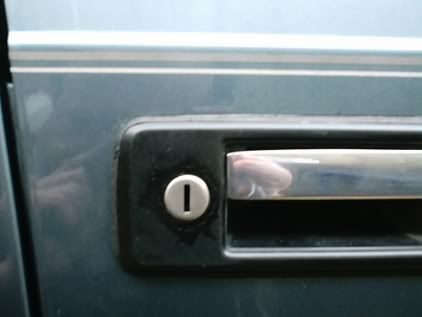
exterior appearance of the door lock to a wonderous condition.
Stare
hard
at the photo of the door handle and you will make out the
reflection of
a balding, ugly man photographing his keyhole - only on the
internet!
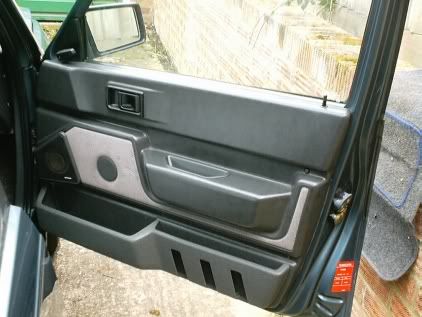
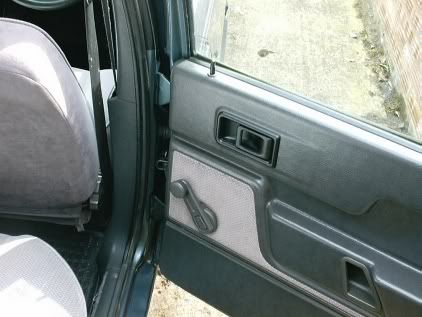
Likewise, the interior door trim was re-fitted to similar
splendid
effect (see below) along with second hand door pull and speaker
in
better condition than the original items (infinitely
better).
Weekends up to and including Easter (27/3/05) saw replacement
of the boot seal with a new genuine volvo item (only half the
price of
the car) and the construction or rather cutting-out and
painting of a plywood cover for the spare wheel in the boot.
Work on
the front dash and centre console has confirmed that all seems
to be
reasonably present and correct without too much meddling by
former
owners
- see below! The air vents each side of the hazard switch have
been
replaced with second hand items in immaculate condition and
likewise
the inner offside rear door handle has also been replaced. Work
on the
radio will involve replacing the same said or sad item with a
genuine
80's volvo
unit - just waiting for the cables to arrive. After this all
that
remains
to be done to the domestic parts of the car is to fix the boot
lock and
to replace the rear offside door handle.
Some things still don't work - like the integral warning
lights for the following switches: hazard lights, fog lights and
the
rear windscreen heater. All very puzzling but no doubt will be
cured
eventually.
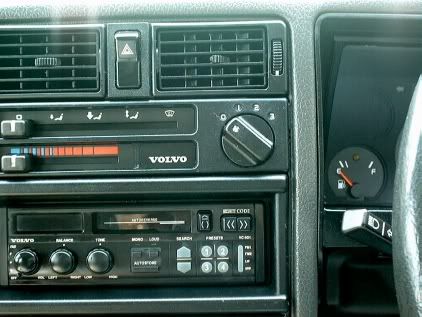
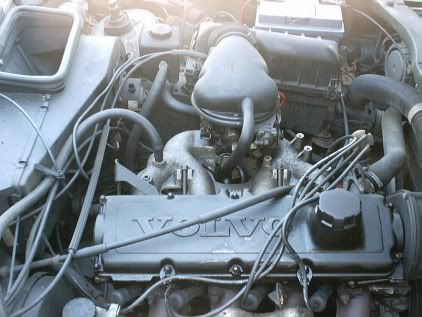
Weekend of 3/4/05 saw the replacement radio, a
VC601 (see below) wired up, decoded and working fine. Work under
the
bonnet has begun with cleaning out the mouse nest (see below)
and
replacing one of the bodged up battery terminals.
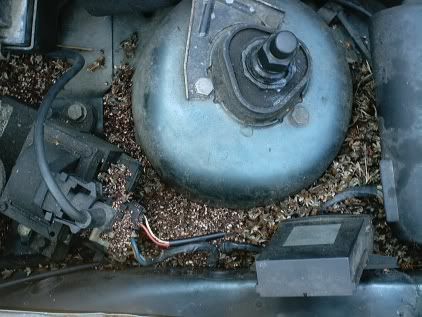
Other under-bonnet work included replacing some hose clips,
cleaning
out the expansion tank, refilling with anti-freeze and general
clean up
of engine bay with paraffin and Jizer. The pictures below were
taken
prior to clean-up!

Work on weekend of 10/4/05 saw the boot lock fixed finally by
replacement of inner lever and its little plastic catch. All
working
fine.

In addition, the rear offside door lock was replaced with second
hand
item and the interior trim refitted. Finally, its looking like
the
interior trim jobs are almost complete. Truly magical moments
for
Bessie Blue.
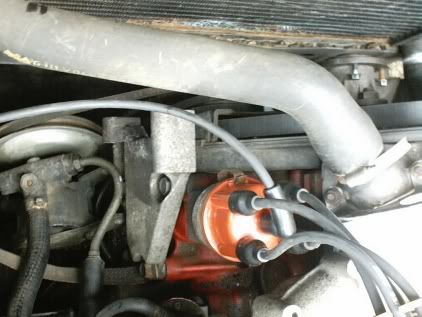
Work on the ignition shows that the leads, plugs
and distributor cap are reasonably OK. Just corrected a slight
180
degree misfit of the dizzy cap and discovered that one of the
plugs
(number 3 from front) has been badly cross-threaded into its
hole. Lets
hope the spark plug thread chaser can sort this out or its a
head off
jobbie which is not to be entertained lightly - thoughts of
warping
heads
and professionals causing yet further engine abuse. Work on the
rear
door confirms just how bad the rust is below the quarter light
which
will eventually need a window-out job on both sides. This will
be left
to the very last of the last.
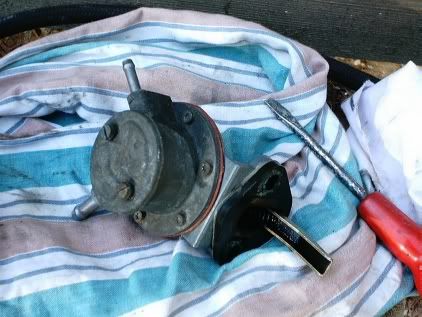
Weekend of 17/4/05 saw some dismantling and checking of the
fuel system. This included cleaning out the float chamber of
the carburettor, changing the fuel filter and removal of the
fuel pump
for checking the diaphram, etc. All seemed fine except for the
fact
that
the fuel pump bolts were only finger tight - perhaps they had
worked
loose giving low fuel pressure that was responsible for the very
poor
starting. Time will tell. The thread of the number 3 spark plug
also
was restored - all life-changing stuff!
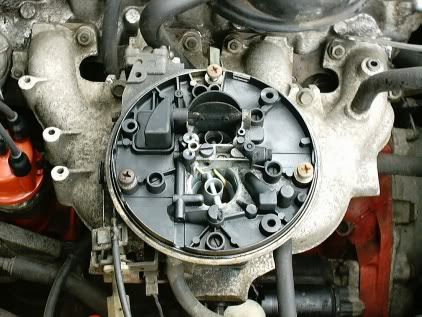
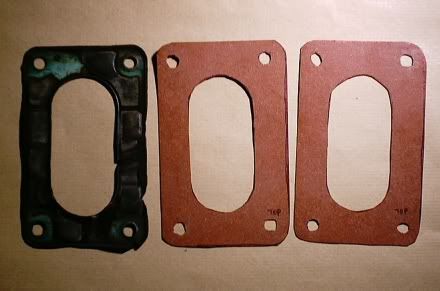
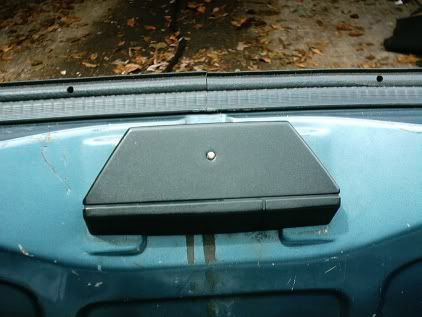
The next few weeks (up to 21/5/05) saw much meddling with the carburettor (see below) to try and sort out its various problems. The car starts on the button which is a big improvement but on warming up it idles much too fast at 2000 rpm. Attempts at adjusting the mixture and slow running screws all have no effect at all on getting it to idle at a more reasonable tickover speed. Likewise replacing the gaskets between it and the inlet manifold had no effect either. Finally, on dismantling it again, a sealed-in washer for a plastic terminal of an electrical connection breaks up and then decide to try getting another carb from somewhere. Find someone who can supply two for 50 quid. Bargain. In amongst this doom and gloom one ray of hope is the arrival of a new boot catch cover, as shown below. Marvellous.
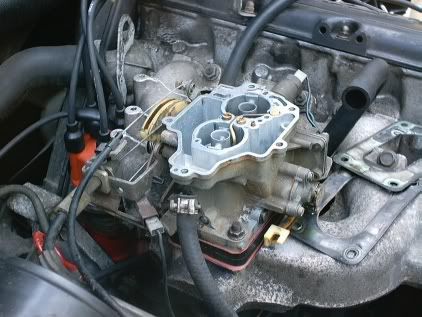
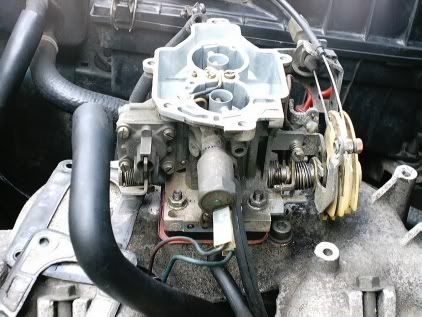
The long weekend of 28/5/05 saw the problem with the carburettor
finally cured. It was operator error. I had reassembled it
incorrectly
such that a plastic pivot in the throttle flap mechanism was not
engaged in the choke cable mechanism. Anyhow the two spares had
yielded
the final clue as to what I had done wrong and a replacement
washer.
Bargain. All put back together properly with better (i.e.
thicker)
gaskets than above. A few tweaks to the tickover speed and the
car now
idles well and the mixture
has been set by strengthening it (i.e. undoing the mixture
screw) until
it runs smoothly. I could not set it with a Colortune plug due
to
difficulty
in seeing a yellow flame as the mixture is enriched - this
engine must
be
too modern!
Removing the valve cover and checking the valve clearances
showed all
to be OK (0.012") so no new shims needed and the nightmare of
fitting
them avoided altogether. Work on replacing the cam belt begins
with
removal of the viscous fan, the alternator pulley and the upper
cam
belt cover.
Weekend of 4/6/05 saw the cam belt replaced with a new one which
involved removal of the power steering pump, radiator shroud and
then
the main
pulley. With advice from the volvo300mania website, this was
removed by
putting spark plugs back in, chocking the wheels, putting car in
5th
gear,
putting on the handbrake and then using a large wrench on the
central
bolt.
The lower cam belt cover was removed, and the old cam belt slit
all
along
the middle with a carpet knife. The outer half of the old belt
was
removed
and the new one was slid into its place after pulling the
tensioner
back.
The remaining half of the old belt was cut out and the new one
slid
fully
into place. The alignment of the timing marks on the engine was
checked
after several complete turns and the process of putting it all
back
together
begun with the cam cover being re-fitted!
Weekend of 11/6/05 saw the old and knackered radiator (see above) removed which unfortunately revealed some rusted-through metal near one of the radiator mountings. Scraped off as much rust as possible and painted it with black Smoothrite. The main pulley, alternator and power steering pump were re-fitted with new belts. The thermostat was replaced and the valve cover re-fitted along with viscous fan, plugs and leads. Just waiting for the new radiator - hard to get these days.
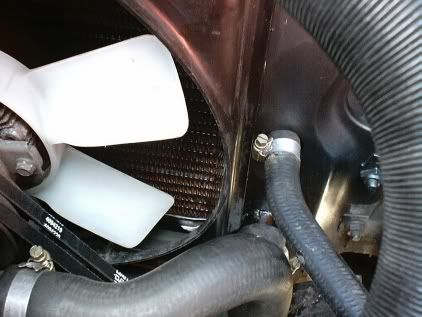
The weekend of 18/6/05 saw the new radiator fitted (see above)
and the
cooling system re-filled. The oil and oil filter were changed
and other
bits and pieces done e.g. the fuel cutoff relay for the carb
(black box
near
the renix) was replaced with a second hand unit in better
external
condition, the hose on the outside of the heater box was
replaced and
the cylinder
head leak tackled with Captain Tolley's Creeping Crack Cure. The
engine
seems to start and run well. What next?
top