January - December 2022
Early March 2022 and I am reeling from hearing that the ULEZ
will likely be extended to New Malden next year and my ovlovov
bangers will therefore have to be SORN'ed. Still there are
selfish £-signs in my eyes at the thought of not having to tax,
MOT and insure them, on a reduced pension. Just keep them safe
and quiet. Not sure its a good thing though. Anyway, the 360 was
put back into action for a few days earlier in the year but the
water pump started leaking so it's been back in storage again
for repairs during the first few months of 2022.
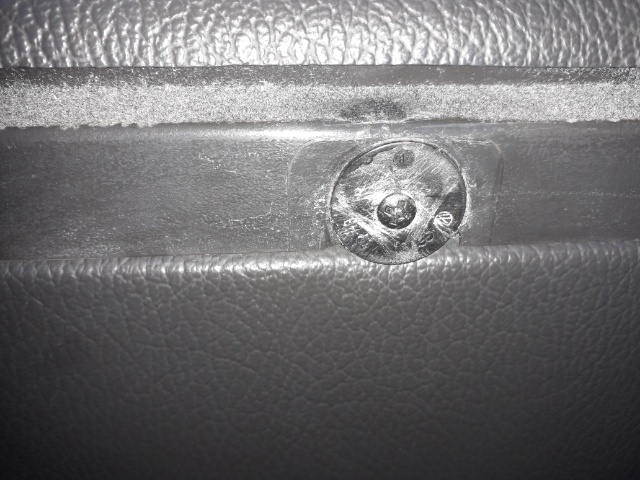
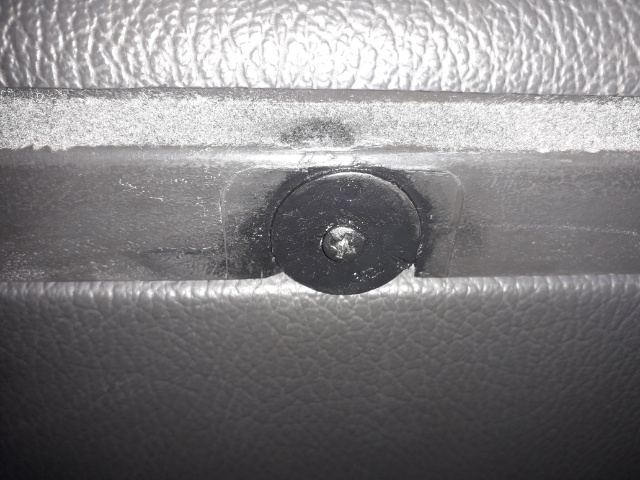
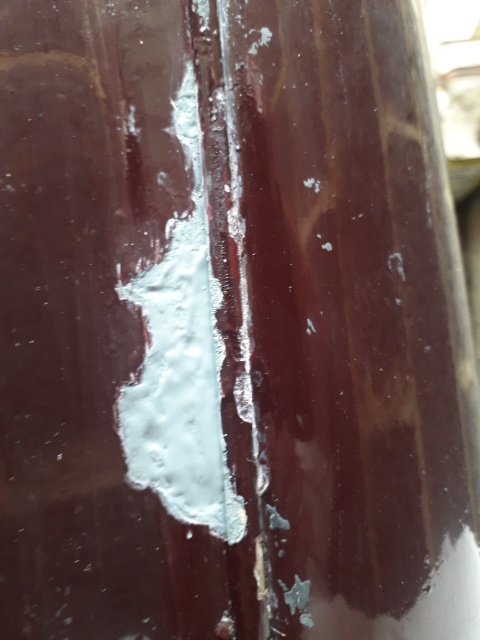
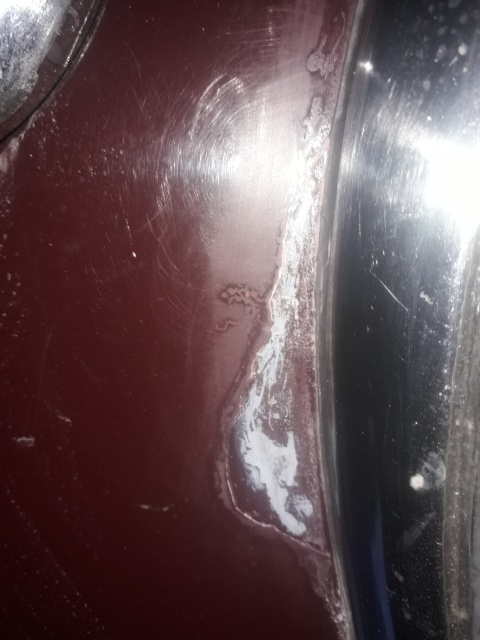
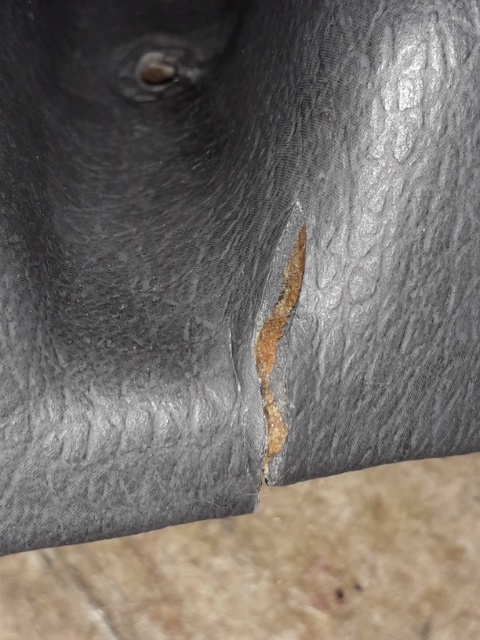
I'm becoming a fan of cheappie art-shop acrylic paint which I used to tidy up the glove box repair. I think before and after shows some benefit.
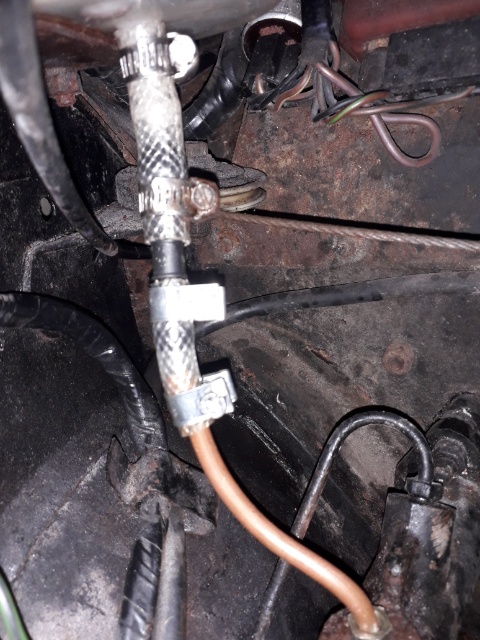
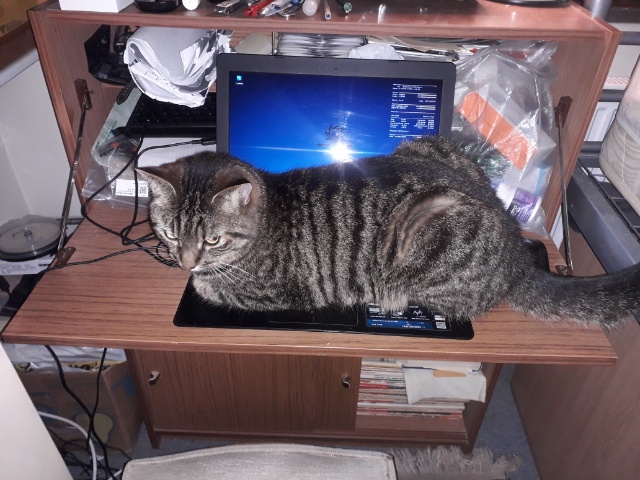
Now for an epic low-pressure brake hose repair on Rover P5 and a lesson on the hazards of cats and computing.
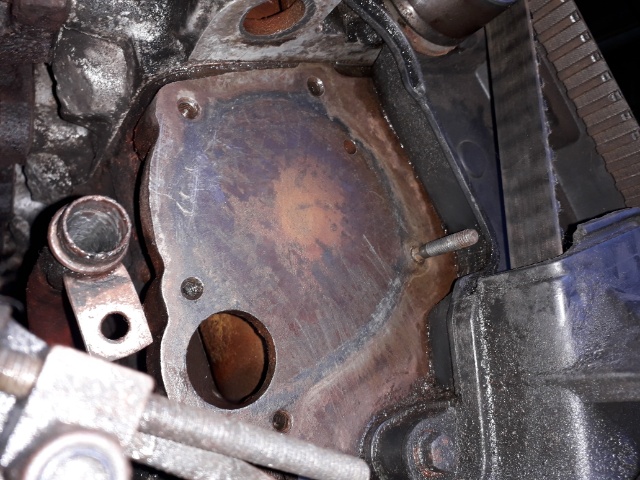
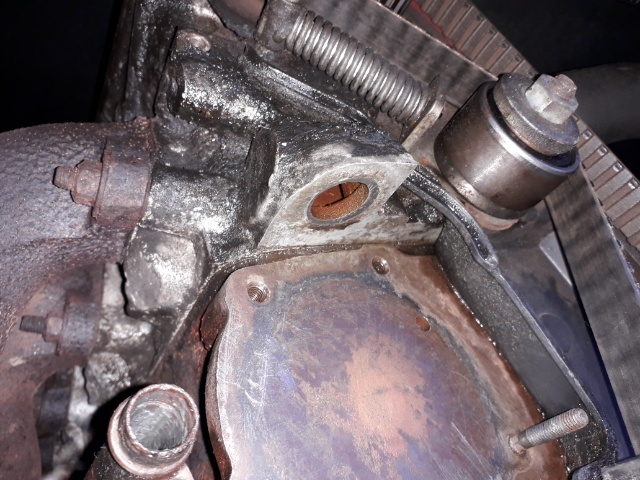
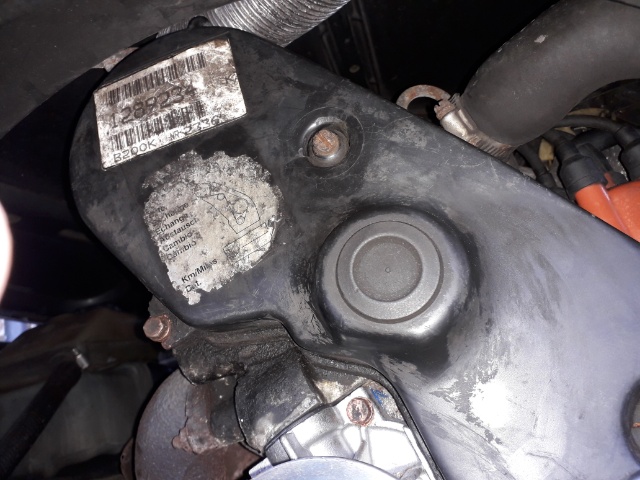
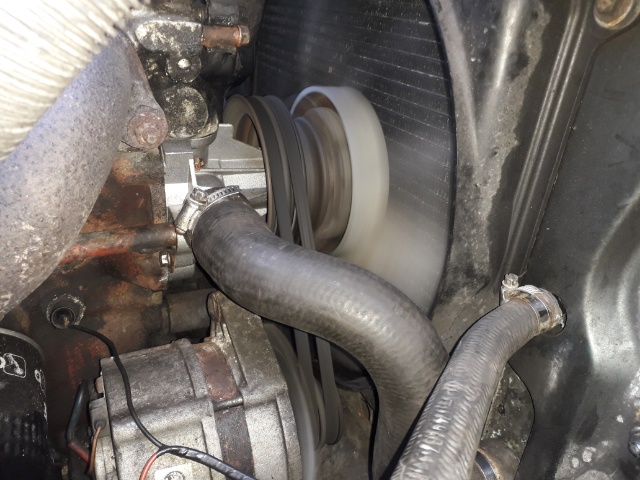
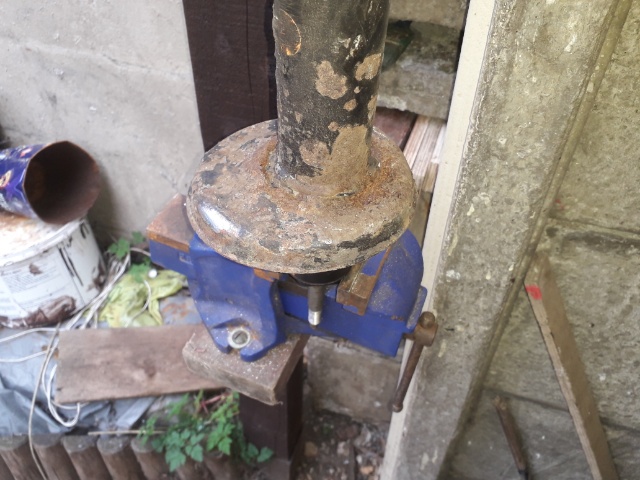
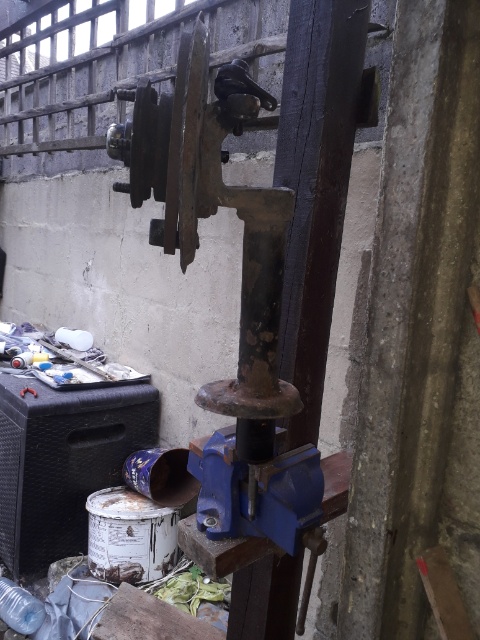
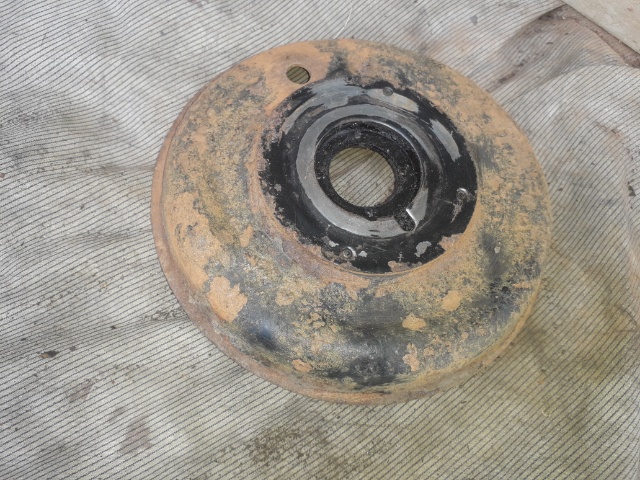
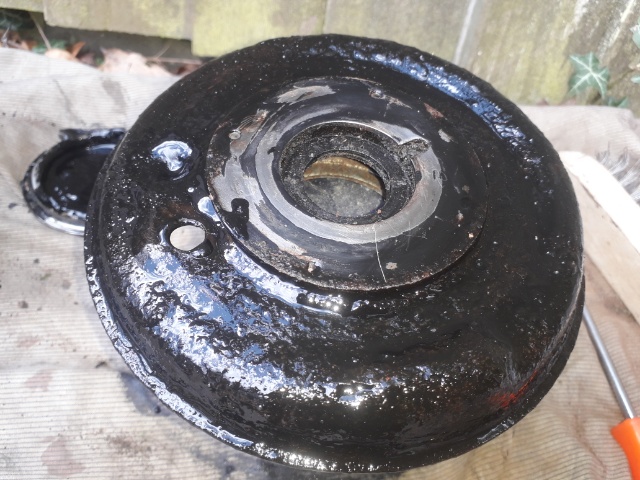
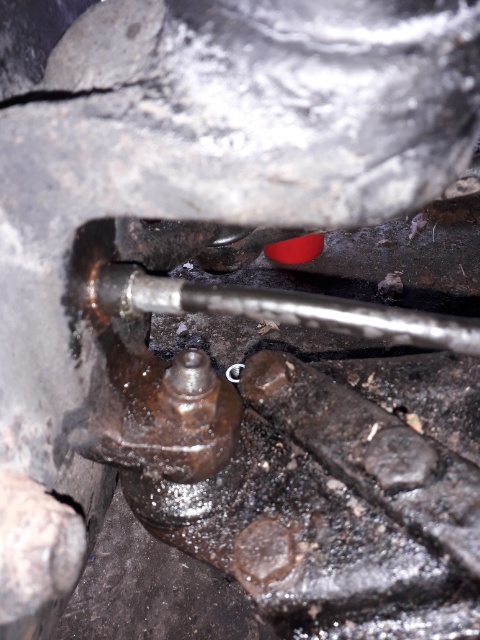
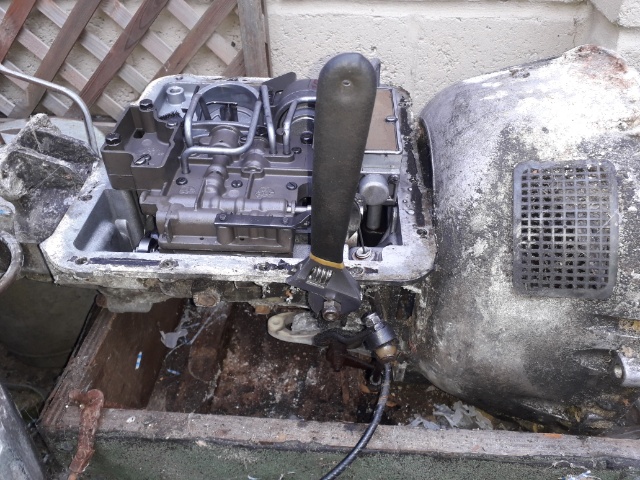
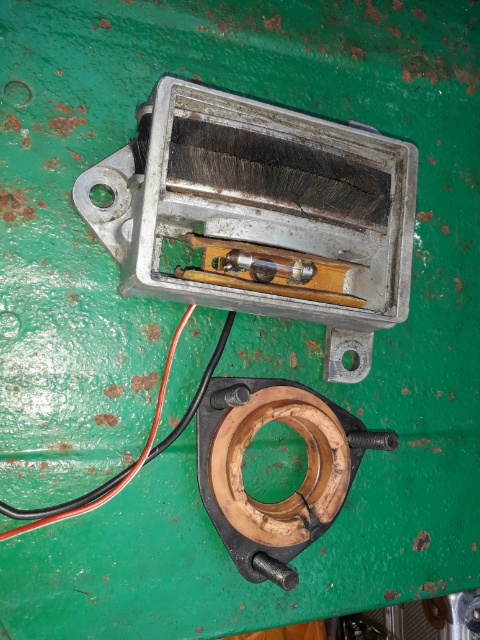
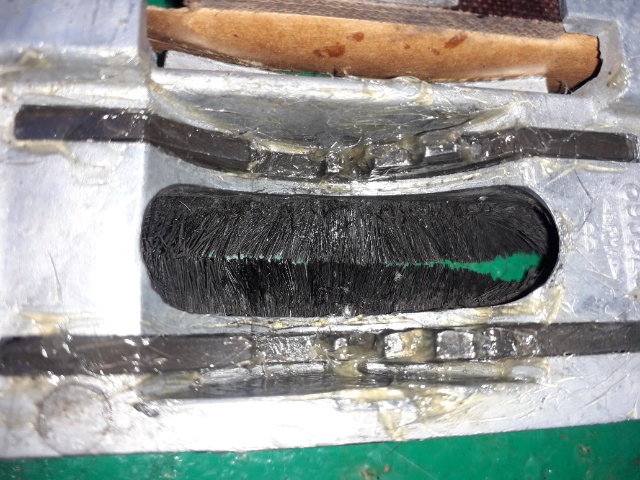
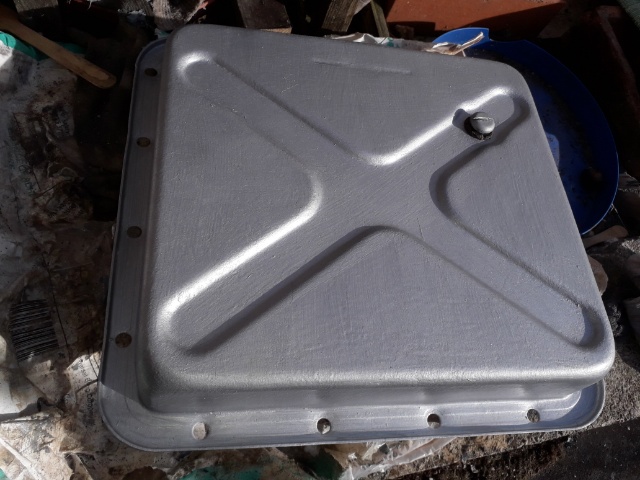
Anyway, some pictures of the leaky old 360 water pump and its removal.
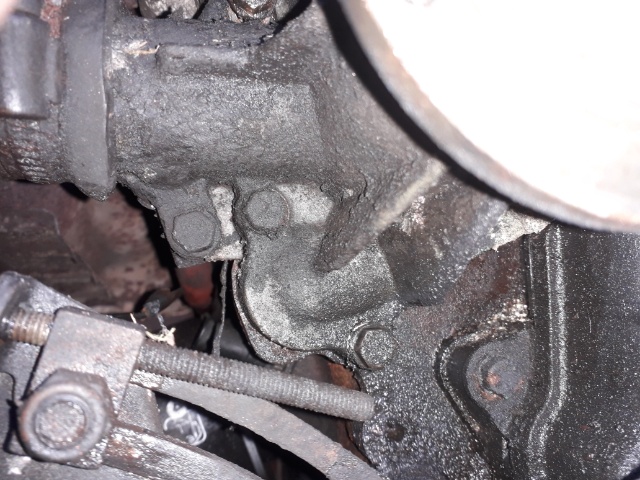

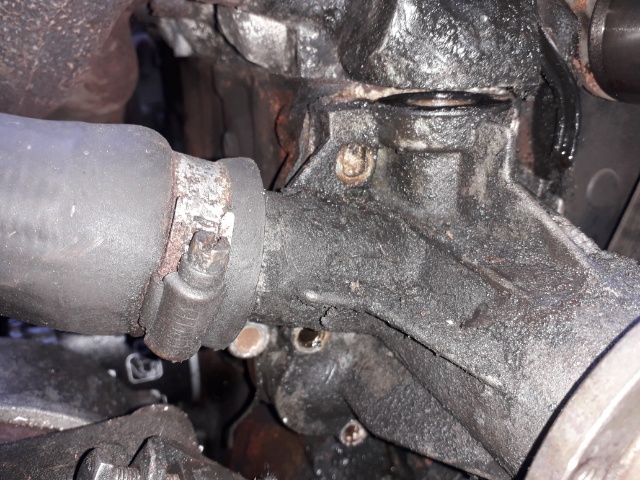
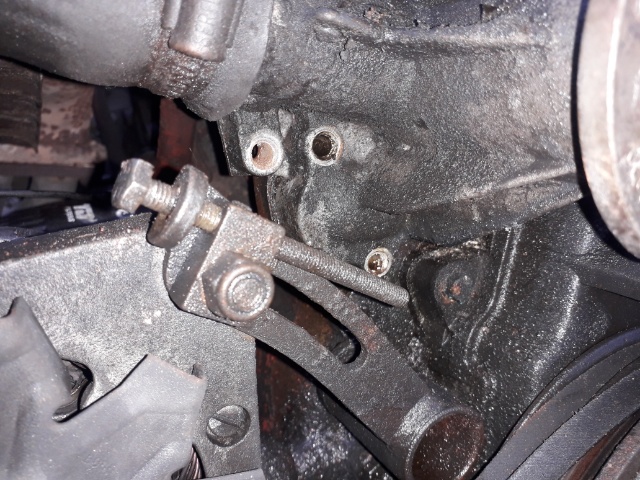
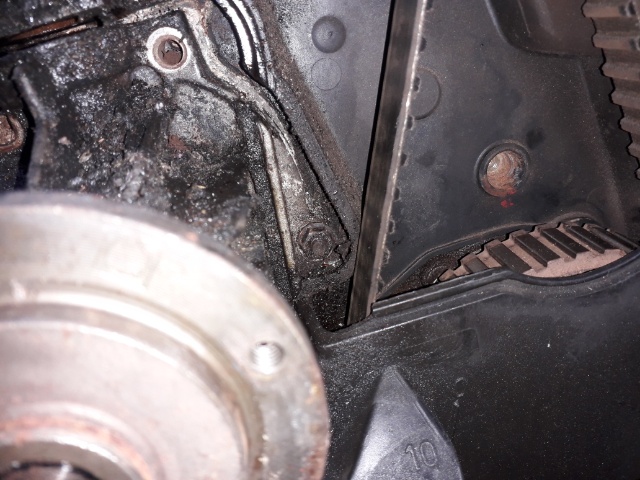
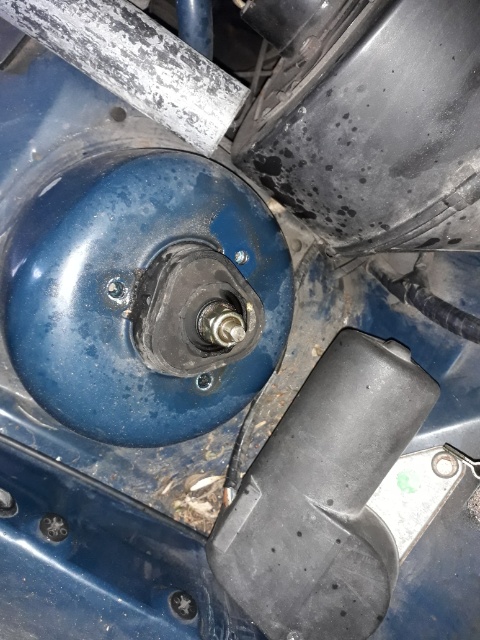
Bizarrely, one of the bolts is behind the cam belt cover. However, as I've not done a water pump before, that might be a completely normal situation. Anyway, I was advised to give all of the mating surfaces a super-double clean-up after removing everything and that is what I aimed to do, but its probably quite shoddy by other people's standards.

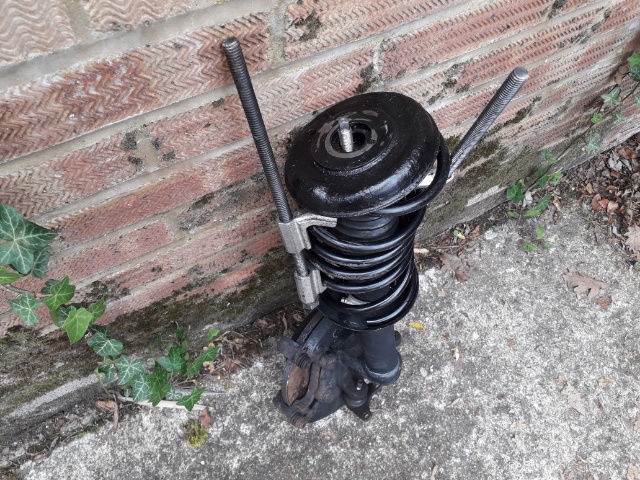
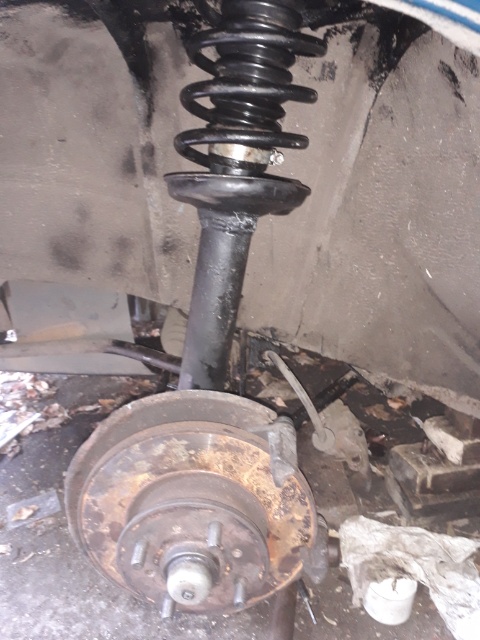
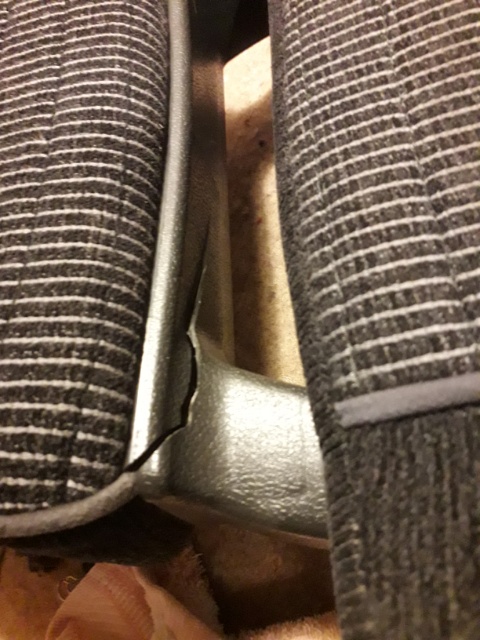
Now into the middle of March 2022 and the passenger side strut is collapsing on the Blue 1.7. You couldn't make it up. I wondered why I could smell burnt sausages everywhere I went. Yes, the front tyre is rubbing on the spring cup and its audible now, so that one's gone off road, too, and these repairs are being done while the Hyundai is pressed into action as everyday transport.
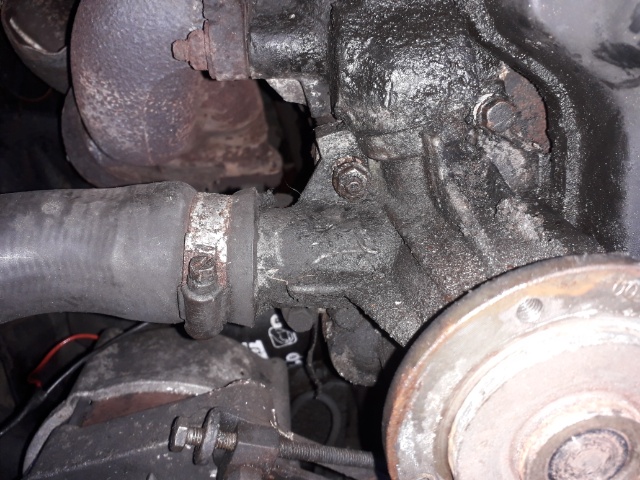
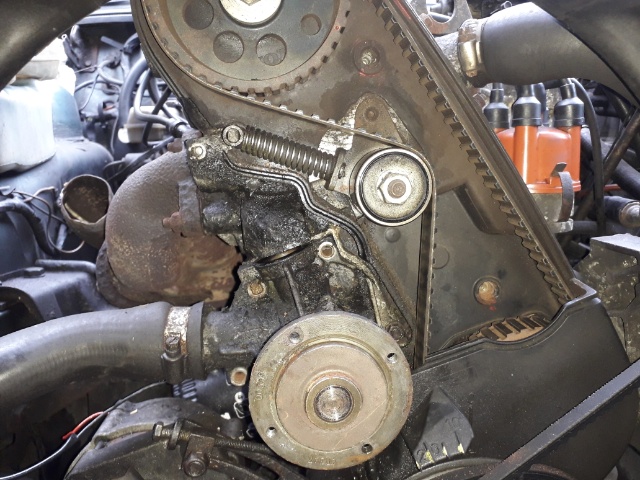
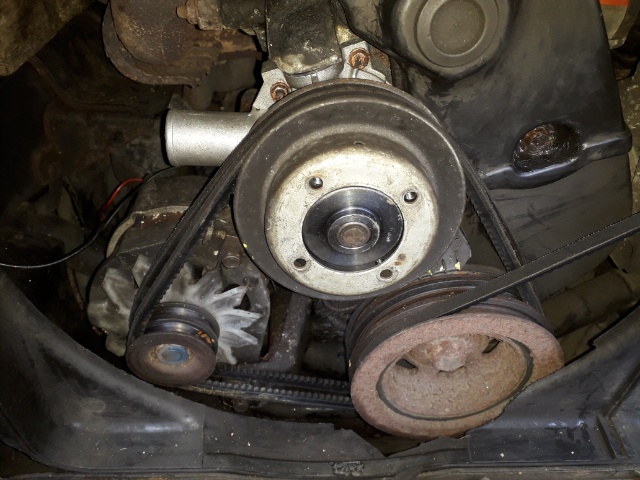
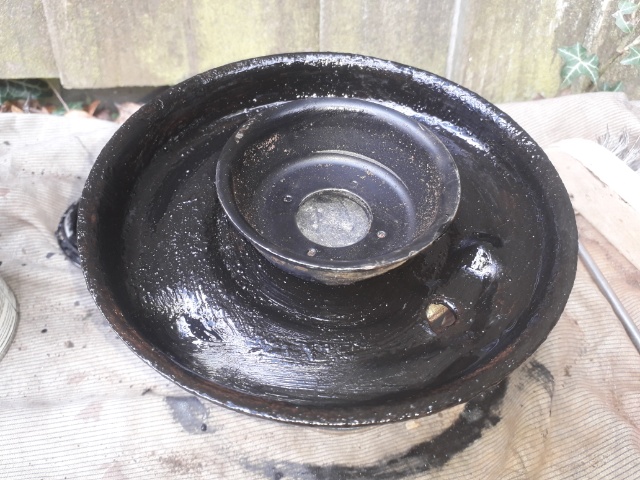
I had another round of cleaning up and the new pump seems to fit OK. Bit of a fiddle due to the new old gasket being very twisted due to its great age! I used some Hylomar Blue in case it helps. The nuts and bolts were then torqued up to 6 lbft which is what the Hades manual says is right for a 1.4. It said that the B19/200 values are the same as the B14 unless stated otherwise below and that's as good as it gets here, sorry ;-0
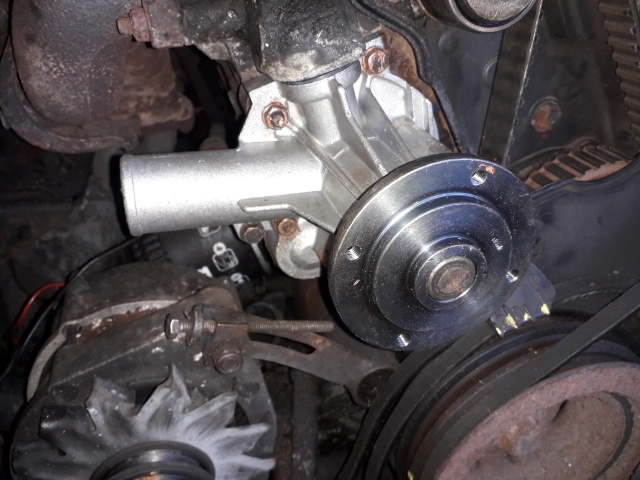
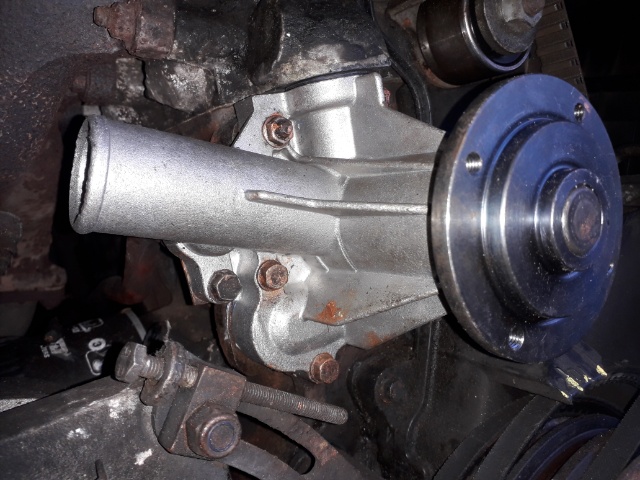
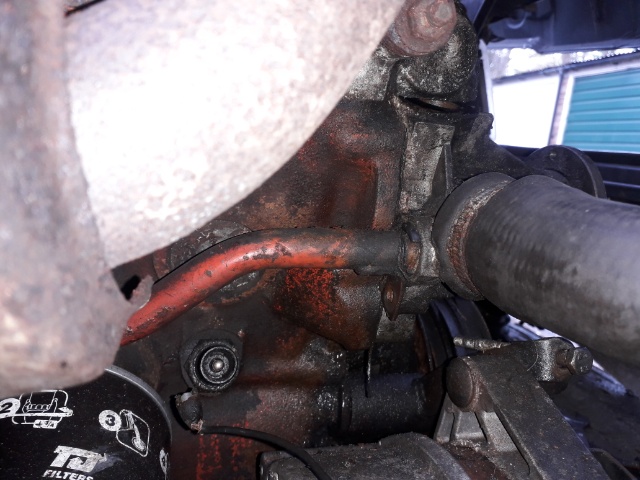
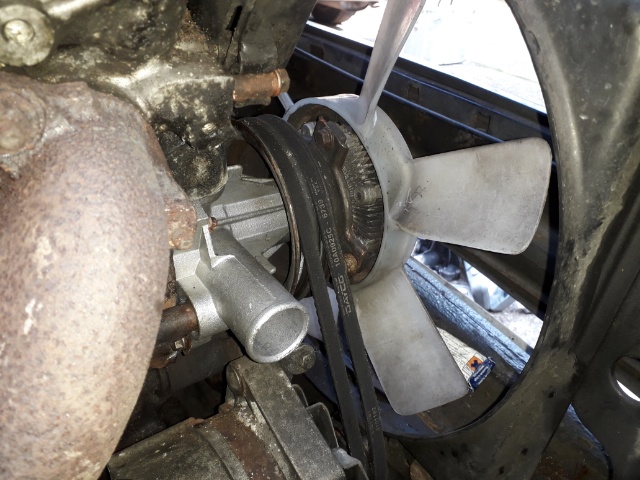
Yo! Going back together with radiator in and hoses reconnected. Just need to pop off the heater tap for a look as its letting hot water through when it's turned off. I realised the fan mounting plate had been put on the pulley the wrong way round before. Tee hee, it wasn't me, even though it was. I like to think I must have been carefully replicating a mistake made by a previous mechanic.
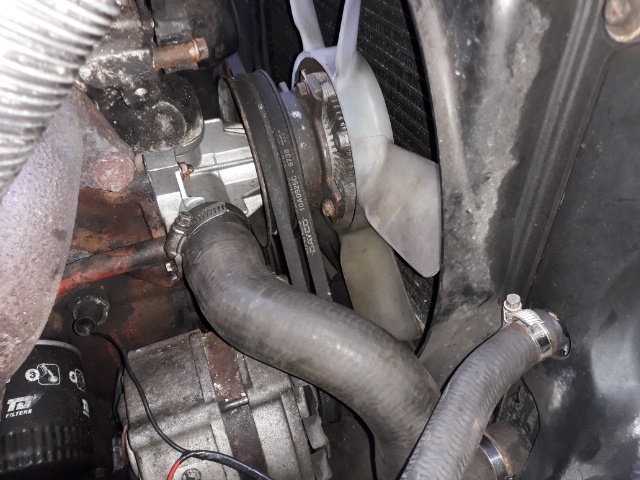
Beginning of the last week of March 2022 and I finished everything on the 360 here today, I hope, and checked the heater valve. It was fine but I reconnected the cable with a hole in the lever which will give it greater deflection, I hope. New hose clips were used too as the originals are not-reusable.
I cobbled together a hybrid Poundland-Halfords antifreeze mix
which has a pH around 9 'ish or higher i.e. its alkaline not
acidic despite being OAT (organic acid technology). Therefore, I
am hoping that, despite wise warnings from the forum, this does
not corrode the block. Anyway, I am part-way through removing
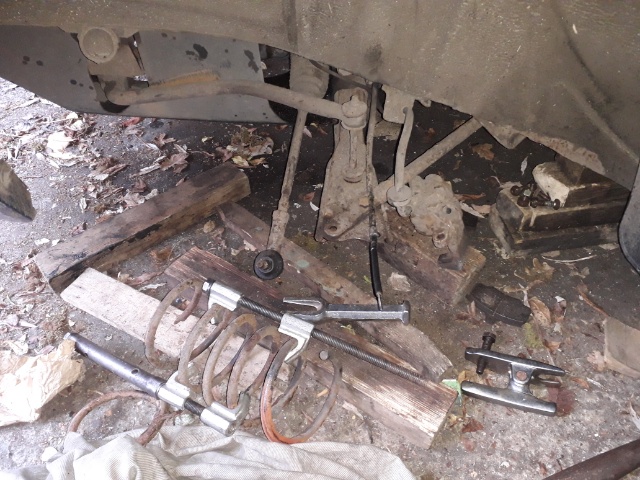
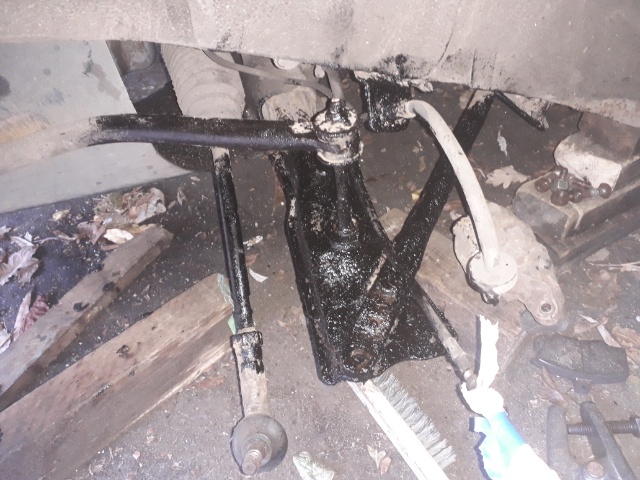
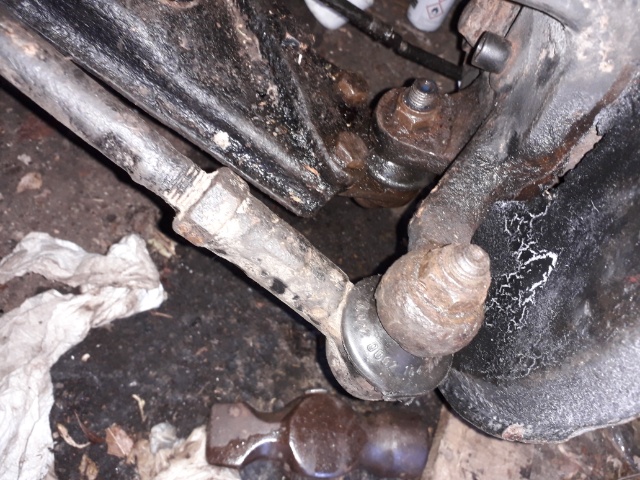
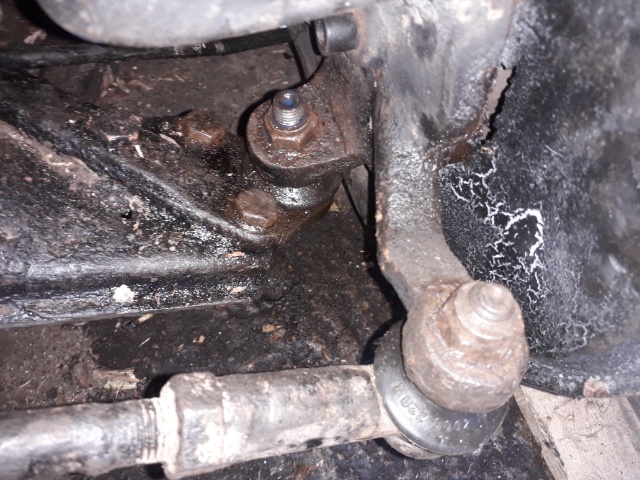
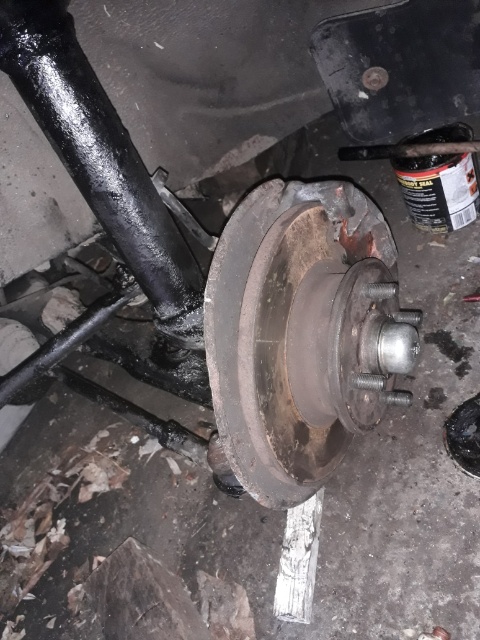
the broken passenger-side front strut from Deep Blue - as you
can see below, the caliper is coming off well enough,
thankfully.

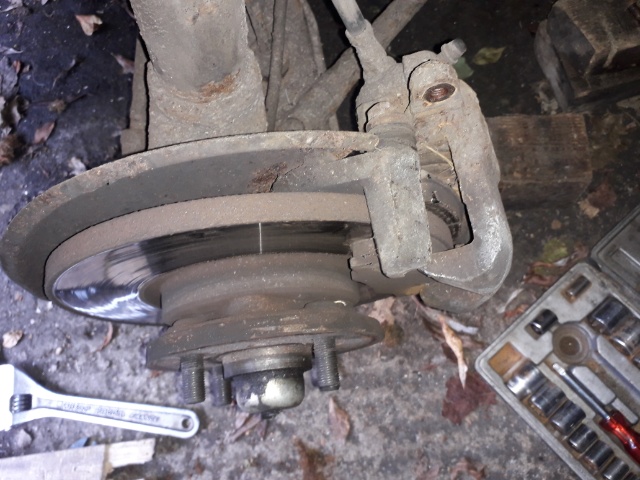
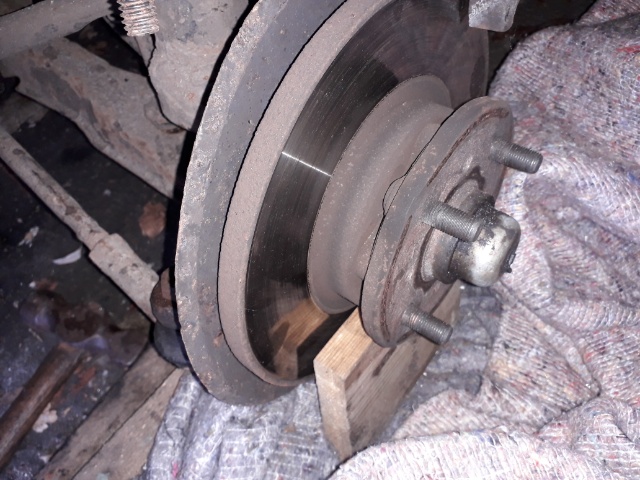
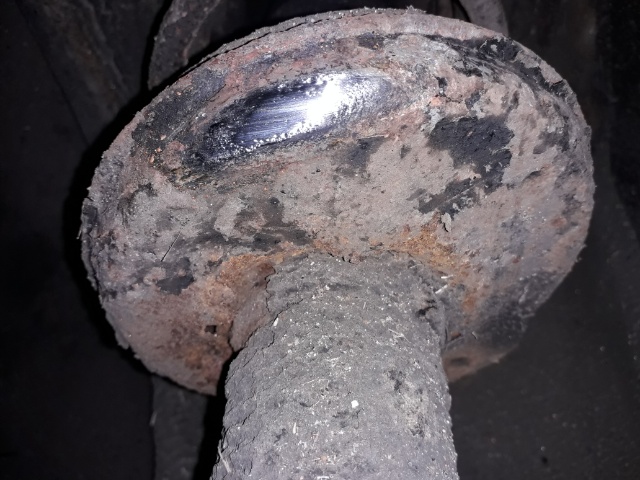
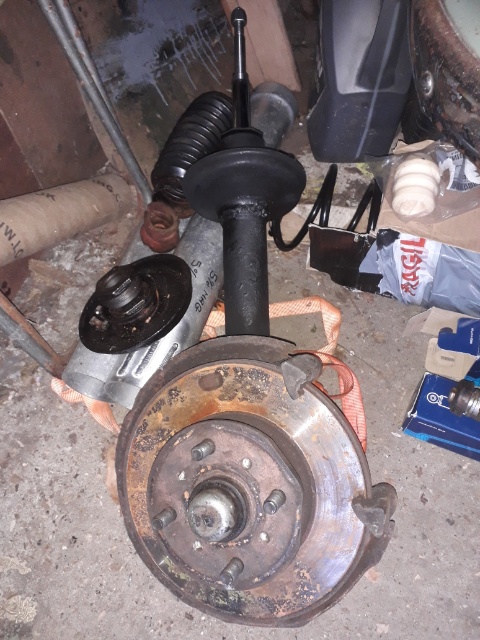
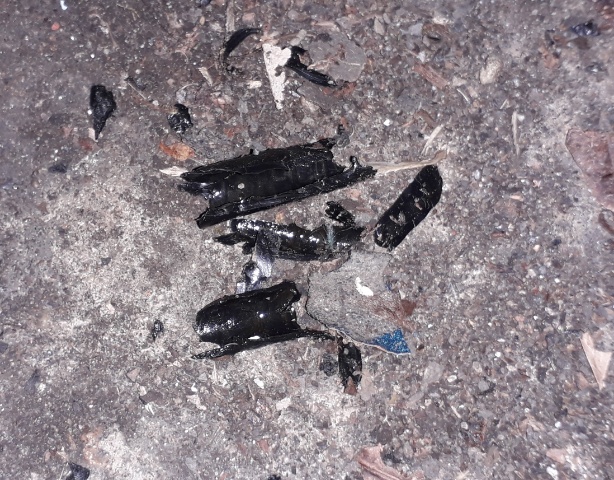
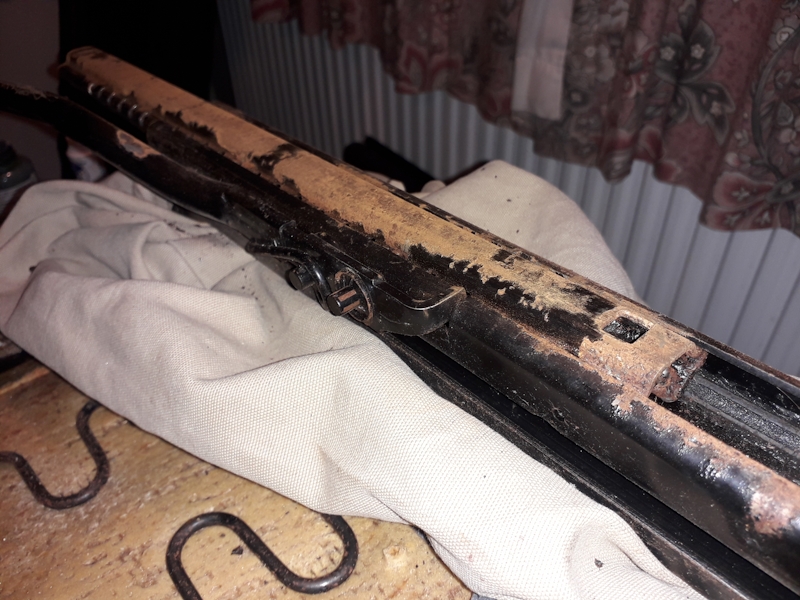
Now into early April 2022 and I have completely removed the strut from Deep Blue. However, not that much is going on right now as I am having 2.5 weeks of radiotherapy and then I caught covid, both of which took their toll on my Volvo hours for few weeks. The wear pattern on the partially collapsed strut cup due to it rubbing against the tyre is plain for all to see. The spring was also broken.
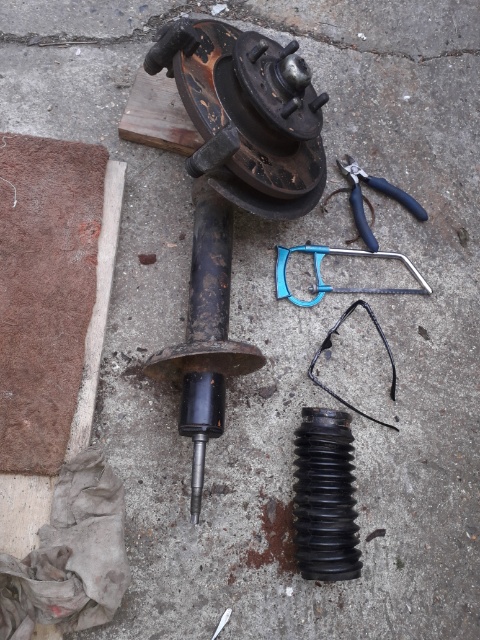
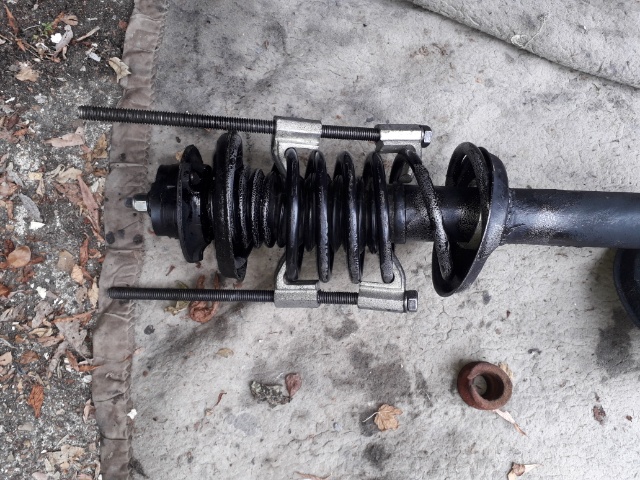
A bit later on and things are better so we're making
strut-tacular progress here. The mud has been cleaned off,
bellows removed, strut opened and oil drained. Just need to pull
out the shock-absorber paraphernalia inside and then it can go
for repairs. It all came apart by hand this time, i.e. without
recourse to the walking stick for leverage, and was sent off to
the expert strut welder.
Yo again! Just patching up under the wing with some rubbishy
waxoyl type paint and cleaning and repainting a few parts with
Smoothrite.
Now into early May 2022 and I have been doing a few more jobs
on Deep Blue while the strut is away being welded. The inner
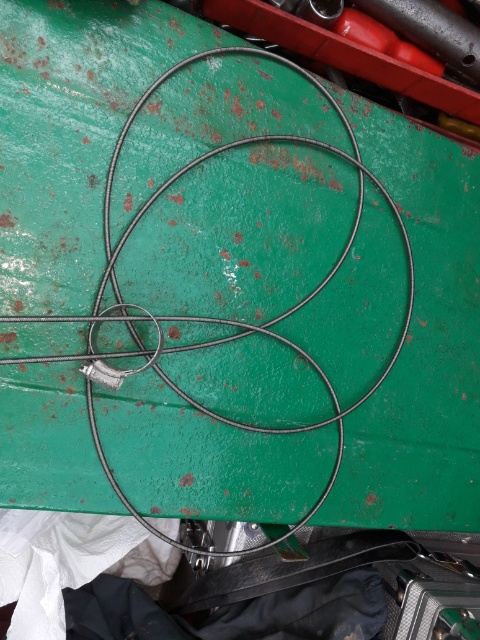
speedometer cable which was giving a very jerky reading on the
dial was removed and found to be coated in very thick sticky
grease which was cleaned off.
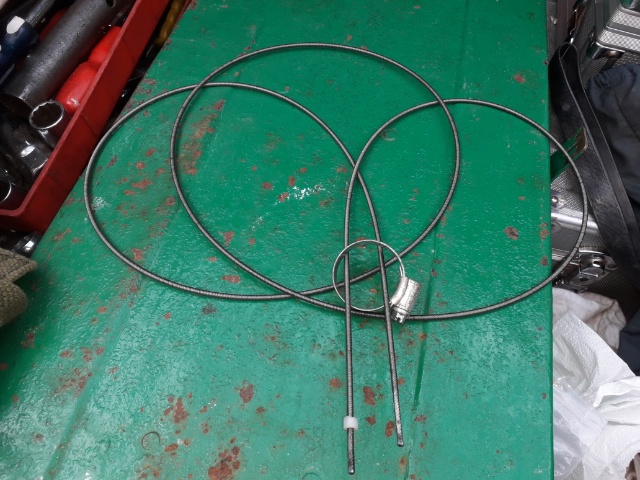
The inside of the outer sleeve was flushed through with carbbie cleaner and compressed air. A great debate began in my shiny little head about how best to lubricate it (the cable, that is). Some say grease, others graphite and bizarrely someone very recently gave me some super-black graphite grease.
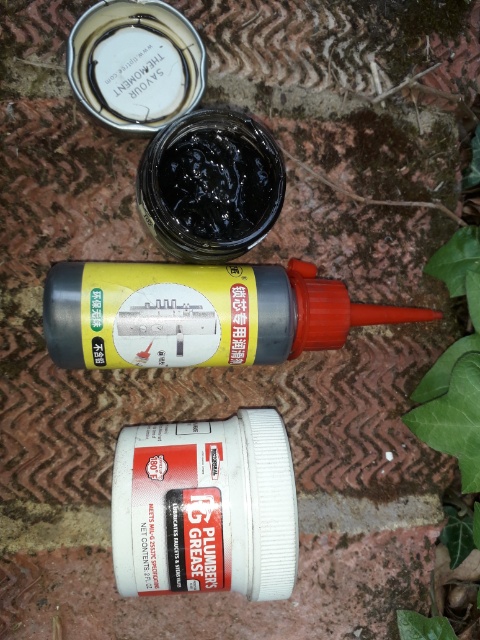
However, having recently acquired some graphite powder I decided to mix this with some Tool Station plumber's grease (yes, it's my fave again) as it was much lighter than the graphite grease I was very kindly given. Anyway, its all refitted and back together.
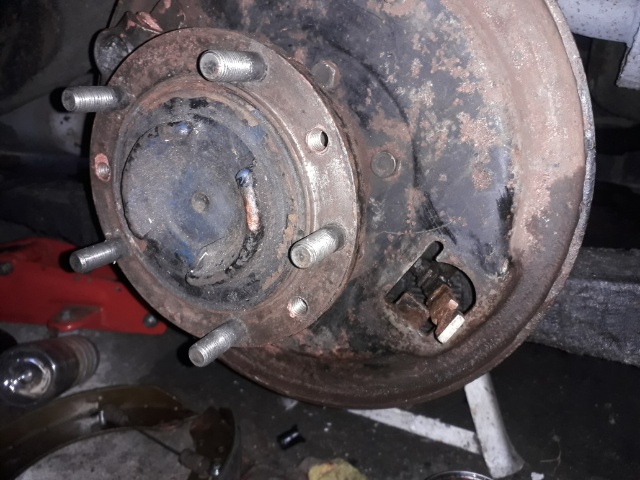
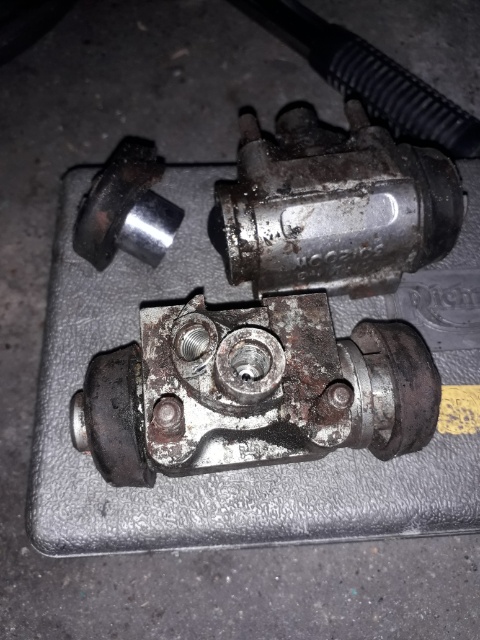
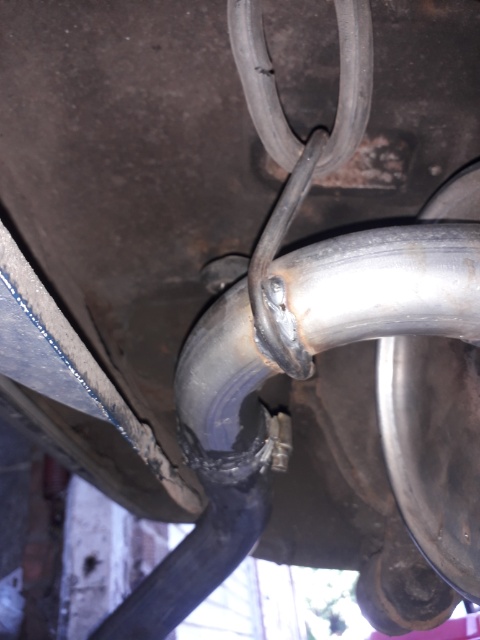
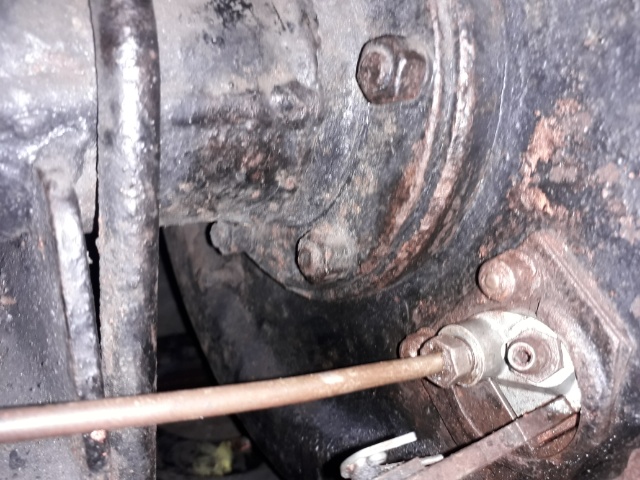
Late May 2022 and back on the old Rover on which I am still
trying to sort the brakes. I put everything back together and
bled it through but they still don't work *sob*. My fault, I was
skimping on the checks I should have made and only now have
found that the rear cylinders are seized. Anyway, one of them
has come off for a clean-up and new seals, barring disasters, so
far so good.
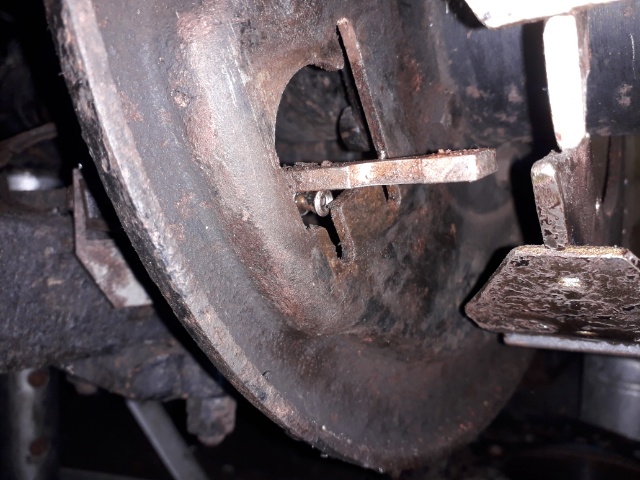
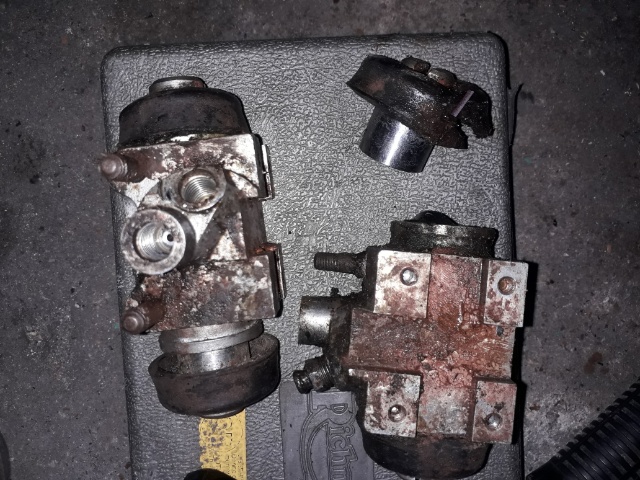
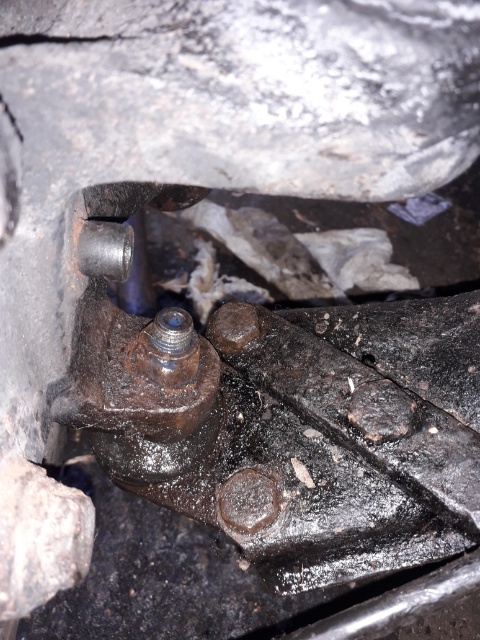
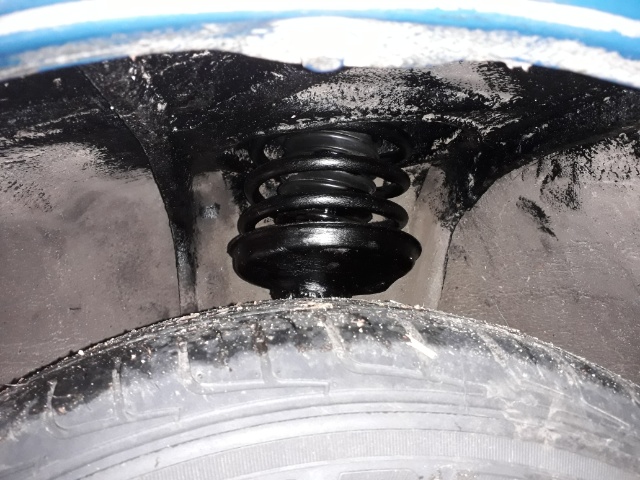
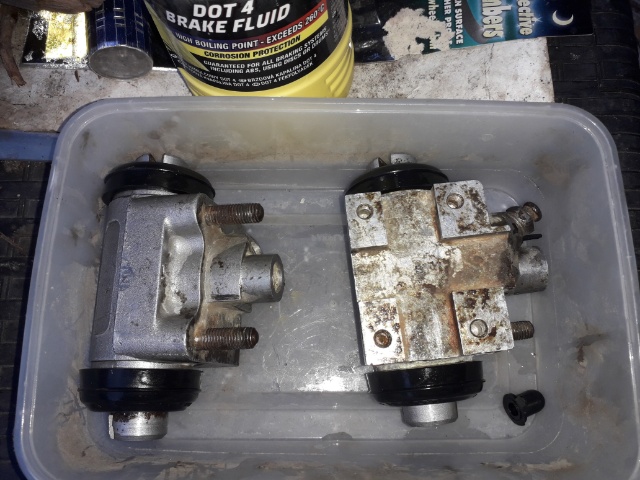
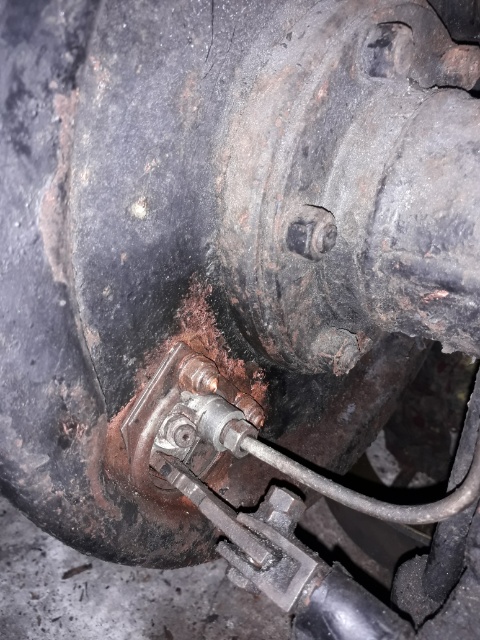
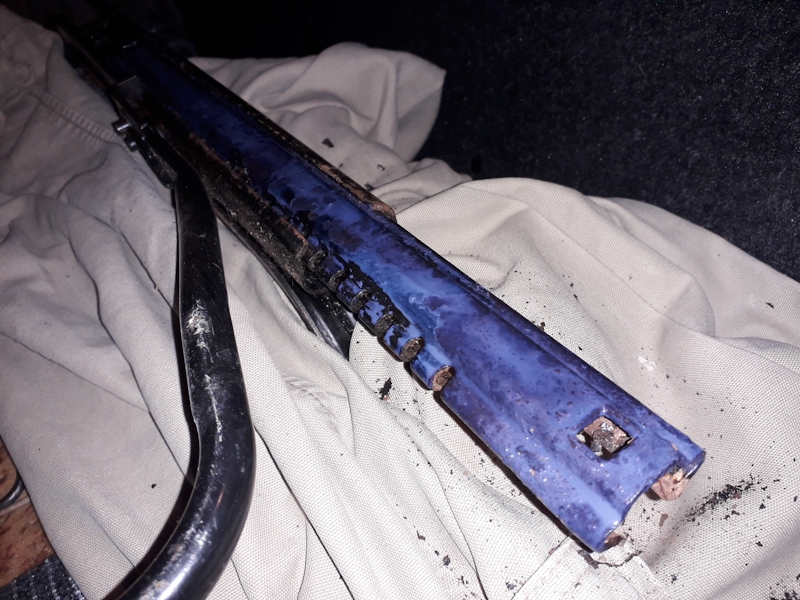
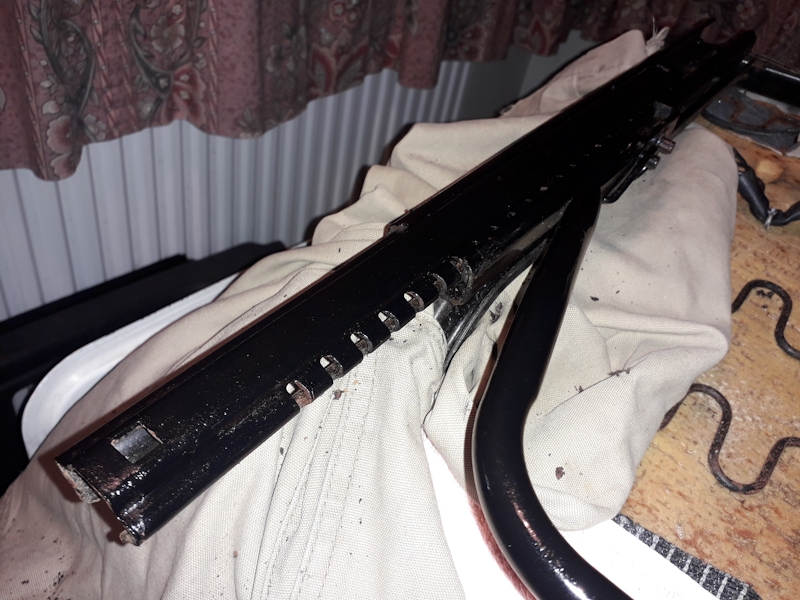
The other side has been removed and seal kit that I ordered arrived in early June but is still to be opened and this Rover job remains very unfinished. However, on the deep blue 340, here is the repaired strut which arrived back in the post. The picture shows how it looks after adding a shock absorber insert and a bit of paint. That should be more-or-less everything ready to go back together with the spring compressors and then back on the car.
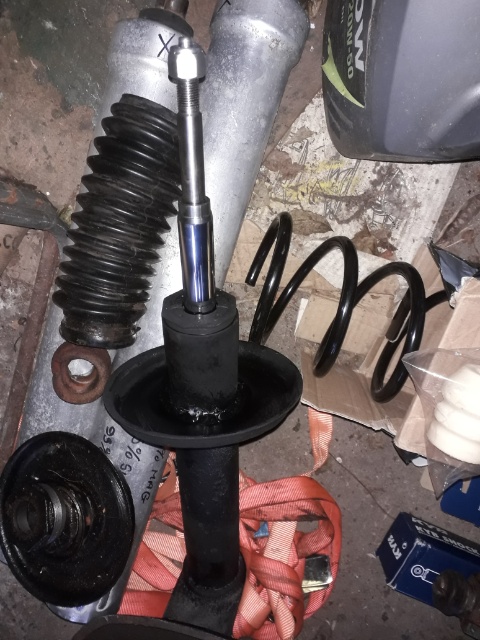
The strut has been going back together, or, given my slippery spring compressors, "boing back together" might be a better phrase. Note: important health and safety issues if, like me, you try this one at home, or anywhere else for that matter ;-0 ,-0
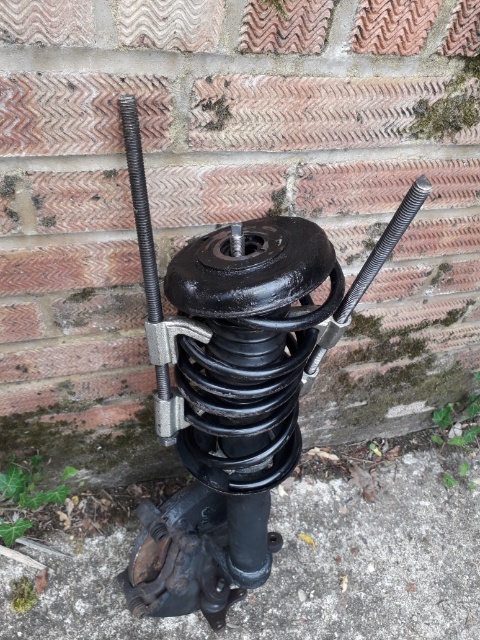
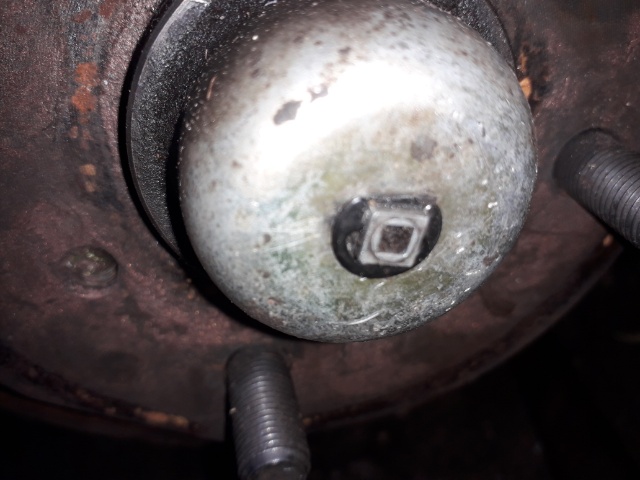
Almost back together, as in tightened up but not torqued up, bar the main ball joint crennelated nut which broke. My substitute nyloc one doesn't seem to have the right thread, but a rummage through the scrap collection came up with an old used nut that has the perfect fit. Tons of thread lock applied everywhere.
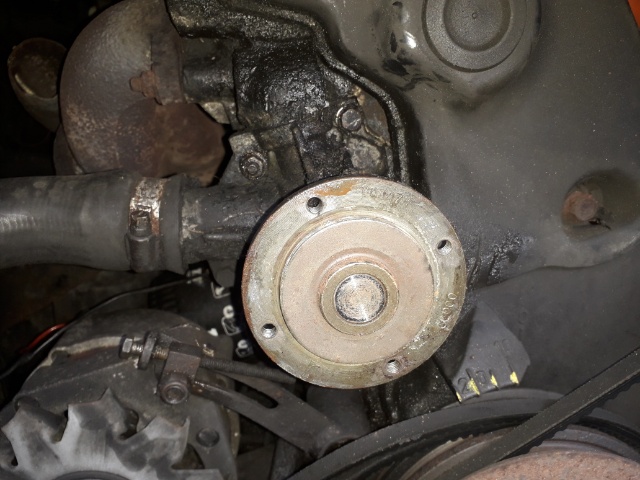
I noticed that the e-clip which holds the speedo cable bobbin in the grease cap had unfortunately got lost in transit to the welder but this item has now been replaced with a substitute from the local lawn mower repairer. The diameter of the circular slot in the bobbin is 3/16 of an inch by my non-metric ruler and general incompetence but the new lawnmower item fits OK, thankfully.

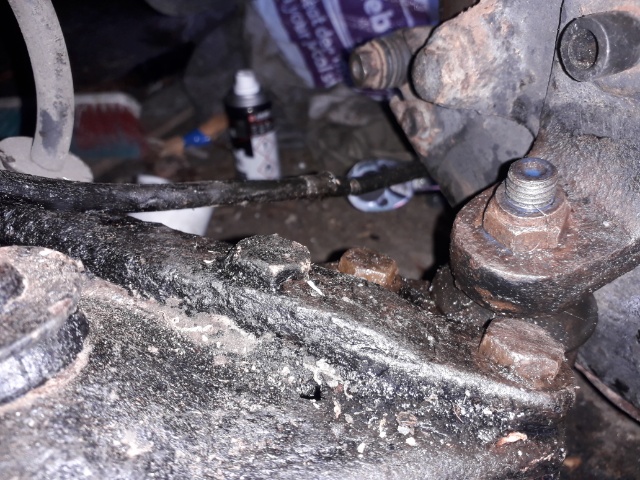
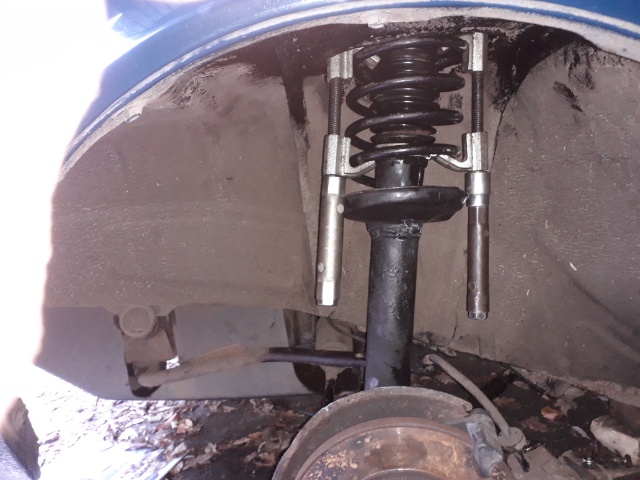
The suspension nuts and bolts were set to 40+ lbft as pacified in the Hades manual, but I couldn't push that hard, hold the phone and press the shutter all at the same time, so the piccy doesn't show quite the right torque. The strut top nuts are set to 16 lbft, too, and, worryingly, I next have to try refitting the speedometer cable to the hub.
Yes, it was a high-stress day in early June 2022. The speedometer cable definitely wouldn't go back into its hole despite grease, graphite dust, using heat to soften the plastic and all the strength I could gather. So, sadly, a Stanley knife was used to whittle away at just enough of the plastic cable coating so that it could, at last, just about be slotted back into the hole, fairly tightly I should say.
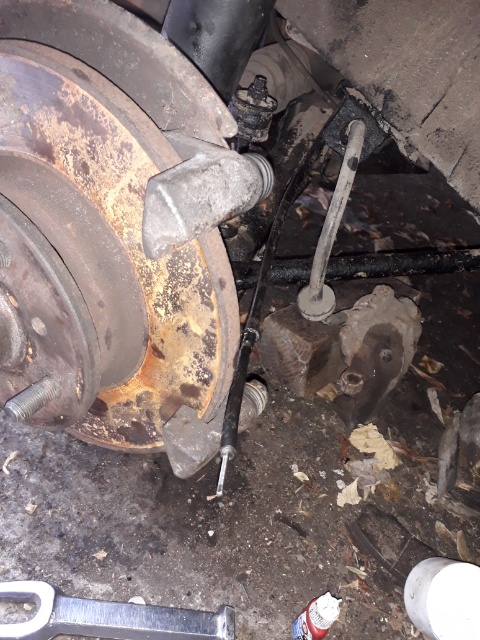
The caliper is back on now and torqued-up. From my photos it seems that one of the sliding caliper nuts with a rubber boot went missing before it was posted i.e. I can't blame the postman for that one. I'm obviously getting to be old and rubbish and losing everything. Still, must be very careful about this in future. Anyway, I have plenty of spares to fall back on, which saved the day.
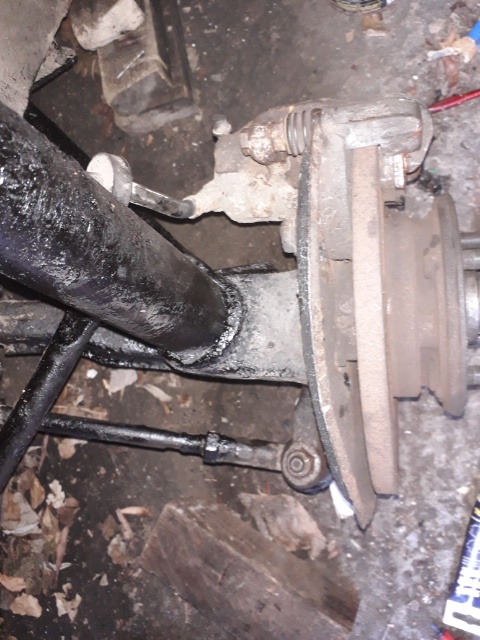
Yo! It's back together and running. The thin back-plate for the disk was given a bit of straightening and the wheel refitted. I remembered to reset the tracking and took it for a quick test run or two which revealed an annoying knock on slight bumps which wasn't there before I did this job. It had to happen. Thinking its a dodgy strut insert which I sourced locally. However, the speedometer is giving a steadier reading than it did before so the plumber's grease and graphite dust must be doing something! Finally, reset the straight-ahead position of the steering wheel as it was madly badly off and also found the missing caliper nut slider thing which will go into reserve for future use, no doubt. Only got to do the rear silencer and then we're back in action, albeit with a vaguely annoying knock from the newly repaired strut. It had to happen.
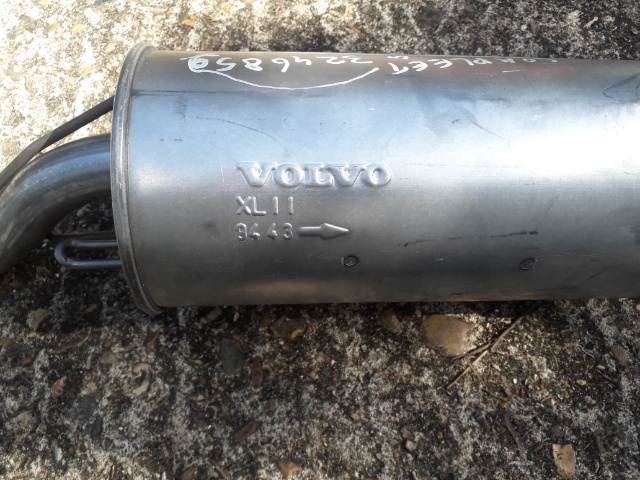
Well, the plan was that I would run the old rear exhaust silencer for a few more weeks to get every last bit of life out of it but on actually looking at it and seeing its chronic state, I decided that it would just be better to fit the new one. I tried to get an econo-one from ebay, as usual, but couldn't so this one came from Dafhobby and has some epic ovolovov branding. Does that mean it was made in week 43 of 1994? If so, I was half way through my first teaching job and having about 20 nervous breakdowns ;-0 ;-0 Anyway, I really hope it isn't the last one left in the world.
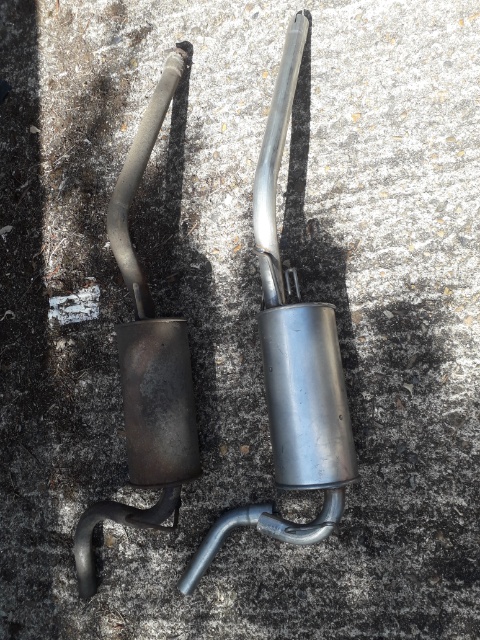
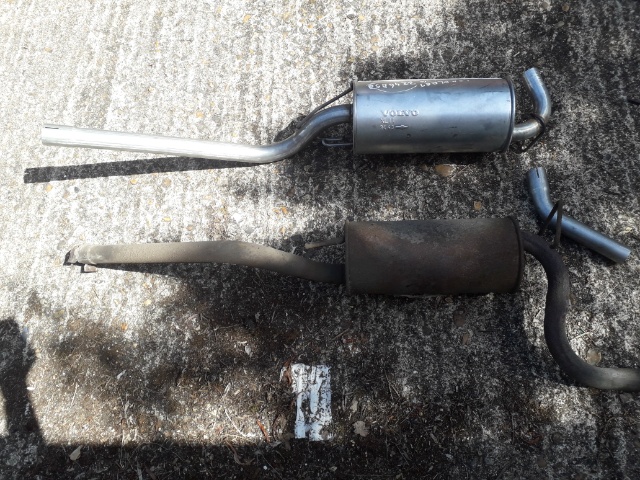
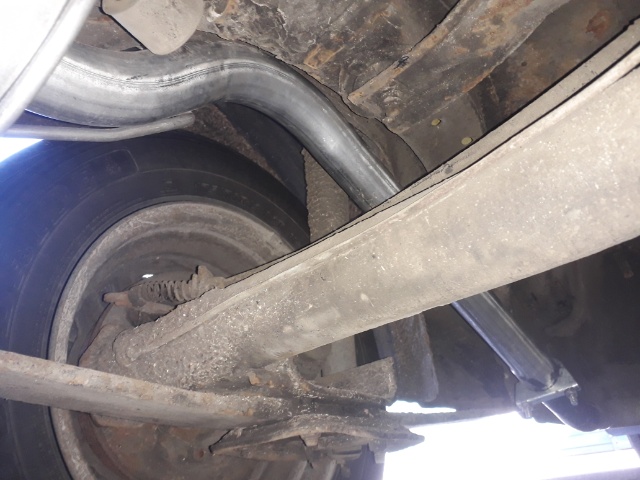
Anyway, after much grief with a hacksaw trying to remove the old rear pipe, I finally decided to use the Dremel and that sped things along epically fast so on a day when I thought everything was going nowhere, suddenly the job is just done! I hope Mr or Mrs MOT tester won't mind the jubilee clip and dodgy exhaust hangers, since renewed ;-0
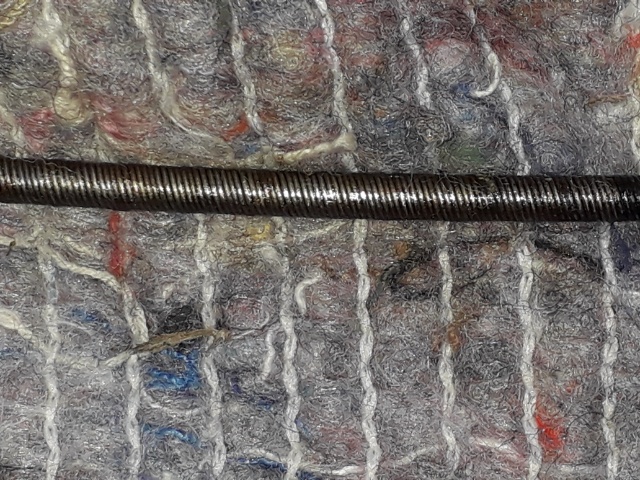
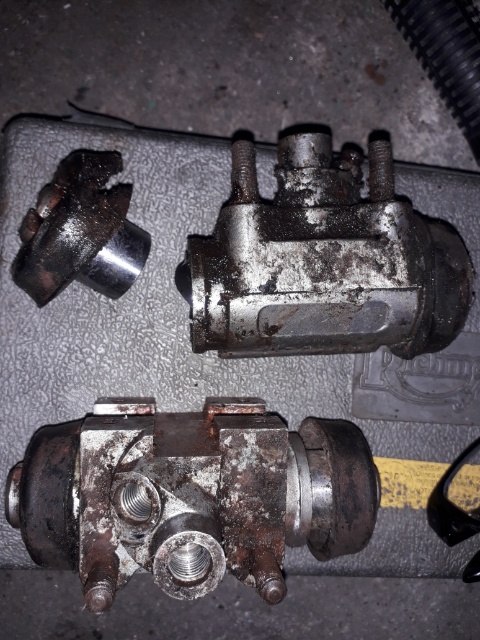
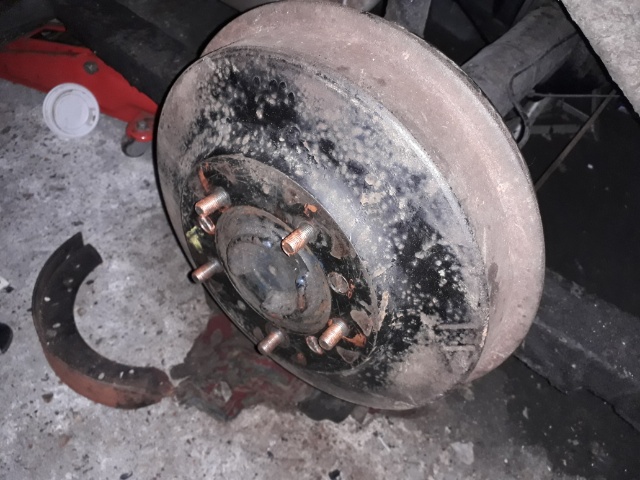
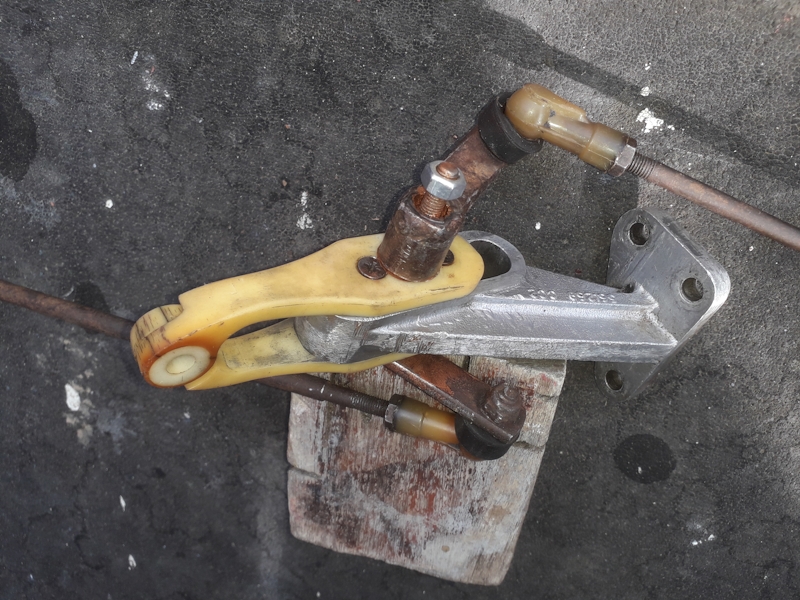
Today (12 Jun 22), the exhaust was tightened up a bit and the sills and front wheel arches given a bit of waxoyl. The plan was then to do an oil change but a look at my notes showed that the last one was done only 4k miles ago, so that can wait for another year! However, the distributor cap was removed and given a clean-up. All the contacts were good and the carbon brush at the top was still present and bouncing on its spring. I think that one should all be back together and working. Nice one. I forgot to tighten the handbrake a bit so that will be done asap. The above right photo shows the Rover brake cylinders getting a set of new seals and below shows them starting to be put back onto the car.
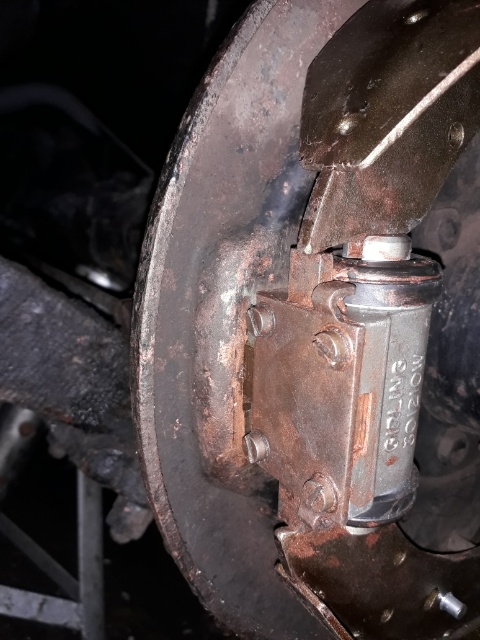
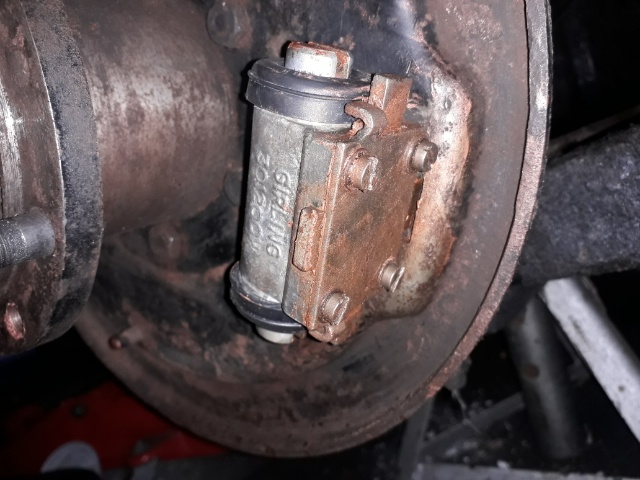
A completely automotively mental weekend in mid-late June 22. The rear brakes on the P5 were reassembled and the blue 1.7 strut nut tightened (which removed the knocking noise whilst driven), as was the handbrake cable. A bit more waxoyling done on the latter car, too.
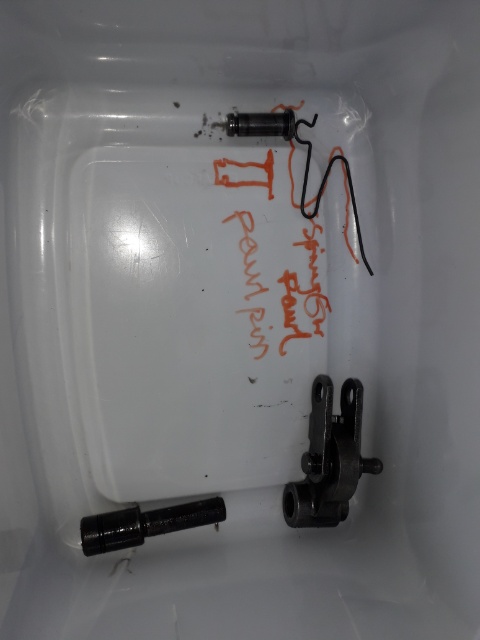
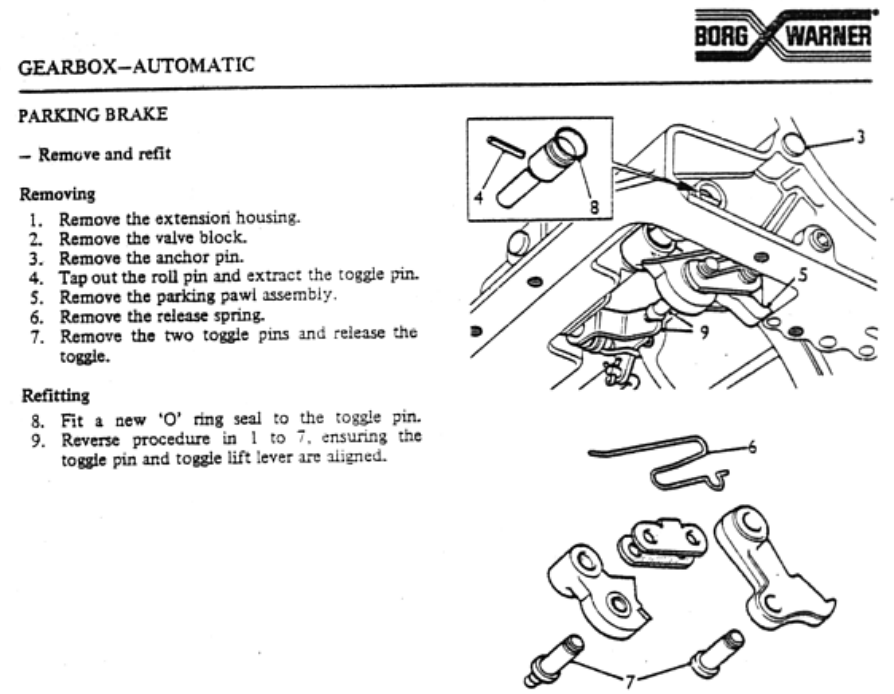
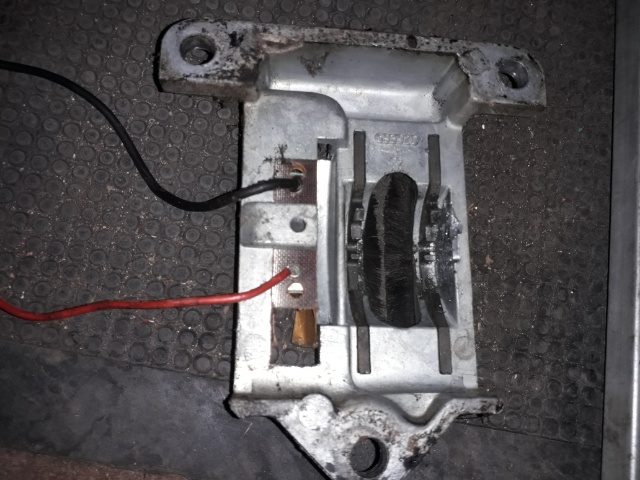
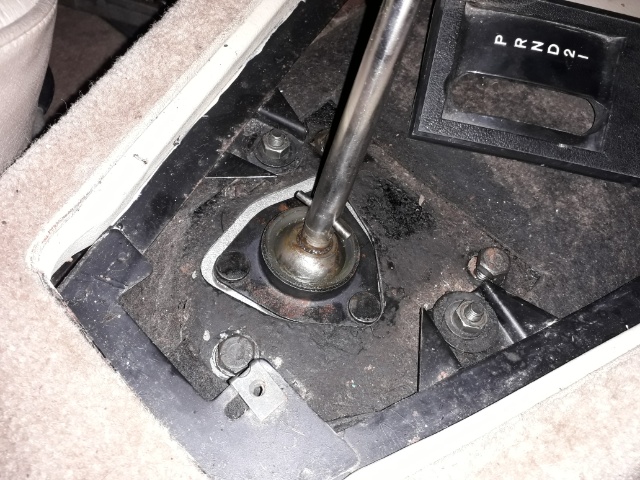
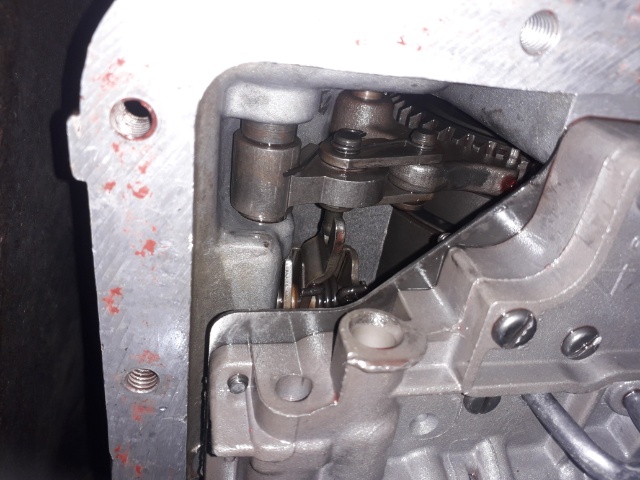
The next problem was one that had been brewing in my head for the last few months and was that the P position of the gear selector on the Rover did not work, i.e. when the car was in P, you could still turn the rear wheels, sometimes with a pretty horrible graunching sound. So the plan was to check that the parking pawl had not been broken by the garage when they were trying to stop the car, having just broken the hydraulic braking system by severing the pipe below the reservoir. Now, there is some logic in this, but being unfamiliar with the workings of a Borg-Warner 35 automatic gearbox, I thought it was better to start by dismantling my spare gearbox and having a look to see how the parking pawl works adn where it is.
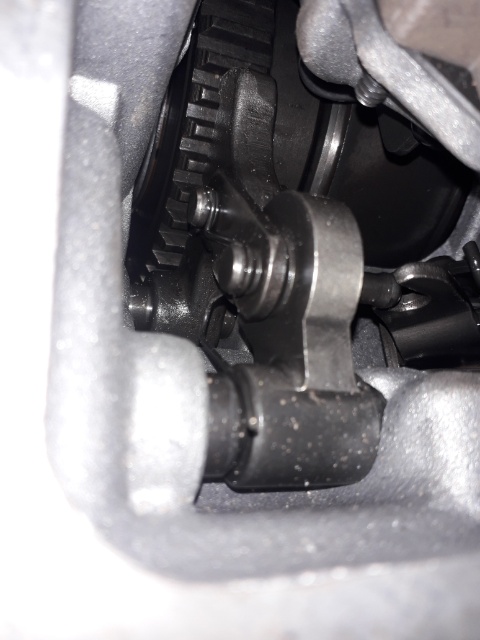
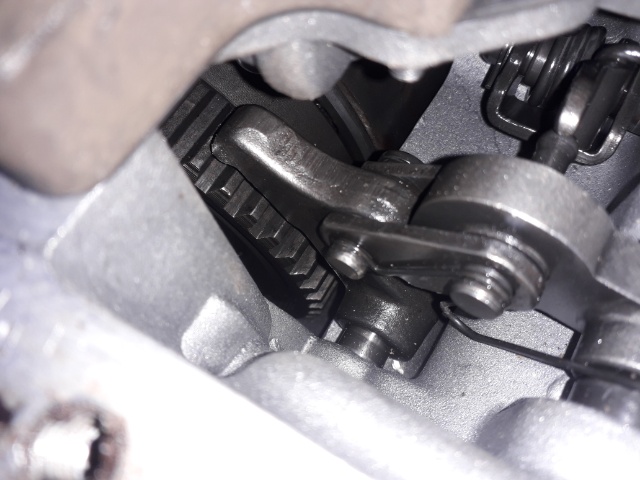
Having found the pawl, I was so convinced that this was the source of the noise from my gearbox, I decided to try to remove it from the spare in case I needed it as a replacement.
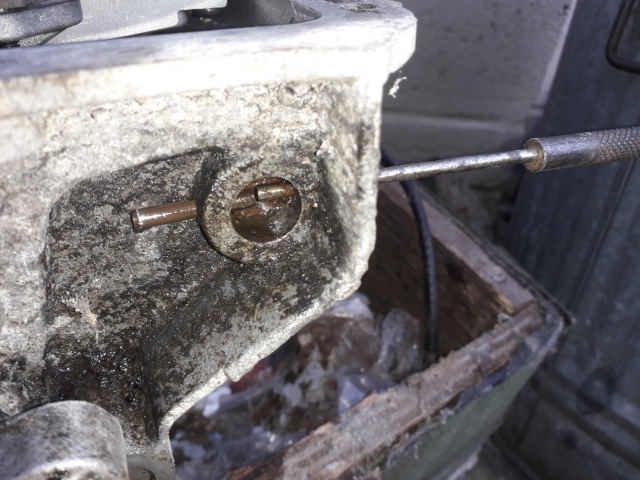

OK, so tap, tap, tap with a parallel pin punch and we get the pawl partially dismantled. However, getting out the lower pivot is a damned sight harder and I decide to stall the operation at that point, although the manual suggests that it is easy to check and remove with the gearbox still on the car!! Pure fantasy, but at least knowing where it is in relation to the underside of the car should allow me to eventually check if the pawl on the car is broken or not.
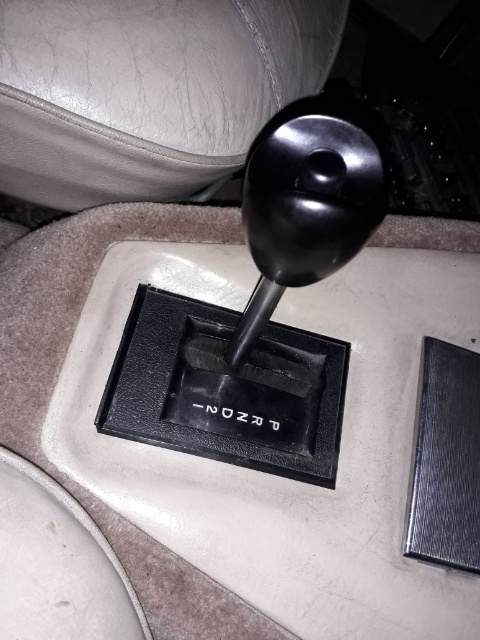
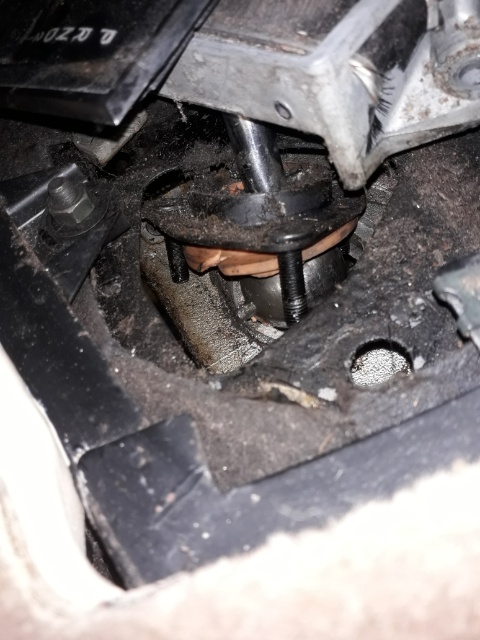
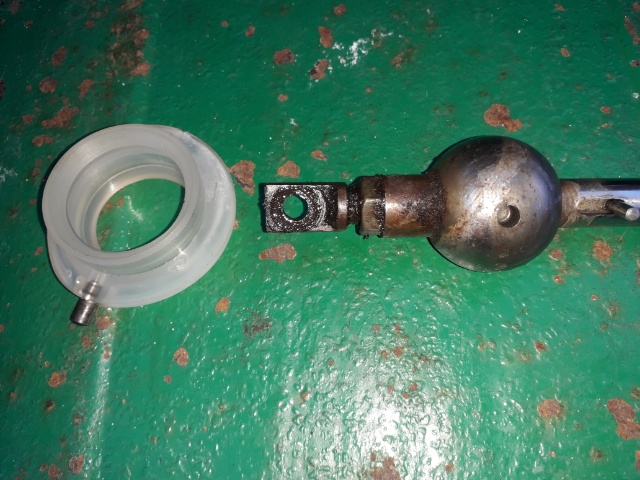
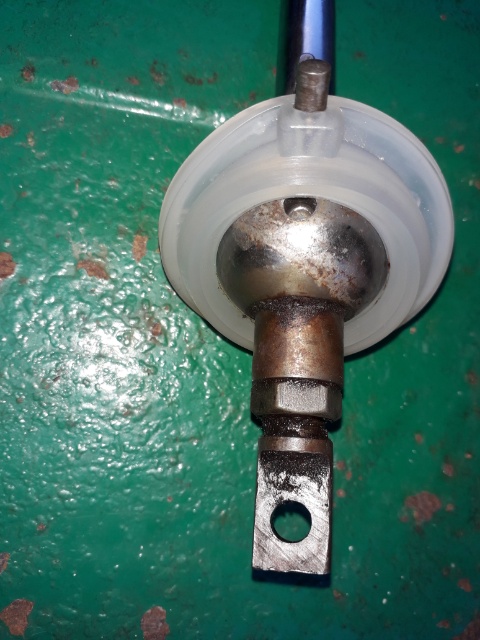
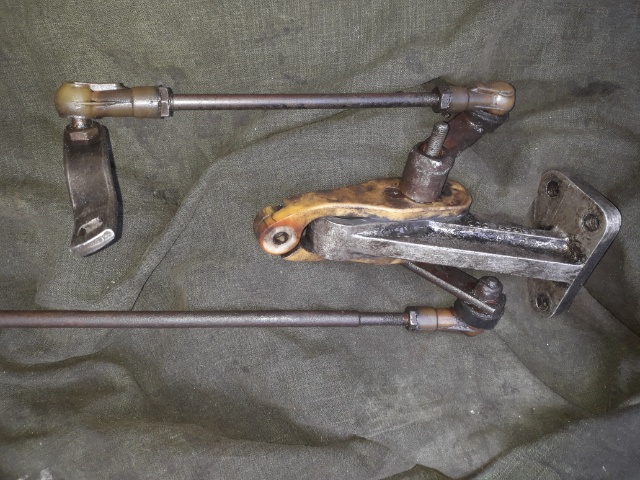
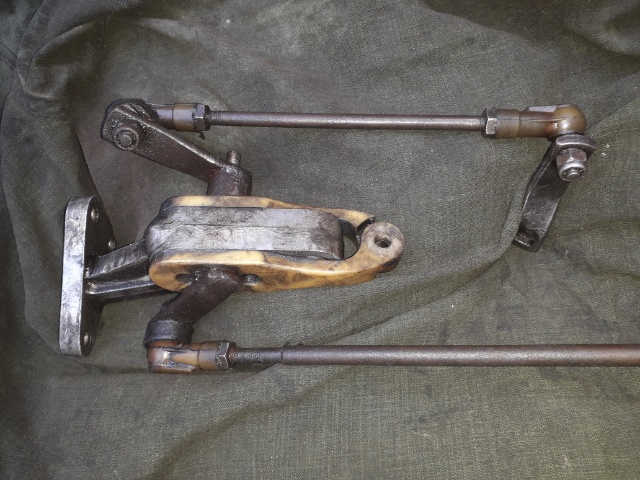
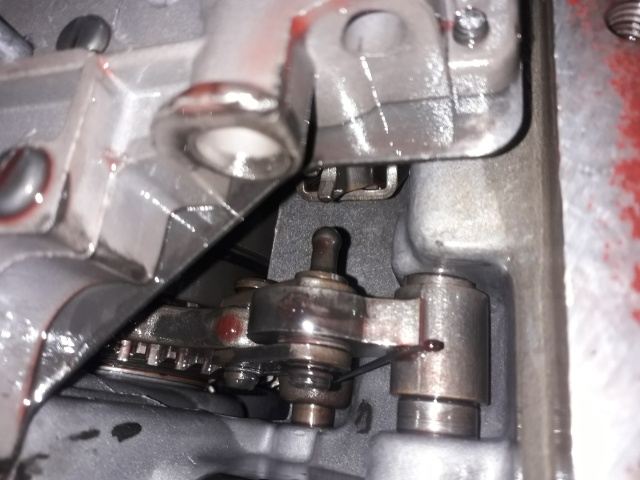
Right, so we still have the problem that when the car is in P it is still able to move and makes a grotesque graunching noise. As draining the gearbox oil and removing the sump is quite a big job, I am advised to leave that for now and check that the selector mechanism is working as it should. Still largely in the dark, it becomes clear that at the base of the gear lever there is a very dodgy-looking ball-and-socket joint, as has featured, I believe, on this website in the past.
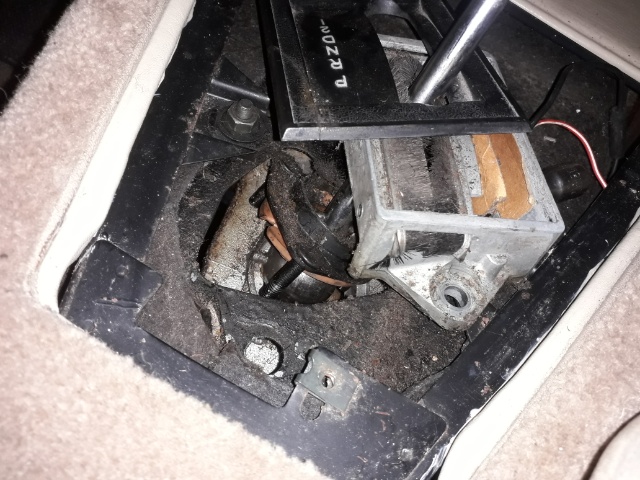
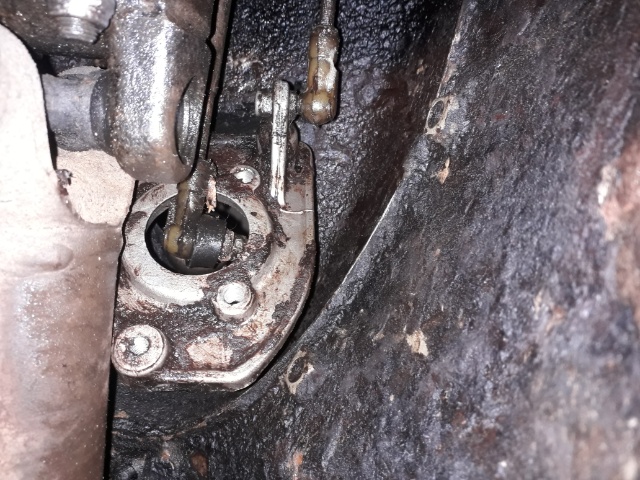
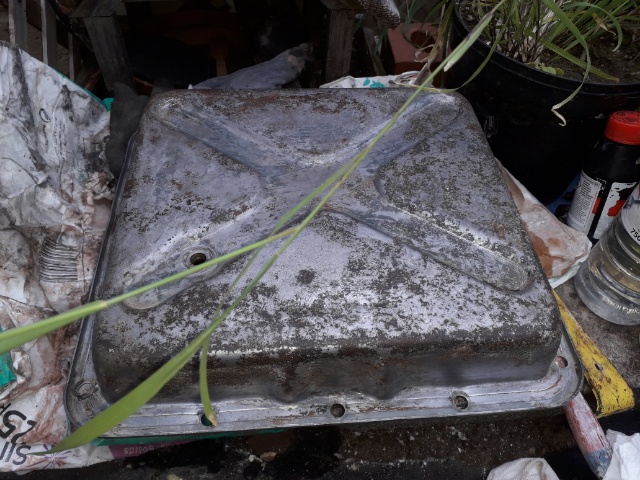
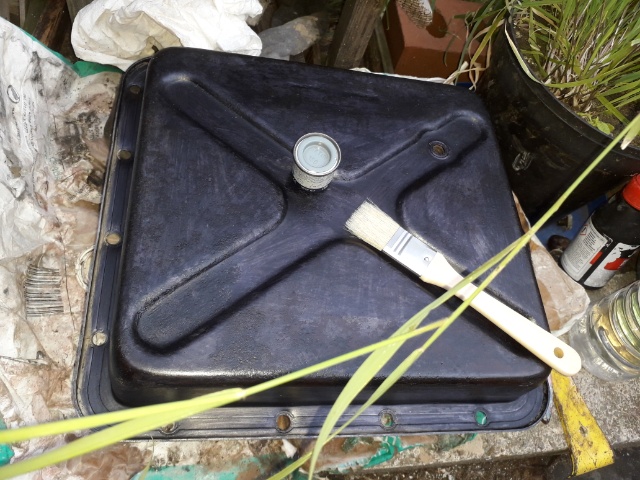
Everything unbolts and cleans up to reveal a very worn out and broken spherical bush which is duly laid to rest while a new one is on order. During the wait, the spare gearbox needs to be put back together so it gets a bit of a coat of paint on the sump pan and finally, the new rubber bush arrives.
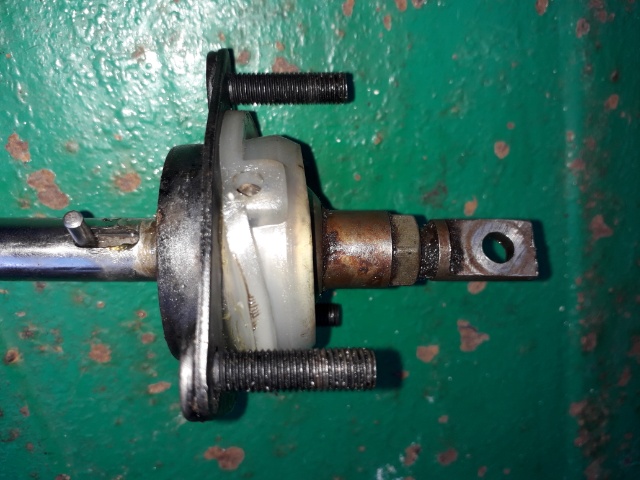
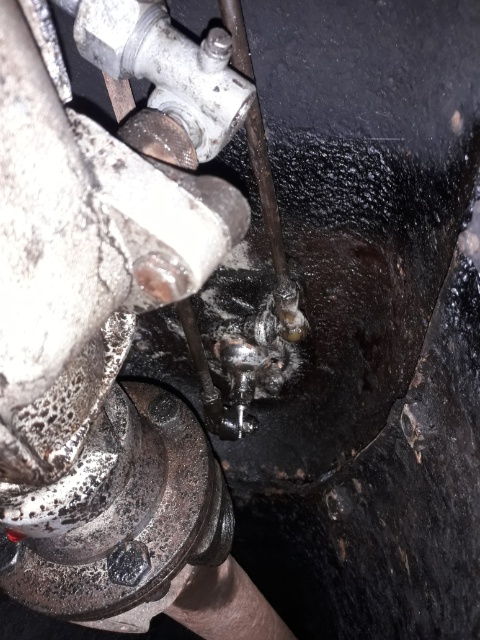
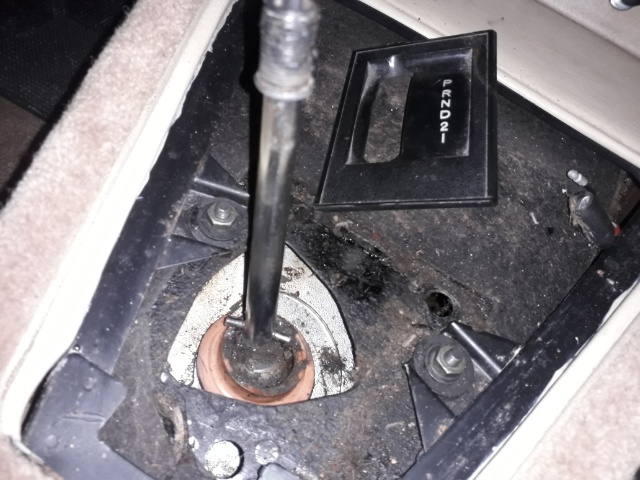
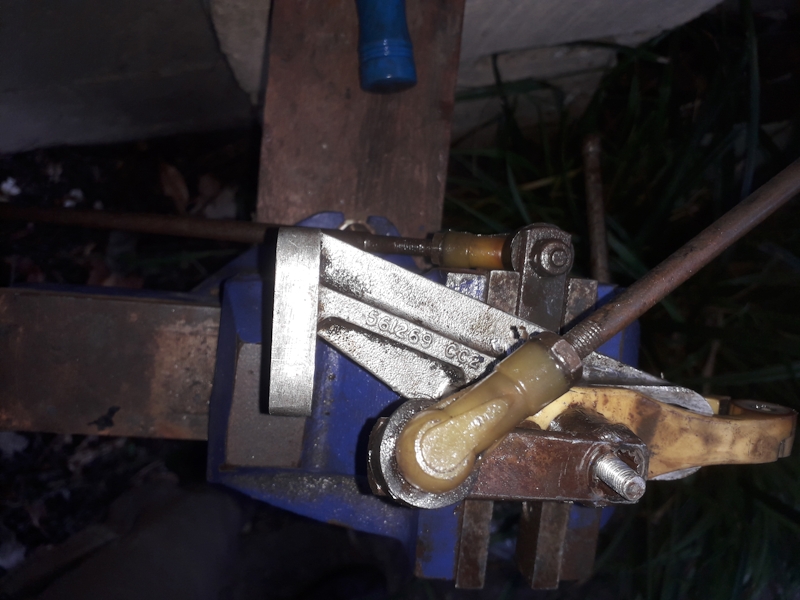
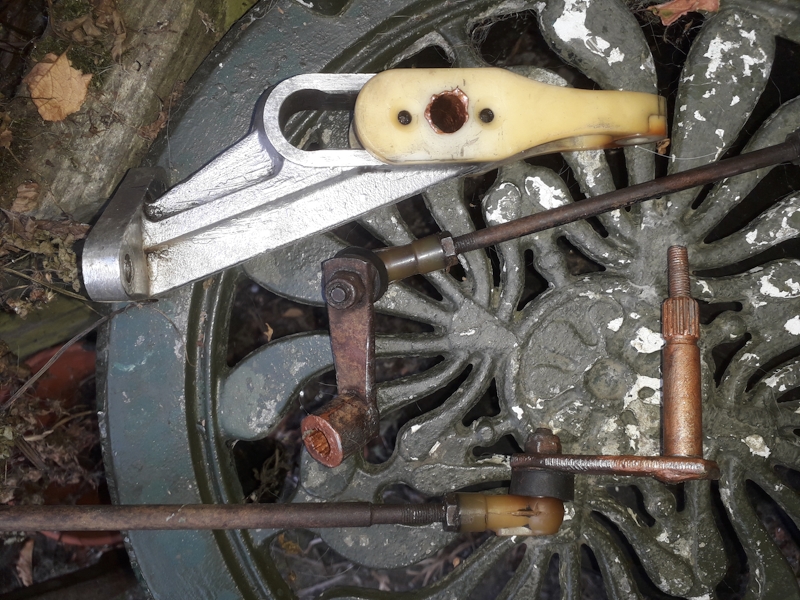
In the end, everything goes back together with a fair amount of greasing, as shown above, but there was still no progress in terms of getting the P brake to work again. What therefore could it be, bar the pawl? My next target was the faded yellow plastic clamp (the compensator) at the top of the rod shown on the above left, and after much struggling it, and the rest of the gear selector mechanism, was removed and found to be firmly jammed up. Slightly to the annoyance of the neighbours, a bit of night-time heavy hammer and chisel work (well, quite a lot, actually) has it all apart and freed-up for a clean and re-grease, without any apparent damage.
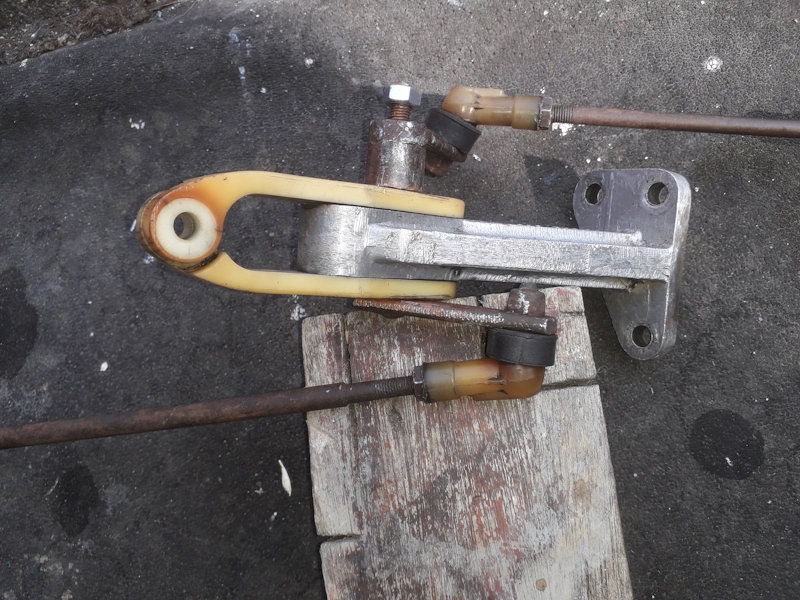
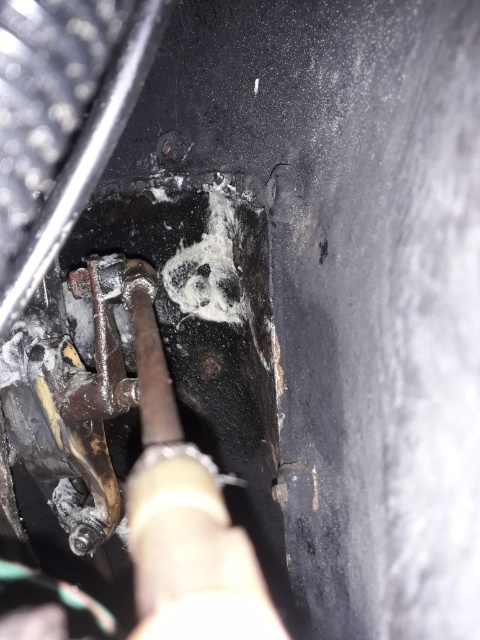
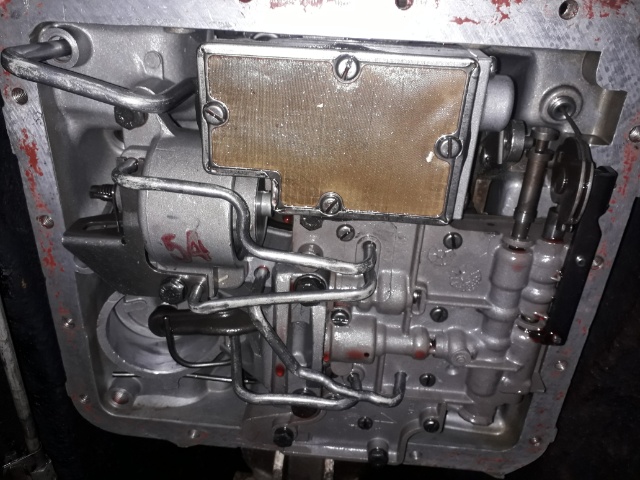
Refitting it to the car, with tons of spray-on grease, and much effort spent on adjusting the lengths of the three selector rods gives nicer operation of the gear lever but still does not solve the problem i.e. we have a parking brake which does not work reliably, usually allowing the car to roll with a horrible graunching sound. Nice one, not. Having now decided the pawl thing must broken, the car went back on blocks and I drained the ATF out to filter and keep for the spare gearbox (waste not, want not). I then removed the sump and found that the pawl mechanism was, slightly annoyingly, absolutely fine. What a relief, though, not least because replacing the pawl would have meant removing the prop-shaft.
However fiddling about suggested that the gear lever isn't engaging the pawl well enough and this causes the ratcheting sound. OK, so I spent some time trying to put the compensator lever on at a different angle via its serrated teeth but that made it impossible to get all the gears and P was in the wrong place. Hence I set it back to the original angle and have decided to shorten the small selector rod as that will achieve the desired effect, I hope. I am led to believe that because the garage had previously made it a couple of cm shorter than it should be but I read that it was critical to have the correct length and had set them all to the right length while refurbishing the compensator (see above). Evidently, that's not the case for an old box since, with the shorter length, it works perfectly, at long last.
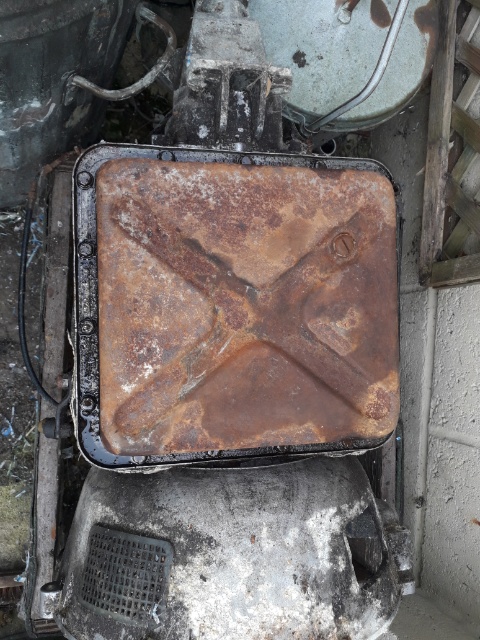
The underside of the gearbox was given a gentle clean-up with tissues and the floating magnet was replaced. Then the flange was cleaned fairly throughly and the same for the sump pan prior to application of silicone sealant. Eventually the pan was refitted correctly and the bolts done up hand tight so that the gloop can partially set overnight prior to final tightening to the right torque. After a day or so allowing the sealant to set, the gearbox is refilled with ATF and all the levers were given another dose of grease where needed and the car taken off blocks for a test run.
The gear lever had been getting progressively better as the work had moved on from one thing to another. My final inkling to concentrate on adjusting the selector levers, etc, did eventually prove to be successful, i.e. we now have a working parking brake and the inhibitor switch finally seems to be behaving correctly, too.
All back together again, working and MOT acquired. All it needed was rear brake adjustment and a new windscreen washer motor which the garage asked me to do because they were too busy and they can't order bits for severiously old cars or bodge modern parts to fit old motors. Nice one, top one, sorted. Still the garage wanted £300 pounds. Hmmmm, are they charging me for my own work ;-? ;-? By now we're into August 2022 and its time to patch up a bit of the Rover's rusty paintwork, so away we go with tons of naval jelly and scratching away at the dried residue left behind by the half-dissolved rust ;-0 ;-0

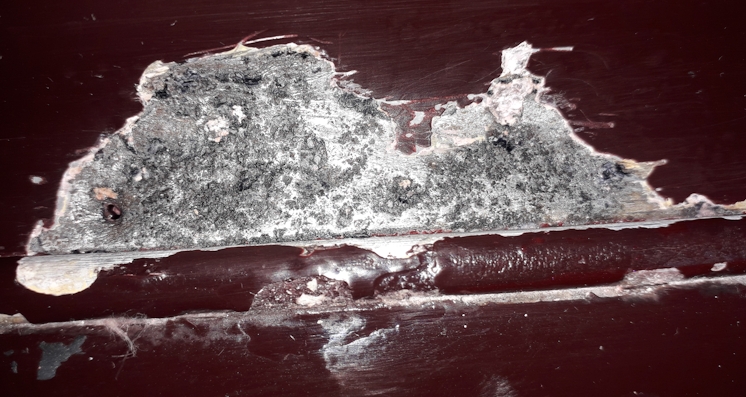

Many applications of naval jelly and scratching with a screw driver, etc, followed by zinc primer and then knifing compound gives, after a rub-down with wet'n'dry, a reasonable surface. A bit of a Ford colour is used to reasonably good effect, after several coats and the car gets an MOT. Trying to get this ready for a local show but I heard it might be cancelled as animal rights protestors are threatening action in town. Bumbu sauce. Talk about the cancel culture. The show's off, and it's not for animal rights protestors, it's for none other than our very own and noble queen (no, Elton's still around AFAIK). Mais c'est pour la republique! Well, I'll have you know I'm currently organising my own mother's funeral which is shortly after the date of the same said and now non-happening show. I could see the funeral being cancelled at this point.... but it wasn't.
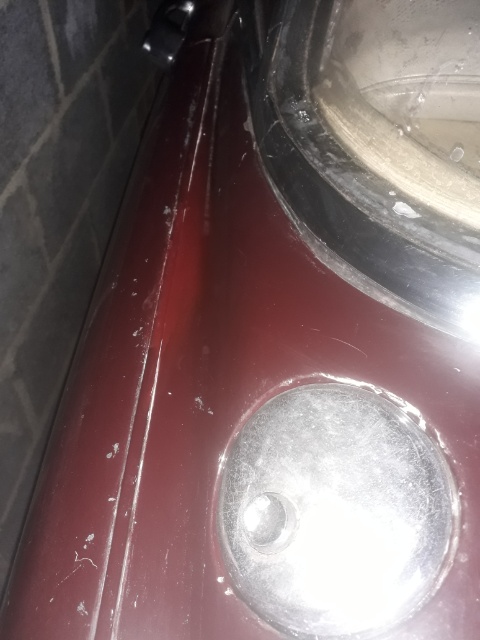
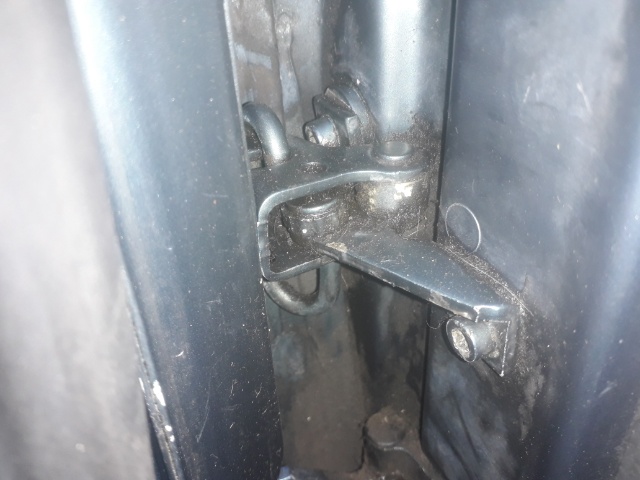
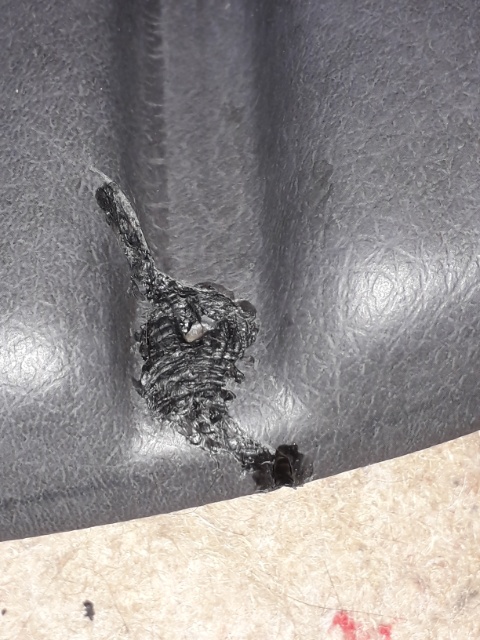
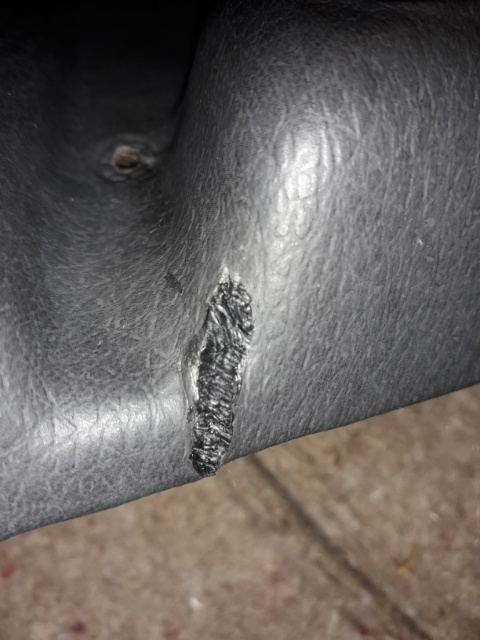
Meanwhile, the 360 has some work done to fix the broken rear driver side door restraint.
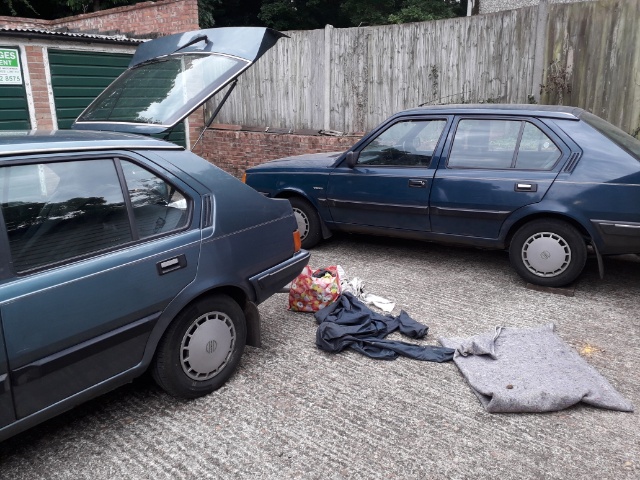
Hah! Sunday 2nd October and its the V3M trip to the Haynes museum in Sparkford, Wilts. I spent the night before at the Travelodge in Wincanton and opened the curtains to see a very wet Deep Blue. Good job I polished it, once for my mother's funeral and once again for the show!

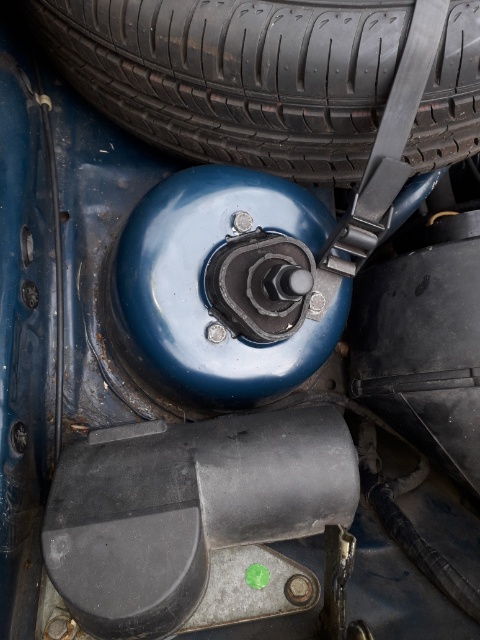
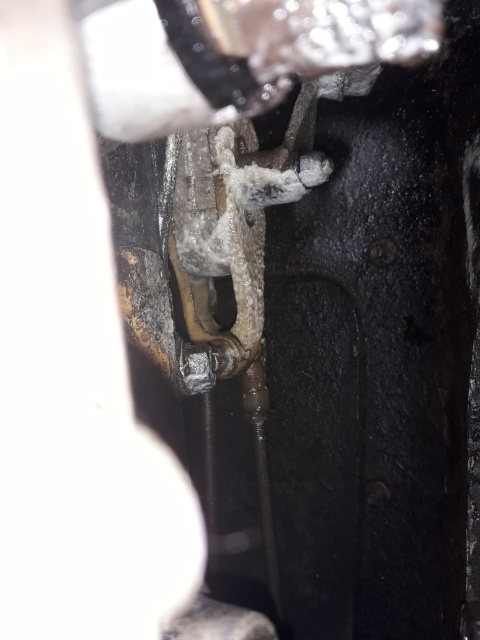
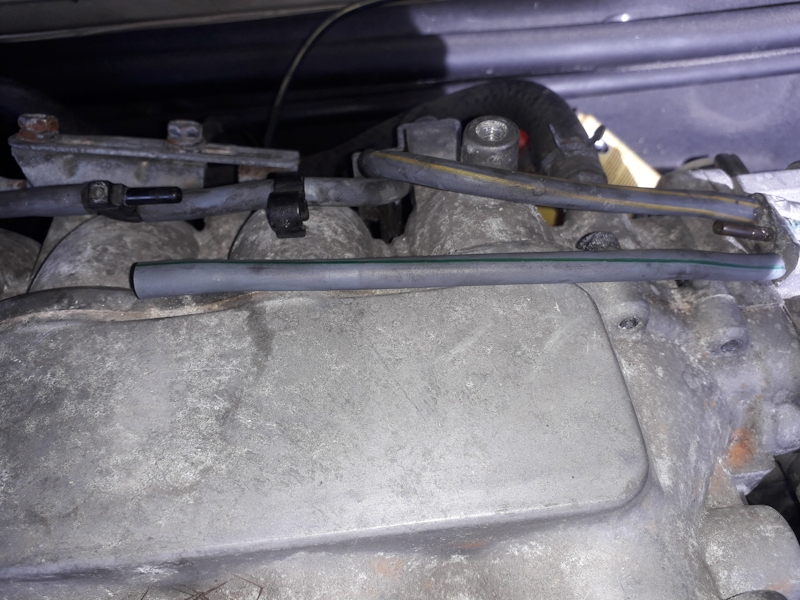
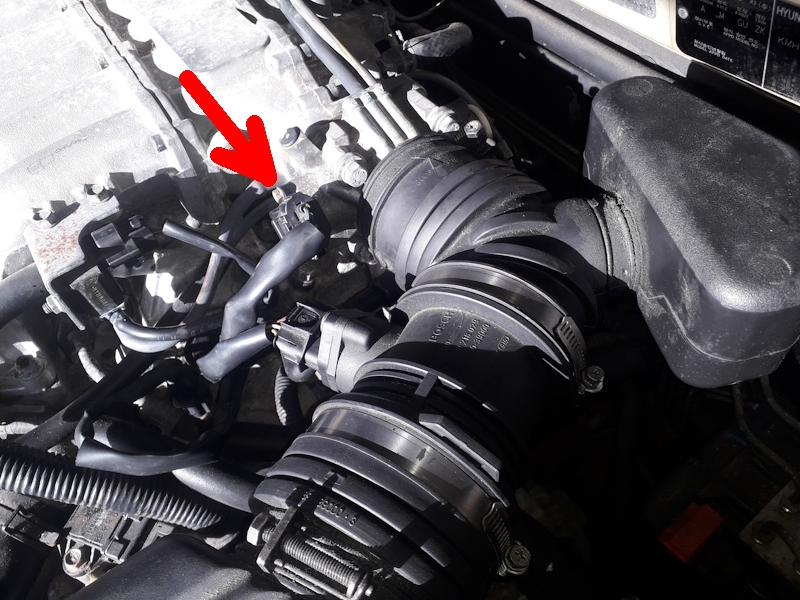
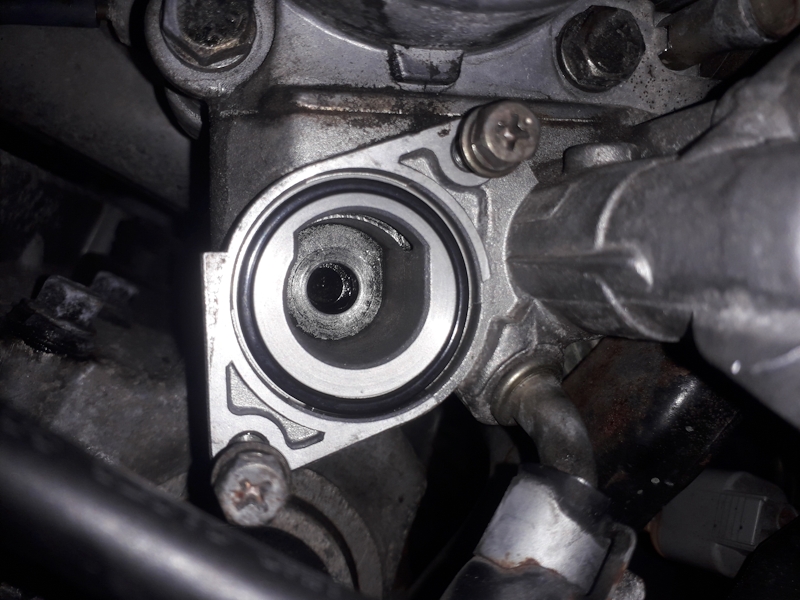
Now into October 2022 and I am having some trouble with the Hyundai which keeps stalling. The first thing perhaps foolishly, was to check the EGR valve in case it was blocked or broken, but removing it for a clean out and test showed it was working fine. The car is australasian spec i.e. it doesn't have cruise control which the UK models had as standard. The latter had an electric motor which rotated the throttle vane whereas my car has a good old fashioned bicycle brake cable doing the job instead. I took the opportunity to tweak the cable tension via the adjustment plate shown below and replace one of the thin EGR hoses which was cracked.
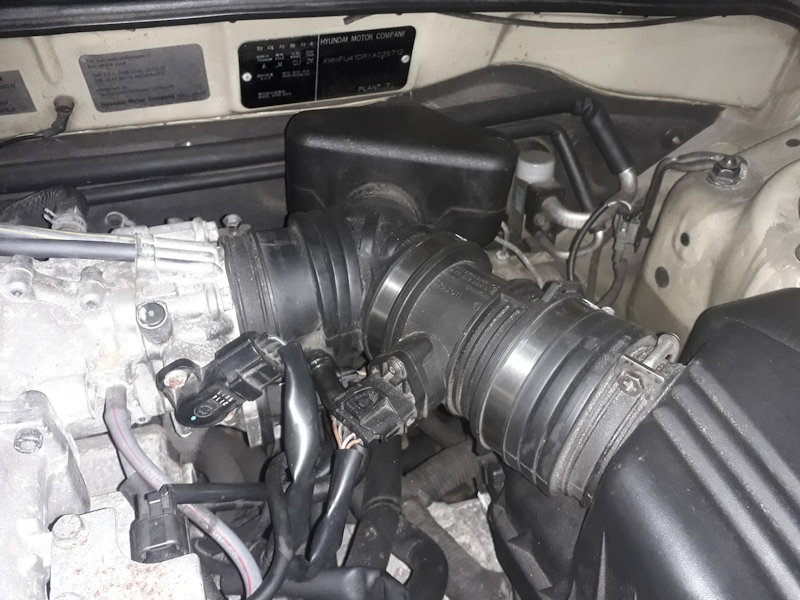
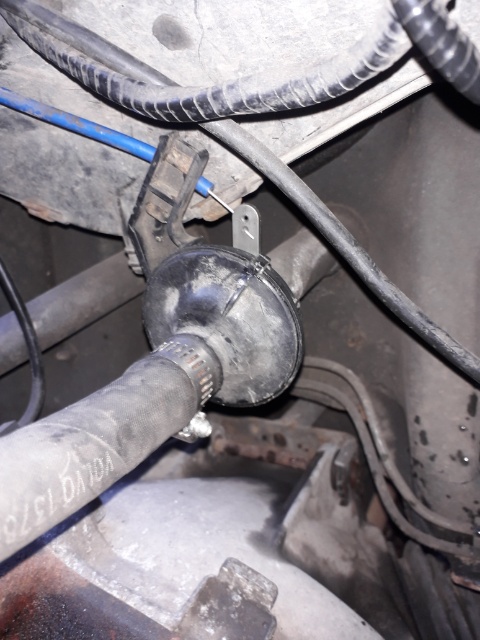
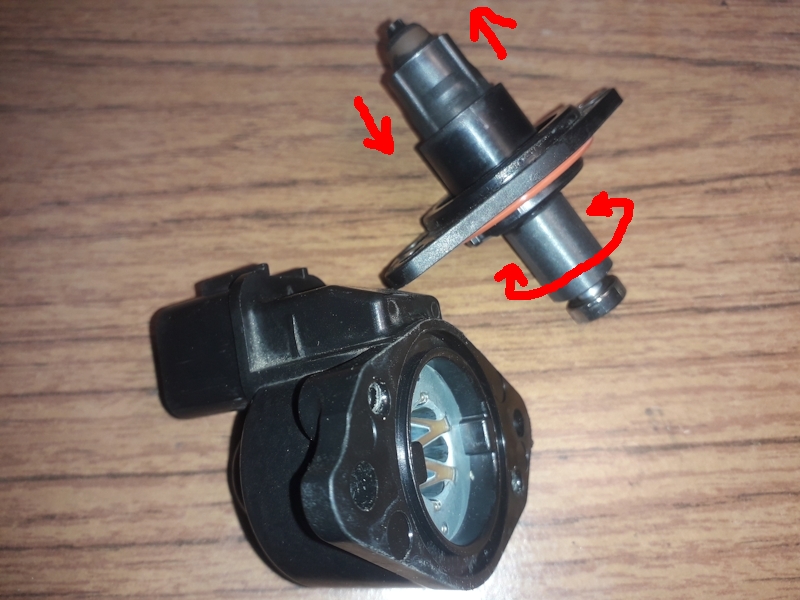
I then got some MAF cleaner for the mass air flow sensor which is the big thing hanging loose on the below left, but that didn't make any difference and in the chaos I actually broke the fuel vapour recovery solenoid which is shown below right. However, that was eventually repaired, I think, with a generous dose of superglue ;-0 ;-0 This has been broken (by me, I assume) at least once in the past already so there's a second-hand spare coming in the post.
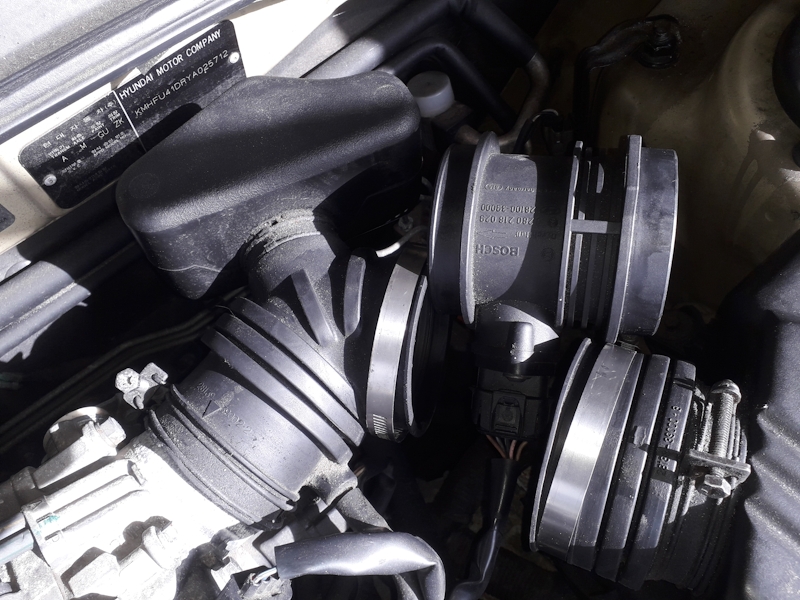
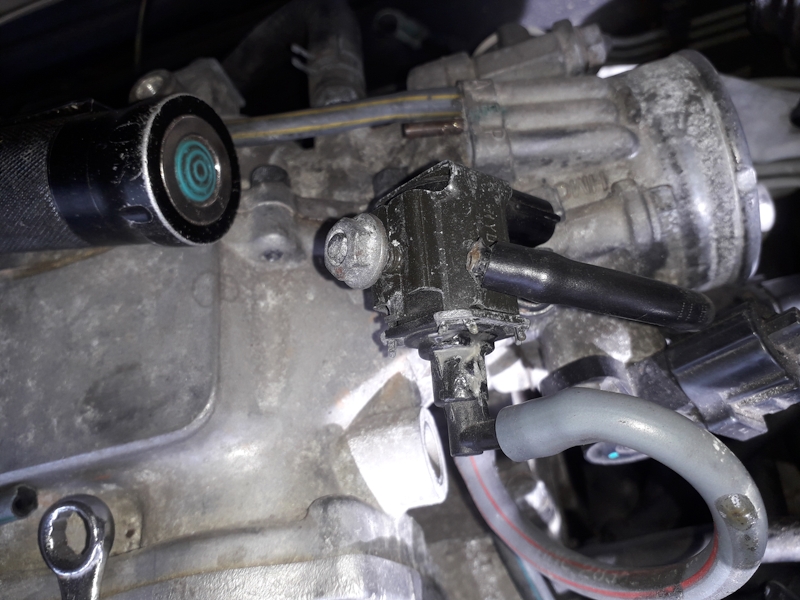
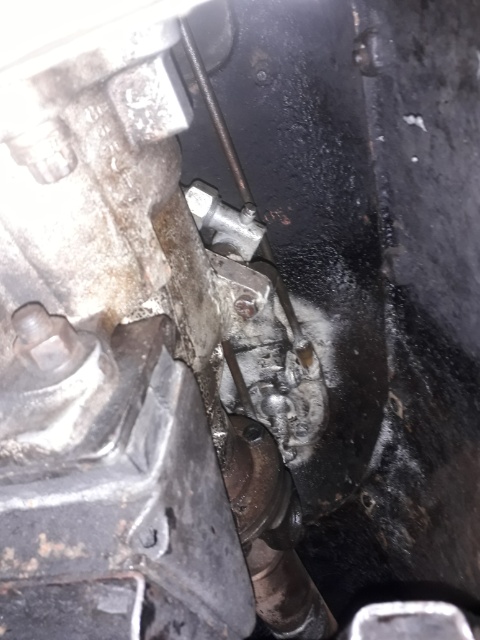
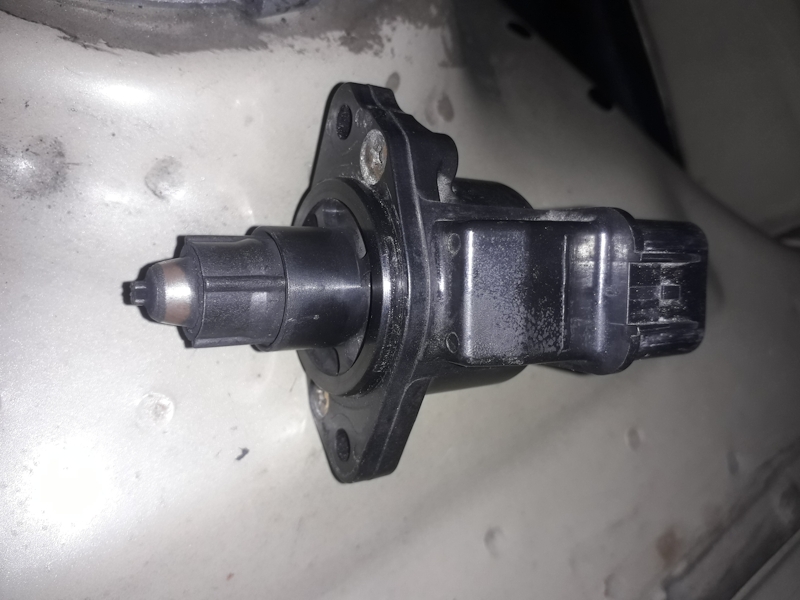
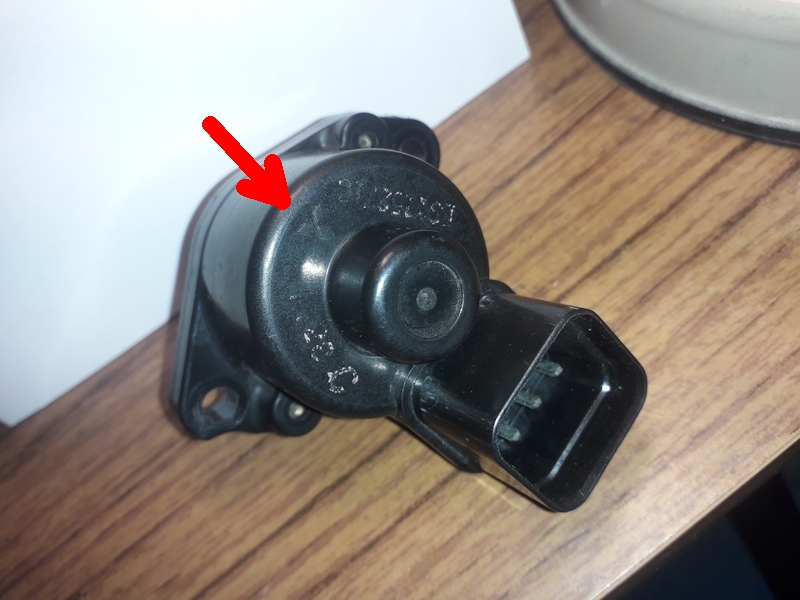
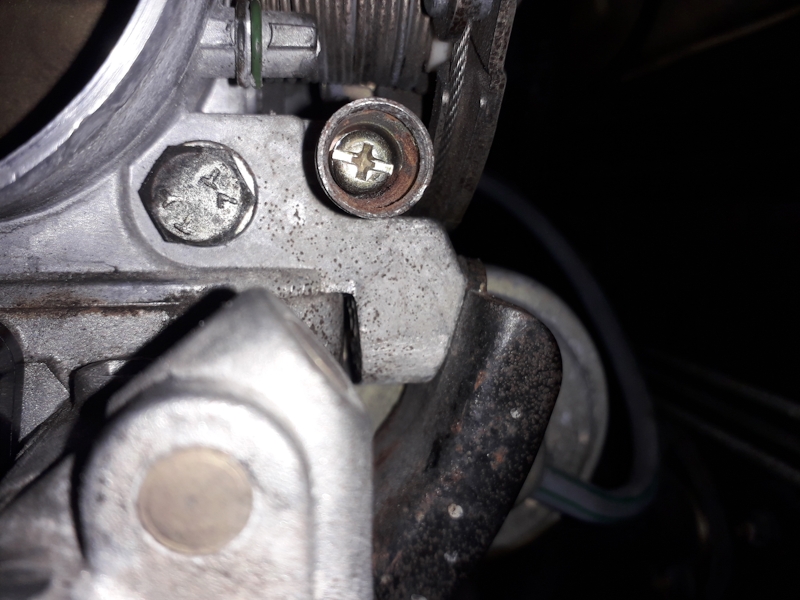
I then thought it might be the throttle position sensor which is indicated by the arrow below. It can also be seen better in the first Hyundai photo above. Anyway it all seemed to be spot on after a bit of adjustment. Ok, coolio Joe, but no progress to show, so far anyway. I then thought it might be the idle air control (IAC) solenoid, which is shown in the picture below right (note the epic Mitsubishi logo, bottom row arrowed) because the mixture on idle is incredibly chokingly rich. *cough*
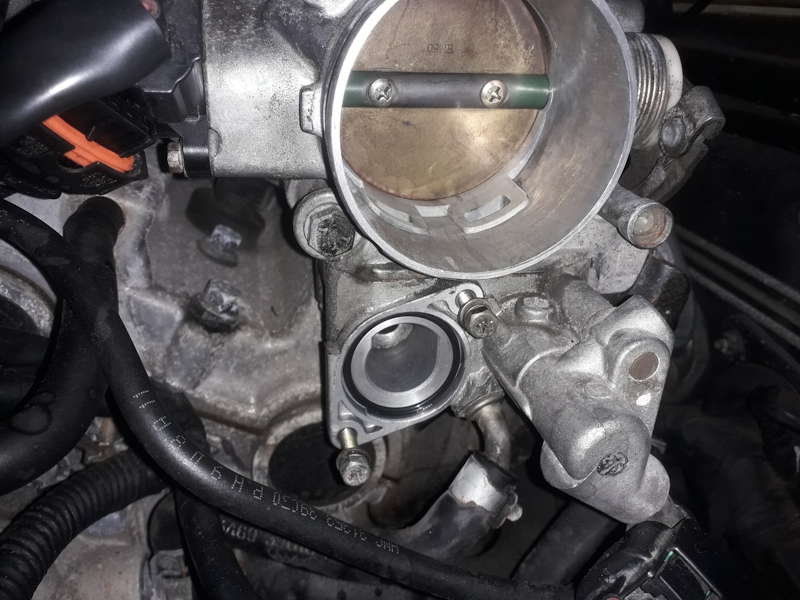
This beastie sits in the hole below the throttle which is shown below. Said hole was, despite appearances, cleaned out with copious amounts of carb cleaner, etc.
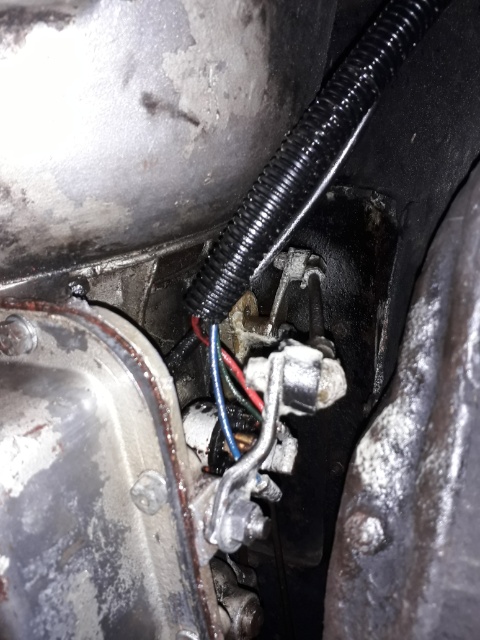
The IAC valve itself was opened and given a clean-out and and oil-up. The resistance of the coil is about 40 Ohms while it should be 30 Ohms, but I have no idea if that's a problem. Anyway, there's a cheappie spare from China coming in the post in case its the issue, given that the original item dates almost from the Ming Dynasty ;-0 ;-0
As indicated by the red arrows above, the curious pointed protrusion moves in and out to open and close the air channel which bypasses the throttle. The movement is driven by a screw device which itself is driven by the core that rotates in the field of the solenoid (as shown). If this sounds barmy, it certainly is, as this ( warning: * LOUD * ) video shows. I love the rattle it makes when the protrusion pulls itself in ;-0 ;-0 I don't know, but it seems to be doing its thing (??), so I am thinking it is probably working OK, but a test run shows that the car still stalls when its warm on idle. Answers on a postcard....
A little but of progress by late Oct 22. Hidden behind a little blanking plug, as well as the befuddling veil of all the high-tech paraphernalia, was a little old fashioned idle adjustment screw and a tiddle of it today seems to have the idling in a much better state. This screw simply acts as a stop for the throttle cable pulley which can be seen above it. Bah humbug, a bit more testing over a couple of days or so shows that it still stalls. Getting too close to Christmas.
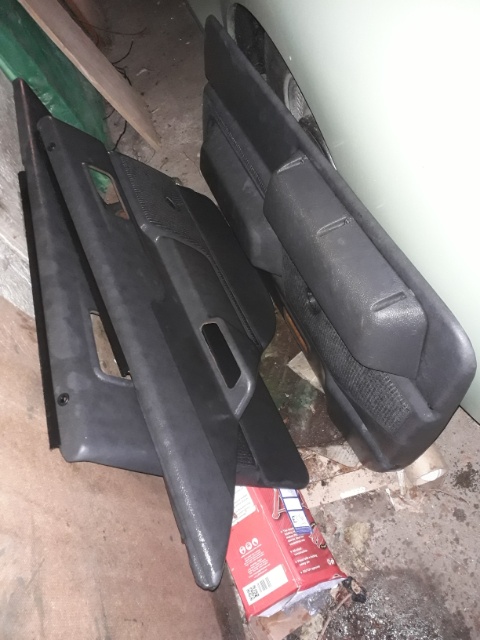
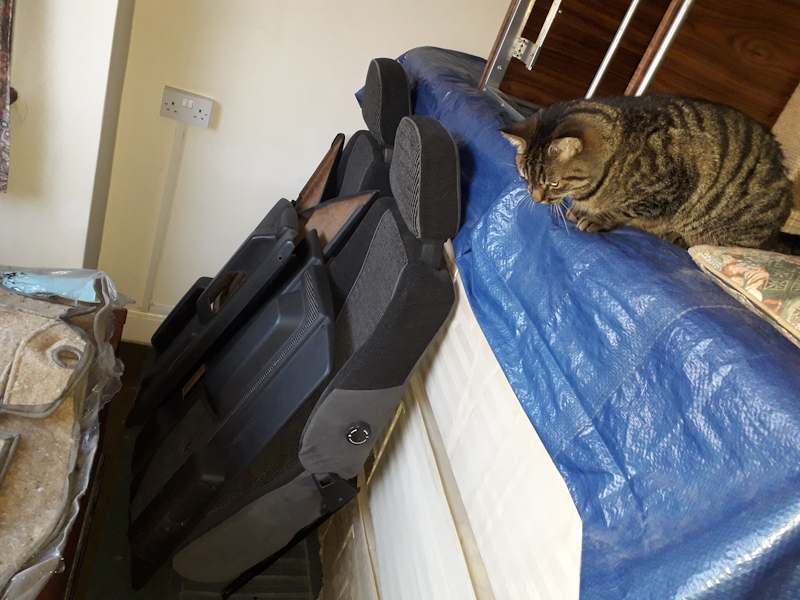
Early Nov 2022 and its sorted. It was the mass airflow (MAF) sensor. A replacement at £66 seems to be a complete cure so now, after an MOT, I am able to get back to the Volvos. A trip to Pompey secures a new set of mark 2 seats and door cards, potentially for Deep Blue. These are given a clean up and a bit of repair work done where needed.
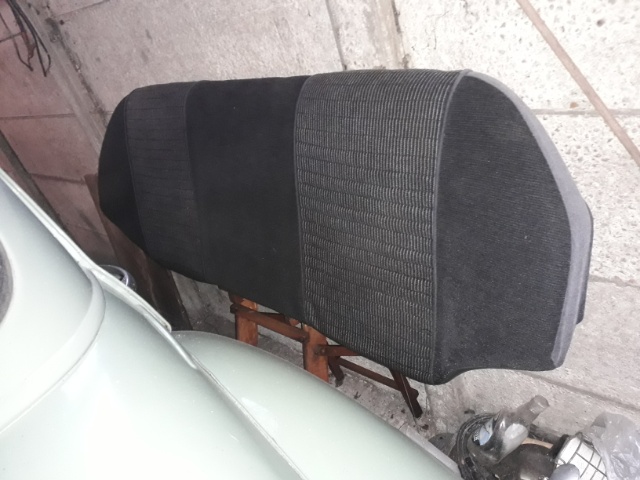
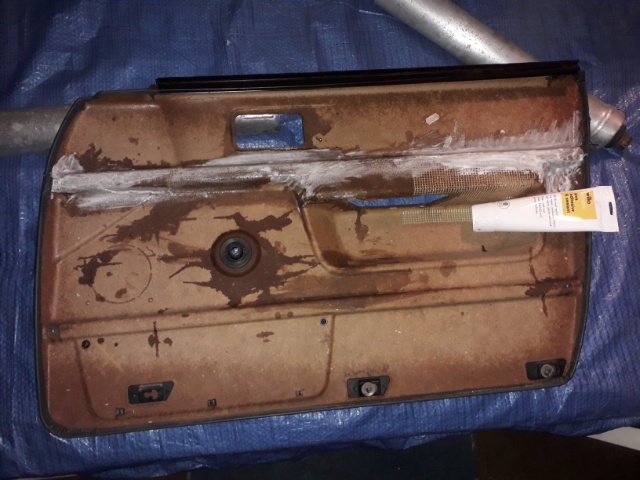
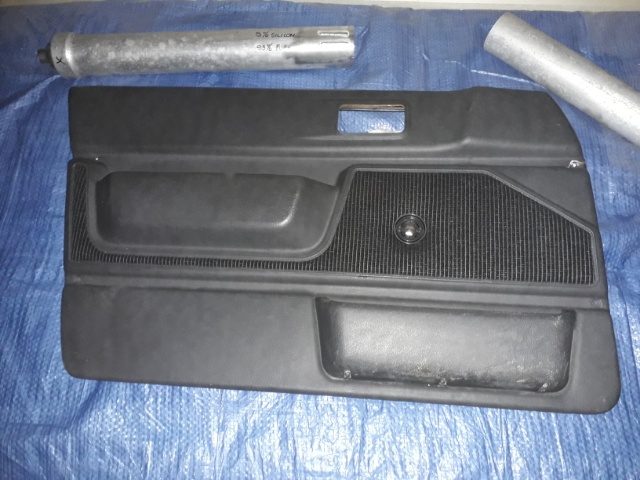
The old vinyl is patched-up and papier mache with some follow-up acrylic paint and Captain Tolley's used to reasonably good effect, too.
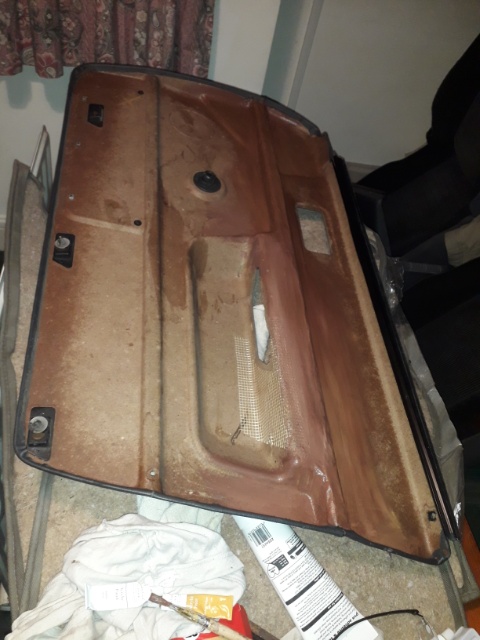
The rust on the seat rails was wire-brushed off carefully and treated with naval jelly prior to a coat of black paint. The seats and door cards are pretty-much ready to fit bar the speakers and rear door grabs which are still a work in progress.
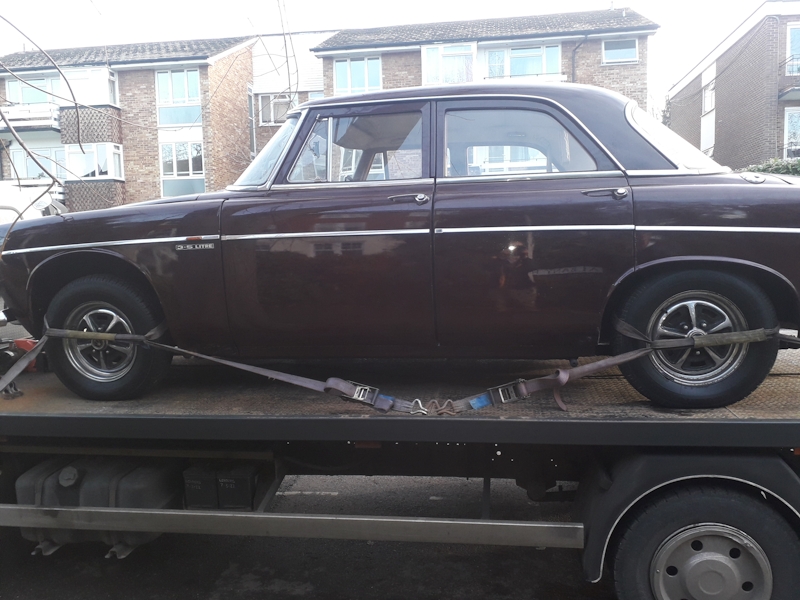
Now into Dec 2022, and its decisions, decisions time and, not hiding the truth, at almost 60 with 6 jalopies to support and the ULEZ expansion coming sooner or later, the old Rover (which I have owned for half my life) is getting to be too much for me, so I get together a quickie web page with all the info about it to try to pass it off onto an unsuspecting P5 specialist. It's here. Time ticks by and we're actually into the first 2 weeks or so of 2023 and after about 10 days of solid preparation for the run up to Ipswich (note severe, chronic wishful thinking here) it's not looking too good, not to mention the inhibitor switch has stopped working again. That doesn't matter too much but I take her on a test run and she dies after a quarter of a mile, so driving to Suffolk is looking like it's well off the cards. The AA man who came couldn't fix her despite swapping coils and condensers, etc, so she was towed back to the garage and pushed in. Another 3 days of trying to make her run for longer than about 2 minutes, before stalling and refusing to start, were not productive. So it's a case of calling in the transport professionals, at cost, for the 100 or so miles to Ipswich and, after successfully driving onto the ramp, off she goes!!
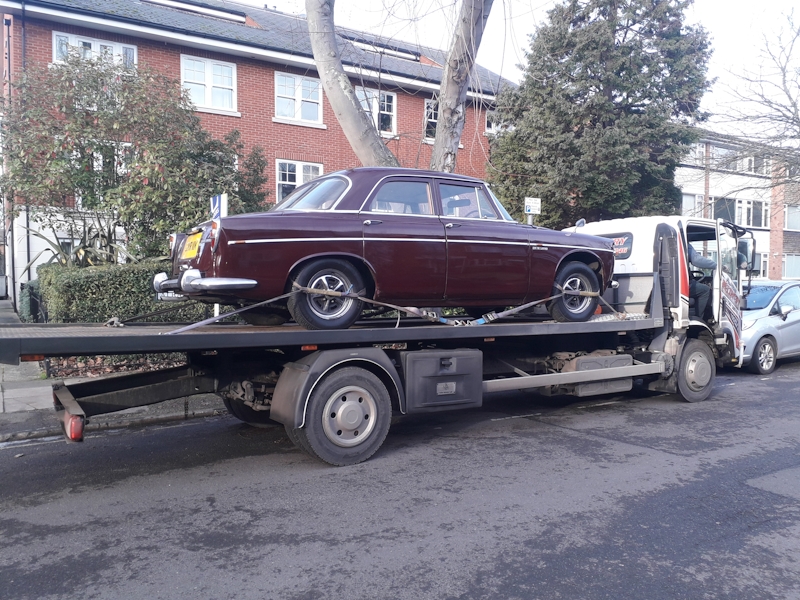
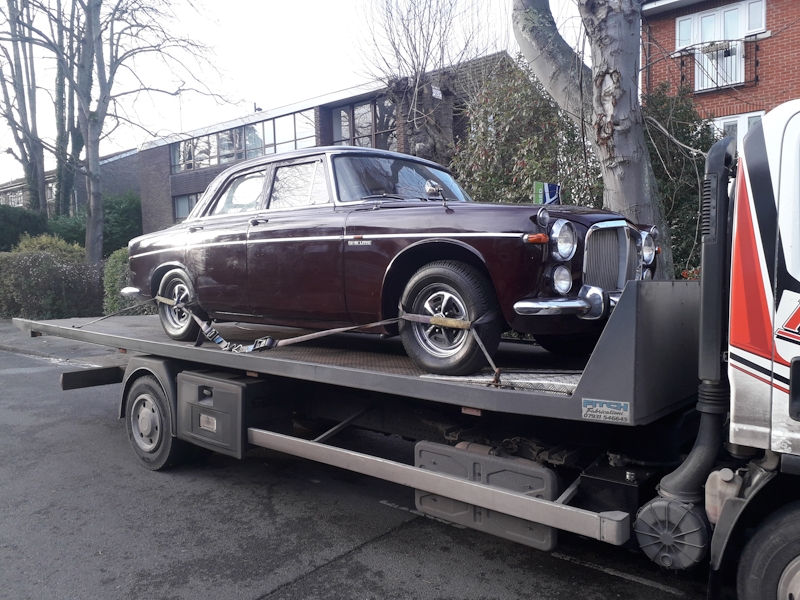
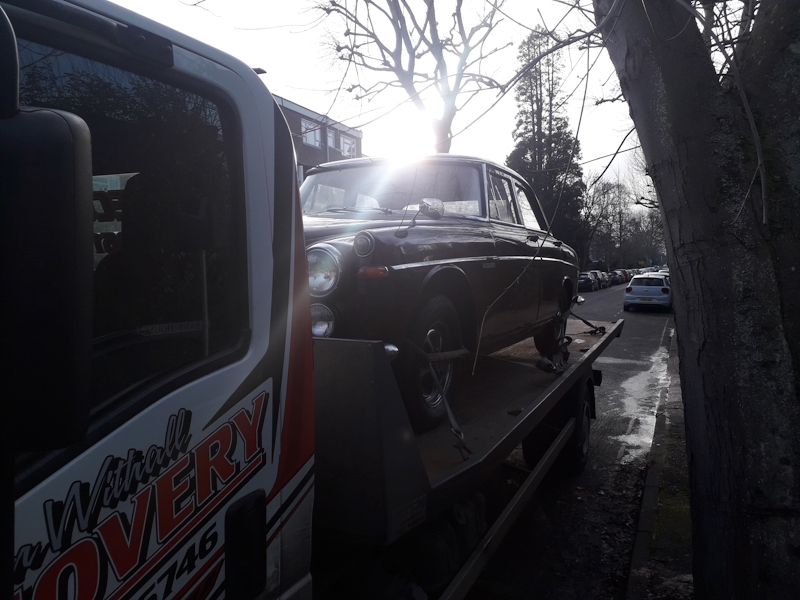
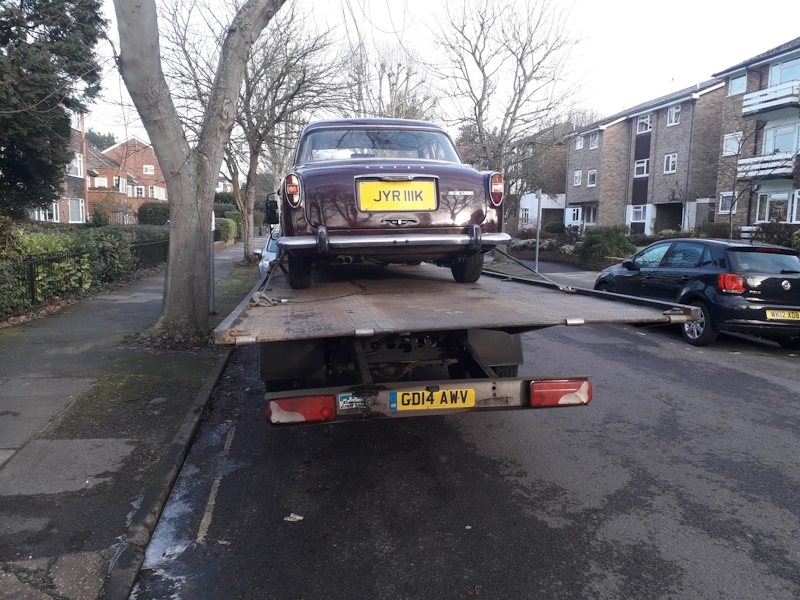
Did I shed a tear as she was driven away? Answers on a postcard ;-0 ;-0. We must move on: here.