January - December 2021
Jan to Mar 2021 were spent in another jolly old lockdown which allowed the garden, front bedroom and loft to be tidied up a lot, thankfully, for the first time in decades. I had noticed that the 360 had an occasional issue of idling too fast (2000 rpm) which I couldn't easily sort out. It turned out that the problem was due to the plunger at the side of the carb (which is to do with float chamber ventilation) kept getting pulled into the down position by the plastic lever. However, a couple of hours fiddling about revealed that it had a *very* simple cause - the choke cable had become a bit bent in all the previous shenanigans and was not allowing the carbie cams and levers to go fully back to ground-zero when the choke was pushed in. However, after a bit of straightening, I can sleep peacefully now.
In early March I found that the car started after 2-3 weeks
standing with fuel level in the filter really low and on a
fairly flat battery. This seem to suggest that the non-return
valve seems to do the business. The mixture is a bit rich,
though. Maybe, a tweak of that well-hidden screw is needed.
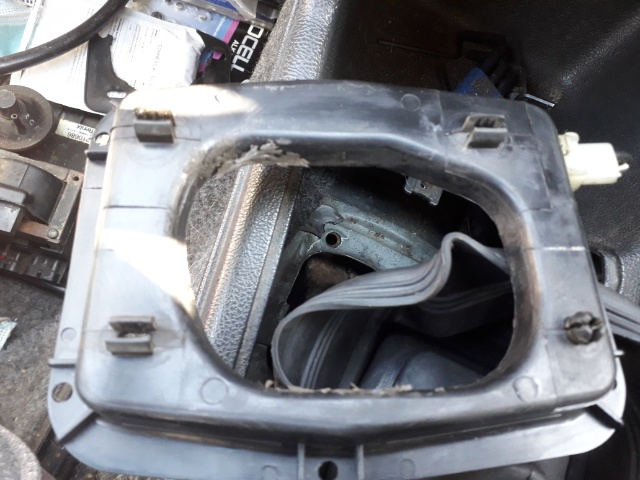
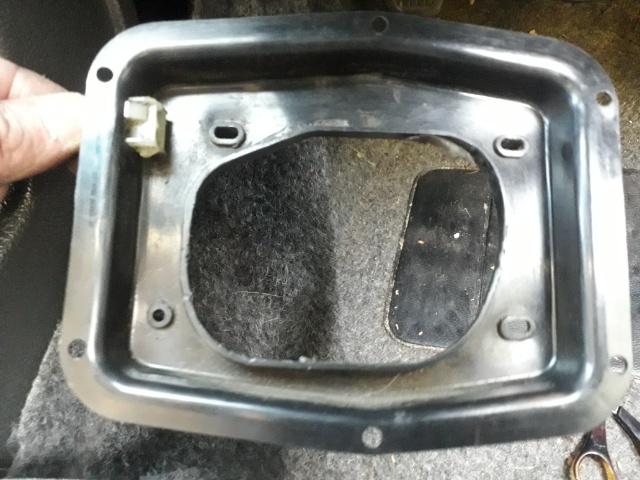
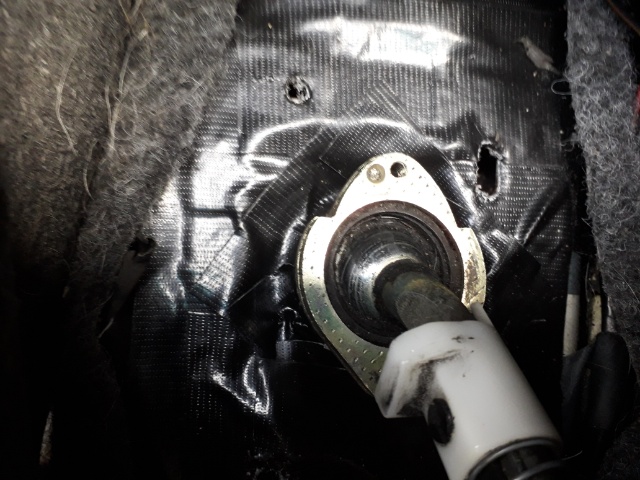
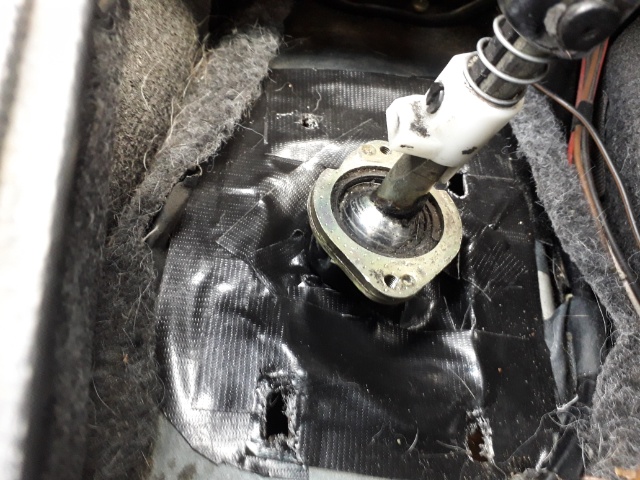
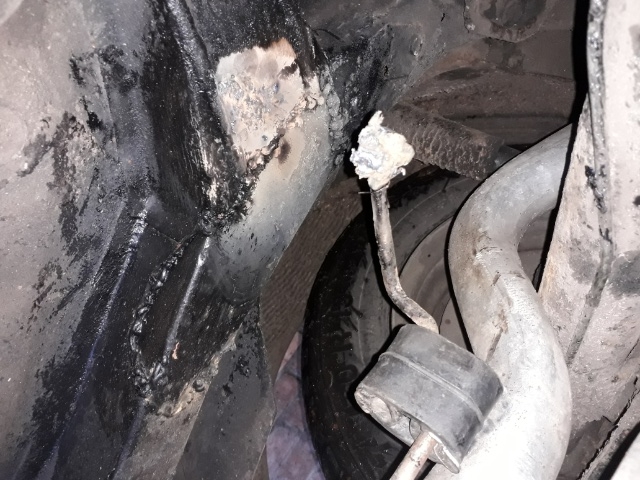
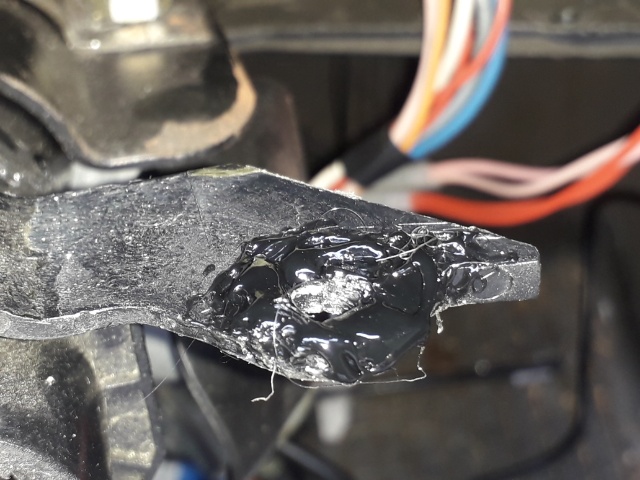
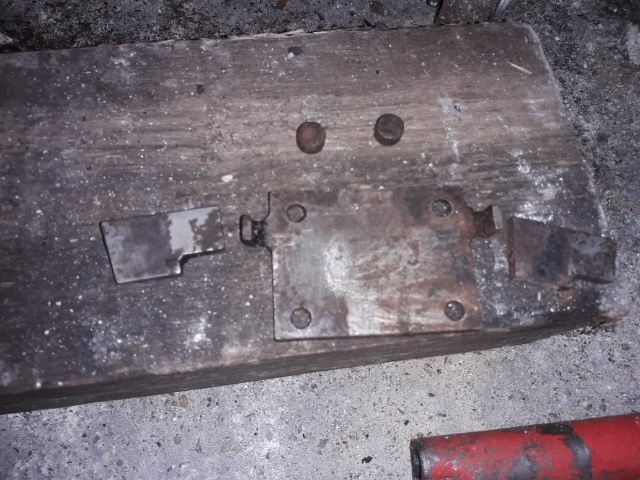
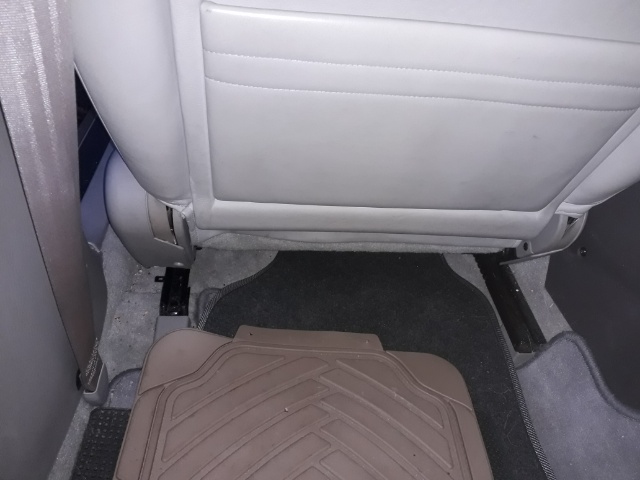
The 360 gear-change died on 5th April 2021 so she was brought back by the AA on the back of a lorry. The gear lever was incredibly loose but I couldn't see anything wrong apart from the fact that the rubber seal with the chassis beneath the two gaitors had given up the ghost. Turns out that its due to a well-known weak point in the linkage and it gets welded up by the garage for £531, which sounds like a lot but they had to drop the gearbox, so its not too bad really. All that remains to be done is to repair the waterproof seal with the chassis which sits under a plastic frame beneath the two rubber gaitors.
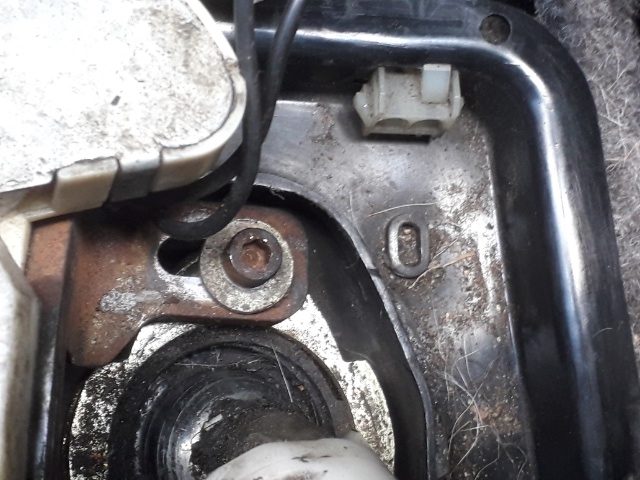
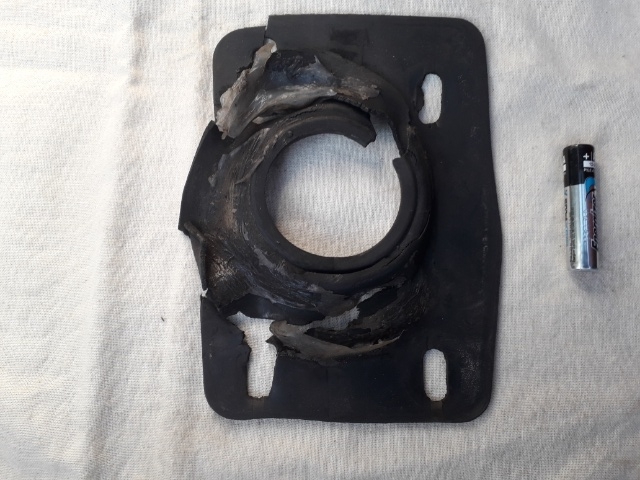
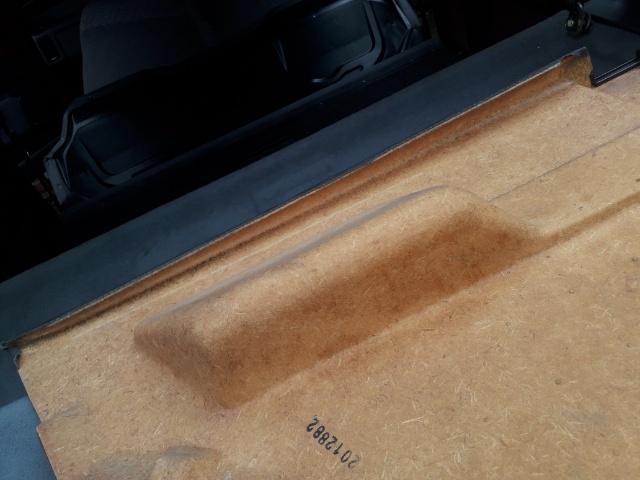
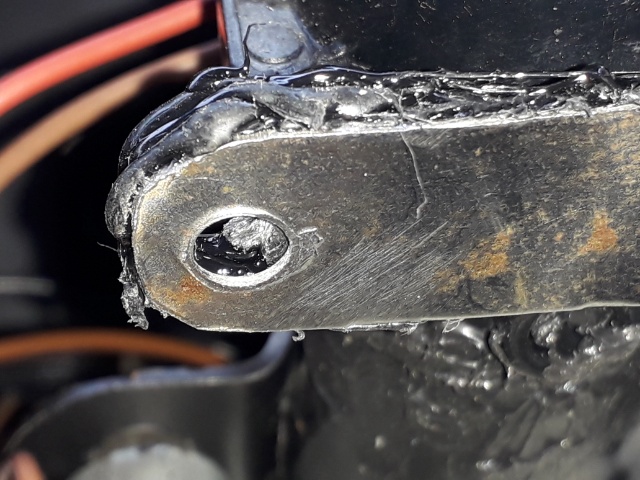
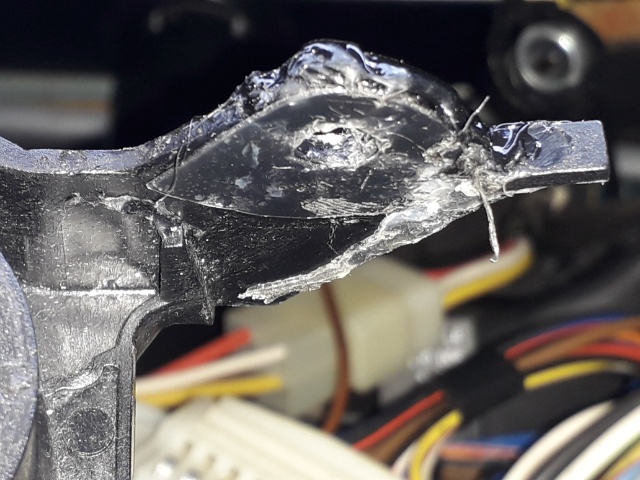
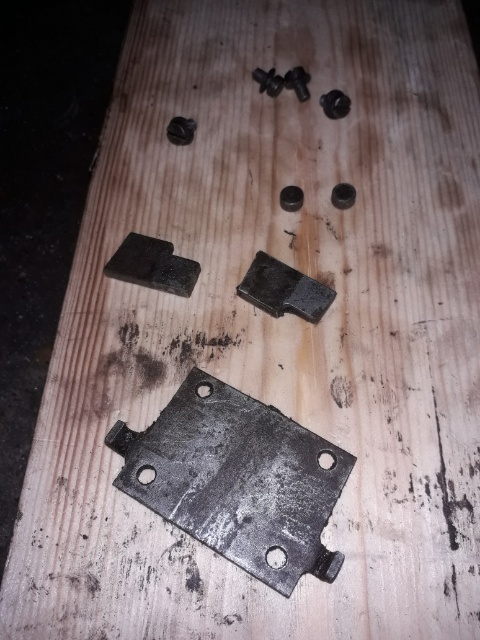
It turned out that the plastic tray can be removed by tapping out little plastic pegs which sit in the 0-shaped holes, one of which is visible in the above right picture. Removal goes quite well, although the rubber seal turns out to be unobtainable and not easy to duplicate. There's even a bit bona fide pigeon poo welding visible on the linkage below.
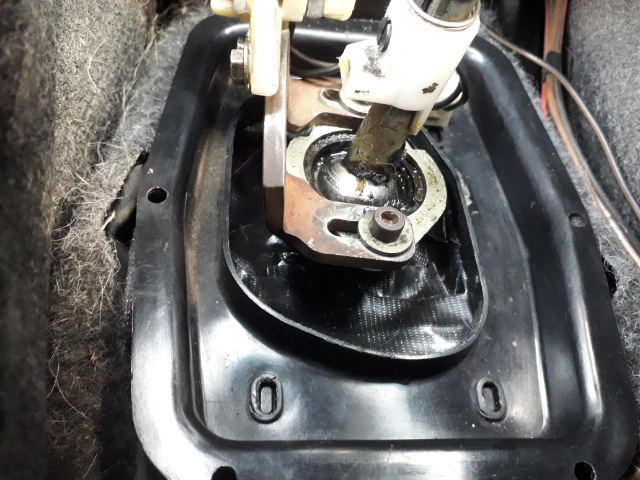
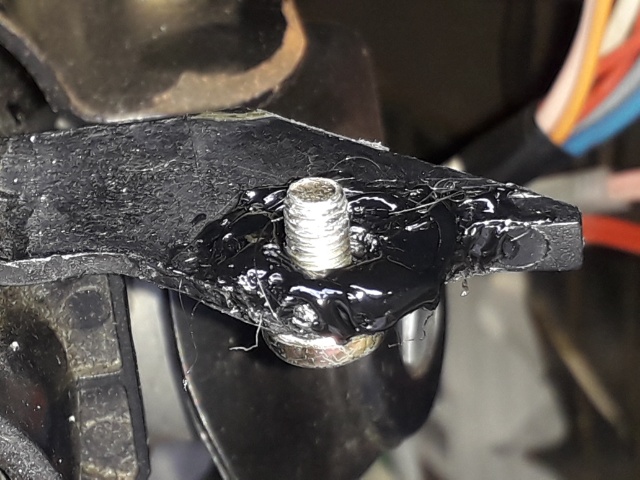
Mid-April 2021 and it's coming back together with Gorilla tape as a substitute for the original rubber moulded seal - just want a bit of waterproofing at that point in case I have to drive through floodwater again, although I have to make holes in the tape for the plastic pegs!
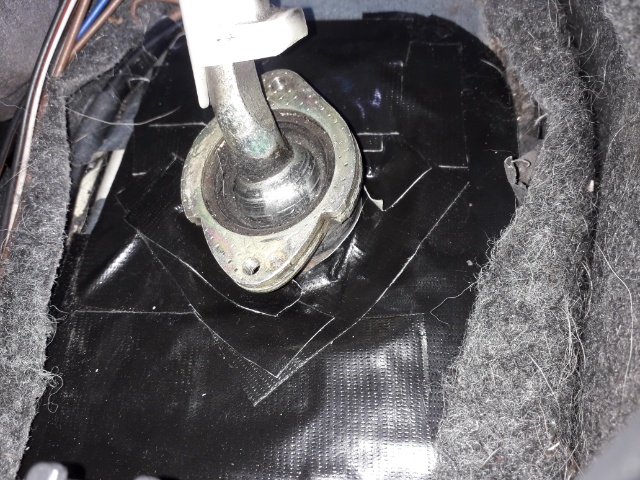

As can be seen, the pegs tap back into their holes to about the right depth quite well, I think. Now moving towards the end of April 2021 and the car is back in everyday use.
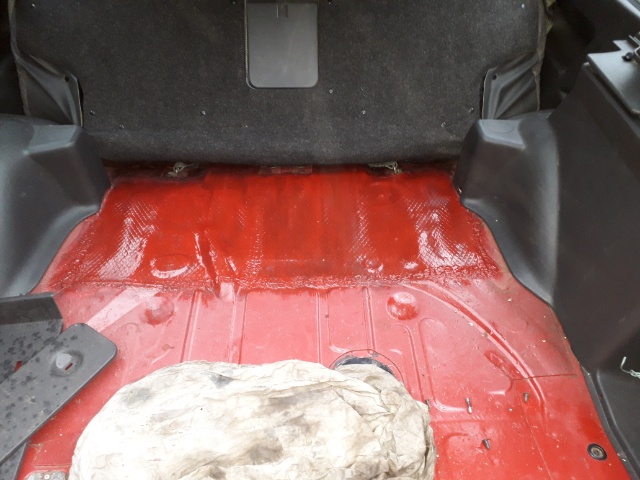
Effort is now concentrated on Red Ness whose boot floor was given a hasty coat of red paint in the autumn that didn't match too well. However, a coat of black Humbrol enamel, diluted a lot with white spirit, has toned it down quite well.
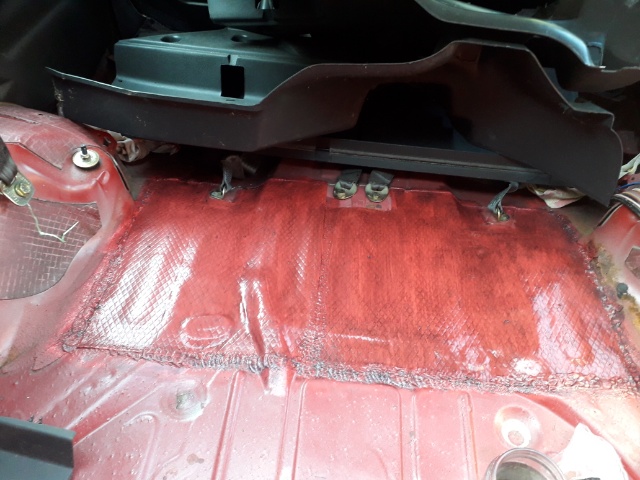
Blast, it looks like a second coat overdid it.
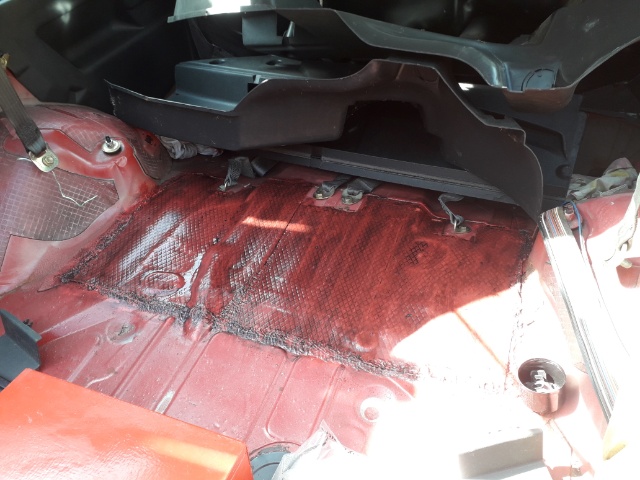
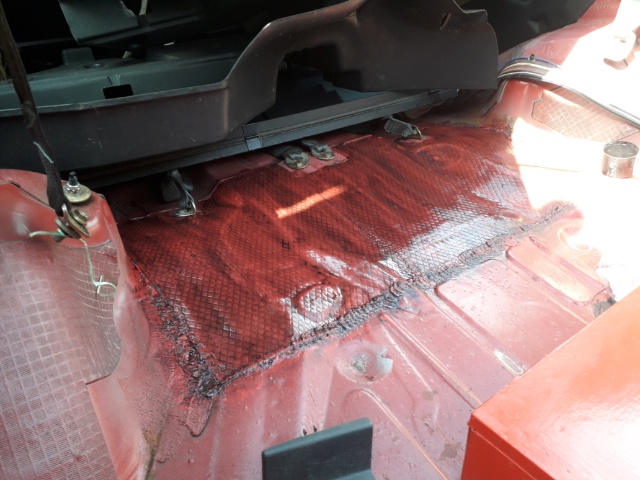
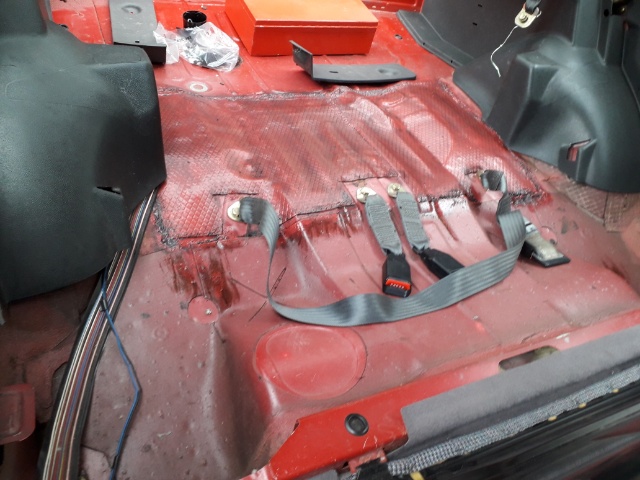
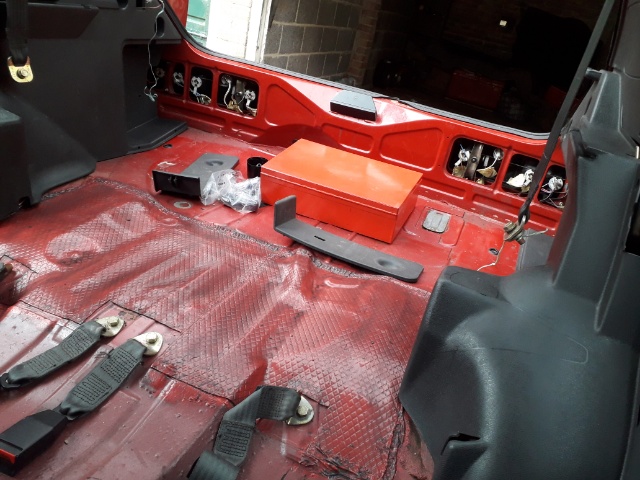
Anyway, after much cursing and climbing in the boot, I got the back seat re-fitted, but my back was telling me I should not try this. Still a bit unhappy with myself over the colour so I went over it with some original Volvo touch-up paint, thinned-out with tons of acetone (shown below right). Dried very quickly so I am happy with the result, but now it's too red again, but I think its OK.

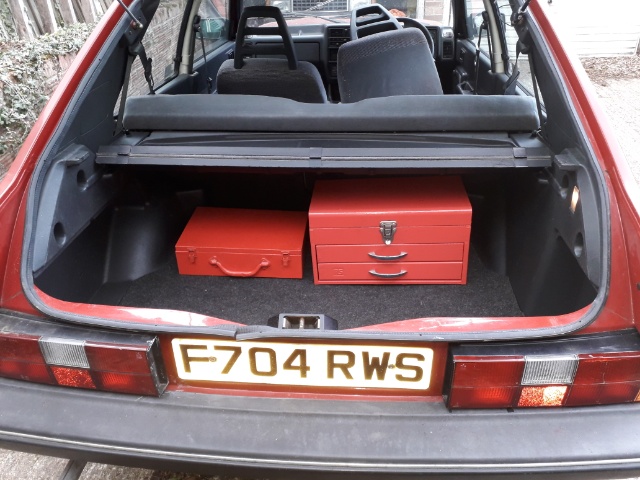
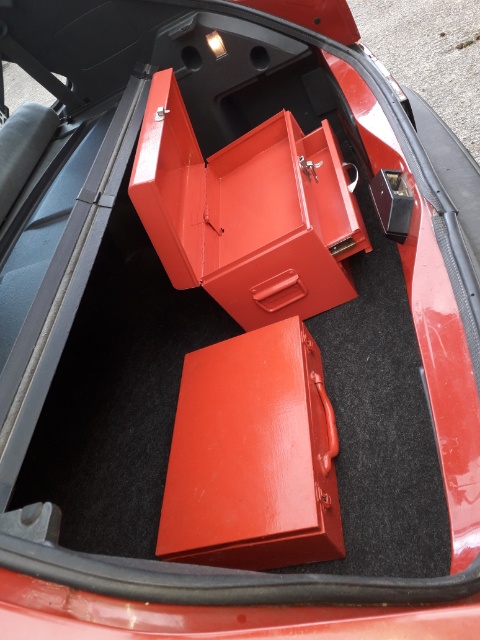
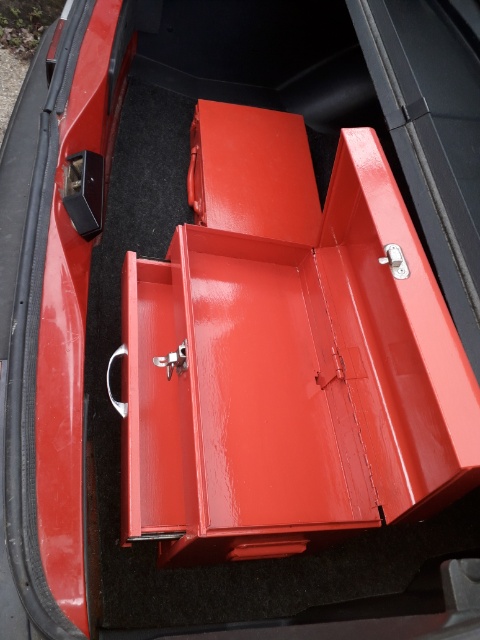
I then got the boot boards back in place, etc, so now (mid-May 2021) it's time to show off my latest restoration piece: a 3-compartment toolbox hand-painted to match, I hope.
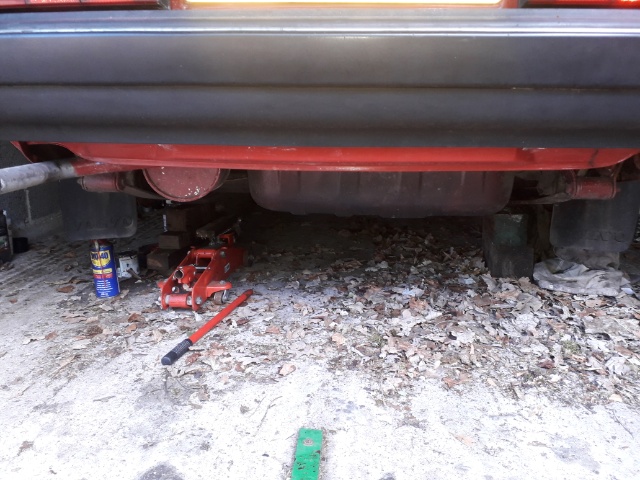
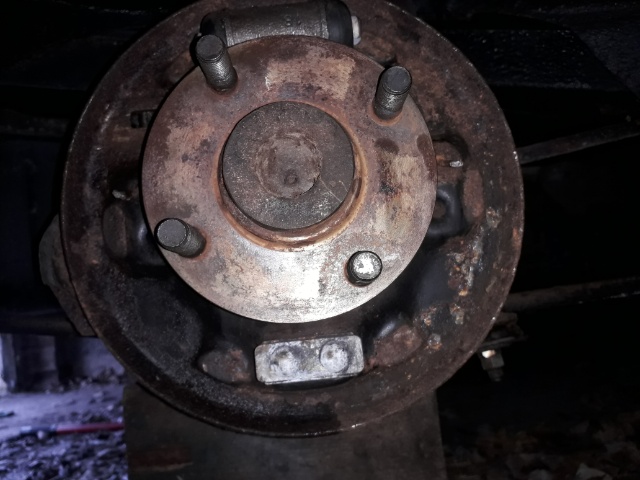
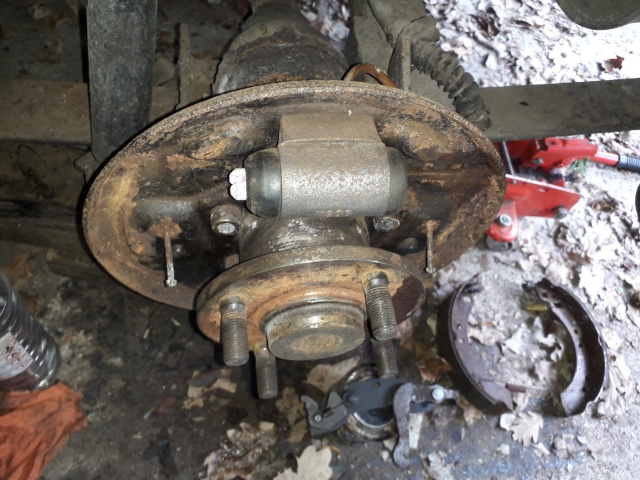
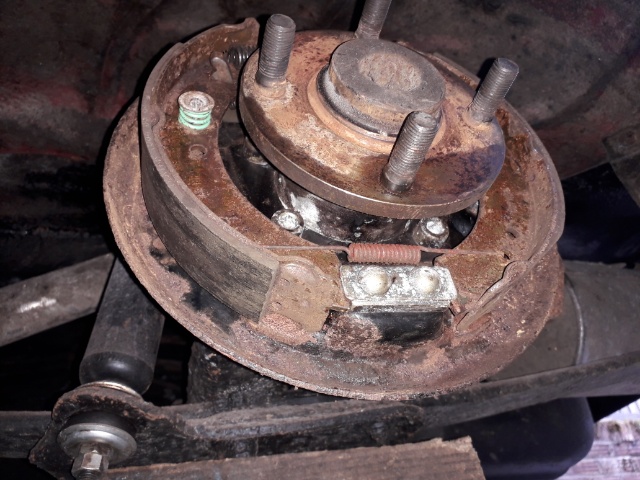
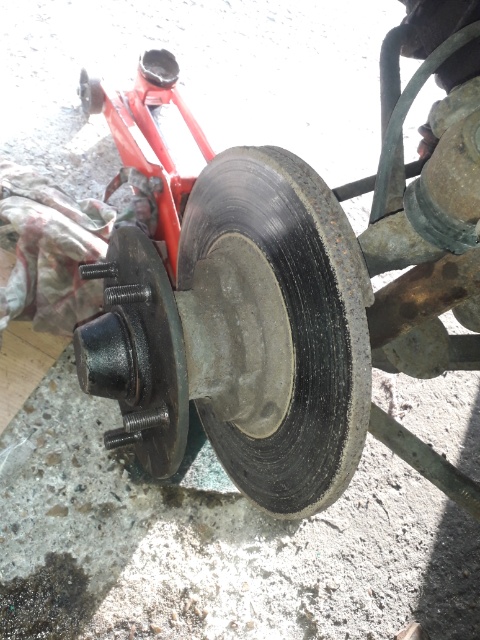
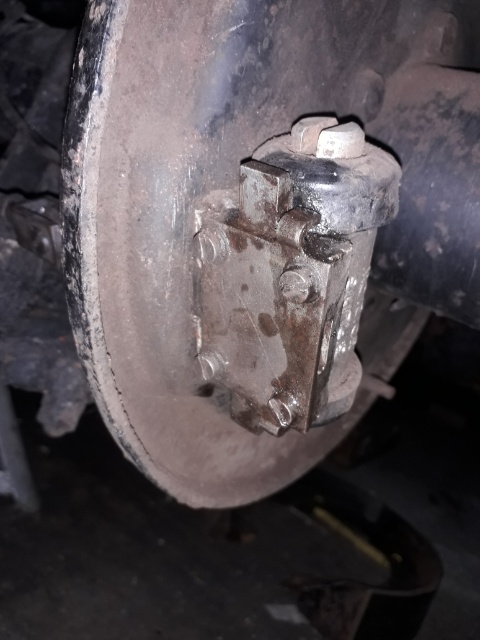
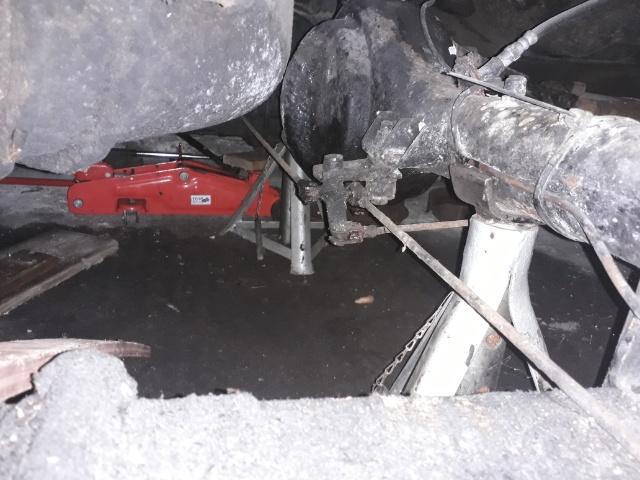
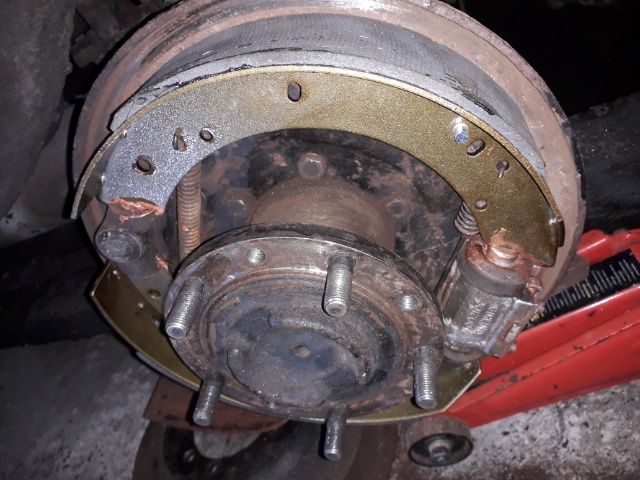
Now, it's time to start freeing-off the rear brakes so the car goes up onto wooden blocks again and, thankfully, the drums came off fairly easily. You can see my slightly embarassing over-spray on the exhaust pipe and spring shackles from 2 years ago. I just assumed they'd be rusted-up by now ;-0
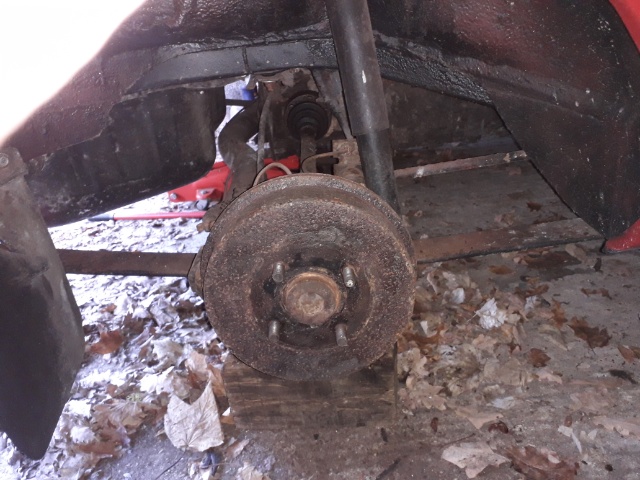
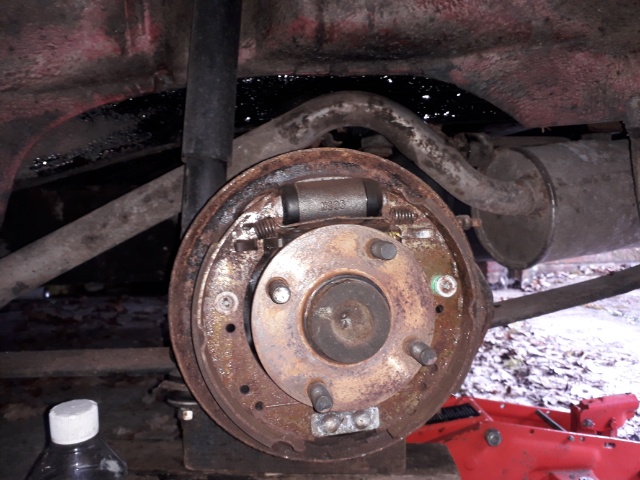
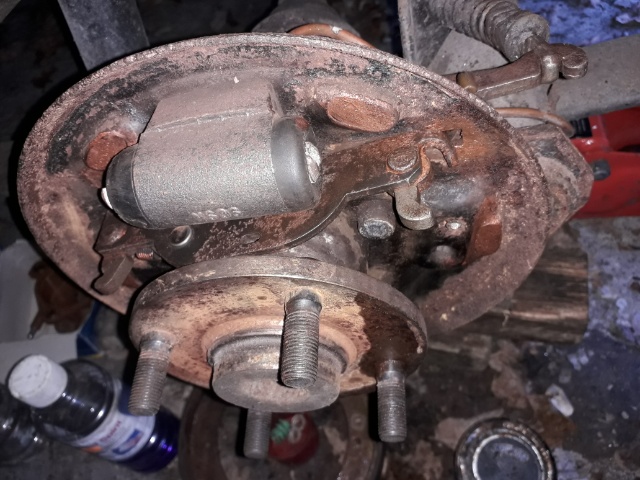
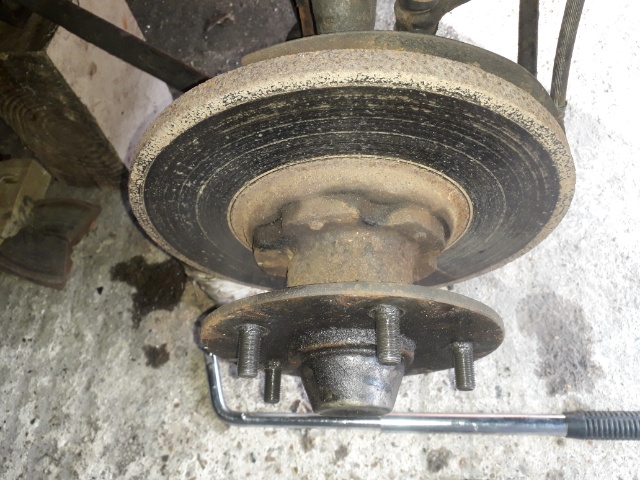
All came apart pretty well on the first side I tackled. The lever was totally seized-up since the garage had used brake-cleaner to remove all the copper-ease I had put on it to stop it seizing-up. However, it freed-up fairly quickly with some hammering and WD40.
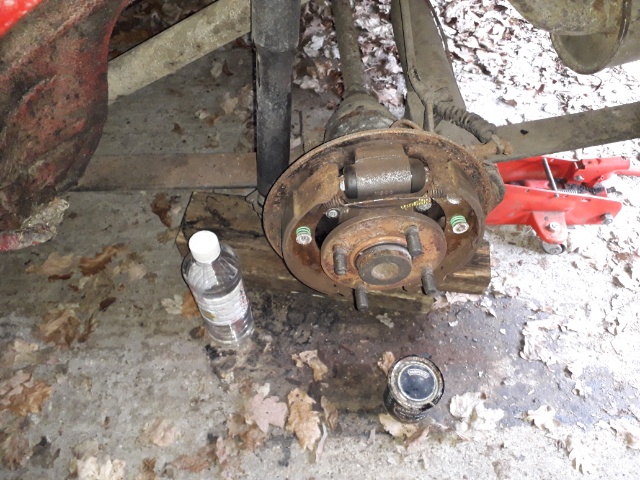
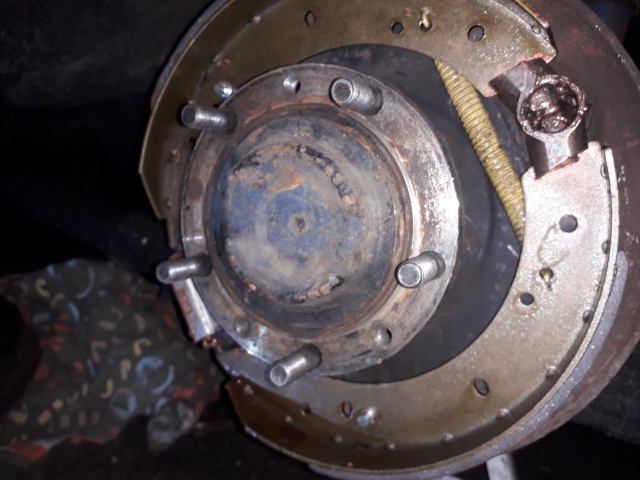
A spot of copper grease and it's all gone back together on the driver's side. I think it's alright.
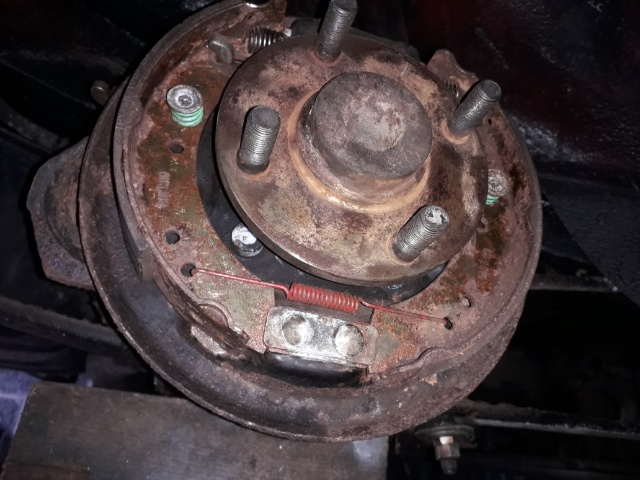

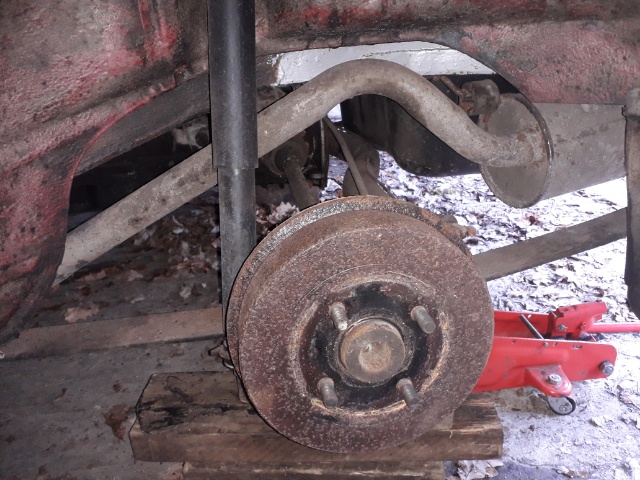
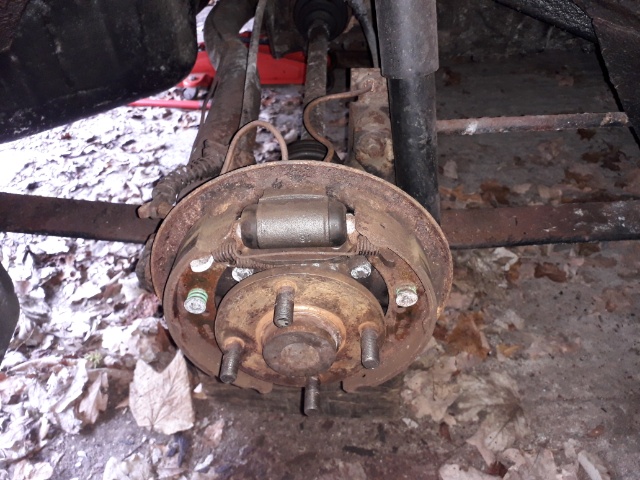
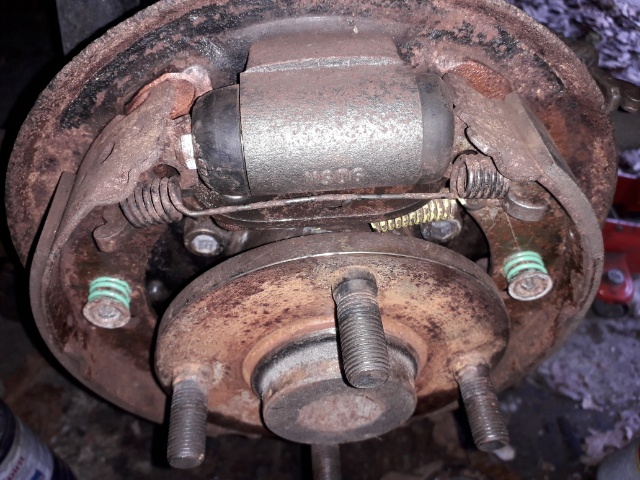
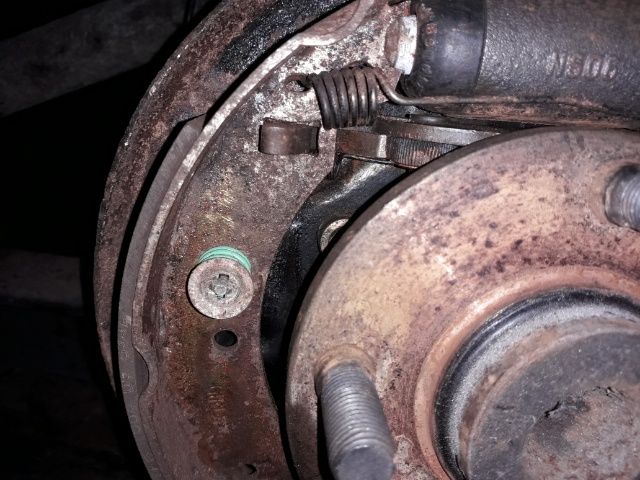
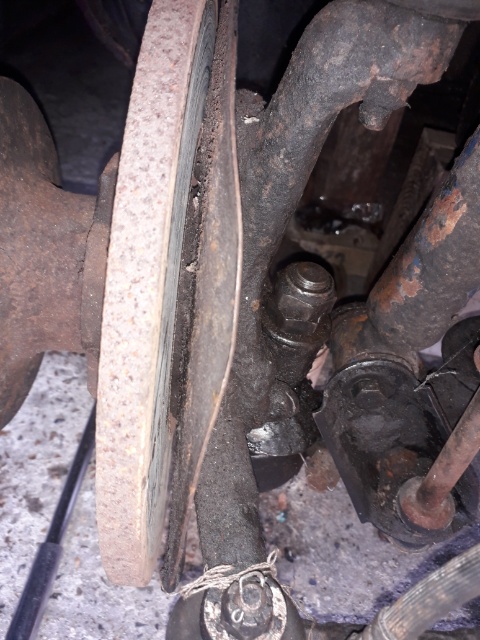
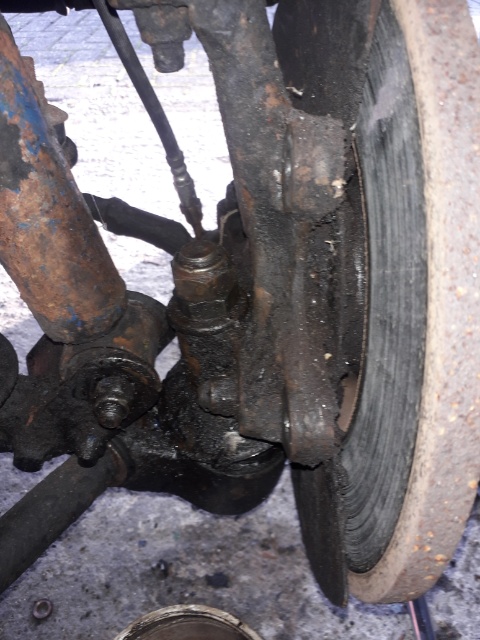
The other side came apart and the lever was found to have seized-up, but not as badly as the first one. Freed-up and copper greased, it's going back together in mid-May 2021.
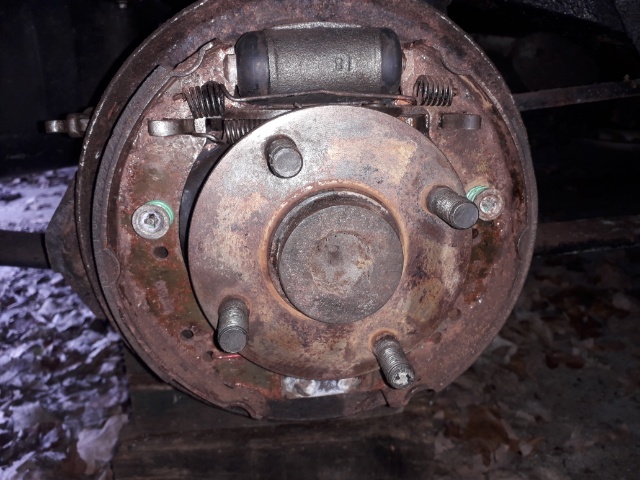
Got it back together, adjusted the handbrake and back on the ground again. Seems ok now. All the while, the deep blue 1.7 soldiers on out to the wild bogs as reliably as ever, touch wood.

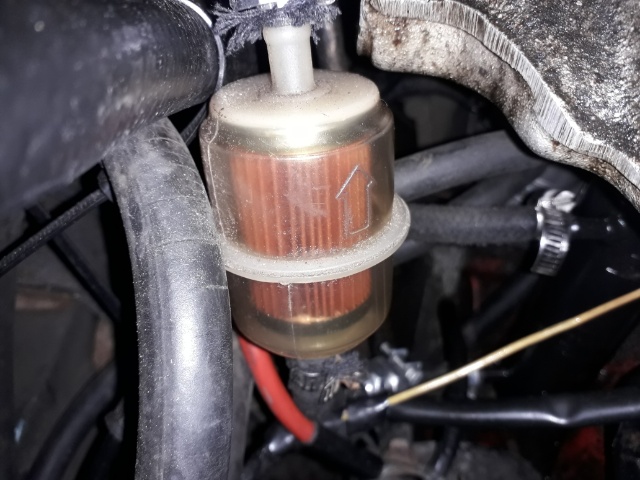
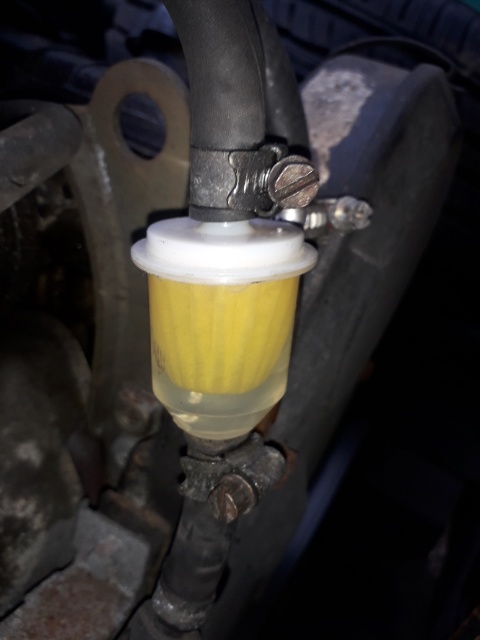
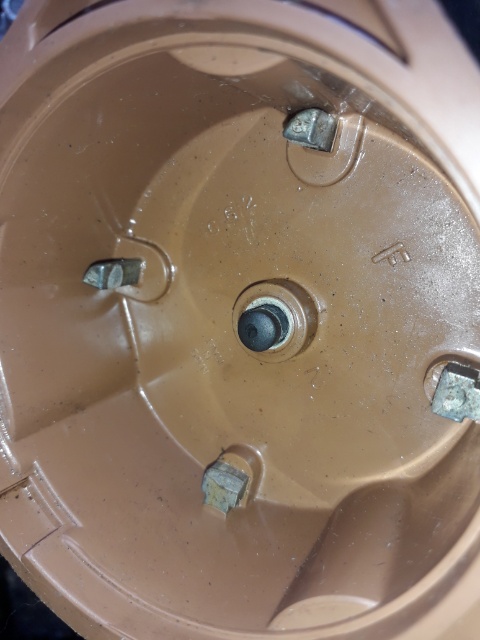
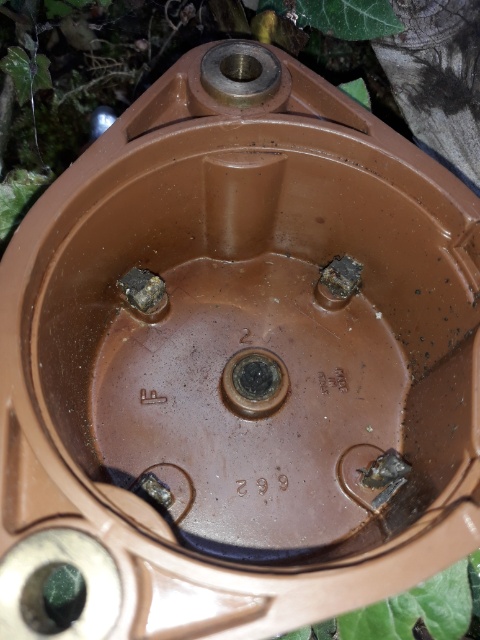
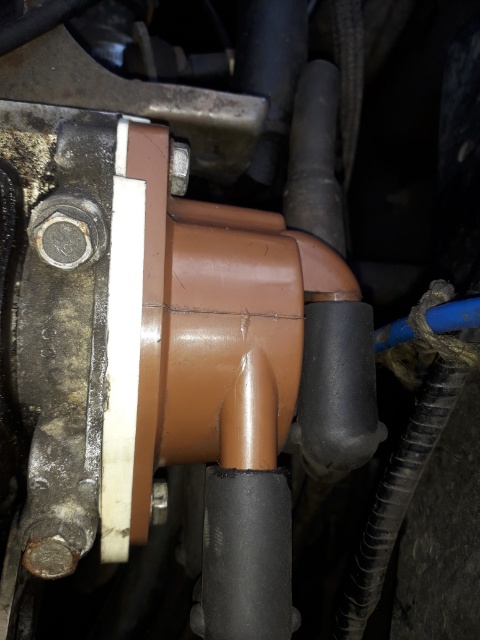
Next up, servicing Deep Blue herself. She needed a new fuel filter, but, as can be seen in the second picture, the dizzy cap was in good condition compared to how it usually looks (third picture), so, like the rotor arm, it was simply cleaned-up and refitted. Waste not, want not.
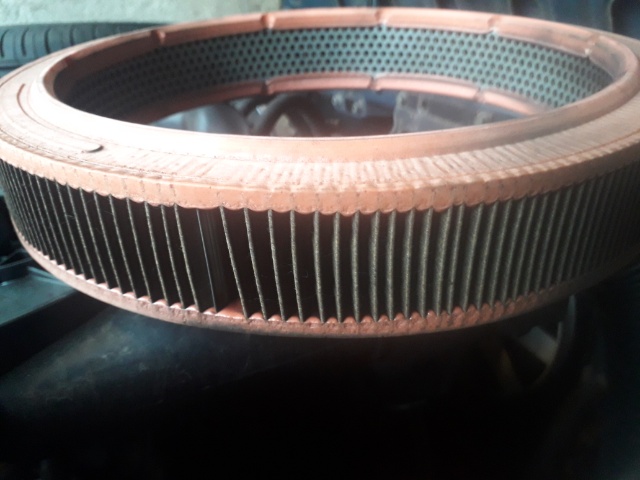
Oil change, plug-clean and air filter change all done. The current mileage on Deep Blue is 95k. There are a couple of jobs that need doing over the Summer, namely the speedo needle keeps jittering and the left-indicator does not self-cancel when the weather is hot!! However, it makes a loud enough click to tell me that it has not self-cancelled, Mr Insurer, so can be remedied by hand.

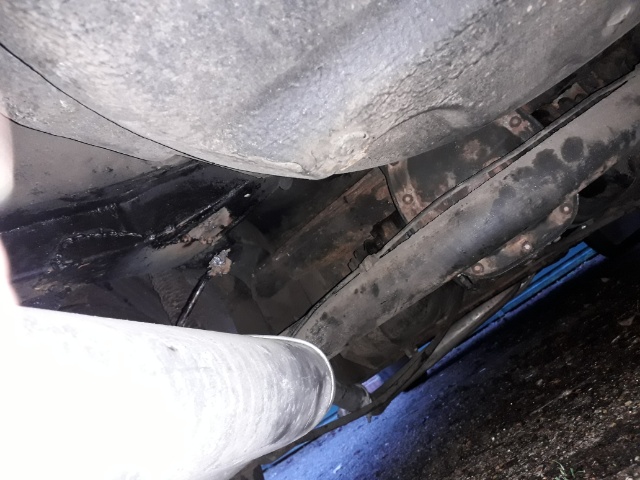
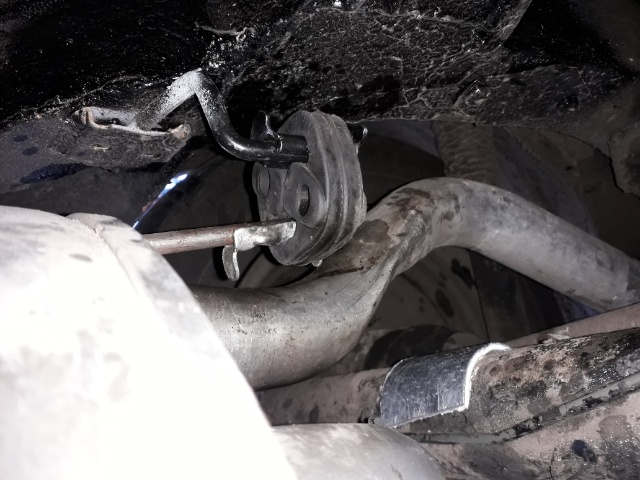
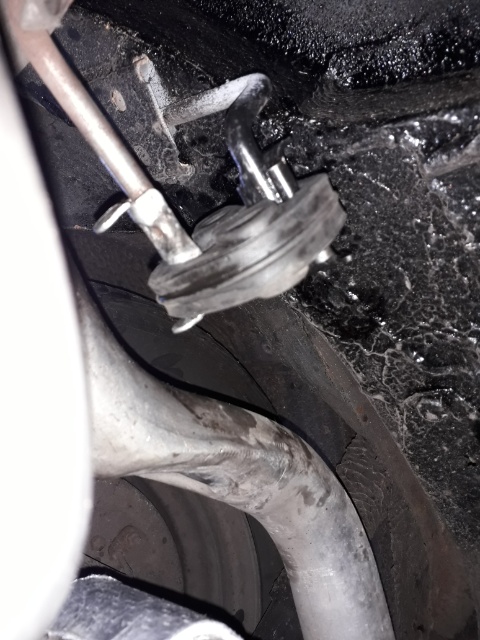
Everything went well with the 360 until the middle of May when the welded repair to the rear exhaust hanger broke, so limped home with piece of string holding the rear silencer up. Back to the newly serviced deep blue 1.7 for a bit. Meanwhile, the garage re-welded the 360 exhaust hanger and put on a new exhaust rubber but when I drove it back to its garage, guess what, the mounting broke again and the rubber O-ring went flying somewhere on the route. Need to find someone who knows how to weld. Hope the gear lever has been welded better, hmmm....
They also broke another mounting in their efforts, but thankfully the third one survived intact.
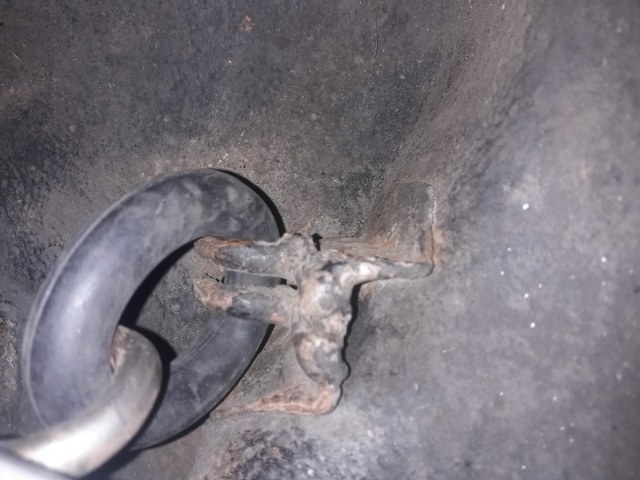
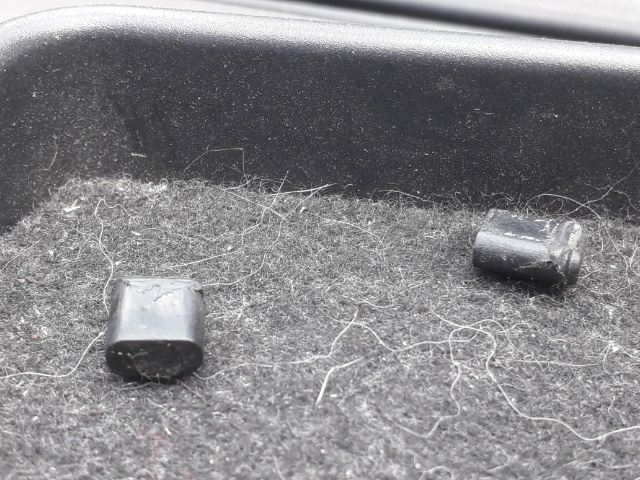
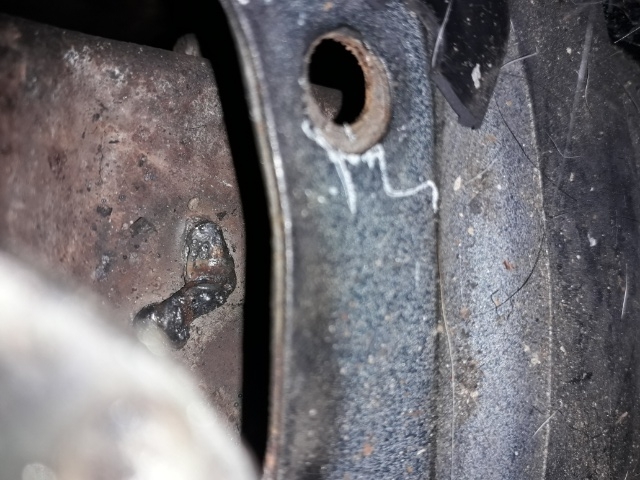
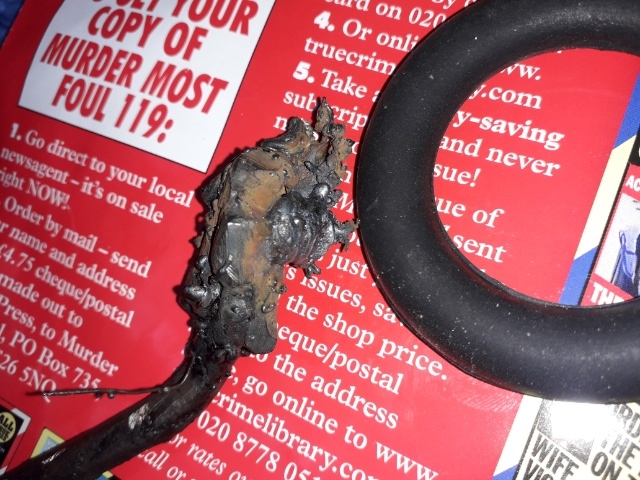
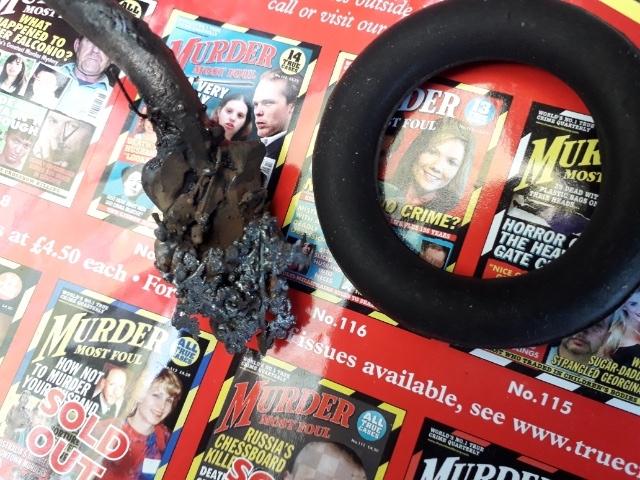
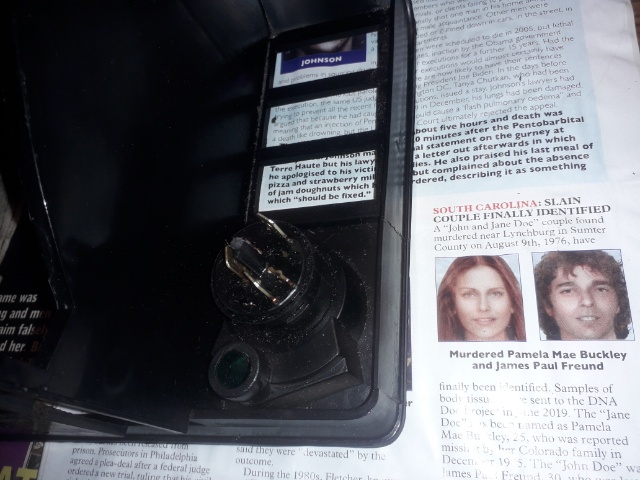
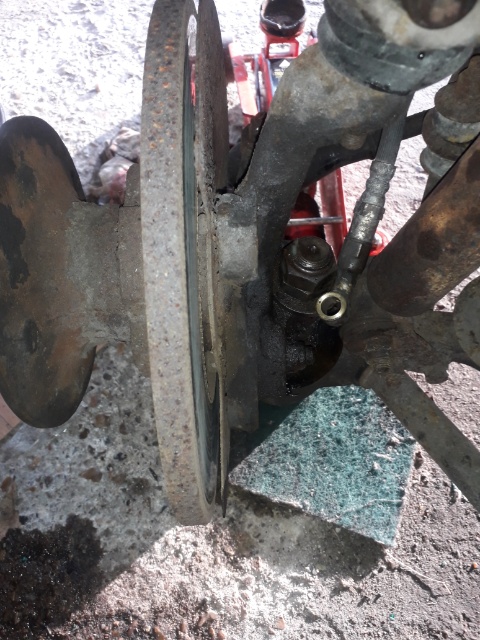
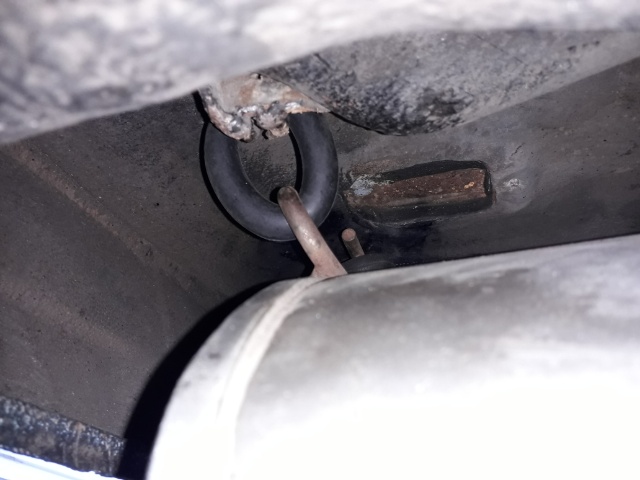
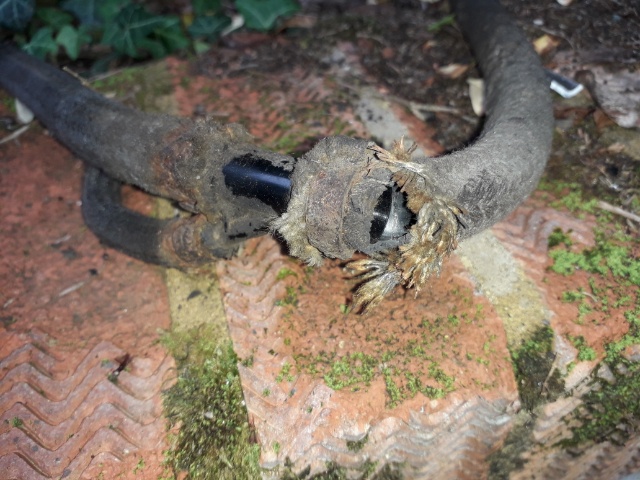
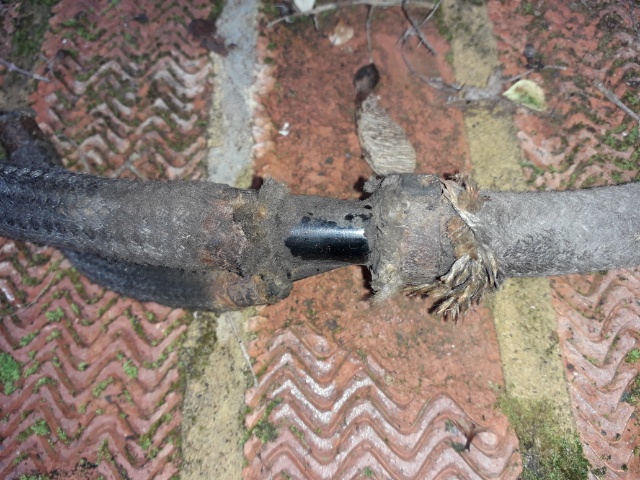
Needless to say, a day or so later, I was able to retrieve the new but, by now multipli-runover, O-ring (shown below) by carefully retracing my steps. Set against a backdrop of Murder Most Foul, the full enormity of these pigeon poo dramatics is plain for all to see, but a hole is a hole...
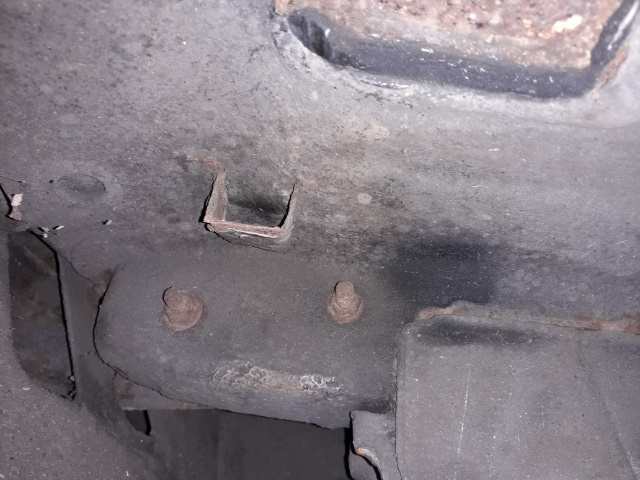
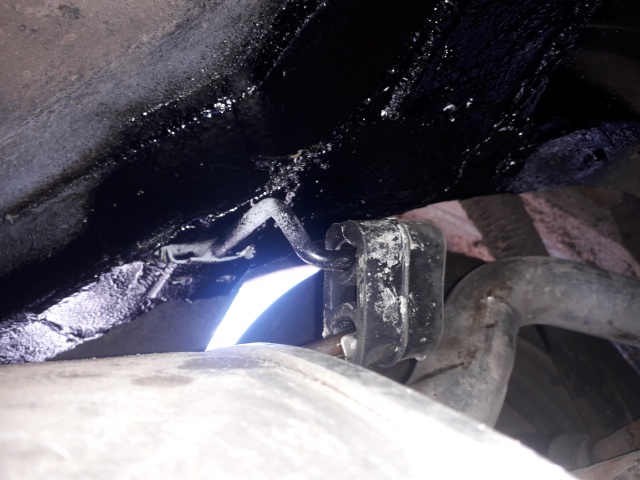
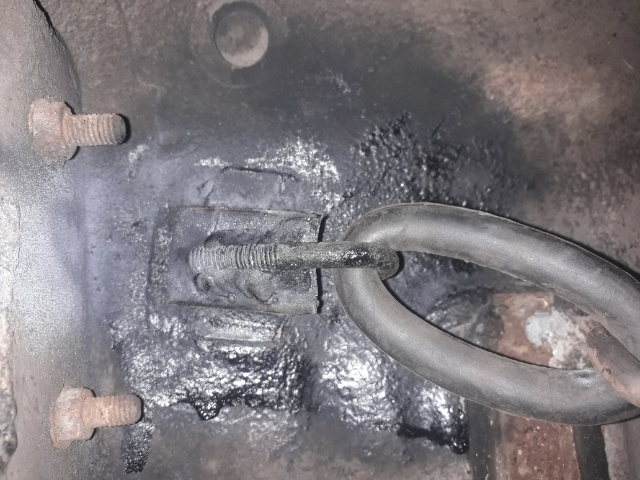
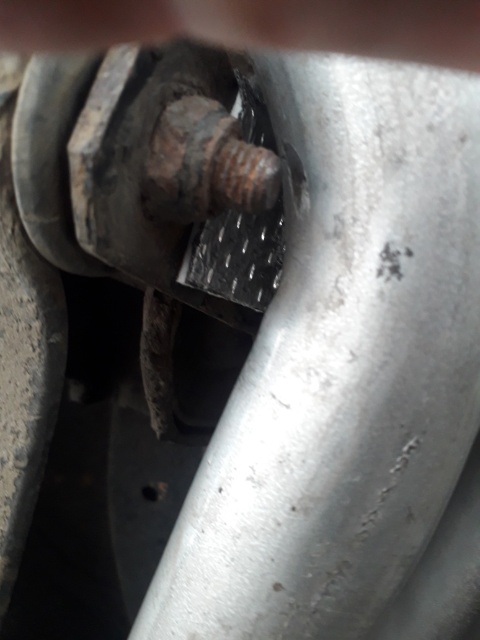
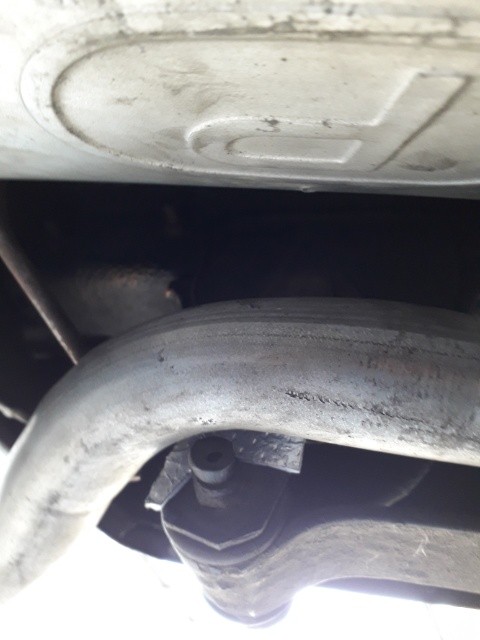
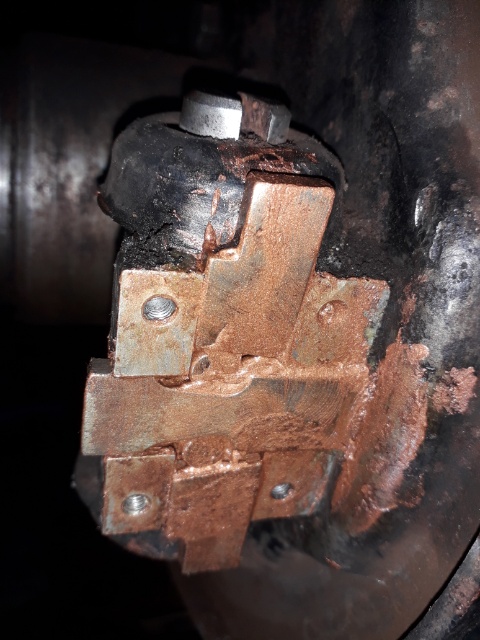
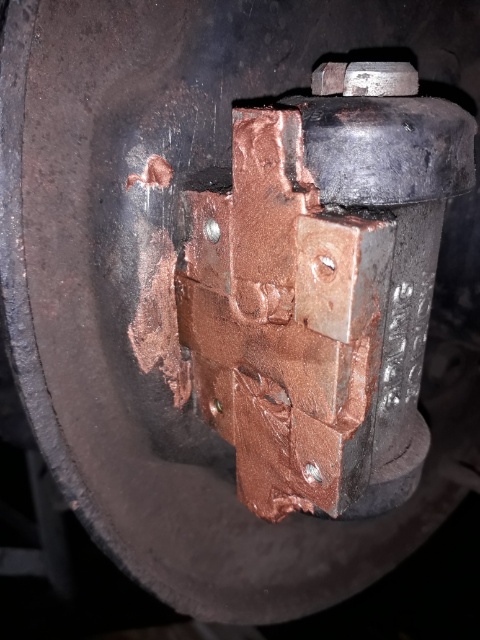
Tony Noble to the rescue with some super-high quality welding (below left). I managed to get a new exhaust hanger from Dafhobby and this was welded on by Tony who realised that the old one had been welded on in the wrong place, before it broke off!! The hanger should be bolted on but the captive nuts in the chassis box section were long, long gone, so welding it on was the right answer. The other mounting that was broken (below right) has been repaired quite innovatively, too. Could that be a bolt-on solution ;-?
So now its 12th June 2021, but lets call it 1st April, and all Red Ness needs is a new twin-tailpipe exhaust and some stylish alloys.
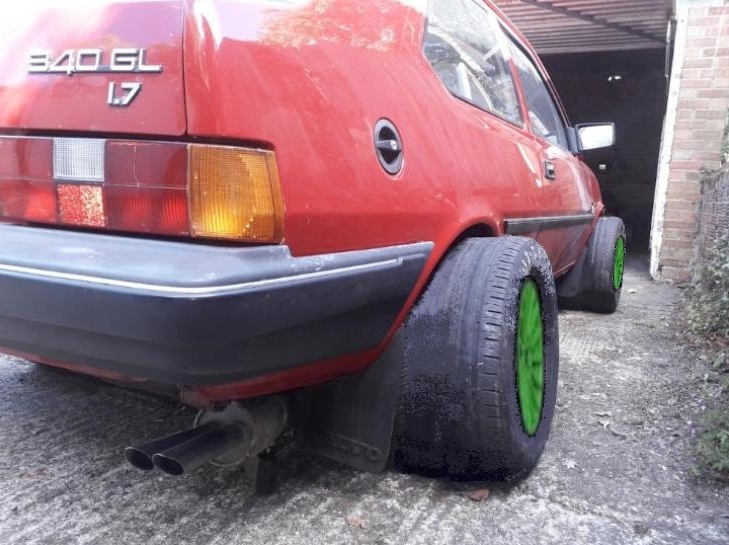
You might detect some failry rubbish pixel editing by a photoshop-style program there and you'd be spot on. Anyhow, the idea came from this which I remembered fondly from my mid-secondary modern school days. Yes, no 11-plus here, sorry! Well, I wouldn't be into 340's if I had the brains to pass ;-0
Anyway, the full enormity of my lack of IQ came to the fore when trying to locate where this item left-over by the welders two years ago should really go.
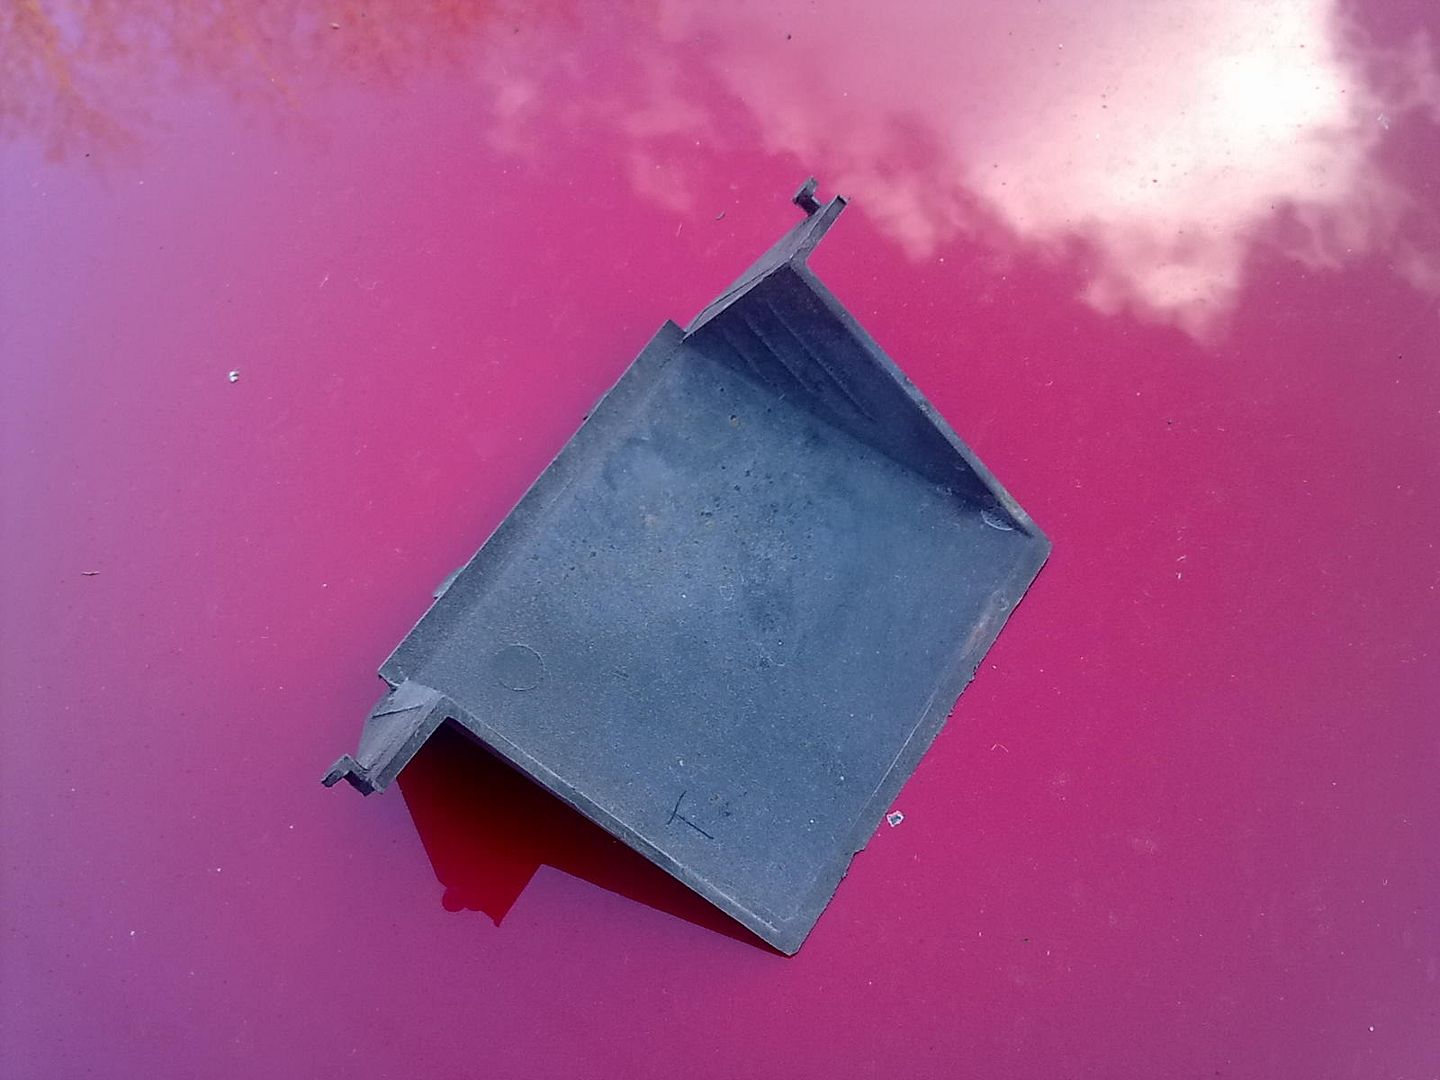
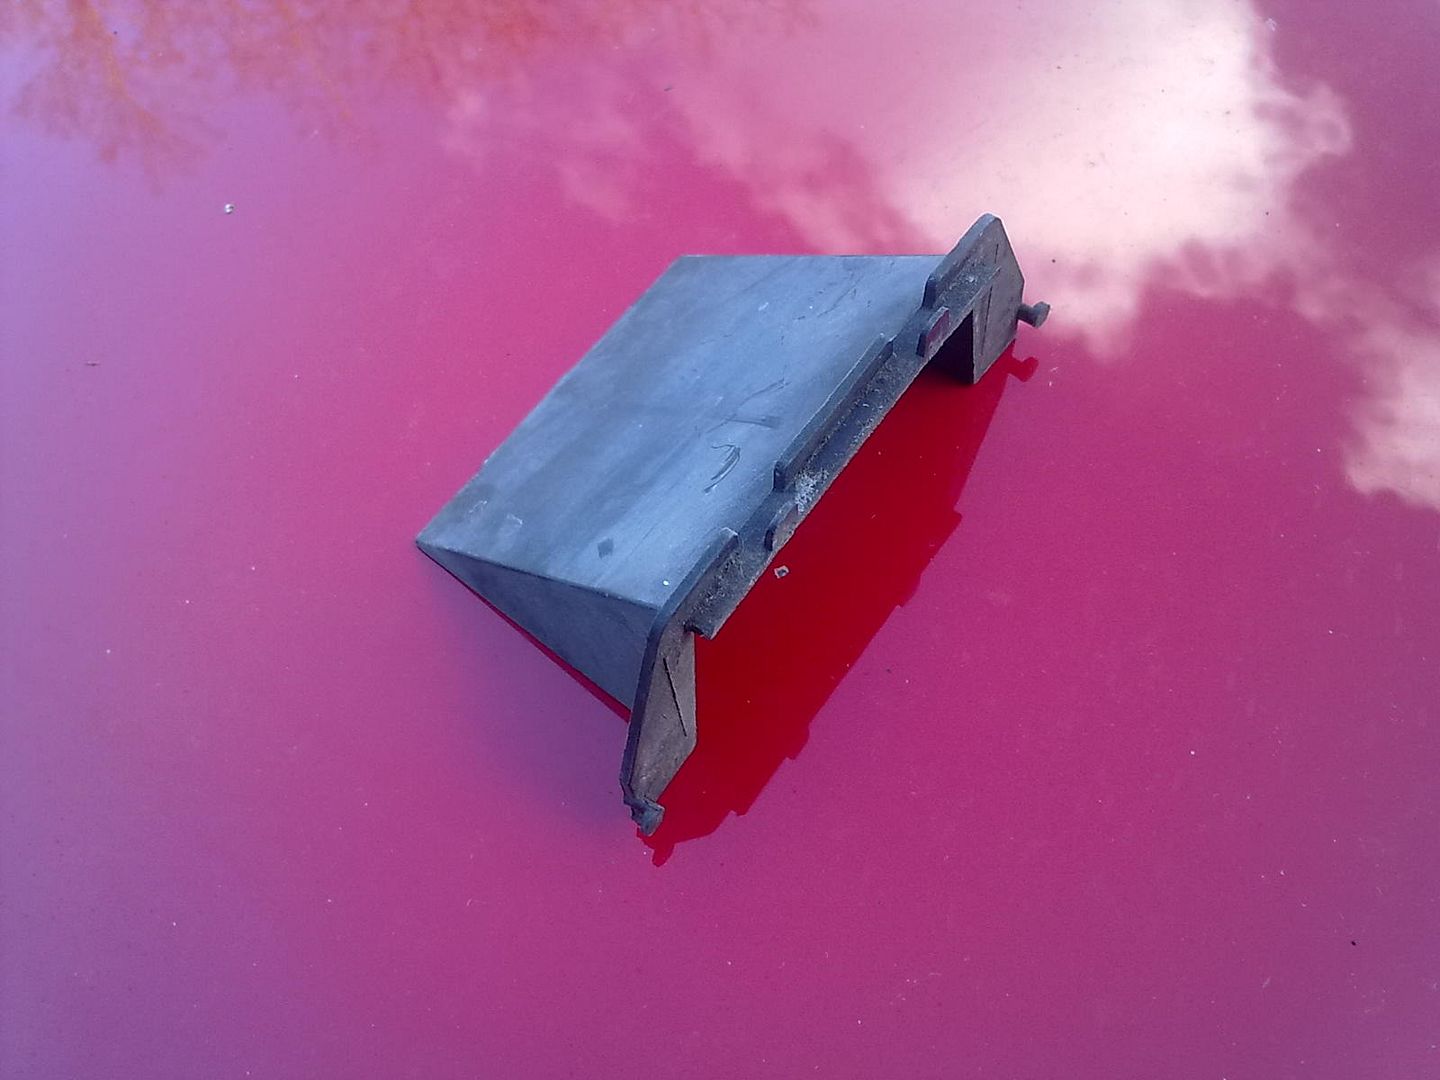
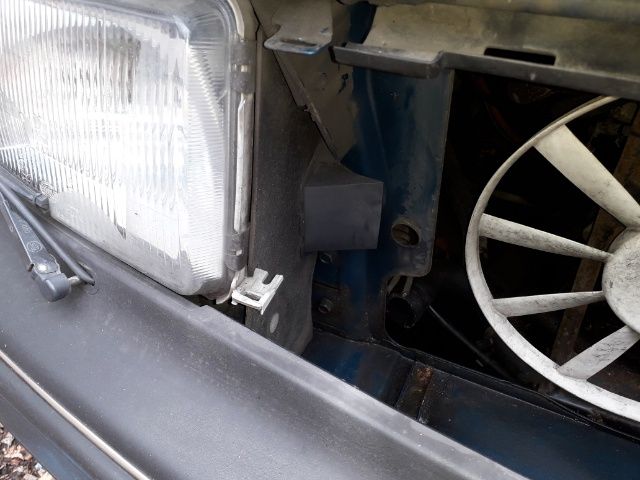
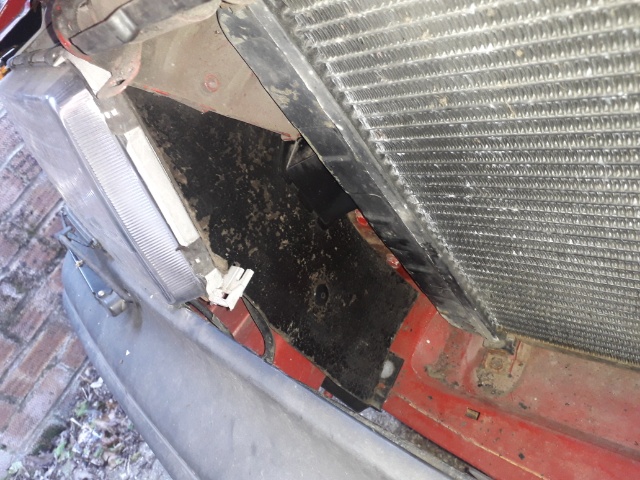
Finally, with help from the volvo300mania forum, I found it on the deep blue 340 next to where the radiator goes. So lets see how it looks on the red 340. OK its there, but hang on, its also different, facing forwards rather than backwards!!
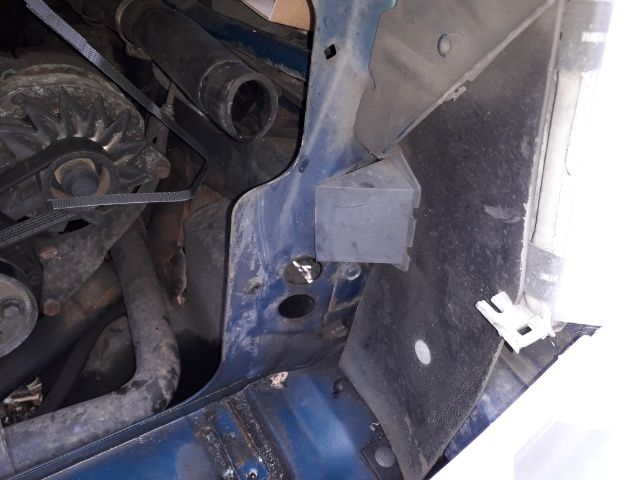
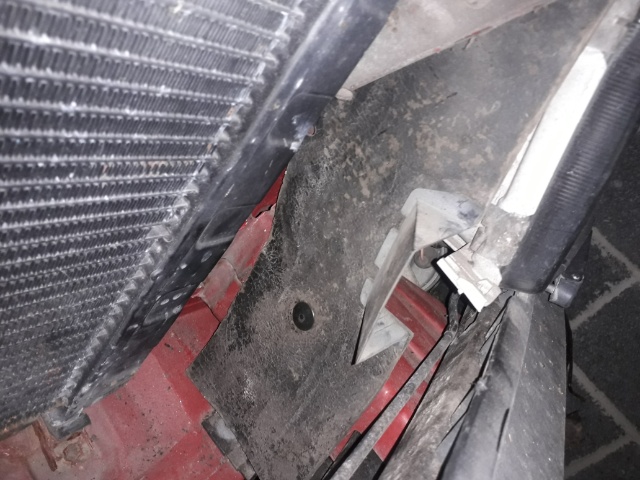
Oh well, its definitely missing on the other side of the red one, so we'll fit the left-over one in its vacant slot.
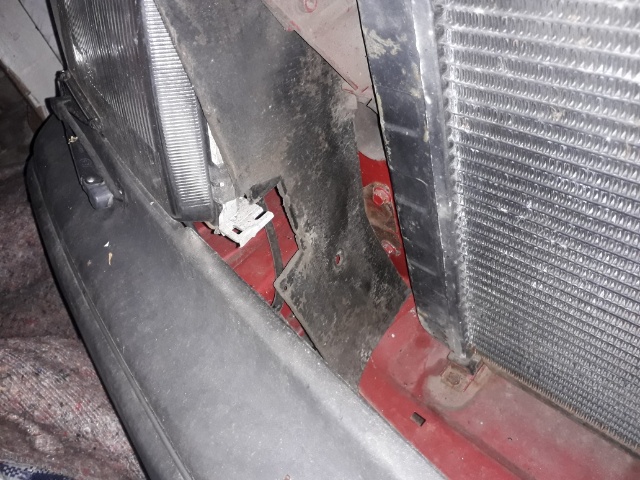

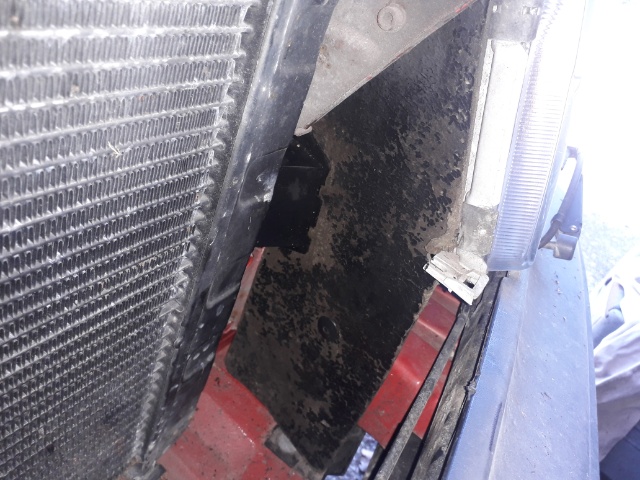
All's well that ends well, but the niggling worry is whether it's really right? A look at the other side of the radiator on the blue 340 leaves me baffled in the extreme since its definitely facing the other way to cover over the air inlet. In one of those eureka moments (that rarely happen to me) I realised that the welders may have fitted the trim panels back on the wrong sides of the radiator, so off they come for a clean-up and a bit of a silicone sealant repair.
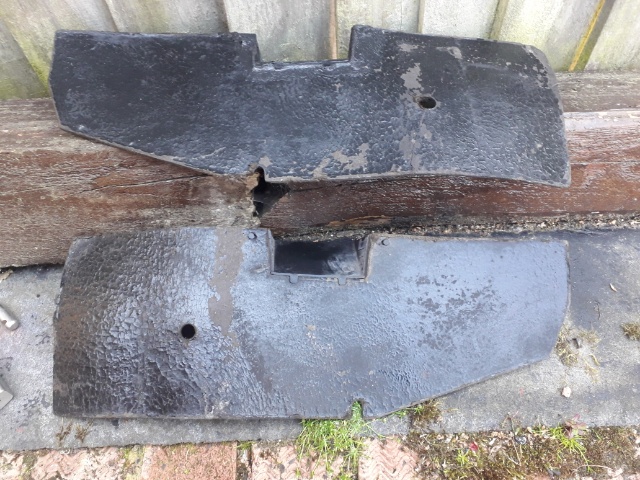
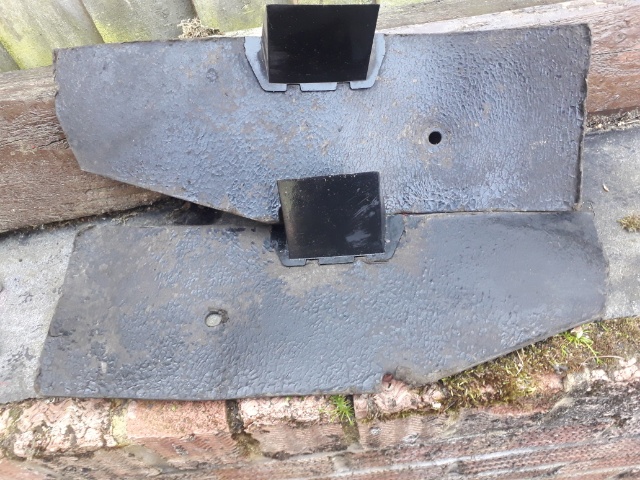
I then experimented with fitting them the other way round. Nice one, top one, sorted and I think that they are finally back in their right places.
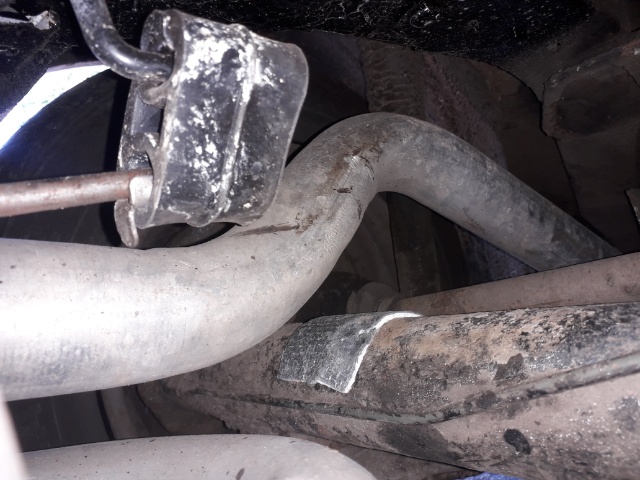
Later in June 2021, I am getting niggled by the bangs from the exhaust still so I adjusted the angle of the rear section and have been juggling rubber mountings about to get the best effect on bumps. A bit more juggling of exhaust rubbers has allowed me to come up with the perfect (sounds dodgy doesn't it) solution in the form of some self-adhesive heat insulation padding which was cut to size and stuck on in a couple of places.
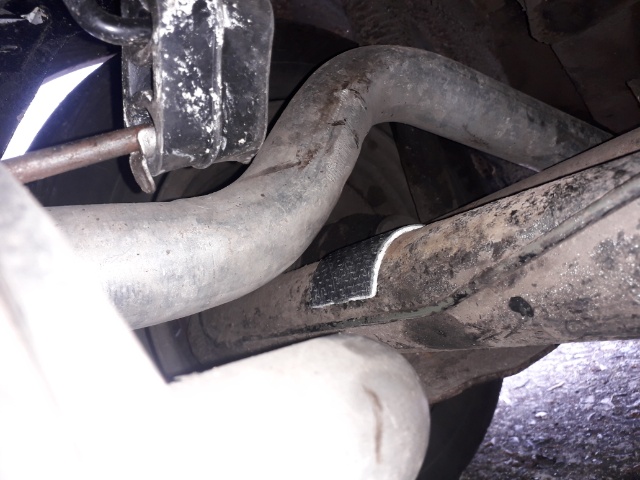
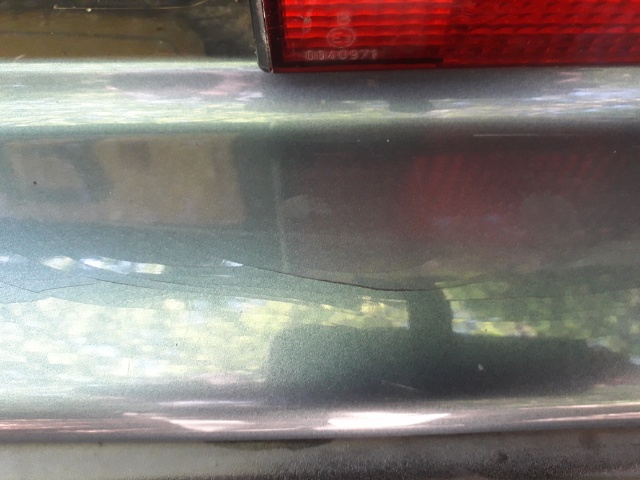
But still the knocking persists as evidenced by the dent in the ali-cated padding, and, sadly, a whump up the backside is received from a coach on a roundabout one sunny arvers in mid-June 2021. Thankfully its just a matter of cracks in the bumper paint which are filled in with a few goes at the Captain Tolley's.
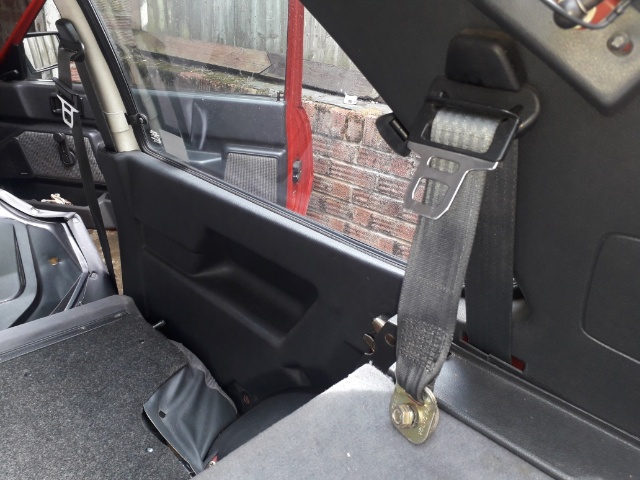
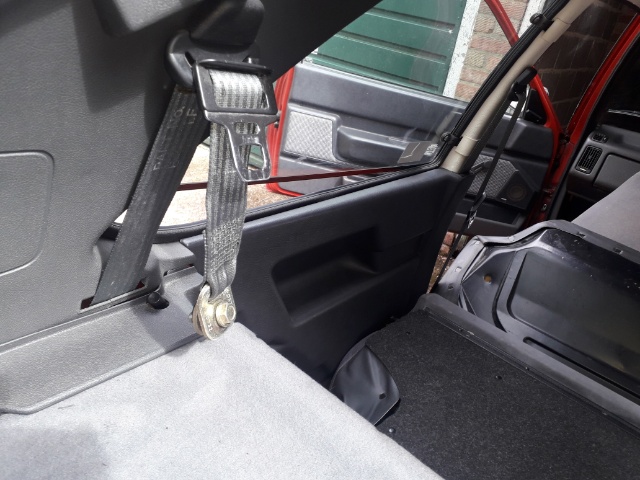
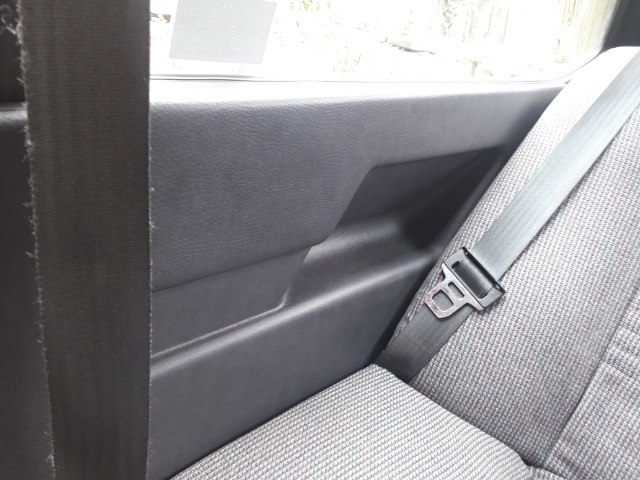
Now into the end of June 2021 and Red Ness fails the MOT on brakes and emissions, but the garage got it back to me for a couple of hundred quid which doesn't seem too bad, but for sure they have removed all the lovely copper grease. Never mind. Got her back into storage without incident but the side trim panels next to the back seat were cheesing me off since they rattle like snakes, and have done since the welder worked on her 3 years ago. So what is going on? Took the offending panels off and underneath is a black strip of bendy metal which the top of the trim panel should hook over.
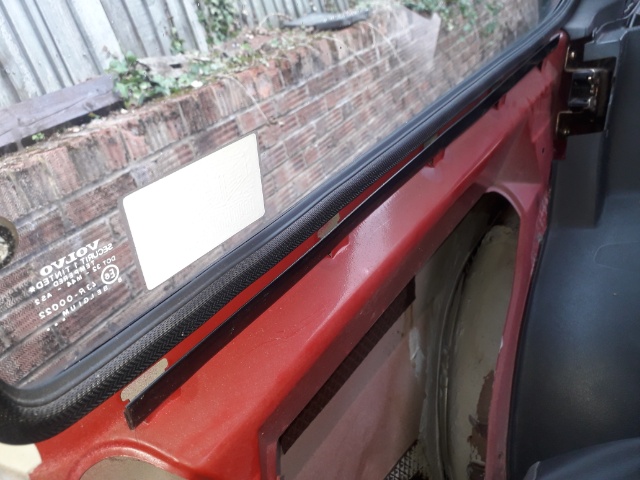
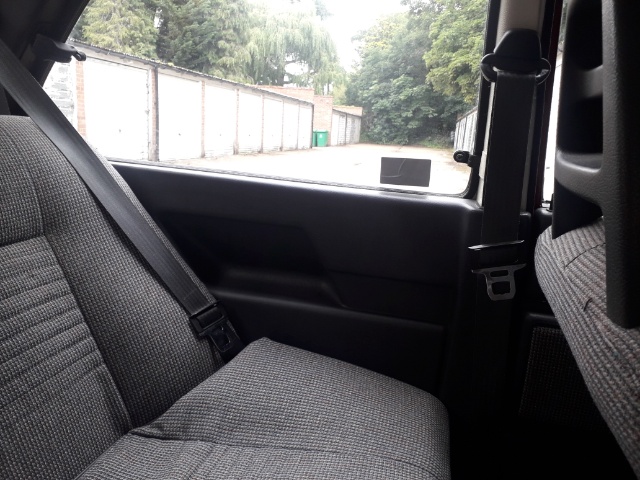
However on one side, the bendy strip was too close to the window for the panel to hook over and on the other side the strip was horribly deformed and bent miles away from the window so the trim panel wasn't catching. None of this requires an 11+ to put right so just bend the strips so that they're about the right distance from the glass to hold the trim panels tightly and away you go. As you can see, the interior trim is really VGC and the wheels and exhaust have been reverted to standard items ;-0 ;-0
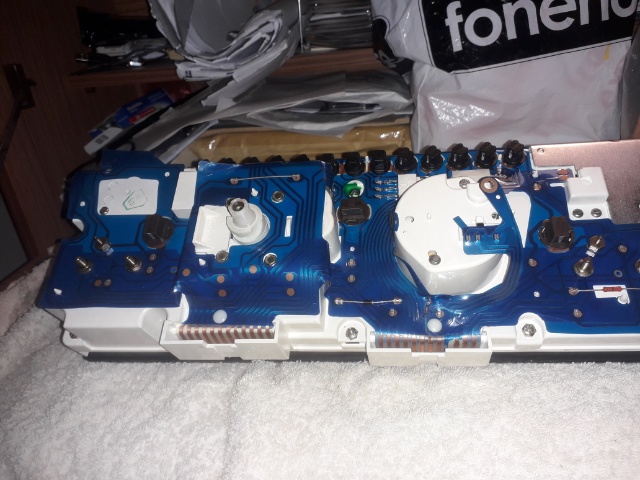
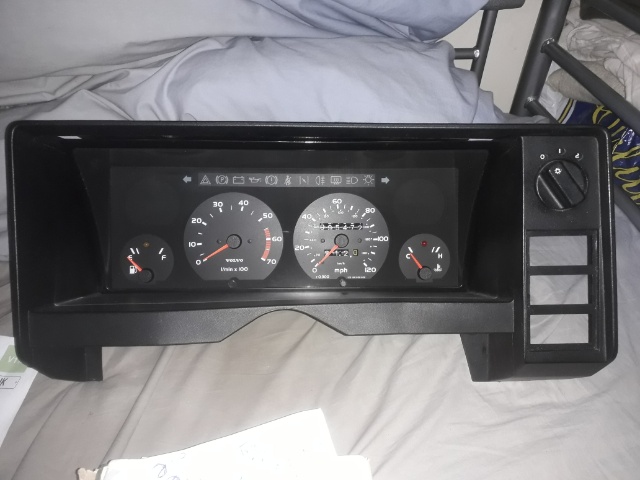
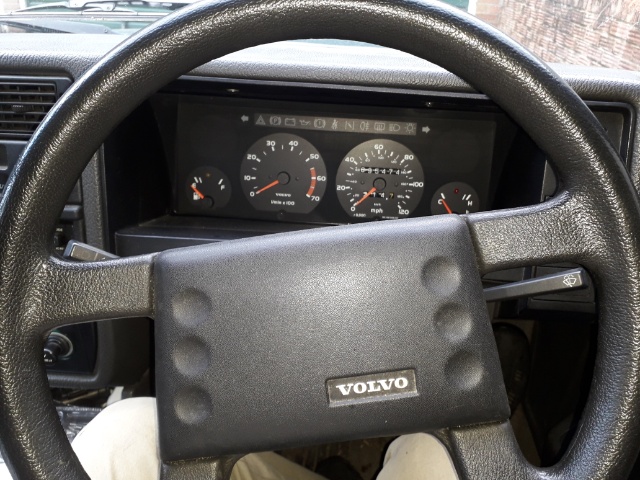
End of July 2021 and we're back on Deep Blue again, trying, against another backdrop of Murder Most Foul, to fix cracks in the fascia.
Also, trying to clean out dust or grease or anything at all that's causing the speedo to jitter so much.
Now, in a trial run with a couple of spare items I am trying out a glue gun that uses those plastic rods and melts them at the tip, so you get drips of hot black gluey plastic. Thought I'd give it a bash as I always find that superglue and araldite don't really stand the test of time. So here we go pigeon pooing with a glue gun:
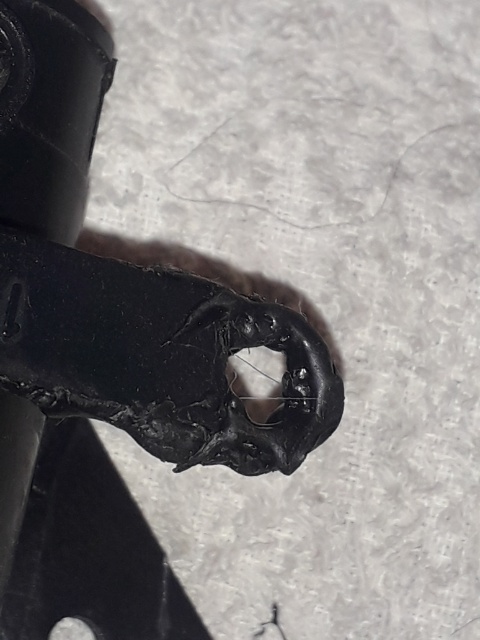
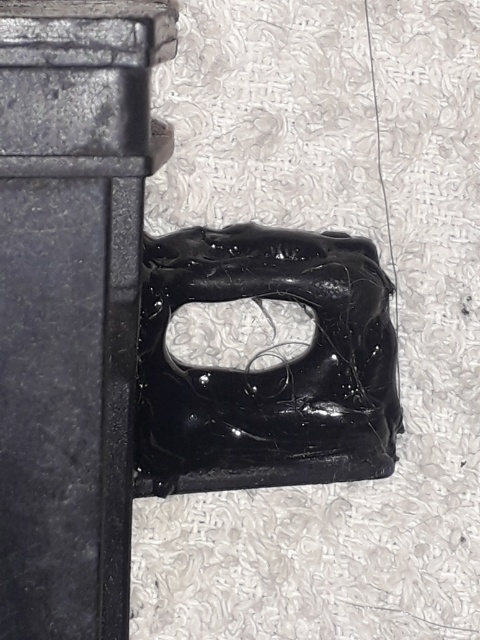
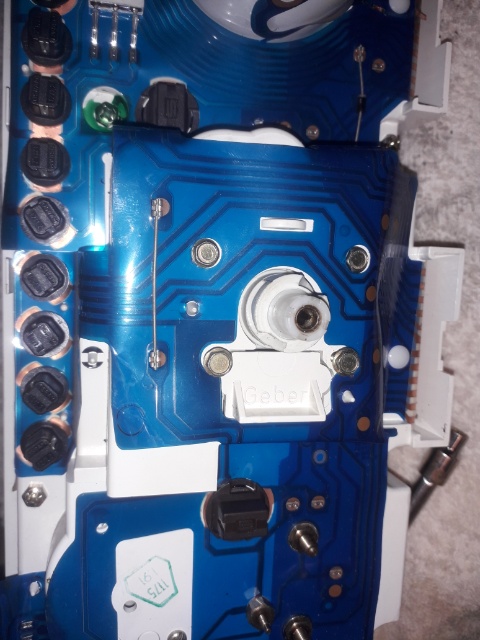
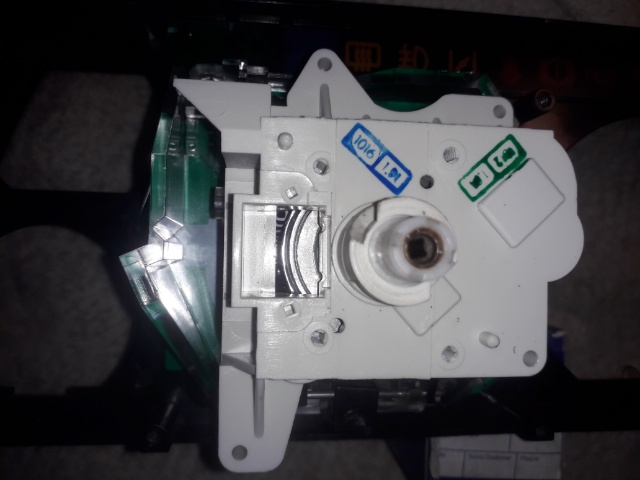
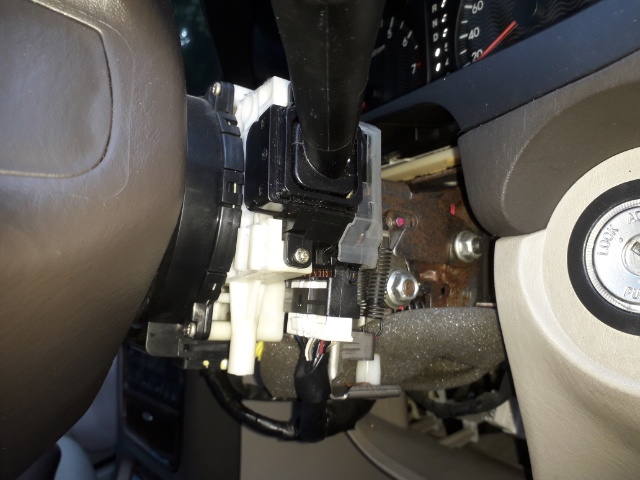
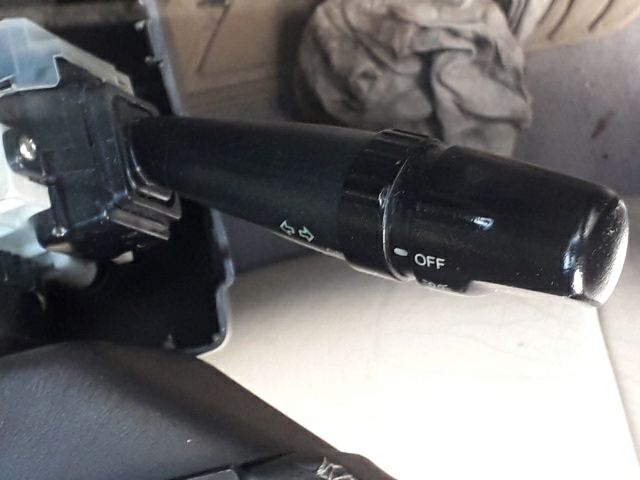
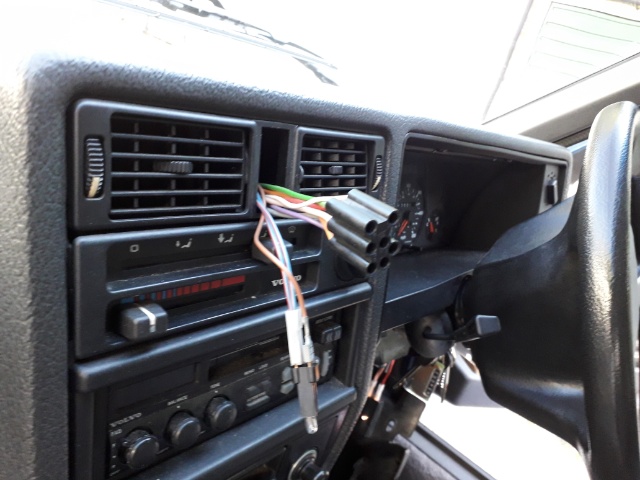
The more you can bulk it up, the stronger the mend (!) and it seems promising so lets try it on the steering column bracket for the indicator and wiper switches.
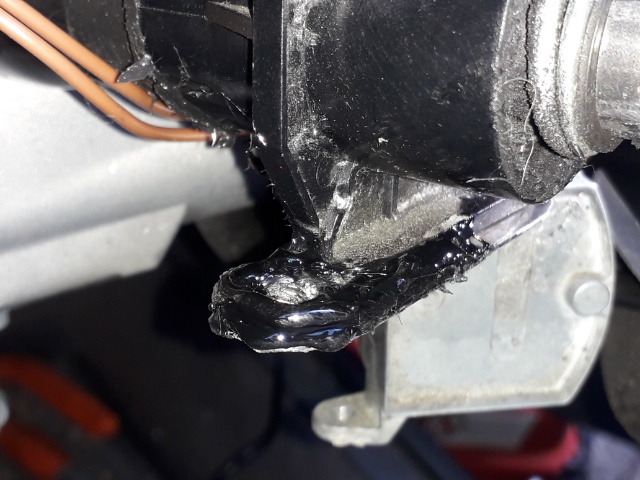
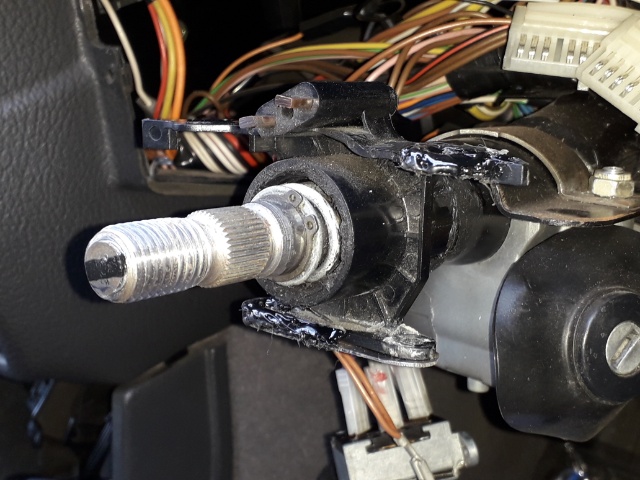
All of this is being done because the indicator switch on Deep Blue has a habit of not self-cancelling in hot weather when turning left (Mr/Ms/Mrs Insurer) so I am trying to put this right and a couple of days reassembling everything will allow us to try everything out!!
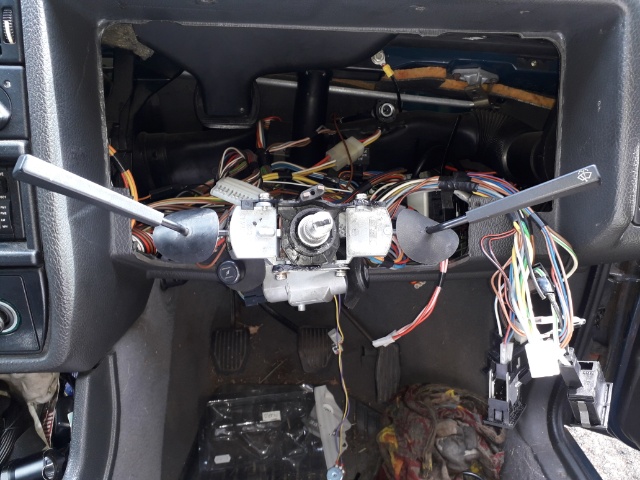
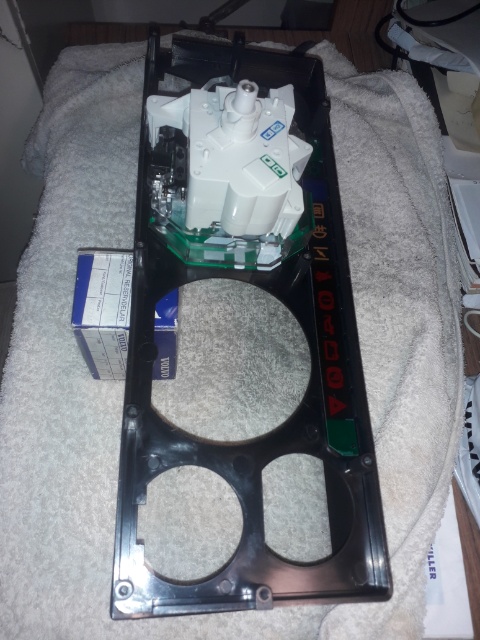
I got the deep blue 340 back together and did a spot of respraying here and there. Unfortunately the hot weather more-or-less disappeared soon after so there wasn't really a chance to see if the self-cancelling problem with the indicator switch is sorted. Next Summer will tell.
Into mid-Aug 2021 and have been tangling with the callipers on a Rover P5 which failed the MOT. The garage broke one of the brake pipes, too. They say its the callipers which need refurbishing but they can't do it themselves so I'll have to sort it. Better than have them leaving it parked on the street for weeks!
Anyway, the callipers have come off OK, between bouts of Montezuma's revenge. It doesn't help to have a colon being more productive than Niagara Falls ;-0 ;-0
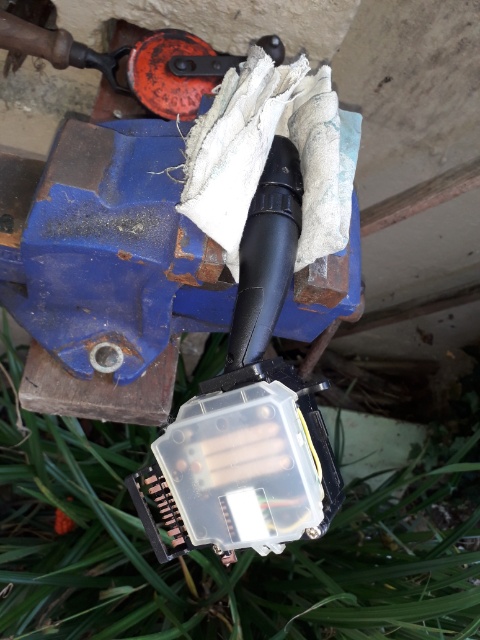
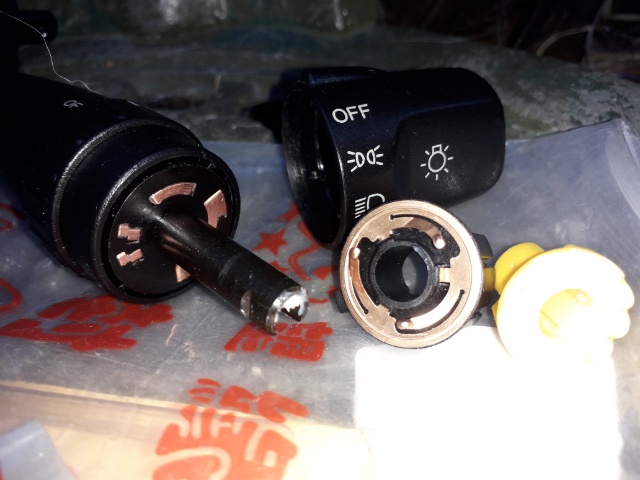
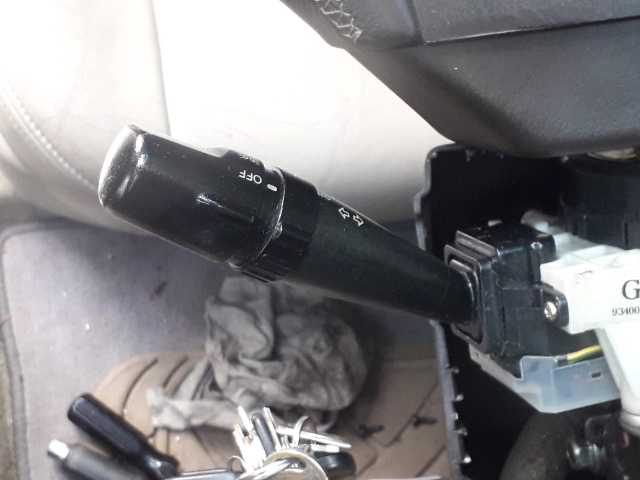
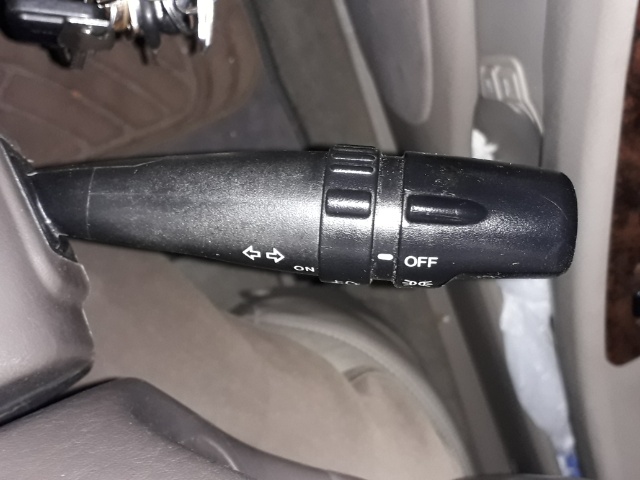
Now into early Sept 2021 and have been trying to fix the indicator switch on an old Hyundai which, when the lights were switched on, caused them to flicker on and off. Cured it for now with a second hand item, but what was causing this problem in the first place? To answer this question, I had a bash at taking the original apart.
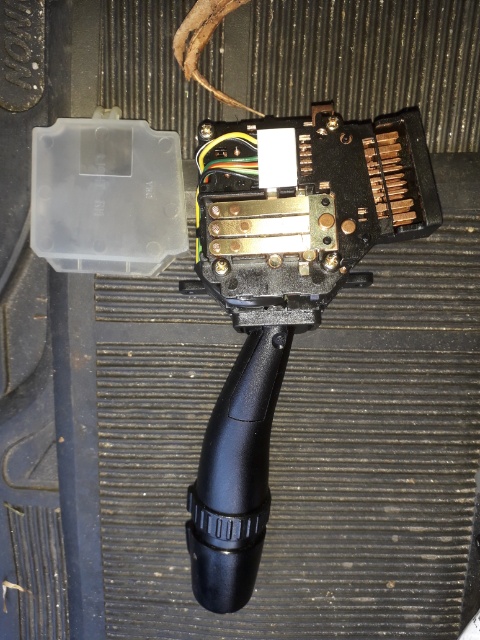
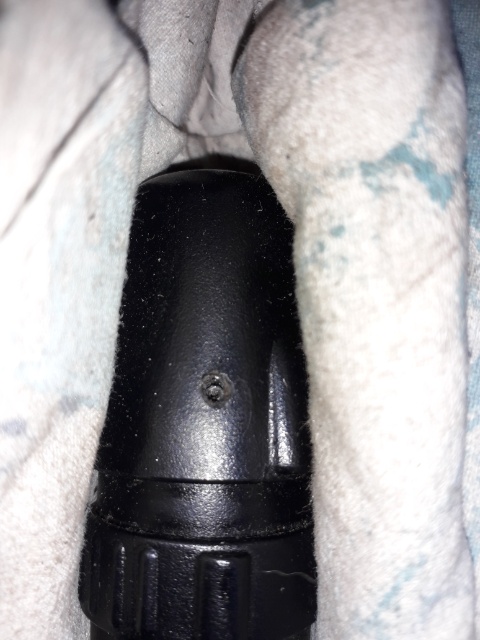
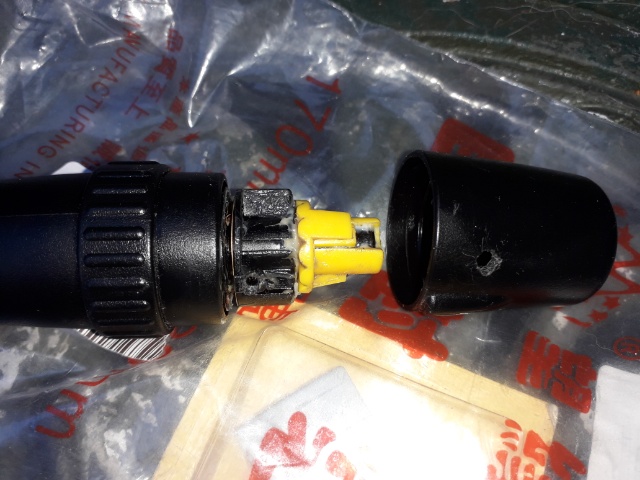
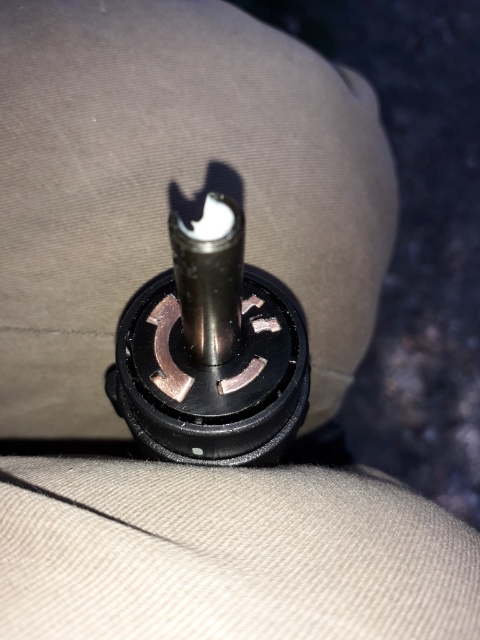
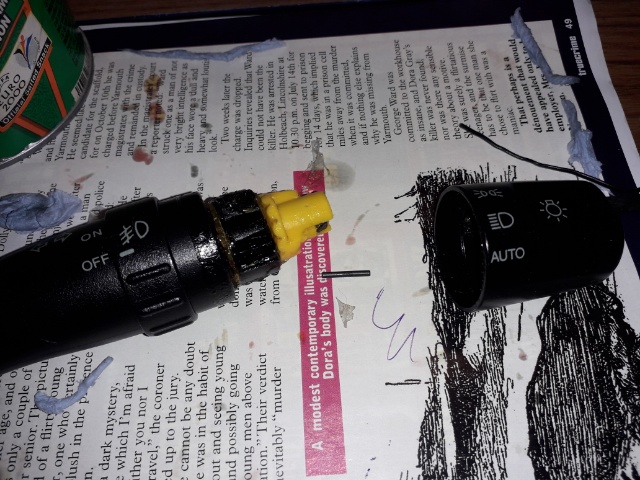
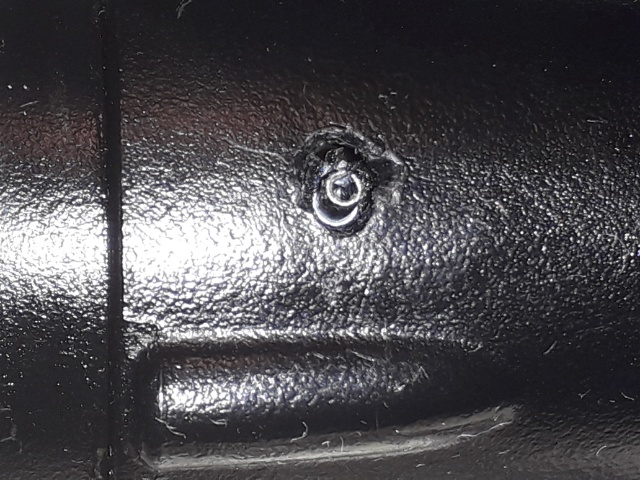
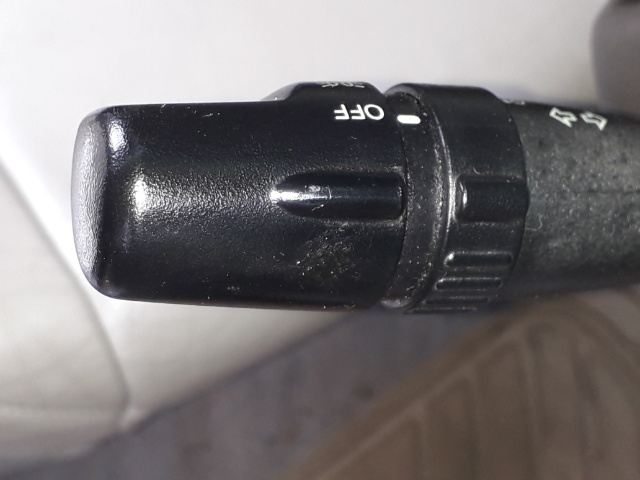
It seemed to come apart OK and showed some blackening of the copper terminals which were cleaned up. I needed to replace the dielectric grease and was going to use vaseline, but I found a plumbers grease at the new local Toolstation (Rectorseal or something) which has higher melting point and is insulating! I decided that cleaning out the base of the switch probably wasn't going to cure a problem that was definitely linked to twiddling the rotating knob at the end of the indicator stalk. So a trip to the local car shop led to the suggestion to drill out a little pin holding the knob on and also turned-up a promising new pin that might go in its place later. The picture on the below-right shows an attempt to drill out the pin. Sorry the drilling is a bit ratty as it damaged the surrounding plastic a bit. Anyhow, subsequent use of a needle file in the drill allowed the pin to be removed (well, to be more accurate, it flew off and got lost in the garden).
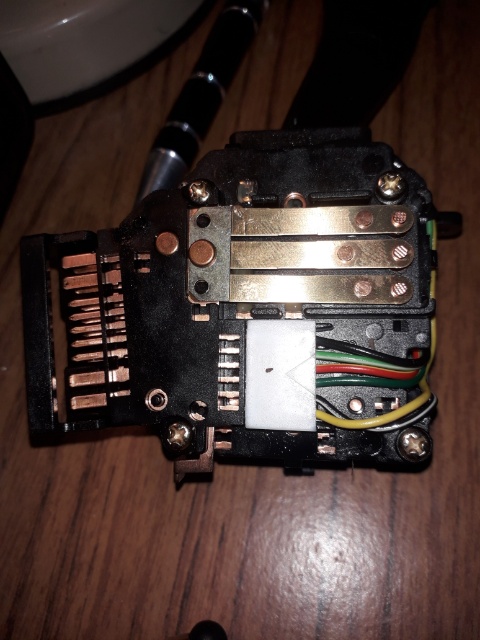
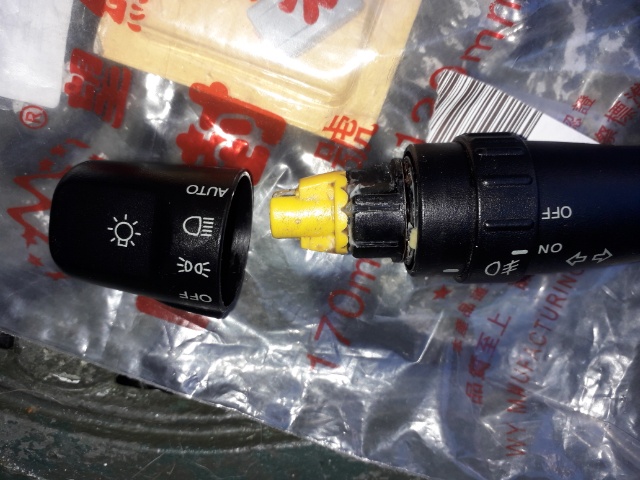
OK, so the rotating switch cover then came off and this allowed the innards to be cleaned-up after removing a yellow clip (swear, slight breakage occurred with this, but its not too bad at all, thankfully).
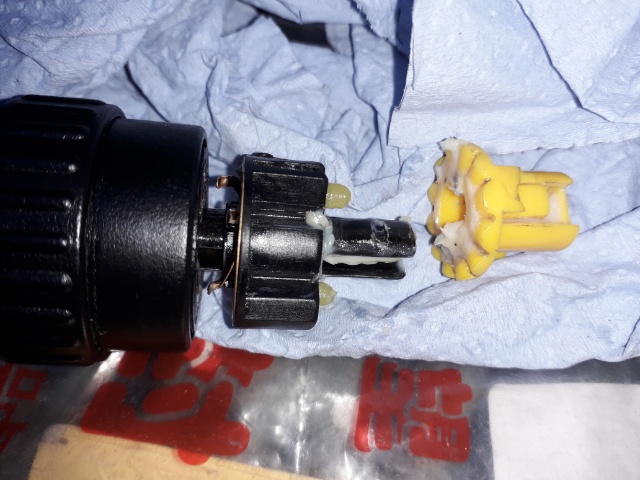
The copper contacts were cleaned-up. Knees up Mother Brown.
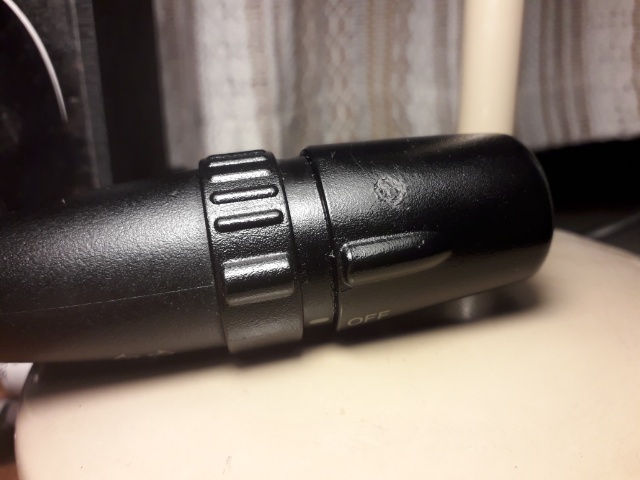
Everything re-greased with Rectorseal and clicked back together! The new hinge-pin (shown below) was sawn to size and slotted into place with a touch of Captain Tolley's added to hold it firmly, hopefully. Then with a cheapie glue-gun, a bit of molten black placky was blobbed into place and given an authentic textured finish with a thumbnail!
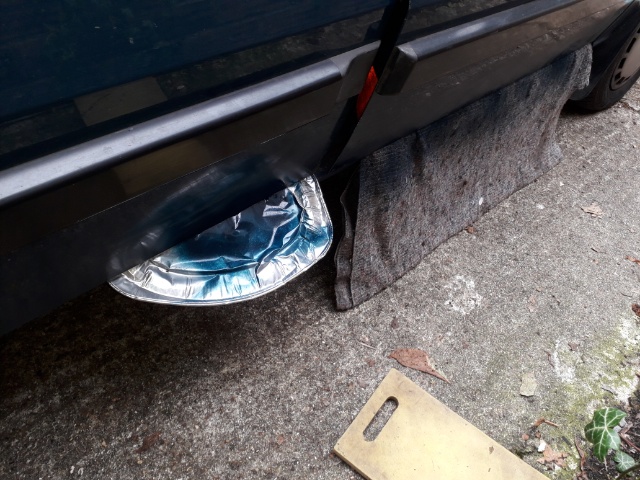
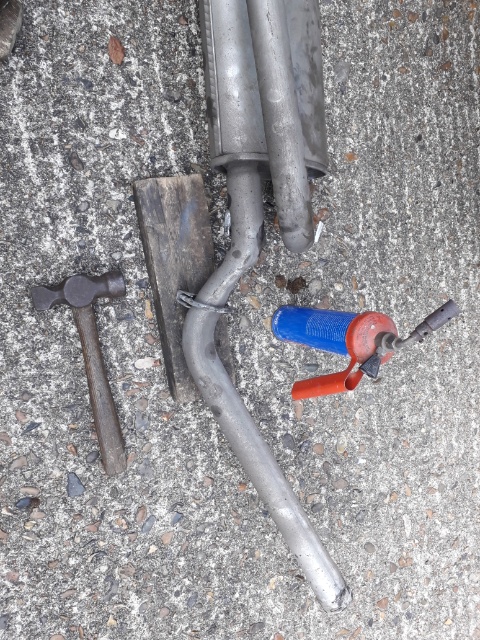
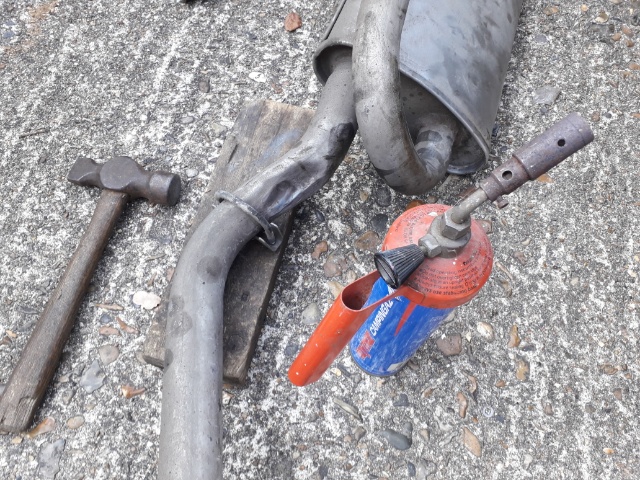
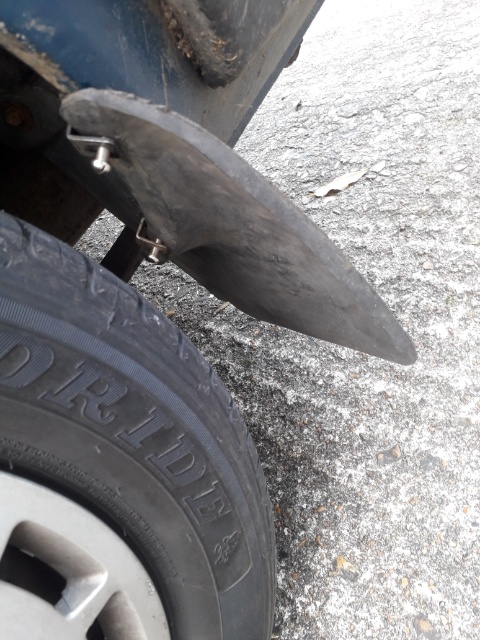
After trying a few paints with a fine brush, I found I got an almost completely invisible repair with a tube of acrylic paint from an art shop. Meanwhile, the exhaust on the 360 keeps banging away so its back to a bit of late September smithy work and then refitting the newly hammered in exhaust. I struggle and strain it back into place with one or two bits of spongy tin foil to dampen the knocks, hopefully. Yes, it's looking pretty well hammered-in but I think its exaggerated by the photographs, arf.

This does turn out to solve the banging-on-bumps problem and I can confirm that the non-return valve in the fuel system has completely cured the non-starting problems which affected this car, particularly in the hot weather. Indeed after not being started for 2 - 3 weeks in Oct 2021, the 360 was again in 'refusing to start' mode so this had to be the ultimate test of the non-return valve. Yo! Persistence paid off and after about 12-15 turns of the key, she started. In previous years, she would have resolutely refused to start till the battery ran flat. So now its back to tidying the rear-brakes on the Rover P5.
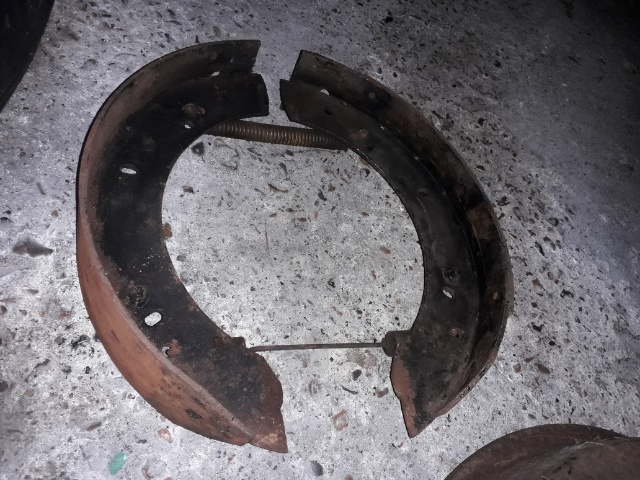

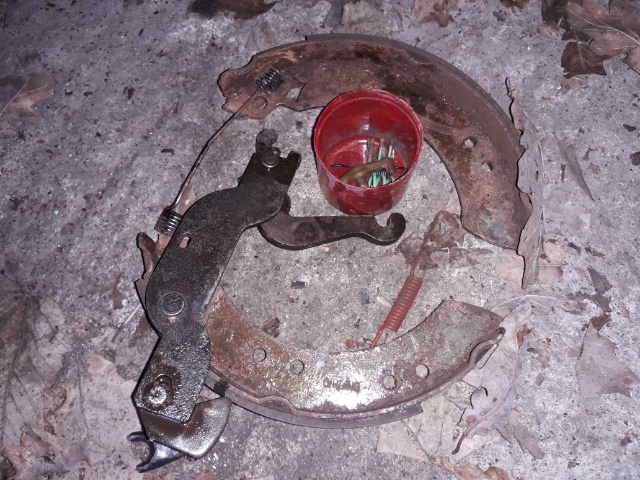
One of the linings had fallen off. Need to test the cylinders somehow. Pretty sure the handbrake mechanism is OK, but will copper-grease it all up.
Grease them all up and put it back together again and test, if not working, go back to start (brakes and ladders) ;-0
Then shock horror, a spare couple of hours suddenly materialises and so we can whack on a new pair of shoes each side.

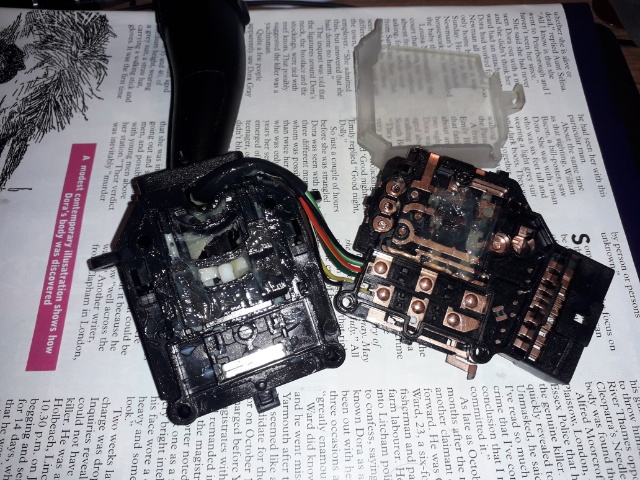
Late Sept 2021 and working on Deep Blue again so its time for another how not to guide. This time it's repairing the hazard light switch. When removing or refitting, remember to press down on the surrounding plastic frame as hard as possible or the spring clip on top of the switch will break the surround. Done that and heard it's very common. Lucky this time, though. When it's off the leads you can pop it open with a finger nail and all the little springs and contacts inside go sproing everywhere, so be quick to catch them all in the dog's water bowl, not.
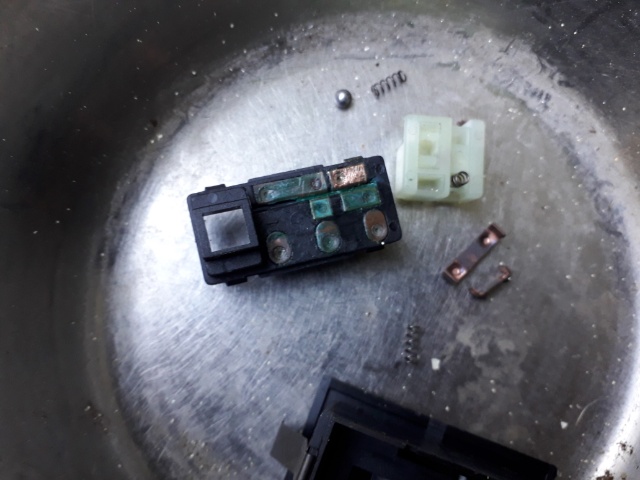
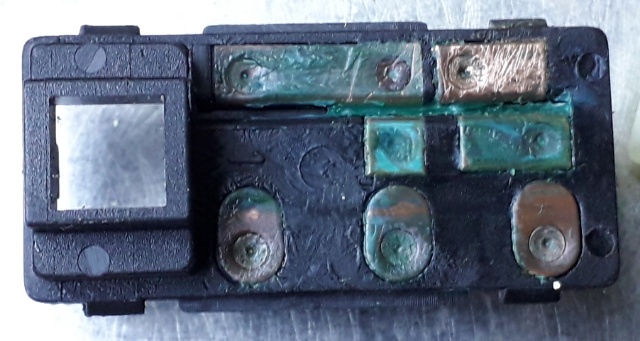
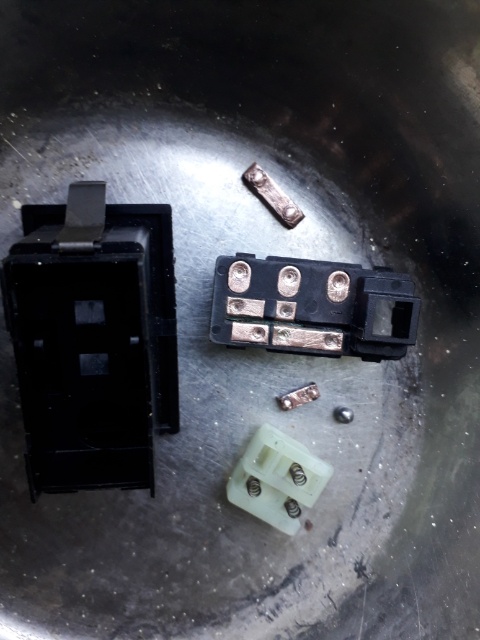
There was plenty of greasy verdigris to be seen. Scrape it all of, well carefully, like. There's a little spring-loaded ball bearing under the white plastic tab and 3 springs on the other side which support two contacts (2 springs for the biggest contact, one for the smaller one). Then regrease it all with plumber's grease (e.g. Rectorseal, my favourite word these days) or some other non-conducting metal-free (dielectric) grease, partly because it helps to keep the springs and contacts in place in readiness for the great click and leap of faith when you snap it all back together again.

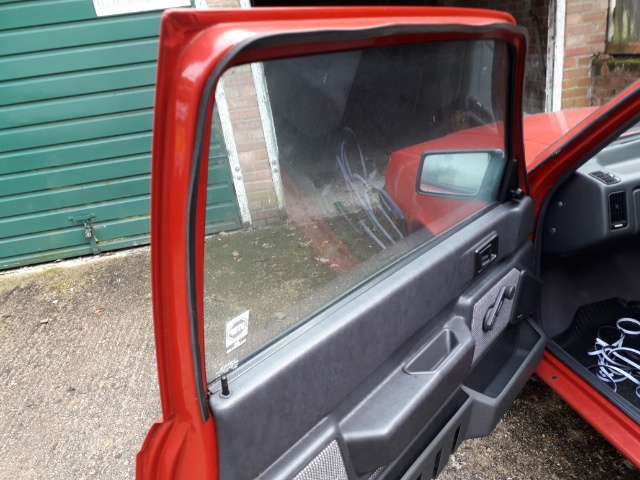
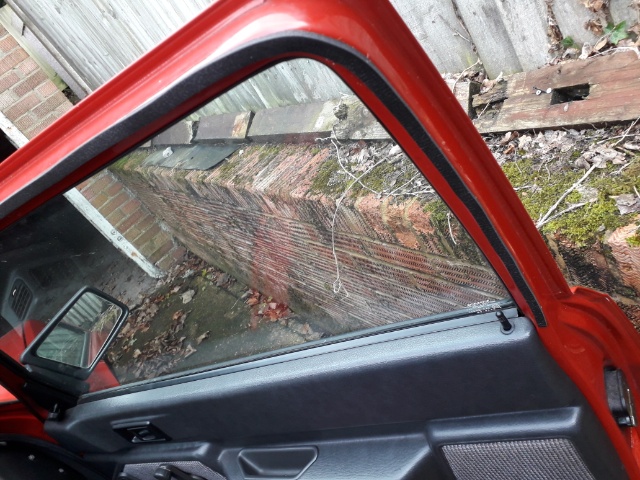
Now into Oct 2021 and on the Red Ness front, I've been trying to cure the wind-noise issue of her big heavy doors, in spite of them having new seals and the window frames being bent back a bit by hand. A bit of black draft excluder certainly works but it comes off a bit too easily really with general handling of the doors, but it's not too bad actually. I might leave it on unless anyone knows of a more permanently sticking draft excluder material.
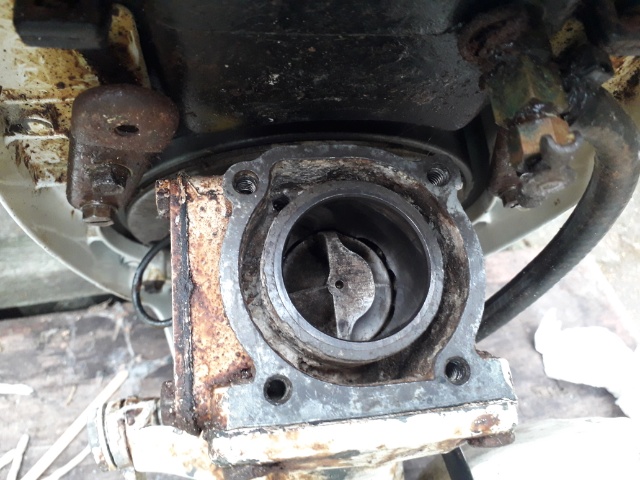
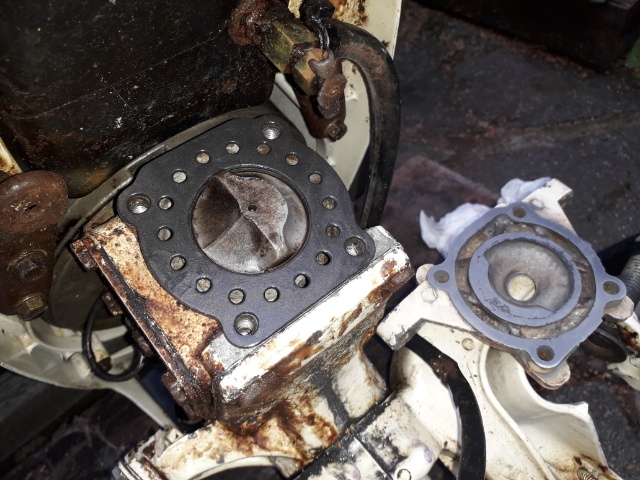
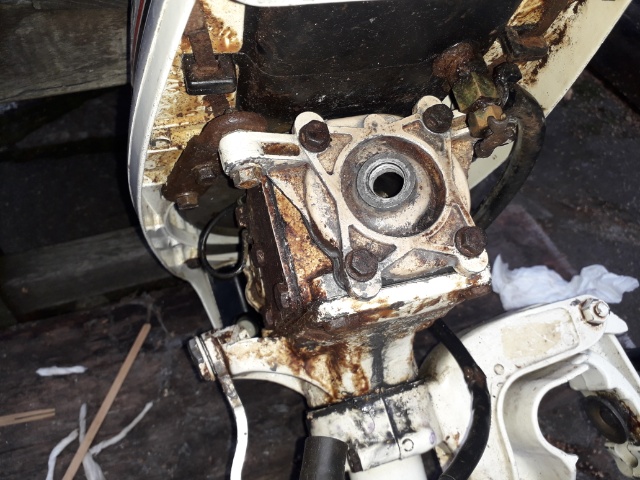
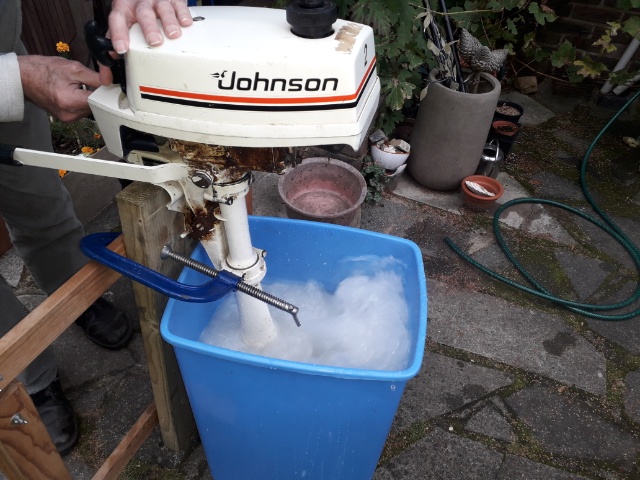
Anyway, we're in for a complete change, it's a Johnson Evinrude Seahorse 2 HP outboard with no compression. Thankfully, not mine.
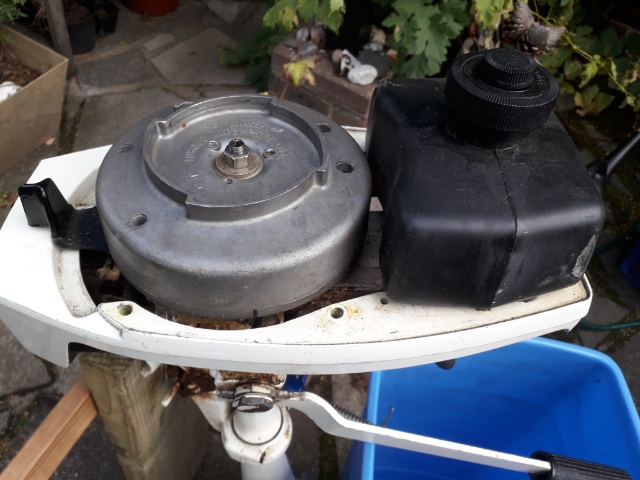
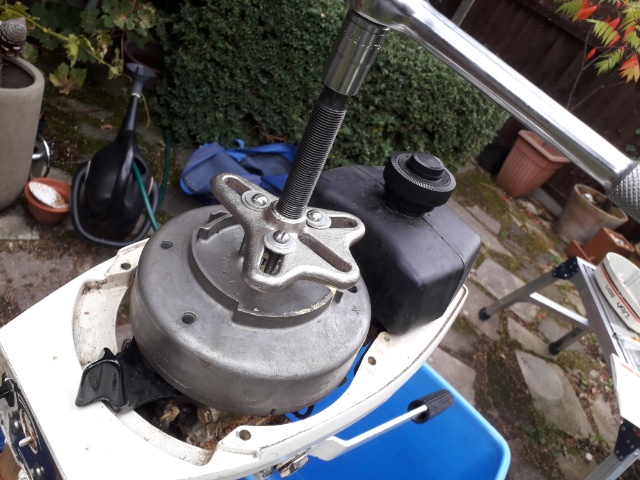
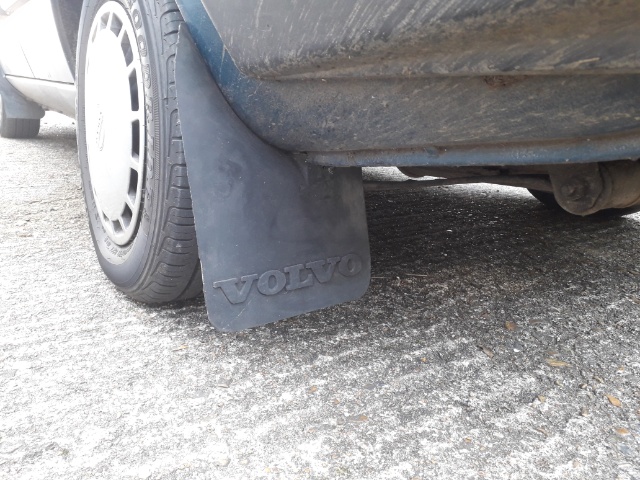
Just trying to make out that I'm doing something and that I know what I'm doing! Been a bit inhibited by the petrol pump lockdown of Oct 2021 but it's getting better. Replaced the missing rear mudflap on Deep Blue and did some rather poor paintwork on the 360, still it won't show too much!
The gear change on the 360 has been a tad difficult this year since the repair to the coupling rod which was done by the garage but it is ok now. I've got the hang of getting reverse but when the lever is at its relaxed position in any gear it can be wobbled like mad. Much more than on the other 300's I have driven. Purely by coincidence, I'm sure ;-0, this is the only one which I had the gearbox open. The selector plate is a bit fiddly to put back and I am thinking that I may have not connected it right to a spring which is supposed to tension it. As it's almost 20 years ago, I might change the gearbox oil in the next year or so and check the little spring which I think I didn't connect properly. You can tighten it apparently.
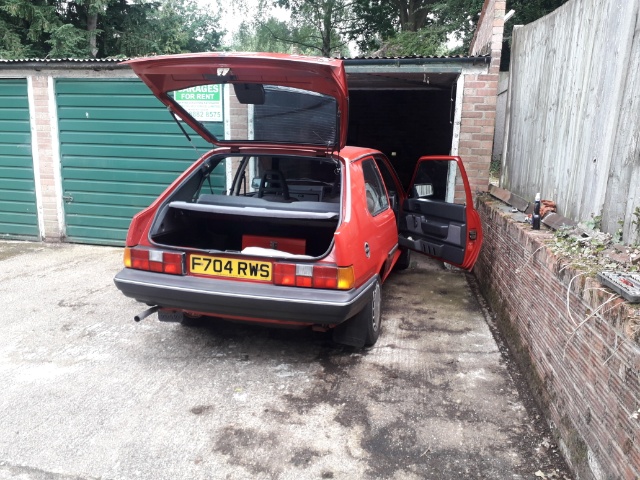
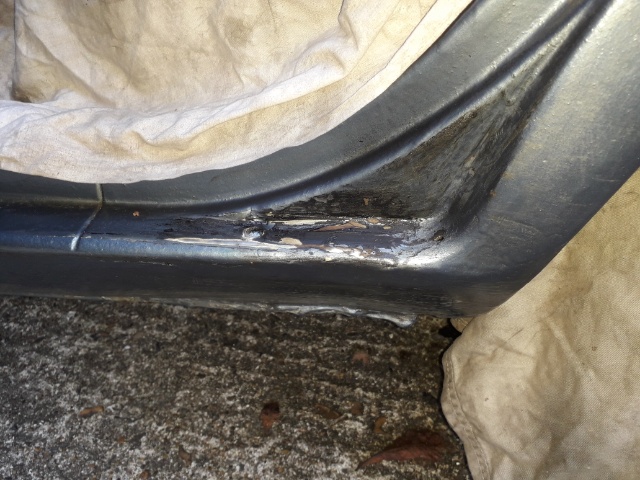
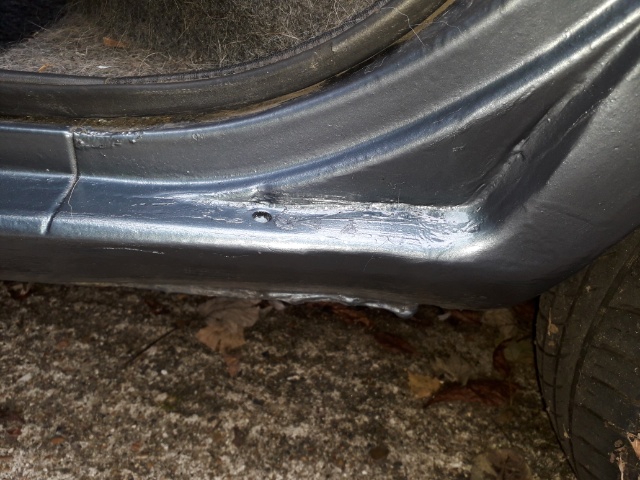
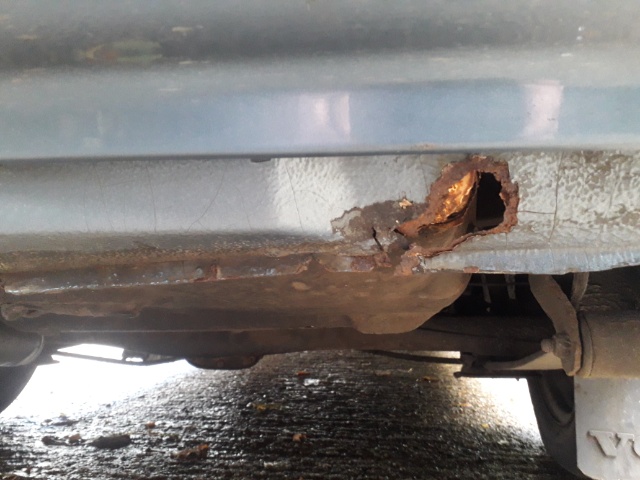
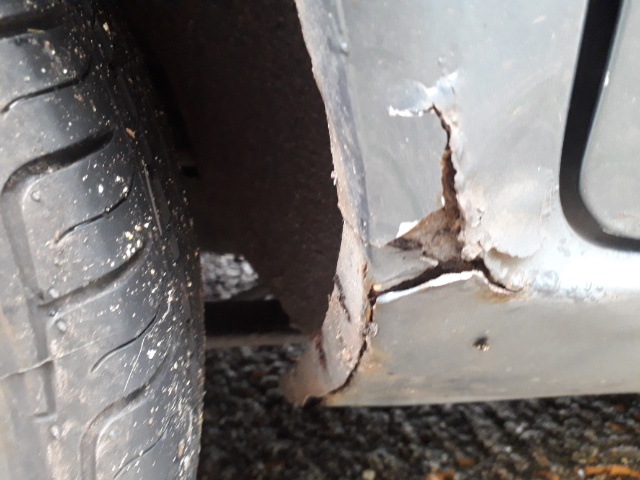
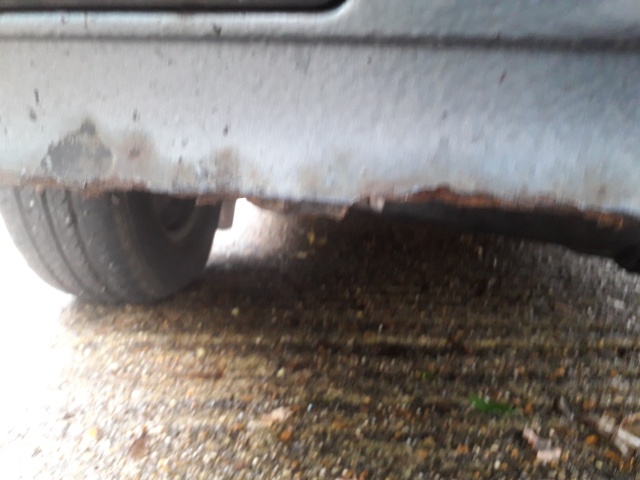
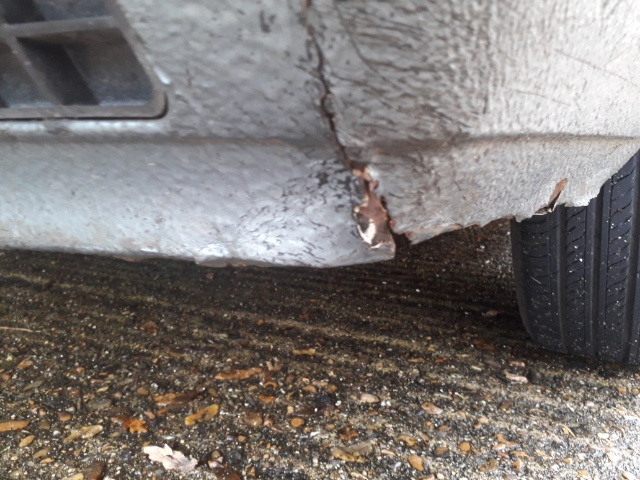
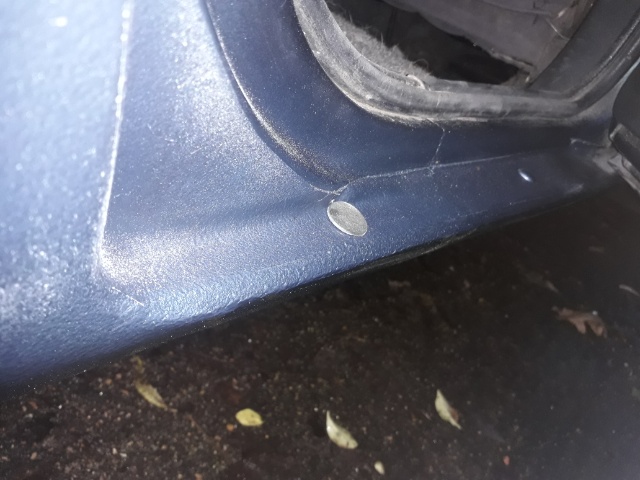
Now, to the end of Oct 2021 when a semi-minor disaster strikes. I was trying a trick to get into reverse easier which involves going into 3rd first and I then found that I couldn't get it into reverse at all. I realised afterwards that I was pushing the lever down instead of up. Anyway, at the time I was so convinced that it wouldn't go into reverse, I got out and pushed the car, which was very foolish cos it was on a slope and it duly ran away, knocking down two wooden posts, one of which made a hole in the rear valance. You couldn't make it up. Just an old man trying an new trick. Bizarrely the only thing that stopped it moving was a post that got wedged under one of the rear springs. As a result I couldn't move the car out of the mud and brambles because the rear wheel was spinning in thin air. Daft, what an oaf. Anyway, I'll take it back to the welder as there is tons of rust around the rear valance and spare wheel well, not to mention the sills and front valance, that needs looking at and anything that galvanises me into action is a good thing but she has to get an MOT first.

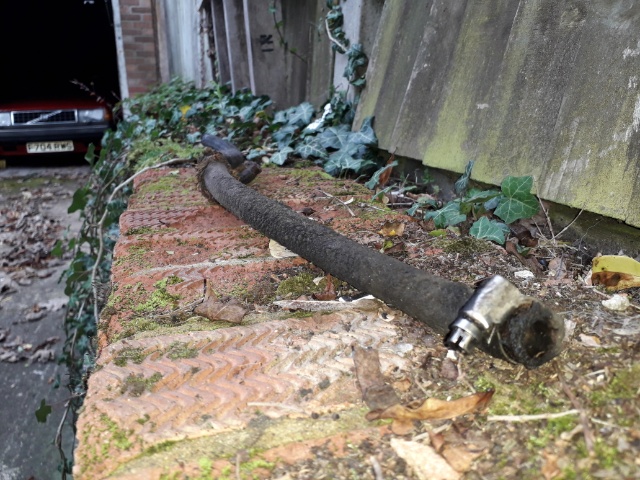
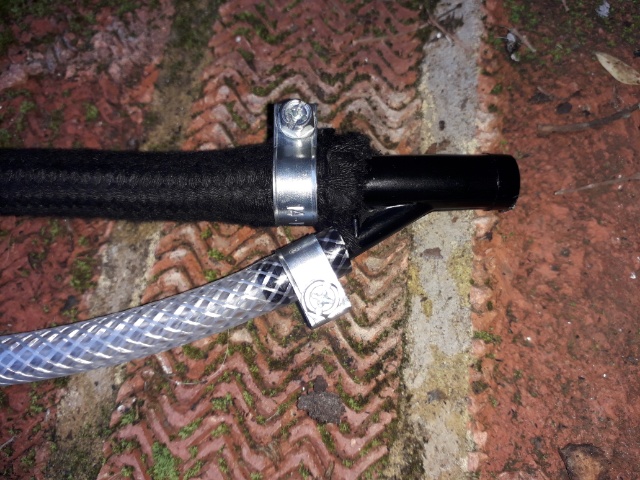
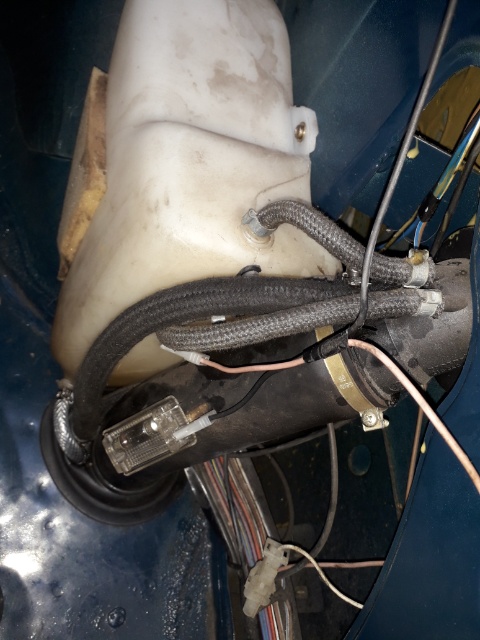
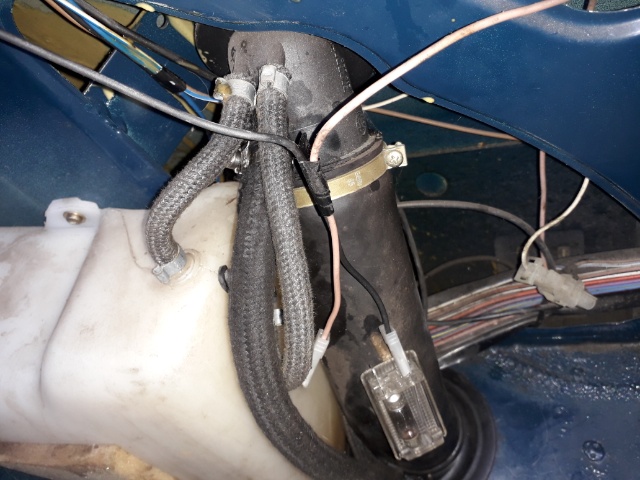
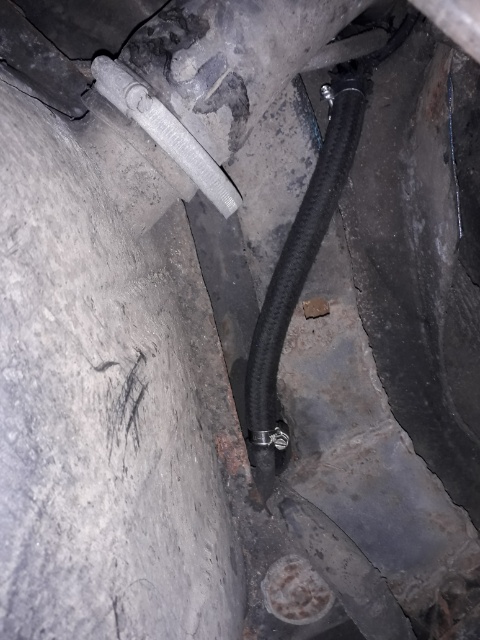
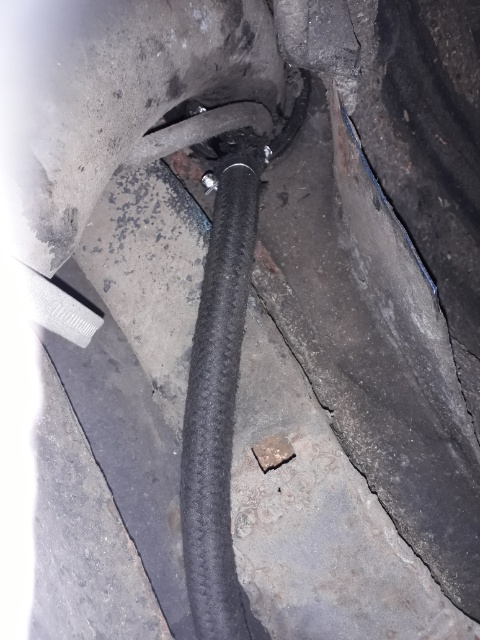
Meanwhile, I have been tackling the petrol smell on Deep Blue which was due to a dodgy overflow hose behind the trim panel in the boot. Getting these petrol overflow hoses replaced and everything back together involves fiddling about with hose clips and rubber seals, inside and underneath, not to mention cursing in abundance.
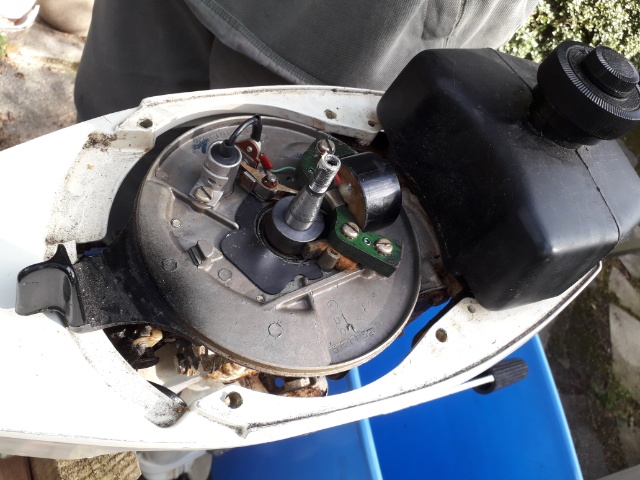
Finally, after pursuing several blind alleys with the outbaord motor, the cylinder head gasket is found to have blown and is duly replaced after a cylinder-head skim, meaning that the beastie is now working fine. Thankfully not mine.
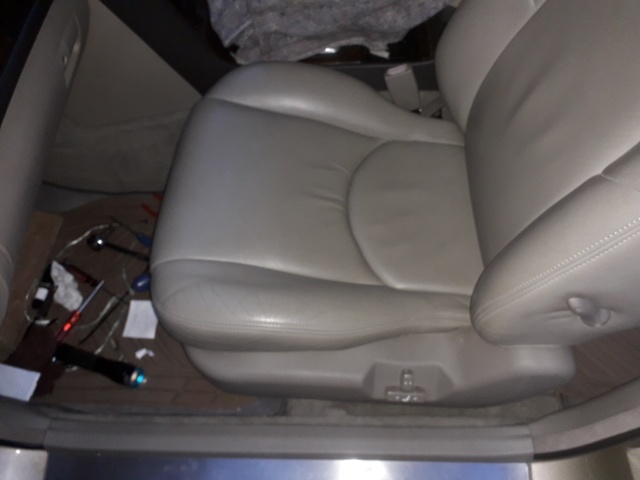
Now into early Dec 2021 and time again for a slightly different story: been trying to fix a jammed passenger seat motor in a Hyundai!
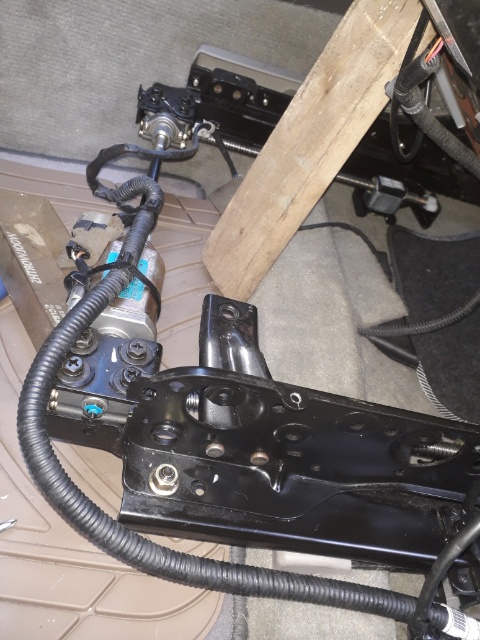
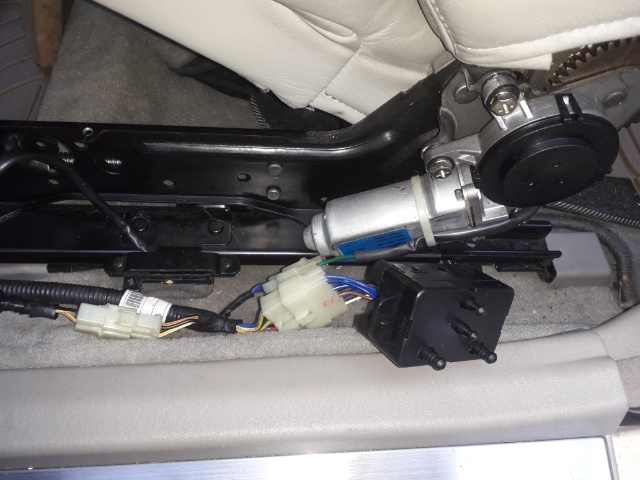
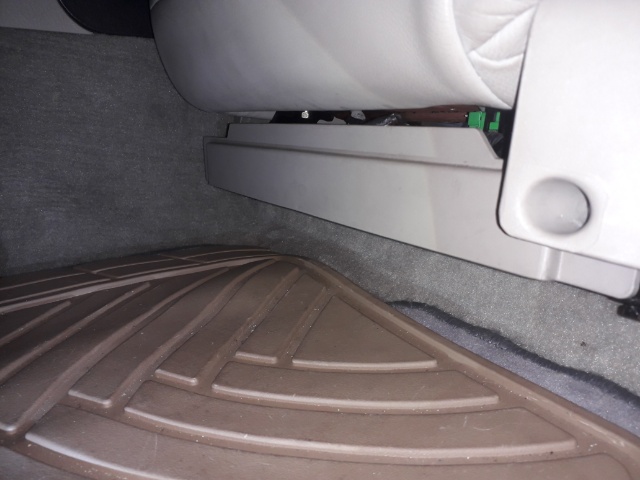
I don't get it, but there is a limit switch and when the seat is at its furthest point forwards, the motor can try to move in the forwards direction (i.e. making the collision with the limit switch worse) but it cannot move backwards, i.e. its completely stuck. I got it off the limit switch by disconnecting and by-passing it with a bit of wire. The motor then got power to wind the seat backwards again. This makes me think one of the connectors is swapped over or something but I can't see any connections where this would be possible. Maybe the limit switch has been fitted the wrong way round or something but to remove it is an absolute pain because the screws face downwards about 2 inches above the floor and are very tightly done up!! If the seat is going forwards you can only stop it by pressing the limit switch button in the direction that it would be pressed if the seat was going backwards, and vice versa. Aren't mechanics supposed to test this sort of thing when they repair things? Duh, despair on Jon. Anyhow, the limit switch was eventually removed with a Philip's screwdriver bit held in a tiny spanner. Turned the switch round and now it's working perfectly and going back together. However, I then found that to refit the side trim panel requires removing the seat again. Another case of snakes and ladders. As this job took most of a week (on and off), I am beginning to see why mechanics don't bother putting this sort of thing right.

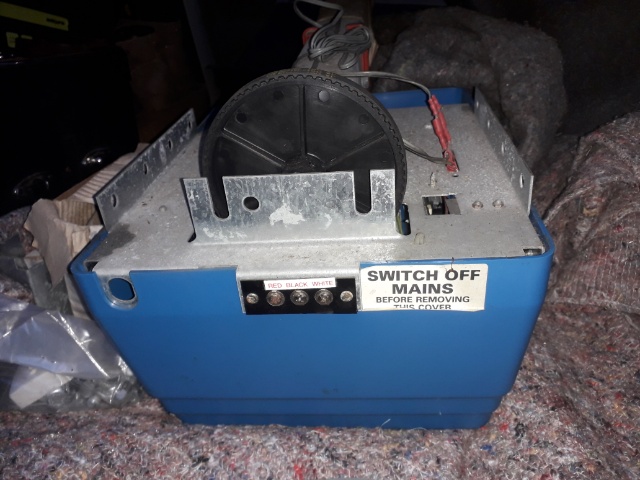
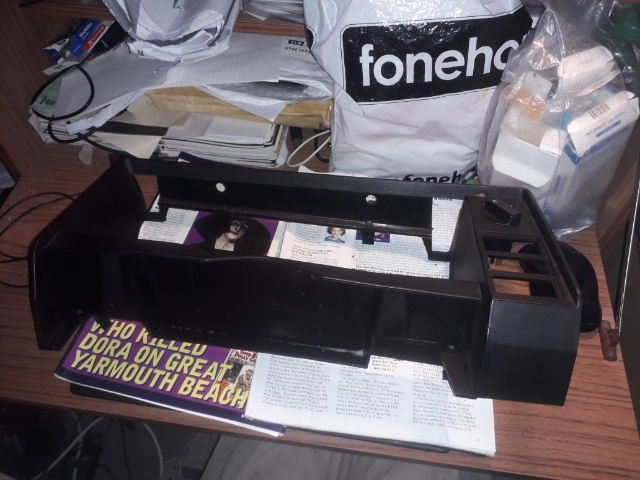
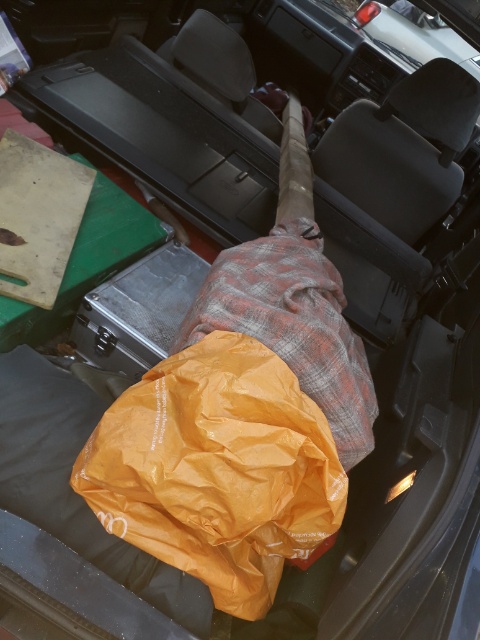
Anyway, all's awesome and back together again. Indeed the car is used to acquire my next top secret, cold-war project - a Wessex Lift Boy GB1 automatic garage door opener (shown above and below).
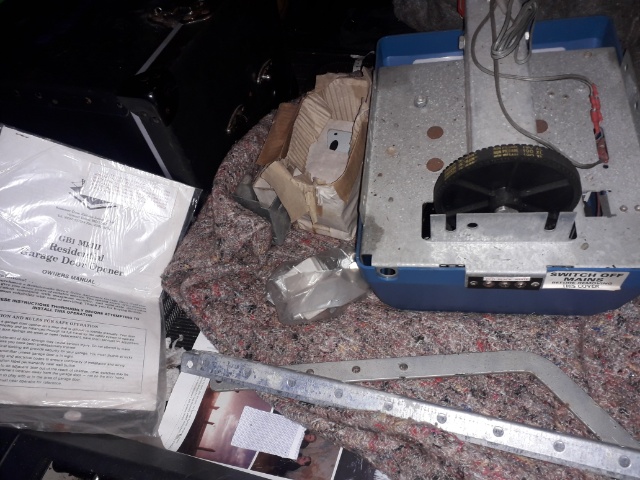
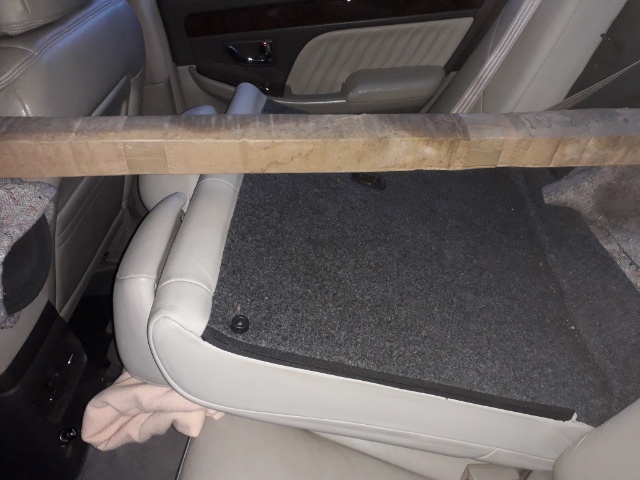
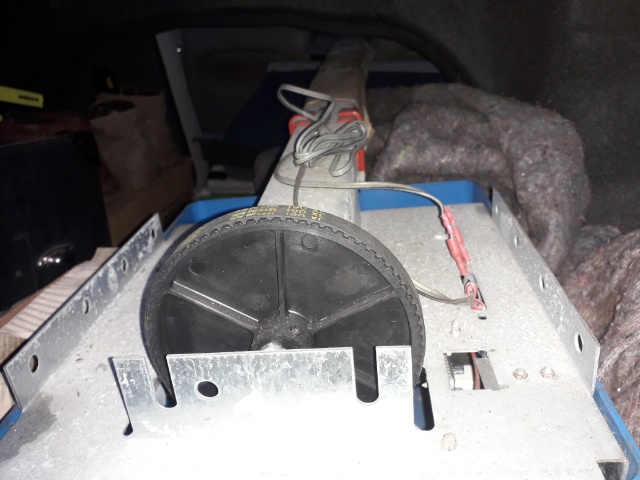
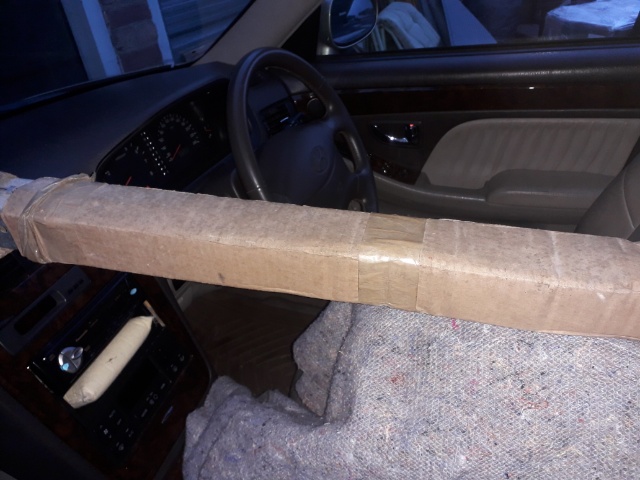
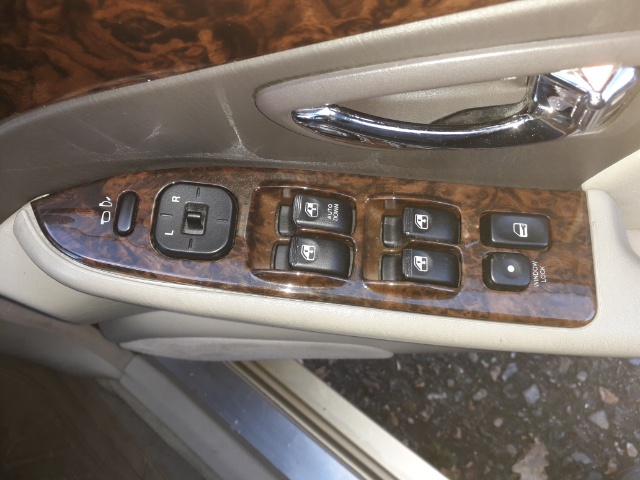
It's new, but 40 years old, so getting it going might need some reverse engineering, whatever that is! Its 10 foot in length, so transport took advantage of the Hyundai's split folding back seats and prestigious dashboard. Indeed, more work on the Hyundai switches has cured the passenger-side front window of its tendency to stick open. It was just a pivot pin for the up-or-down button which had popped-out. Anyhow, the final leg of the homeward journey for the garage door lifter is by 340.
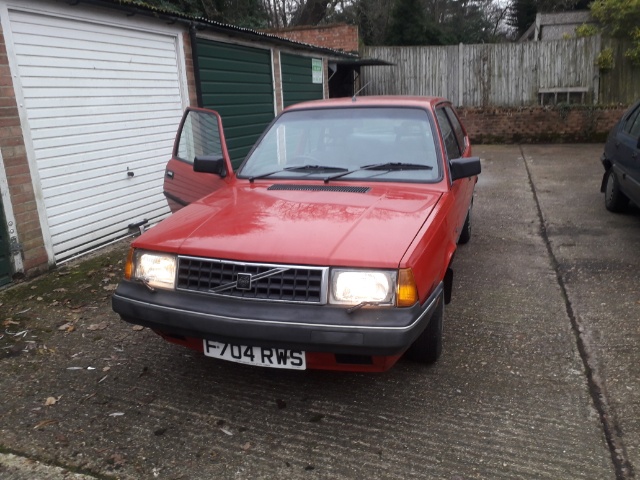
Into mid-Dec2021 and the 360 comes back from the welder. He has been generous with the stone-chip but its looking good by my book, very!!
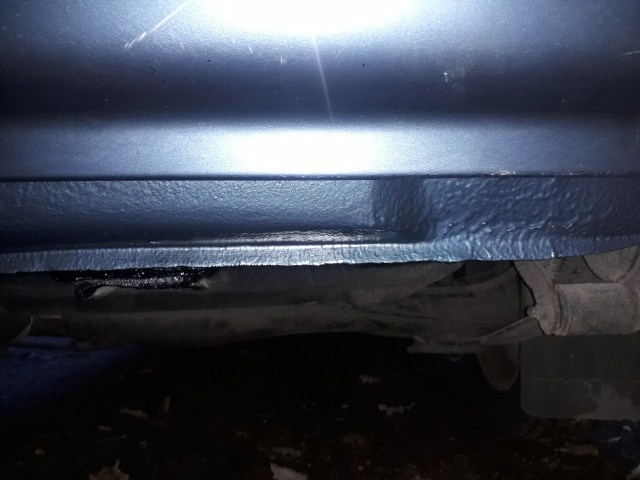
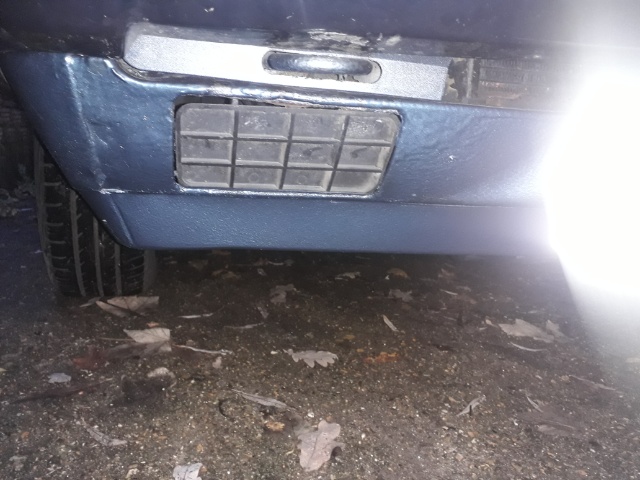
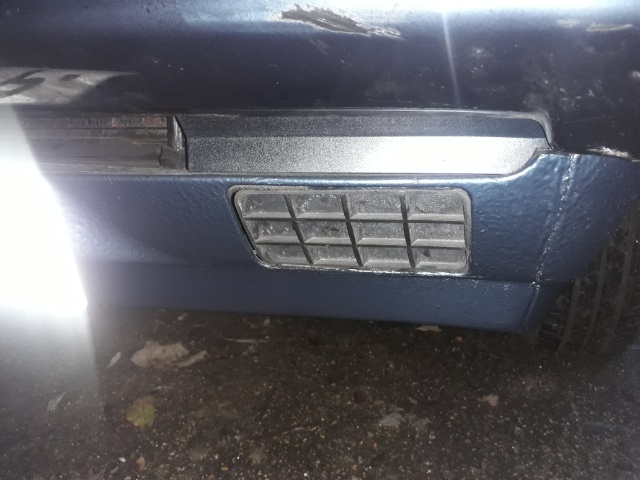
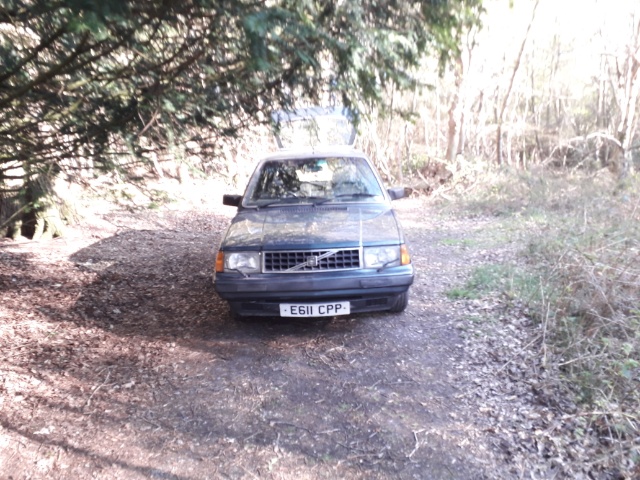
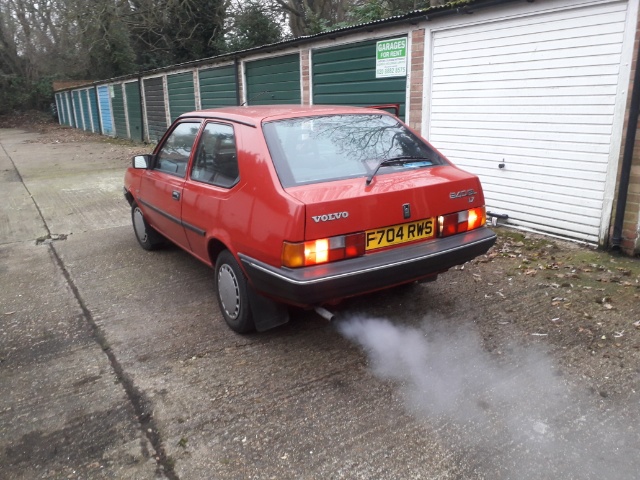
Finally, getting very close to Crimbo and the red 3-door is taken for a short run and all goes very well. OK, well, I left her running with the choke out in carbon-neutral (not) for the photo, so I guess we won't be in Greta's good books, but never mind too much.
Time for another: what's next!